1
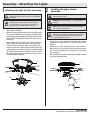
Assembly - Standard Ceiling Mount
1
2
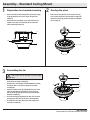
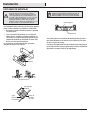
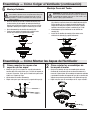
Preparation for standard mounting
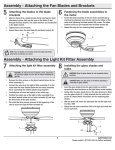
□□ Remove the slide-on mounting bracket (A) from the canopy
□□
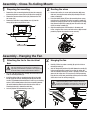
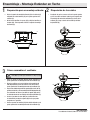
Routing the wires
□□ Make sure the slot openings are on top and route the
wires existing at the top of the fan-motor assembly (D)
through the canopy (C) and then through the ball/downrod assembly (B).
(C) by loosening the four screws (SS) on the top of the
canopy (C).
Remove the two non-slotted screws (SS) and loosen the
slotted screws (SS). This will enable you to remove the
slide-on mounting bracket (A).
C
A
B
SS
C
3
D
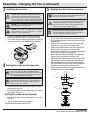
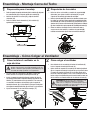
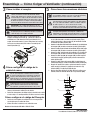
Assembling the fan
WARNING: Failure to properly install the locking pin (DD)
could result in the fan becoming loose and possibly
falling.
C
□□ Loosen, but do not remove, the setscrews (HH) on the collar
on top of the fan-motor assembly (D).
□□ Align the holes at the bottom of the ball/downrod assembly
□□
□□
□□
CC
(B) with the holes in the collar on top of the fan-motor
assembly (D).
Carefully inset the hanger pin (CC) through the holes in the
collar and ball/downrod assembly (B). Be careful not to
jam the hanger pin (CC) against the wiring inside the ball/
downrod assembly (B).
Insert the locking pin (DD) through the hole near the end of
the hanger pin (CC) until it snaps into its locked position.
Re-tighten the setscrews (HH) on the collar on top of the
fan-motor assembly (D).
B
DD
HH
D
7
HAMPTONBAY.COM
Please contact 1-877-527-0313 for further assistance.