1
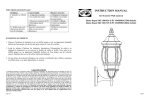
PARTS INCLUDED FOR INSTALLATION (parts are not to scale):
1ea Ground Screw (#20)
1ea Mounting Strap (#21)
2ea Outlet Box Screws (#23)
3ea Wire Connectors (#19)
2ea Mounting Screws (#22)
2ea Lock Nuts (#2)
INSTALLATION INSTRUCTIONS:
1. Screw the two Mounting Screws (#22) into the Mounting Strap (#21). Mount
the Mounting Strap (#21) to the Outlet Box (#18) using the two Outlet Box
Screws (#23). [Make sure the threads of the Mounting Screws (#22) are
facing outside when the Mounting Strap (#21) is attached to the Outlet Box
(#18).]
2. Wrap the ground wire from the fixture around the Ground Screw (#20) on the
Mounting Strap (#21), and then connect the ground wire from the fixture to
the ground wire from the Outlet Box (#18). Connect the white wire from the
fixture to the white wire (neutral wire) from the Outlet Box (#18). Connect
the black wire from the fixture to the black wire (live wire) from the Outlet
Box (#18). Cover the connections using the Wire Connectors (#19). Wrap the
wire connections with electrical tape for a more secure connection. Position
the wires back inside the Outlet Box (#18). Note: If you have electrical
questions, consult your local electrical code for approved grounding methods.
3. Place the Canopy (#1) against the Outlet Box (#18) by aligning the
protruding Mounting Screws (#21) all the way through the holes on the
Canopy (#1). Tighten the fixture to the ceiling by screwing the two Lock Nuts
(#2) onto the two protruding Mounting Screws (#22).
AVERTISSEMENT:
1. Avant de commencer installer ce luminaire ou d'enlever l'ancien luminaire,
d connectez le courant en teignant le disjoncteur ou en enlevant le fusible
correspondant du coffret fusibles.
2. CONSULTER UN ELECTRICIEN QUALIFIE
QUESTION RELATIVE A L'ELECTRICITE.
POUR
TOUTE
propos de ce luminaire,
3. En cas de questions non relatives l' lectricit
veuillez contacter notre centre de Service la Client le au 1-877-527-0313
ou visiter www.homedepot.com. Veuillez indiquer votre UGS 185-632 ou
UPC 6940500310732
4. Conserver votre re u et ces Instructions comme Preuve d'Achat.
OUTILS REQUIS POUR L'ASSEMBLAGE & L'INSTALLATION
(non inclus):
2 Ampoules
(60 watts maxima)
(ou quivalent LFC)
Lunettes de Protection
Echelle
Gants
D nudeur de
c bles lectriques
4. Before completing Installation, please return to the Assembly Instruction #5.
Tournevis t te plate
Tournevis croisillon
Ruban adh sif isolant
Pince pour c bles lectriques
5. Installation is complete. Turn on the power at the circuit breaker or fuse box.
Turn the light switch on to activate the fixture.
Page 6
Page 19