1
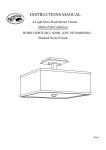
2 Light Flush Mount
Sydney
Home Depot SKU 168-219 (UPC 718212271827)
(Chrome Finish)
INSTRUCTION MANUAL
LA-2029E/S/F
Page 1
Thank you for purchasing this Home Decorators Collection interior light
fixture. This product has been manufactured with the highest standards of
safety and quality.
FEATURES:
1. Traditional 2 Light Flush Mount in Chrome Finish.
2. Timeless Elegant Design.
3. Easy to assemble and install.
QUESTIONS, PROBLEMS, MISSING PARTS:
Before returning to your local Home Depot, please call our Customer
Service Team at 1-800-986-3460 or visit www.homedepot.com. Please
reference your SKU (168-219 Chrome fixture) or UPC (718212271827
Chrome fixture).
Page 2
CAUTION:
1. Before starting installation of this fixture or removal of a previous
fixture, disconnect the power by turning off the circuit breaker or by
removing the fuse at the fuse box.
2. CONSULT A QUALIFIED ELECTRICIAN IF YOU HAVE ANY
ELECTRICAL QUESTIONS.
3. If you have any non-electrical questions about this fixture, please
contact our Customer Service Team at 1-800-986-3460 or visit
www.homedepot.com. Please reference your SKU (168-219 Chrome
fixture) or UPC (718212271827 Chrome fixture).
4. Keep your receipt and these Instructions for Proof of Purchase.
TOOLS REQUIRED FOR ASSEMBLY & INSTALLATION
(not included):
Light Bulb
(60 watt maximum)
Safety goggles
Flathead screwdriver
Phillips screwdriver
Step Ladder
Electrical tape
Wire strippers
Wire cutters
Page 3
PARTS INCLUDED FOR ASSEMBLY (parts are not to scale):
1 Ceiling Pan (#1)
1 Finial (#8)
1 Nipple (#2)
1 Cap (#7)
2 Plastic Washer (#4)
2 Metal Washer (#3)
1 Glass Shade (#5)
1 Hex Nut (#6)
ASSEMBLY INSTRUCTIONS:
1. Shut off power at the fuse box or circuit breaker box. Remove the old fixture from
ceiling, including the mounting hardware.
2. Carefully unpack your new fixture and lay out all the parts on a clear area. Take care
not to lose any small parts necessary for installation.
Page 4
ASSEMBLY:
1.Ceiling Pan
2. Nipple
3.Metal washer
4.Plastic washer
5. Glass shade
4.Plastic washer
3.Metal washer
6. Hex Nut
7.Cap
8.Finial
Page 5
PARTS INCLUDED FOR INSTALLATION (parts are not to scale):
2 Mounting Screws (#9)
1 Crossbar (#12)
1 Ground Screw (#10)
2 Outlet box Screw (#11)
3 Wire Connector (#13)
INSTALLATION INSTRUCTIONS:
1. Thread the two Mounting Screws (#9) about 1/4” into the pre-drilled holes in the
Crossbar (#12) spaced the same distance apart as the holes in the Ceiling Pan (#1).
2. Attach the Crossbar (#12) to the Outlet Box (#14) using the two Outlet Box Screws
(#11) as shown. The side of the Crossbar marked “GND” must face out.
3. While holding the Ceiling pan (#1) toward the ceiling, Connect the white wire from
the fixture to the white wire from the Outlet Box (#14), and the black wire from the
fixture to the black wire from the Outlet Box (#14). Cover the two wire connections
using the two provided Wire Connectors (#13). Wrap the two wire connections with
electrical tape for a more secure connection. If your outlet box has a ground wire
(green or bare copper), connect fixture’s ground wire to it using the wire connector
(#13) and with electrical tape for a more secure connection. Otherwise connect the
copper ground from the fixture to Ground screw (#10) on the Crossbar (#12). Note:
If you have electrical questions, consult your local electrical code for approved
grounding methods.
4. Finish mounting the Ceiling Pan assembly by placing it over the two Mounting
Screws (#9) so they protrude through the “keyholes” in the bottom of the pan. Rotate
the Pan until the screws are in the slots of the “keyholes” and tighten with a
screwdriver.
5. Install the light bulb (not included) in accordance with the fixture’s specifications.
(DO NOT EXCEED THE MAXIMUM WATTAGE RATING!!)
6. Thread the Nipple (#2) into Ceiling Pan (#1). Place Metal Washer (#3), Plastic
Washer (#4) and Glass Shade (#5) over the Nipple (#2). While holding the Glass
Shade (#5), place Plastic Washer (#4), Metal Washer (#3) over the Nipple (#2) and
tighten with Hex Nut (#6). Thread Cap (#7) over Nipple (#2) and tighten with Finial
(#8).
7. Installation is complete. Turn on the power at the circuit breaker or fuse box. Turn
the light switch on to activate the fixture.
Page 6
INSTALLATION:
14.Outlet Box
13. Wire Connectors
Ground Wire
Black Wire
White Wire
12.Crossbar
11.Outlet Box Screws
10.Ground Screw
9.Mounting Screw
1.Ceiling Pan
Page 7
TROUBLESHOOTING:
Bulb will not light.
Fuse blows or circuit
breaker trips when light
is turned on.
Possible Cause
1. Bulb is burned out.
2. Power is off.
Corrective Action
1. Replace light bulb.
2. Make sure power
supply is on.
3. Faulty wire connection.
3. Check wiring.
4. Faulty switch.
4. Test or replace switch.
Crossed wires or power wire Check wire connections.
is grounding out.
PRODUCT MAINTENANCE:
1. To clean the outside of the fixture, use a dry or slightly dampened clean cloth (use
clean water, never a solvent) to wipe the glass and surface of the fixture.
2. To clean the inside of the fixture, first disconnect power to the fixture by turning off
the circuit breaker or by removing the fuse at the fuse box. Next, use a dry or slightly
dampened clean cloth (use clean water, never a solvent) to wipe the inside glass and
interior surface of the fixture.
3. Do not use any cleaners with chemicals, solvents or harsh abrasives. Use only a dry
soft cloth to dust or wipe carefully.
LIMITED WARRANTY
The manufacturer warrants this lighting fixture to be free from defects in materials and workmanship for a
period of five (5) years from date of purchase. This warranty applies only to the original consumer
purchaser and only to products used in normal use and service. If this product is found to be defective, the
manufacturer’s only obligation, and your exclusive remedy, is the repair or replacement of the product at the
manufacturer’s discretion, provided that the product has not been damaged through misuse, abuse, accident,
modifications, alterations, neglect or mishandling. This warranty shall not apply to any product that is found
to have been improperly installed, set-up, or used in any way not in accordance with the instructions
supplied with the product. This warranty shall not apply to a failure of the product as a result of an accident,
misuse, abuse, negligence, alteration, or faulty installation, or any other failure not relating to faulty material
or workmanship. This warranty shall not apply to the finish on any portion of the product, such as surface
and/or weathering, as this is considered normal wear and tear.
The manufacturer does not warrant and specially disclaims any warranty, whether express or implied,
of fitness for a particular purpose, other than the warranty contained herein. The manufacturer
specifically disclaims any liability and shall not be liable for any consequential or incidental loss or
damage, including but not limited to any labor / expense costs involved in the replacement or repair of
said product.
Page 8