Transcript
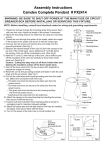
Assembly Instructions
Preston Complete Pendant # PX2913
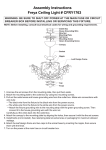
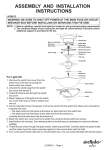
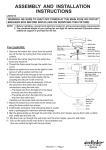
WARNING: BE SURE TO SHUT OFF POWER AT THE MAIN FUSE OR CIRCUIT
BREAKER BOX BEFORE INSTALLING OR SERVICING THIS FIXTURE.
NOTE: Before installing, consult local electrical codes for wiring and grounding requirements.
1. Attach the mounting plate to the outlet box by using two mounting
screws.
2. Thread the cord through the spider of the shade, attach the nipple
of the socket to the spider and secure it with the coupling of the
holder.
3. Unscrew two set screws of the clip to adjust the length of the steel
wire. (See Fig.1)
4. Measure the desired length of the steel wire (A) from the canopy
to the top end of the holder. Leave additional 6" steel wire (E)
above the canopy. Then keep the cord weaving round the steel
wire. Leave additional 8" cord (B) above the canopy, cut off the
unnecessary steel wire and cord. (See Fig.2)
Caution: The cord could not be hung anything.
5. Reset the steel wire to the clip and fasten it with two set screw.
6. Adjust the strain relief at 8" position from the top of the cord.
Note: Adjust the strain relief can decrease or increase the
length of cord exposing outside.
7. Mark the 3" cord (C) from the top of the cord. Use a knife to peel
off the insulation of the cord (C) carefully to show three inside
wires out. (See Fig.2)
Caution: Cutting too deep may cut off three inside wires and
destroy the insulation surface of the three inside wires.
8. Peel off the three wires from the top at about 5/8" length(D) to
expose the copper for wiring.
9. Pull out the outlet wires and house grounding wire from the outlet
box. Make wire connections with wire nuts:
---The black wire from the fixture to the black wire from the
power source.
---The white wire from the fixture to the white wire from the
power source.
---The green wire from the fixture to the house grounding
wire from the power source.
* Carefully put the wires back into the outlet box.
10. Attach the canopy to the mounting plate by aligning the side
holes, then secure it with the screws.
11. Install a bulb (not included). Note relamping label at socket
or packaging area for maximum allowed wattage.
12. Attach the rubber pad and the light shield to the harp by inserting
the nipple, then secure them with the finial.
13. Turn on the power at the main fuse or circuit breaker box.
Outlet Box
House Grounding Wire
Wire Nut
Mounting Plate
Mounting Screw
Screw
Canopy
Steel Wire
A
Cord
Holder
Coupling
Spider
Shade
Nipple
Socket
Harp
Nipple
Rubber Pad
Light Shield
Finial
D (5/8")
Cord
Strain Relief
Set Screw
B (8")
Clip
Steel Wire
Canopy
Fig.1
C (3")
Green Wire
White Wire
Black Wire
Steel Wire
Cord
Canopy
E (6")
Fig.2