Transcript
RIDGEWAY WALL MOUNT LIGHTING FIXTURES
ASSEMBLY/INSTALLATION INSTRUCTIONS
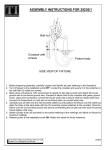
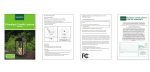
FIGURE 1.
Wall Plate
NOTE: Fixtures are suitable for up or down mounting.
Wire Nut
1. Before beginning the installation, carefully unpack and identify all parts
referring to Figure 1. Be sure the supply power is OFF.
2. Using 2 JUNCTION BOX SCREWS, securely fasten the CROSSBAR to the
JUNCTION BOX.
3. MAKE ELECTRICAL CONNECTIONS: (We recommend 2 people for
the remainder of installation) Connect the SUPPLY GROUND WIRE to the
FIXTURE GROUND WIRE with a wire nut and then secure it to the
CROSSBAR with GREEN GROUND SCREW. Using wire Connectors,
connect the SUPPLY WHITE WIRE(S) to the FIXTURE WHITE(or
RIBBED) LEAD(S); Connect the SUPPLY BLACK (or RED) WIRE to the
FIXTURE BLACK (or SMOOTH) LEAD(S). Wrap all connections with
approved electrical tape.
4. Place the WALL PLATE over the CROSSBAR and secure it with (2)
LOCKING BALLS.
5. Locate the GLASS SHADE(S) and pull over the SOCKET(S), Thread
SOCKET RING(S) onto end of the SOCKET(S). Hand tighten until snug.
6. Install the bulb(s) (Sold separately) referring to fixture labels for maximum
wattage. The bulb quantities depend on the style (Refer to Figure 2).
7. Restore supply power (ON). Retain this sheet for future reference.
Socket
Junction Box
Screw
Ground Wire
Junction Box
Green Ground
Screw
Glass
Shade
Cross Bar
Lock Ball
Socket Ring
Bulb (Sold
Separately)
FIGURE 2.
IF IN DOUBT ABOUT ELECTRICAL INSTALLATION,
CONSULT A LICENSED ELECTRICIAN.
Customer Service: 1-800-558-8700
#519363, 519447
#519371, 519454