1
Assembly - Attaching the Light Kit (continued)
11
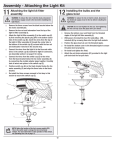
Installing the bulbs and glass
shade
E
□□ With the power off, install two bulbs (J) (Max. 14W, included)
□□
□□
by twisting them into the light bulb sockets.
Place the glass shade (I) into the light kit fitter assembly (E),
aligning the three flat areas on the top flange of the glass
shade (I) with the three raised dimples in the light kit fitter
assembly (E). Then turn the glass shade (I) clockwise until it
stops.
Attach the pull chain fobs (FF) to the pull chains exiting the
pull chain guide.
J
FF
I
NOTE: Periodically check that the glass shade is seated fully
clockwise in the light kit assembly.
NOTE: Notice the location of the fan’s slide switch. This is the
switch used to change the fan’s directional rotation. For more
information on the operation of this switch, see “Slide Switch
Operation Instructions” on page 12.
Operation
NOTE: Wait for the fan to stop before reversing the direction of
blade rotation.
PULL CHAIN OPERATING INSTRUCTIONS
Turn on the power and check the operation of the fan. The pull
chain controls the fan speeds as follows:
1 pull - High, 2 pulls - Medium, 3 pulls - Low, 4 pulls - off
The appropriate speed settings for warm or cool weather depends
on factors such as the room size, ceiling height, and number of
fans.
REVERSE SWITCH OPERATING
INSTRUCTIONS
The slide switch controls the direction of the blades: forward (switch
down) or reverse (switch up).
Warm weather - (Forward) A downward airflow creates a cooling
effect. This allows you to set your air conditioner on a warmer
setting without affecting your comfort.
Cool weather - (Reverse) An upward airflow moves warm air off
of the ceiling. This allows you to set your heating unit on a cooler
setting without affecting your comfort.
12
Ensamblaje - Cómo Instalar el Kit de Luces (continuación)
11
Cómo instalar las bombillas
y la pantalla de vidrio
E
□□ Con la electricidad apagada, instala dos bombillas (J) (de 14 W
□□
□□
máximo, incluidas) enroscándolas en los portabombillas.
Coloca la pantalla de vidrio (I) en el ensamblaje del soporte del
kit de luces (E), alineando las tres áreas planas en el reborde
superior de la pantalla de vidrio (I) con las tres muescas salientes
del ensamblaje del soporte del kit de luces (E). Gira la pantalla de
vidrio (I) de izquierda a derecha hasta que se detenga.
Fija los colgantes para interruptores de cadena (FF), a las
cadenas que salen de la guía del interruptor de cadena.
NOTA: Verifica con frecuencia que la pantalla de vidrio esté
ajustada por completo de izquierda a derecha en el ensamblaje
de luces.
NOTA: Marca la posición del interruptor deslizante del
ventilador. Este interruptor se usa para cambiar la rotación
direccional del ventilador. Para más información sobre la
operación del interruptor, consulta “Cómo Usar el Interruptor
Deslizante” en la página 12.
Funcionamiento
NOTA: Espera a que se detenga el ventilador antes de invertir la
dirección de giro de las aspas.
INSTRUCCIONES DE FUNCIONAMIENTO
DEL INTERRUPTOR DE CADENA
Enciende la electricidad y verifica el funcionamiento del ventilador.
El interruptor de cadena controla las velocidades del ventilador de la
siguiente manera:
Halar 1 vez: Alto, halar 2 veces: Medio, halar 3: Bajo y halar 4:
Apagado
Las configuraciones de velocidad apropiadas para clima cálido o frío
dependen de factores como el tamaño de la habitación, la altura del
techo y la cantidad de ventiladores.
INSTRUCCIONES DE FUNCIONAMIENTO
DEL INTERRUPTOR DE REVERSA
Los controles del interruptor deslizante cambian la dirección de las
aspas: hacia delante (interruptor para abajo) o reversa (interruptor
para arriba).
Clima cálido - (Hacia adelante) Un flujo de aire descendente crea un
efecto de enfriamiento. Esto te permite fijar tu aire acondicionado en
una configuración más alta sin afectar tu comodidad.
Clima fresco – (Reversa) Un flujo de aire ascendente mueve el aire
cálido del techo. Esto te permite configurar la unidad de calefacción
más baja sin afectar tu comodidad.
12
J
FF
I