1
Assembly - Attaching the Light Kit
2
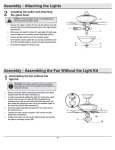
Installing the bulbs and attaching the
glass bowl
WARNING: Allow the glass bowl to cool completely before
removing.
CAUTION: Make sure the power is off before attaching or
removing the glass bowl.
F
CAUTION: Over lamping the fan will result in the fan lights
shutting down until the proper wattage bulbs are installed.
Reset the lights by turning off the power, replacing the bulbs
with the correct wattage bulbs, and turn the power on.
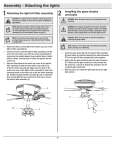
□□ Remove the finial (RR), glass holder (PP), hex nut (Q),
J
□□
R
□□
□□
1
VV
G
rubber washer (P), and glass bowl (R) from the light kit
assembly (G).
With power off, install the two bulbs (J) by twisting them
into the light bulb sockets. Position the glass bowl (R) over
the threaded nipple and pass the pull chain for the fan
through the pull chain guide (VV) on the side of the light kit
(G) to avoid the chain from touching the glass bowl (R).
Re-install the rubber washer (P), hex nut (Q), glass holder
(PP), and finial (RR) to the threaded nipple to secure the
glass bowl (R) properly.
Attach the pull chain extensions (BB).
P
Q
PP
RR
BB
Assembling the fan without light kit
□□ Remove the three light kit mounting screws (QQ) from
□□
□□
□□
switch cup cover (FF).
In order to use the fan without the light kit, remove the
switch cup cover (FF) from the top of the light kit fitter
assembly (G) by removing the center hex nut inside the
switch cup cover (FF), and then thread the switch cup cover
off of the threaded nipple on the top of the light kit fitter
assembly (G).
Press the plastic plug (CC) (provided) into the center hole of
the switch cup cover (FF).
Position the switch cup cover (FF) onto the bracket and
reinstall the light kit mounting screws (QQ).
F
QQ
FF
CC
G
12
Ensamblaje - Cómo instalar el kit de luces
2
Cómo instalar las bombillas y
colocar el tazón de vidrio
ADVERTENCIA: Espera que el tazón de vidrio se enfríe
completamente antes de retirarlo.
PRECAUCIÓN: Asegúrate de que la corriente esté cortada
antes de montar o retirar el tazón de vidrio.
F
PRECAUCIÓN: Colocar bombillas de vataje incorrecto hará
que las luces del ventilador se apaguen hasta que se instale
las bombillas adecuadas. Reinicia la lámpara apagando la
electricidad, reemplaza las bombillas por otras de vataje
correcto y enciende de nuevo la electricidad.
□□ Reemplaza el remate (RR), el soporte de vidrio (PP), la
J
□□
R
□□
□□
1
VV
G
tuerca hexagonal (Q), la arandela de goma (P) y el tazón de
vidrio (R) del ensamblaje del kit de luces (G).
Con la electricidad apagada, instala las dos bombillas (J)
enroscándolas en los portabombillas. Coloca el tazón de
vidrio (R) sobre la boquilla enroscada y pasa la cadena del
interruptor del ventilador a través del orificio guía (VV) en el
lado del ensamblaje del kit de luces (G) para evitar que la
cadena toque el tazón de vidrio (R).
Reinstala la arandela de goma (P), la tuerca hexagonal (Q),
el soporte de vidrio (PP) y el remate (RR) en la boquilla
roscada para asegurar el tazón de vidrio (R) correctamente.
Instala las extensiones de cadena del interruptor (BB).
P
Q
PP
RR
BB
Cómo ensamblar el ventilador sin el
kit de luces
□□ Quita los tres tornillos de montaje del kit de luces (QQ) de la
□□
□□
□□
cubierta de la caja del interruptor (FF).
Con el fin de utilizar el ventilador sin el kit de luces, retira la
cubierta de la caja del interruptor (FF) ubicado en la parte
superior del ensamblaje del soporte del kit de luces (G),
retirando la tuerca hexagonal del centro dentro de la cubierta
de la caja del interruptor (FF); y luego, desenrosca la cubierta
de la caja del interruptor de la boquilla roscada sobre el
ensamblaje del soporte del kit de luces (G).
Empuja el tapón plástico (CC) dentro del orificio central de la
cubierta de la caja del interruptor (FF).
Coloca la cubierta de la caja del interruptor (FF) en el soporte
y reinstala los tornillos de montaje del kit de luces (QQ).
F
QQ
FF
CC
G
12