1
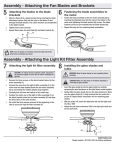
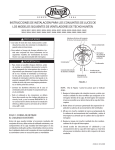
Assembly - Attaching the Fan Blades and Brackets
5
6
Attaching the blades to the blade
brackets
Fastening the blade assemblies to
the motor
□□ Fasten the blade assembly to the fan-motor assembly (C) by
NOTE: Your fan blades are reversible. Select the blade
side finish which best accentuates your decor.
□□
inserting the alignment post into the slot on the bottom of the
motor and tightening the blade bracket (D) screws. The blade
bracket screws are pre-installed into the blade bracket (D).
Repeat this step for the remaining blade assemblies.
AA
D
E
C
D
E
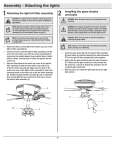
Assembly - Attaching the Light Kit Fitter Assembly
7
8
Attaching the light kit fitter assembly
CAUTION: To reduce the risk of electric shock, disconnect
the electrical supply circuit to the fan before installing the
light kit.
WARNING: Allow the glass shades to cool completely before
removing.
□□ Remove the three screws on the black bracket below the fan□□
□□
□□
□□
Installing the glass shades and
bulbs
motor assembly (C).
Connect the wires from the light kit fitter assembly (F) to the
wires from the black bracket below the fan-motor assembly
(C) by connecting the molded adaptor plugs together.
Carefully tuck all wires and splices in the switch cup.
Position the switch cup of the light kit fitter assembly (F) on
the black bracket below the fan-motor assembly (C) and align
the three holes in the black bracket.
Re-install the three screws removed at the beginning of this
step to secure the light kit fitter assembly (F).
CAUTION: Make sure the power is off before attaching or
removing the glass shades.
□□ Insert the glass shade (G) into the glass holder by carefully
□□
□□
□□
squeezing the steel tensioners on the light fixture socket
together.
Gently slide the glass shade (G) over the steel tensioners.
Make sure the glass shade (G) is fully inserted into the socket
for a secure fit. Repeat these instructions for the remaining
glass shades.
With the power off, insert the light bulbs (H) into the light
sockets, Max. 60W.
Attach the pull chains extensions (DD) to the light pull chain
and the fan pull chain.
C
F
G
F
H
9
DD
HAMPTONBAY.COM
Please contact 1-877-527-0313 for further assistance.
Ensamblaje- Cómo Montar las Aspas y los Soportes del Ventilador
5
6
Cómo conectar las aspas a los
soportes de las aspas
□□ Ajusta el ensamblaje de las aspas al ensamblaje del motor del
NOTA: Las aspas de tu ventilador son reversibles. Elige
el acabado del aspa que mejor resalte tu decoración.
□□ Monta un aspa (E) en un soporte de aspa (D) colocando los
□□
□□
Cómo sujetar los ensamblajes de
las aspas al motor
tornillos para asegurarlas (AA) en los orificios del aspa (E) y a
través del soporte de esta (D). Las arandelas de goma vienen
fijadas al soporte del aspa (D).
Aprieta cada tornillo firmemente.
Repite estas instrucciones para cada aspa (E) y soporte del
aspa (D).
□□
ventilador (C) insertando el poste de alineación dentro de la
ranura de la parte inferior del motor y apretando los tornillos
del soporte del aspa (D). Los tornillos del soporte de aspa
vienen preinstalados en el soporte (D).
Repite este paso para los ensamblajes de las aspas restantes.
AA
D
E
C
D
E
Ensamblaje - Cómo Instalar el Ensamblaje del Soporte
del Kit de Luces
7
8
Cómo instalar el ensamblaje del
soporte del kit de luces
PRECAUCIÓN: Para disminuir el riesgo de descarga
eléctrica, desconecta el circuito de energía del ventilador
antes de instalar el kit de luces.
ADVERTENCIA: Espera que las pantallas de vidrio se
enfríen por completo antes de retirarlas.
□□ Quita los tres tornillos en el soporte negro debajo del ensamblaje del motor del ventilador (C).
PRECAUCIÓN: Asegúrate de que la corriente está
apagada antes de montar o retirar las pantallas de vidrio.
□□ Conecta los cables del ensamblaje del soporte del kit de luces (F) a los
□□
□□
□□
Cómo instalar las pantallas de
vidrio y las bombillas
cables del soporte negro debajo del ensamblaje del motor del ventilador (C), conectando juntos los enchufes con adaptadores moldeados.
Coloca con cuidado todos los cables y empalmes dentro de la
caja del interruptor.
Coloca la caja del interruptor del ensamblaje del soporte del kit de
luces (F) sobre el soporte negro debajo del ensamblaje del motor
del ventilador (C) y alinea los tres orificios del soporte negro.
Vuelve a instalar los tres tornillos que fueron quitados al inicio de este
paso para asegurar el ensamblaje del soporte del kit de luces (F).
□□ Inserta la pantalla de vidrio (G) en el soporte de vidrio apre□□
□□
□□
tando con cuidado los tensores de acero sobre el portabombilla de la luz.
Cuidadosamente desliza la pantalla de vidrio (G) sobre los
tensores de acero. Asegúrate de que la pantalla de vidrio
(G) esté totalmente insertada en el portabombillas para que
quede bien ajustada. Repite estas instrucciones para las
pantallas de vidrio restantes.
Con la electricidad desconectada, inserta las bombillas
Sujeta las extensiones de las cadenas para halar (DD) a la
cadena para halar del kit de luces y la del ventilador.
F
C
G
F
H
9
DD
HAMPTONBAY.COM
Para obtener asistencia, llama al 1-877-527-0313.