1
INSTALLATION INSTRUCTIONS
For Model # 25000, 25001, 25002 (Rev 12/09/2003)
WARNING!
S H U T P O W E R O F F AT F U S E O R C I R C U I T B R E A K E R .
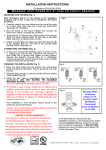
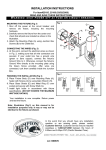
MOUNTING THE FIXTURE (Fig. 1)
Fig. 1
1. Shut off power at the circuit breaker and remove old
fixture from ceiling, including the crossbar.
2. Carefully unpack your new fixture and lay out all the parts
on a clear area. Take care not to lose any small parts
necessary for installation.
3. Attach Circular Strap (B) using Junction Box Screws (C)
to the Junction Box (A). The side of the Circular Strap
marked “GND” must face out.
4. Thread Studs (D) into the pre- drilled holes of the Circular
Strap (B), same distance apart as the hole in the canopy.
E
D
F
G
H
I
C
B
A
J
K
CONNECTING THE WIRES (Fig. 2)
5. Connect the electrical wires as shown in Fig. 2, making
sure that all wire connectors are secured. If your outlet
has a ground wire (green or bare copper), connect the
fixture’s Ground Wire to it. Otherwise, connect the
fixture’s Ground Wire directly to the crossbar using the
Green Screw provided.
FINISHING THE INSTALLATION (Fig. 1)
Fig. 2
6. Place the Canopy (E) over the junction box and thread
studs through the Canopy. Secure assembly with Cap
Nut (G).
7. Install the light bulb in accordance with the fixture’s
specifications. (DO NOT EXCEED THE MAXIMUM
WATTAGE RATING!)
FIXTURE
WIRES
Black or
Smooth
FIXTURE
WIRES
White or
Ribbed
HOUSE
WIRES
Black
(Hot)
FIXTURE
WIRES
Bare
Copper
(Ground)
HOUSE
WIRES
White
(Neutral)
8. Align predrilled hole on the Bulb Cover (I) and the hole
from the socket. Secure assembly with screw (F).
9.
Cover the light bulb assembly with Lamp Shade (K) and
secure with Shade Screws (J)
Your installation is now complete. Return power to the
outlet box and test the fixture.
Note: Illustration (Fig. 1) on this manual is for installation
purposes only. It may or may not be identical to the fixture
purchased.
MIN 90℃ SUPPLY CONDUCTORS
In the event that you should have any installation
question or are missing parts, please contact
Customer Service. Customer service may be reached
weekdays a 1-800-527-0998 between the hours of
8:00am and 5:00pm PST (Pacific Standard Time).
LA-750E/S
HOUSE
WIRES
Green
(Ground)
INSTRUCCIONES PARA LA INSTALACION
Para Modelo # 25000, 25001, 25002 (Rev 12/09/2003)
ADVERTENCIA! CORTE LA CORRIENTE DESDE EL FUSIBLE O EL INTERRUPTOR CENTRAL
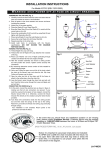
ENSAMBLAJE DE LA LAMPARA (Fig. 1)
1. Corte la corriente en el circuito principal y saque la lampara
vieja incluyendo la barra transversal.
2. Desempaque cuidadosamente su nueva lampara y coloque
todas las partes en una superfice despejada. Tenga
cuidado de no perder las partes pequeñas que son
necesarias para la instalacion.
3. Coloque la Abrazadera Circular (B) con los Tornillos de la
Caja de Union (C) y montelo a la Caja de Union (A). Ell
lado marcado “GND” deben quedar hacia afuera.
4. Colloque los Tachones (D) en los abujeros de la
Abrazadera Circular (B). A la misma distancia de la
Cubierta.
CONECTANDO LOS ALAMBRES (Fig.2)
Fig. 1
E
D
F
G
H
I
C
B
A
J
K
5. Conecte el alambrado electrico como se muestra en la
(Fig.2), use un conector de plastico para asegurar la
conexion. Si su caja de union tiene un alambre de tierra
(verde o de cobre), conectelo al alambre de tierra de la
lampara. Si no tiene, entonces conecte el alambre de tierra
de la lampara directamente a la barra transversal usando
el tornillo verde incluido.
TERMINANDO LA INSTALACION (Fig.1)
6. Levante la Cubierta (E) sobre los Techones asegurando la
Cubierta al Techo con las Tuercas Decorativas (G).
7. Instale los focos de acuerdo a las especificaciones. NO
EXCEDA MAS DE LOS VATIOS ESPECIFICADOS!!
Fig. 2
ALAMBRES
DE LA
LAMPARA
VERDE O DE
COBRE
(A TIERRA)
ALAMBRES
DE LA
LAMPARA
BLANCO O
CON MARCA
ALAMBRES
DE LA
LAMPARA
NEGRO O
SIN MARCA
8. Alinie los agujeros de la Cubierta del Foco (I) con los
agujeros del Socket asegurela con los Tornillos (F).
9. Cubra el ensamble del Foco con la Cubierta (K) y asegure
con los Tornillos de la Cubierta (J).
ALAMBRES
DE LA
CASA
ALAMBRES
DE LA
CASA
BLANCO
(NEUTRAL)
Su instalacion a terminado, conecte la corriente electrica y
pruebe la lampara.
Nota: La ilustracion (Fig 1) en este manual esta para los
propositos de la instalacion solamente. Puede o no
puede ser identical al accesorio comprador.
CONDUCTORES DE ALIMENTACION
CON MINIMO DE 90℃
En caso de preguntas sobre la instalacion o le
faltaron partes, porfavor hablar al departamento de
Servicio al Cliente al 1-800-527-0998 de Lunes a
Viernes de 8:00 a.m. a 5:00 p.m. PST (Tiempo del
Pacifico).
LA-750E/S
ALAMBRES
DE LA
CASA