Transcript
INSTALLATION INSTRUCTIONS
For Model #1007-44-PL
W ARNING!
S H U T P O W E R O F F AT F U S E O R C I R C U I T B R E A K E R .
CAUTION
Turn off the main power at the circuit breaker before installing
the fixture, in order to prevent possible shock.
GENERAL
All electrical connections must be in accordance with local
and national electrical code (N.E.C) standards. If you are
unfamiliar with proper electrical wiring connections obtain the
services of a qualified electrician.
Remove the fixture and the mounting package from the box
and make sure that no parts are missing by referencing the
illustrations on the installation instruction.
ASSEMBLY AND INSTALLATION
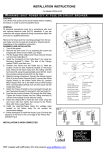
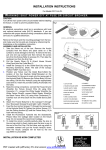
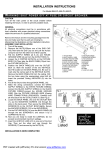
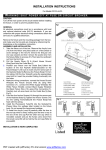
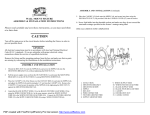
1. Turn off the power.
2. Remove the wire cover (17) by loosening the screw and
snapping the Wire Cover(17)with your finger.
3. Pull the Supply Wires (3)&(4) and House Ground Wire(2)
out from the Outlet Box(1)
4. Install the Canopy(9) to the Outlet Box(1)by using
two Mounting Screw(11) (Note: The side of the
Canopy marked "GND" must face out.)
5. Position your fixture over the Outlet box (1). Mark the
location of the two Slot Holes located on the fixture body.
Remove the fixture body from the ceiling. Drill the two
holes(12) using the appropriately sized drill bit. Insert the
provided ceiling Anchors(13) into the holes.
6. Make the wiring connections: Connect the House
Ground Wire (2) to the Fixture Ground Wire(7);
connect the White Supply Wire (3) to the White
Fixture Wire (8); connect Black Supply Wire (4) to
the Black Fixture Wire (5) using Wire
Connectors(6). Carefully tuck all wires back into the
Outlet.Box(See Fig.4)
7. Attach the Fixture Pan(22)to the Canopy(9)through
the two Downward Screws(10)and tight it with two
Nuts(15)
8. Feed the two Anchor Screws (16) through the Slot
Holes.Tighten the Anchor Screws into the Ceiling
Anchors(13) until the Fixture Body is flush with the
ceiling.
9. Follow the drawing #3 to install the wire cover.
Snap the wire cover with your hands, then secure to
the fixture body with screw. (see Figure 3 )
10. Install the tube (18). Please follow the wattage label
located on the fixture body. Do not exceed the
recommend wattage.
11. Follow drawing #2 to install the Acrylic Lens
(19).hook the Clips(21) of the lens to the curve edge
of the Fixture Pan (22) (see Figure 2 )
Fig. 4
FIXTURE
WIRES
Black or
Smooth
INSTALLATION IS NOW COMPLETED
PDF created with pdfFactory Pro trial version www.pdffactory.com
FIXTURE
WIRES
White or
Ribbed
HOUSE
WIRES
Black
(Hot)
FIXTURE
WIRES
Bare
Copper
(Ground)
HOUSE
WIRES
White
(Neutral)
HOUSE
WIRES
Green
(Ground)