1
3
Selecting a container
This kit includes only the diverter system to be added to a barrel you supply.
Therefore, we take no responsibility for losses, damages or injury caused
by failure of the barrel, or improper installation of the parts. Follow these
instructions carefully for successful results.
This kit will work on both sealed, open top barrels, and top fill rain barrels.
If the rain barrel is pre-drilled for an overflow hose, seal the opening to preserve
the automatic overflow function of the FlexiFit diverter. For new top fill rain barrel
installations, do not drill and install the overflow hose.
Water weighs 8.3 lbs. per gallon. Be sure to select a sturdy container that can
support the weight when full. 55 gallons of water weighs 456 lbs.
Select a sturdy watertight container:
a. A commercial grade plastic waste barrel with latching lid.
b. A traditional wood barrel
c. If using a recycled barrel, use only FDA approved food grade barrels.
Make sure the barrel is clean and has not been used to contain toxic
or hazardous substances.
The container selected should be sealed, or have a locking lid to prevent
mosquitoes, animals and children from entering the barrel.
This kit is not for use with metal drums or barrels.
WARNING
Stored rainwater is not
suitable for human or
animal consumption
FlexiFit™ Universal Rain Barrel Diverter System
User Guide FDS-0001 V.1
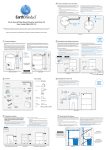
EarthMinded has assembled all the parts needed to add a diverter system to any rain barrel (barrel not included).
Using this kit, anyone who can use a drill can install a rain barrel diverter in minutes! Works with plastic and wood
rain barrels and tanks.
Please read all instructions and warnings before installation, and retain this Booklet for future reference
a. Plastic Waste Barrel (Open Top)
1
4
General description
Rain barrels have been used for hundreds of years to harvest and
store rainwater for use with plants, gardens and other outdoor
chores.
2
EarthMinded’s Universal Diverter System is a state-of-the art
rainwater collection system to be used with a barrel or container
you supply. Our FlexiFit™ diverter installs easily by drilling a single
hole into any standard 2” x 3” or 3” x 4”* rectangular downspout.
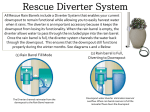
The diverter sends rainwater into the barrel. Once the barrel is
full, the diverter will automatically pass excess water through the
downspout.
1
3
b. Wood Barrel
c. Recycled Plastic Barrel (Sealed)
Select a location for your rain barrel
Before installing the diverter we recommend that you select and prepare the
location where the barrel will be used. This will help you to locate the water inlet
on the barrel in the most suitable location.
1. Place the barrel in the intended location with the front facing out.
•
Choose a downspout that is near the plants or garden beds to be watered.
•
The downspout must be a standard rectangular 2” x 3” or 3” x 4”.*
•
The barrel must be located within 28”(71cm) of the downspout to use the fill
hose provided.
3. Hold the fill hose in position between the barrel and the downspout and
eeemark the water inlet location on the rim of the barrel. This mark can be at
eeethe back, right or left side of the barrel.
•
The ground under the barrel must be level and firm. A solid surface base of
wood, pavers, or stone is recommended.
2. If the surface is not level, use a shovel or rake to grade the surface. Check
eeeby placing a level on the rim of the barrel before continuing.
eeeCheck that the hose can reach horizontally from the mark on the barrel to
eeethe downspout.
*Water capture percentage is reduced with 3”x 4” downspouts
The diverter is easy to remove from the downspout and the kit
includes a winter hole cover.
The FlexiFit diverter offers many advantages over conventional
top fill rain barrels that commonly flood with heavy rain, require
permanent modifications to your downspout, and use unsightly
overflow hoses.
6” MIN (15cm)
3
*Water capture percentage is reduced with 3”x 4” downspouts
28” MAX
(71cm)
•Round downspout diverter and cover available as an accessory
3
Some areas prohibit the use of rain barrels. Please check local
regulations before installing.
1
1. Fill hose
2. FlexiFit diverter
3. Winter hole cover
WARNING
Stored rainwater is not for human
or animal consumption
2
Top View
Parts list
Tools needed
1. Safety Glasses
2 Pc. Hole Saw Set
FRN-068
1
5
Installing the fill hose seal
1. Locate the water inlet mark on the barrel (from Step 4). Measure
down 3” (76mm) and mark the center for the water inlet hole. Make
sure the water inlet is located on a flat or evenly curved surface: avoid
ridges or other features that could affect the water seal.
2. Drill a single hole using the (SMALLER) 1-1/2”(38mm) hole saw
included in the set.
Fill Hose
FRN-054
2. Safety Gloves
3. Insert the fill hose seal into the hole. Pinch the seal into a “U” shape
for easier insertion.
2 Screws
TM
Flexifit Diverter
FRN-008
Fill Hose Seal
FRN-043
Barrel Not
Included
3. Drill
REMOVE LID
BEFORE MEASURING
4. Measuring
Tape or Ruler
3”
3”
5. Pencil
Winter Hole
Cover
FRN-009
Instructions
6. Phillips
Screwdriver
7. Level
Back of barrel
1-1/2”
(38mm)
Hole Saw
6
9
About the FlexiFit Diverter
DO NOT CUT THE DOWNSPOUT UNTIL READING THE ENTIRE GUIDE!
The FlexiFit diverter redirects water from your downspout to the barrel and
automatically passes water through the downspout when the barrel is full
of rainwater.
The diverter is installed in a hole that is cut in the downspout.
1. The hole must be cut at the correct height for the diverter to work
properly.
2. If the diverter is installed too low, the barrel will not fill properly.
3. If the diverter is installed too high, water will overflow from the rim of
the barrel (this only applies to open top barrels).
IMPORTANT: There are two ways to install the diverter depending on the type
of barrel you use. If the barrel is a sealed container without a lid or screen, the
diverter can be located at the same level as the rim of the barrel or higher. This will
improve the filling efficiency of the diverter.
If the barrel has a removable lid or screen, the center of the diverter hole must be
drilled 3” (76mm) below the level of the rim of the barrel to prevent water from
leaking from the lid seam or screen. The diverter will not work if it is placed below
the level of the water inlet on the barrel.
The diverter provided in this kit is not for use with round downspouts.
A round downspout diverter available as an accessory at
www.earthmindedconsumerproducts.com
Installing the FlexiFit Diverter
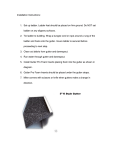
1. Insert the diverter into the hole in the downspout by squeezing the
sides and pushing the diverter into the downspout until the flange
sits flat against the downspout. Do not twist the diverter when
installing - push it straight in - with the collection cup facing up at
all times to insure a proper seal. Make sure that the arrow on the
front of the diverter is installed pointing straight up.
WARNING
WARNING
Installation Hazard
Wear Safety Glasses
WARNING
WARNING
Electrocution Hazard
Wear Safety Gloves
2. Use 2 of the self-tapping screws to attach the diverter to the
downspout.
3. Connect the fill hose to the cuff end of the FlexiFit diverter. Press
the hose into the diverter until the corrugated section is flush
against the diverter. Use soapy water or hand lotion on the hose
cuff and seal to reduce friction and improve fit.
TIP
Soapy water or
hand lotion on
the hose cuff and
rubber seal reduces
friction and makes
insertion easier
2
1
INCORRECT
WARNING
2
If the hole is cut too low,
the barrel will not fill.
Damage to home or
property may occur if
improperly installed.
1
3
INCORRECT
For open top containers
or containers with screens
only, If the hole is cut too
high, water will overflow
from the barrel rim.
3
CORRECT
7
10
Marking the FlexiFit Diverter hole on the downspout
DO NOT CUT THE DOWNSPOUT UNTIL READING THE ENTIRE USER GUIDE!
1. Make a reference mark even with the rim of the barrel on the downspout
using a pencil and a straight edge placed on the rim of the barrel as a
guide.
2. For sealed containers only (no opening lid or screen): measure and
make a mark on the CENTER of the downspout.
3. For open top containers only: measure 3”(76mm) below the reference
line and make a second mark on the CENTER of the downspout. The
second mark will now be your reference mark for the diverter height.
Be sure to take any elevated base into account before measuring. If you plan
on using an elevated base you must do it before measuring and cutting the
downspout.
An elevated base will increase water pressure if using with a garden hose.
When installing to a 3” x 4” rectangular downspout, you must make the mark
on the narrow 3” side of the downspout (not the front) for the diverter to
work properly.*
*Water capture percentage is reduced with 3”x 4” downspouts
Connecting the barrel
Winterizing the barrel
1. Extend the hose to the desired length, up to 28”(71cm). The hose can be
bent to form elbows.
A rain barrel can be damaged if water is allowed to freeze in the barrel.
To Winterize:
2. Connect the other end of the fill hose to the fill hose seal on the barrel.
Press the hose end firmly into the seal until the corrugated section is flush
with the hose seal. Use soapy water or hand lotion on the hose cuff and
seal to reduce friction and improve fit.
1. Remove the FlexiFit diverter by removing the 2 screws. Remove the diverter
by pulling it out in an upwards motion.
2. Completely drain the barrel making sure the water is being drained away
from the foundation of the house.
3. Cover the hole in the downspout with the winter hole cover and secure with
the 2 screws.
If using an open top barrel with lid make sure the lid is secure and latched. Do
not leave the lid off for extended periods of time. The barrel may bow from
the weight of the water and make fitting the lid difficult.
4. Store rain barrel and diverter for winter.
TIP
3"x 4" downspout
2"x 3" downspout
2
1
4”
3”
Remove lid
for measuring
Soapy water or
hand lotion on
the hose cuff and
rubber seal reduces
friction and makes
insertion easier
2
WARNING
2”
3”
Tipping Hazard
3”
3
3
8
11
Drilling the FlexiFit Diverter hole
Drill a hole in the downspout using the (LARGE) 2-1/8”(54mm) hole saw.
The center bit of the hole saw should align with the center mark on the
downspout.
• Do not force the hole saw. Cut slow and steady keeping a firm hold on
eithe drill.
• Always wear safety glasses and gloves when cutting or drilling.
• The cut edges of the downspout can be sharp! Wear protective safety
eiglasses and gloves when handling.
• For 3” x 4” downspouts make sure you drill the hole on the narrow 3”
eiside (not the front side).
Do not use with heated downspouts!
WARNING
Installation Hazard
WARNING
Electrocution Hazard
Troubleshooting
The rain barrel does not fill with water after rainfall:
WARNING
2-1/8”
Wear Safety Glasses
(54mm)
Hole Saw
WARNING
Warnings regarding potential hazards
Drowning Hazard
Contamination Hazard
Electrocution Hazard
Installation Hazard
Tilting/Tipping Hazard
Infestation Hazard
Wear Safety Glasses
Wear Safety Gloves
1. Check the top of the gutter for blockage at the downspout connection.
2. Remove the FlexiFit™ diverter and check that the downspout, diverter,
and fill hose are not blocked by leaves or debris.
3. Make sure the diverter is installed with the collection cup (arrow)
facing up.
4. Make sure no point of the fill hose is above the level of the diverter.
5. Check that the diverter is installed at the correct height. It must be
above the water inlet on the barrel to fill properly. To Correct: drain
the barrel and lower the ground until the water inlet on the barrel
is 1” (25mm) below the level of the diverter.
Wear Safety Gloves
6. Check the spigot and drain to make sure that water is not leaking.
Even a slow leak will drain the barrel over time.
The rain barrel overflows and water leaks out from the lid or screen:
The barrel is too low.
3”
To correct: drain the barrel and construct a solid surface base to
raise the barrel to the correct height.
The fill hose can be replaced by a 1 - 1/4” (32mm) bilge hose available
cccat most home centers.
Sealed Barrel
Open Top Container
WARNING
WARNING
Lid must be secured at all times
to prevent injury to children.
The barrel must be installed
on a solid and level base.
WARNING
Stored rainwater is not for human
or animal consumption