1
Assembling & Using Your Product
•
Gently pour water into the fountain, being careful not to
overflow and cause splashing. Make sure the water
completely submerges the pump and the water runs clear
during operation. Plug pump cord into your local power
supply & make sure that there is no water around the plug.
Always keep the power source in a dry place.
•
NOTE: We recommend that you use distilled water to prevent
any build-up. The first time you operate the pump it can take
up to 5 minutes for the air to be completely expelled and
water to flow properly.
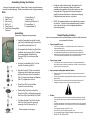
Unpack all components carefully. Please check to ensure all parts have been
removed from the packaging. Decide on a suitable location to begin assembling.
Parts:
1.
2.
3.
4.
5.
6.
Fish Figurine (1)
Small Tier (1)
Dish Cover (1)
Big Tier (1)
Pump Cover (1)
Pump/Pump Housing/Metal
Connector
7.
8.
9.
10.
11.
Fountain Basin (1)
Fountain Leg (1)
Bottom Leg Connector (1)
Fountain Base (1)
Screws/Washers (3)
Assembling:
Please refer to diagrams during assembly.
•
•
Diagram 1-1
Insert the Pump cable through the Fountain
Leg (Part 8), the Bottom Leg Connector (Part
9), and the Fountain Base (Part 10).
Screw together the Fountain Leg (Part 8) into
the Bottom Leg Connector (Part 9), followed
by screwing together the Bottom Leg
Connector (Part 9) to the Fountain Base
(Part 10).
•
Screw the Fountain Basin (Part 7) into the
top of the Fountain Leg (Part 8).
•
Align the Pump (Part 7) that is connected to
the housing unit and metal screw connector
with the screw holes on the Fountain Basin
(Part 7). Use the three Screws and Washers
(Part 11) to tighten them in place.
•
Pump Cover (Part 5) over the Metal
Connector to cover the Pump.
•
Place the Big Tier (Part 4) on top of the
Pump Cover (Part 5), followed by placing the
Dish Cover (Part 3) onto the Big Tier (Part 4).
•
Then place the Small Tier (Part 2) onto the
Dish Cover (Part 3) and lock in place by
screwing in the Fish Figurine (Part 1).
Please continue on other page.
Diagram 1-2
Trouble Shooting & Caution
If you have any questions and/or problems, please contact the retail store where
you purchased this fountain.
•
If your pump fails to run
•
•
•
•
•
•
If your pump “spews”
•
Check the water level to make sure the pump is completely submerged and
there if enough water in the basin to operate your fountain. Not having enough
water will cause your pump to spew
If your pump is making abnormal loud noises
• Disconnect the pump from the electrical power supply and remove the front
•
•
•
Check the circuit breaker or try a different outlet to make sure the pump is
receiving electrical power.
Check the pump discharge and tubing for any kinks and/or obstructions
Any buildup obstructing the water flow can be flushed with a garden hose
Check the rotor by removing the front cover & plate to access the impellor area.
Turn the rotor and make sure that the rotor is not jammed or broken
cover & plate
Carefully grip the impellor and gently pull the impellor/rotor assembly out of the
pump housing
Rinse the impellor/rotor assembly and clean the cavity with clean water. If
breakage or damage is found, contact your local retailer for parts
Caution
o
o
o
o
o
o
o
o
Always unplug the pump from the electrical outlet before cleaning & handling
Uses with clean water only, do not place the fountain and/or parts in any other
liquid.
Periodically change water & clean the pump to keep free from micro-organisms
Disconnect and store the unit in a dry place if not in use for an extended period
of time
Do not operate with water above 90°F or 30°C
Do not lift, carry or pull the pump by the power cord
Do not exceed the maximum voltage & wattage on transformer or pump
NEVER LET THE PUMP RUN DRY