Transcript
E-Z Connect® Multipurpose Edging
Installation Guidelines (for use as landscape edging)
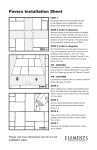
Step 1
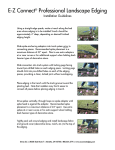
No digging required. Using a spade or shovel, clear area where edging is to be placed of turf
and debris. For best results, edging should be placed on clear, level ground.
2
1
Step 2
Slide connectors into track system with locking pegs facing toward
pre-drilled holes on each edging piece. Locking pegs should click into pre-drilled holes on each of
the edging pieces, providing a clean, locked joint without overlapping.
Step 3
Place edging on cleared surface with the anchoring tabs facing toward the planting bed. Note
that installers may find it easier to connect all pieces before positioning edging prior to
anchoring.
3
Step 4
Drive spikes vertically, through holes on horizontal anchoring tabs. Recommended spike
placement is a maximum distance of 24” apart. Use extra spikes at or near curves or for extra
support when holding back heavier types of decorative stone.
4
5
Step 5
Tightly pack soil around edging and install landscape fabric and ground cover (decorative
stone, mulch, etc.) to the top of the edging.
Installation Guidelines (for use as brick paver edging)
Install compacted aggregate base. Consult you paver supplier for proper width and depth for the specific paver application.
Slide connectors into track system with locking pegs facing toward pre-drilled holes on each edging piece. Locking pegs should
click into pre-drilled holes on each of the edging pieces, providing a clean, locked joint without overlapping.
Determine proper positioning and install edging directly on top of compacted aggregate base prior to screeding sand and
setting pavers.
E-Z Connect® Multipurpose Edging can be installed with anchoring tabs for spikes underneath or adjacent to the edge of the
pavers. Diagram 1 illustrates an installation with the anchoring tabs underneath the pavers. Diagram 2 illustrates an
installation with the anchoring tabs adjacent to the edge of the pavers.
Secure edging by driving
anchoring spikes through
anchoring tabs into
compacted base.
Recommended spike
placement is a maximum of
24” apart.
Diagram 1
Diagram 2
Backfill perimeter with
topsoil. Seed, sod or install
groundcover, as specified.
Dimex LLC » 28305 State Route 7 » Marietta, OH 45750 » www.ezconnectedging.com