1
Tool Free Potting Bench With Raised Garden Beds
(24” x 48”) Assembly Instruction
3
1
TFPBRB 24-48
Parts Identification Box 1
1
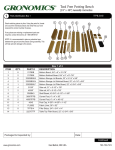
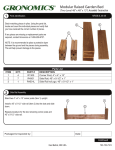
Stack matching pieces in piles. Using the parts list, locate
and count the individual pieces and verify that you have
received the correct number of pieces.
3
6
7
8
10
9
13
If any pieces are missing or replacement parts are
required, contact Gronomics at 1-855-299-6727.
11
12
NOTE: It is recommended to place a protective layer
between the ground and the pieces during assembly. This
will help prevent damage to the pieces.
2
4
5
14
13
Box 1 of 3
DESCRIPTION
ITEM
QTY.
PART #
1
6
2178BB
Bottom Board, 5/4” x 6” x 21-7/8”
2
2
2178BN
Bottom Notched Board, 5/4” x 6” x 21-7/8”
3
6
22525BSLB
Bottom Storage Lid Boards, 22” x 5-1/4” x 5/8”
4
2
22525BSLN
Bottom Storage Lid Notched Board, 22” x 5-1/4” x 5/8”
5
1
22525BSLF
Bottom Storage Lid Filler Board, 22” x 2-3/4” x 5/8”
6
4
2100T
Side rail, 21” x 5-1/2” x 7/8”
7
2
4500T
Side rail, 45” x 5-1/2 x 7/8”
8
1
PBSB43
9
2
3600TFPB
Corner Post, 4” x 4” x 36”
10
2
4650TFPB
Corner Post, 4” x 4” x 46-1/2”
11
4
4545
12
1
FL3652
Fabric Liner, 36” x 52”
13
8
TFFS14
Filler Strips, 3/4” x 3/4” x 14”
14
1
22275TTF
Shelf Board, 43-3/4” x 5-1/2” x 1-3/8”
Post Cap, 4-5/8” x 4-5/8” x 1-1/2”
Table Top Filler Board, 22” x 2-3/4” x 5/8”
Packaged & Inspected by:
Date:
Continued
www.gronomics.com
East Bethel, MN USA
763-753-7374
2
Parts Identification Box 2
15
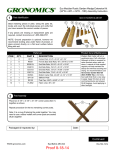
Remove contents from Box 2 of 3.
Stack matching pieces in piles. Using the parts list, locate and
count the individual pieces and verify that you have received
the correct number of pieces.
17
16
17
18
19
21
If any pieces are missing or replacement parts are required,
contact Gronomics at 1-855-299-6727.
NOTE: It is recommended to place a protective layer between
the ground and the pieces during assembly. This will help
prevent damage to the pieces.
20
Box 2 of 3
ITEM
15
16
17
18
19
20
21
3
QTY.
1
1
4
2
6
2
4
PART #
TR4500T
L4500T
4503TC
4502TC
22525TTB
22525TTN
2100T
DESCRIPTION
Top Rail, (Top Rail for Shelf Board), 45” x 5-1/2” x 7/8”
Side rail, (w/Logo), 45” x 5-1/2” x 7/8”
Side Rail, w/Top Cleat, Side rail, 45” x 5-1/2” x 7/8”
Side Rail, w/Bottom Cleat, Side rail, 45” x 5-1/2” x 7/8”
Table Top Board, 22” x 5-1/4” x 5/8”
Table Top Notched Board, 22” x 5-1/4” x 5/8”
Side rail, 21” x 5-1/2” x 7/8”
Parts Identification Box 3
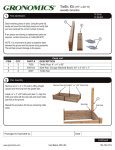
Remove contents from Box 3 of 3.
Stack matching pieces in piles. Using the parts list, locate and
count the individual pieces and verify that you have received
the correct number of pieces.
23
24
22
If any pieces are missing or replacement parts are required,
contact Gronomics at 1-855-299-6727.
NOTE: It is recommended to place a protective layer between
the ground and the pieces during assembly. This will help
prevent damage to the pieces.
Box 3 of 3
ITEM
22
23
24
QTY.
2
4
8
PART #
R1300
2100T
4500T
DESCRIPTION
Corner Post, 4” x 4” x 13”
Side rail, 21” x 5-1/2” X 7/8”
Side rail, 45” x 5-1/2” X 7/8”
Continued
www.gronomics.com
East Bethel, MN USA
763-753-7374
4
6
Corner Post / Side Rail Assembly
Bottom Storage Lid Installation
Stand two 4” x 4” x 46-1/2” corner posts (Item 10) upright. Install a
side rail (Item 7) between the posts and slide to the ground.
Place one 22” x 5-1/4” x 5/8” bottom storage lid notched board (Item 4)
on each end of the potting bench.
Stand two 4” x 4” x 36” corner posts (Item 9) upright. Install a 45”
x 5-1/2” x 7/8” side rail (Item 7) between the posts and slide to the
ground.
Place six 22” x 5-1/4” x 5/8” bottom storage lid boards (Item 3) onto
potting bench.
Install two 21” x 5-1/2” x 7/8” side rails (Item 6) at each end of the
potting bench and slide down.
Place the 22” x 2-3/4” x 5/8” bottom storage lid filler board (Item 5) onto
the potting bench.
NOTE: Make sure the boards tongue and grooves fully seat
together.
10
5
3
10
4
4
7
6
6
9
9
5
7
Side Rail w/Top Cleat Assembly
Install a 45” x 5-1/2” x 7/8” side rail w/top cleat (Item 17) on each side,
with the cleat located at the top and the cleat facing inward. Slide the
side rails w/top cleat between the posts and slide down.
NOTE: Make sure the boards tongue and grooves fully seat together.
17
Filler Strip And Side Rail w/ Bottom Cleat Assembly
Install two 3/4” x 3/4” x 14” filler strips (Item 13) into the grooves on
adjacent sides of each post as shown and slide the filler strip down.
Install a 45” x 5-1/2” x 7/8” side rail w/bottom cleat (Item 18) on each
side, with the cleat located at the bottom and the cleat facing inward.
Slide the side rails w/bottom cleat between the posts and slide down
until the side rails contact the filler strip.
Install a 21” x 5-1/2” x 7/8” side rail (Item 21) between the posts at each
end and slide down until the side rails contact the filler strip.
18
21
21
13
13
13
13
13
13
Continued
www.gronomics.com
East Bethel, MN USA
763-753-7374
8
10
Side Rail w/Top Cleat Assembly
Install a 45” x 5-1/2” x 7/8” side rail w/top cleat (Item 17) on each side,
with the cleat located at the top and the cleat facing inward. Slide the
side rails w/cleat between the posts and slide down.
Install a 21” x 5-1/2” x 7/8” side rail (Item 21) between the posts at each
end and slide down.
NOTE: Make sure the boards tongue and grooves fully seat together.
Side Rail / Shelf Assembly
Install one 45’ x 5-1/2” x 7/8” side rail (Item 16) (w/Logo) between the
posts and slide down.
Install the 45“ x 5-1/2” x 7/8” top rail for shelf board (Item 15) and slide
down.
NOTE: Make sure the boards tongue and grooves fully seat together.
Install the 43-3/4” x 5-1/2” x 1-3/8” shelf board (Item 8) onto the side rail.
17
15
Logo
8
21
21
9
16
11
Bottom Board Installation
Raised Garden Bed Assembly
Install the one 5/4 x 6” x 21-7/8” bottom notched board (Item 2) at each
end of the potting bench.
Install two 45” x 5-1/2” x 7/8” side rails (Item 24) into the corner post
slots on each side and slide to the ground.
Place six 5/4” x 6” x 21-7/8” bottom boards (Item 1) onto potting bench.
Repeat procedure on the opposite end of the potting bench.
2
1
2
24
24
Continued
www.gronomics.com
East Bethel, MN USA
763-753-7374
12
14
Raised Garden Bed Assembly
Top Bench Notched Board and Fabric Installation
Install the 4” x 4” x 13” corner posts (Item 22) onto the 45” side rails.
Place the 36” x 52” fabric liner (Item 12) into the potting bed.
Install two 21” x 5-1/2” x 7/8” side rails (Item 23) between the posts and
slide down.
Install the two 22” x 5-1/4 x 5/8” table top notched boards (Item 20) at
each end of the potting bench.
Repeat procedures on the opposite end of the potting bench.
12
22
20
20
23
22
-
13
15
Post Cap Installation
Remove the rubber cap from the corner posts.
Align the hole of the 4-5/8” x 4-5/8” x 1-1/2 post cap (Item 11) with stud
and tighten until the cap makes contact with the post. Repeat procedure
on all corner posts.
Table Top Board Installation
Place six 22” x 5-1/4” x 5/8” table top boards (Item 19) onto potting
bench.
Place the 22” x 2-3/4” x 5/8” table top filler board (Item 14) onto the
potting bench.
14
NOTE: Do not overtighten.
19
Rubber Cap
11
Stud
www.gronomics.com
East Bethel, MN USA
763-753-7374
www.gronomics.com
East Bethel, MN USA
763-753-7374