Transcript
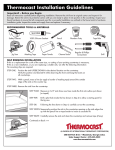
Thermocast Installation Guidelines
Important! – Before you Begin:
Read all instructions carefully before beginning installation. Remove the sink from its original carton and inspect it for
damage. Return the sink to its protective carton until you are ready to place it into position in the countertop. Inspect your
faucet hardware to insure that all components exist for a successful installation as outlined in the faucet and/or hardware
installation guide. Inspect the waste and supply lines and replace if necessary.
STEP NINE:
Mount the faucet hardware on the sink following the manufacturer’s instructions.
STEP TEN:
Install the drain in accordance with the manufacturers instructions using Plumbers
Putty following the manufacturer’s instructions. Note: Silicone Sealant or any
other sealants other than Plumbers Putty should not be used as a replacement for
Plumbers Putty. Apply a thin, continuous bead of 100% silicone sealant to the
underside outer perimeter of sink approximately 1/4" inside the perimeter and
carefully position the sink in the opening. Remember that the sink rests on a layer
of silicone sealant, not dry fitted to the countertop.
STEP ELEVEN:
Verify that the sink has not moved out of position and immediately remove any
excess sealant filling any remaining voids as needed.
STEP TWELVE:
SIL
IC
ON
E
SELF RIMMING INSTALLATION con't
NUT
GASKET
Allow the sealant to cure at least 1 hour before proceeding.
STEP THIRTEEN: Install the garbage/waste disposer, if applicable, following manufacturer's
instructions.
NUT
GASKET
STEP FOURTEEN:Connect the drain assembly.
STEP FIFTEEN:
Connect the faucet supply lines following the faucet manufacturer’s instructions.
STEP SIXTEEN:
Carefully turn on the water supply lines, then turn faucet on and check faucet, drain,
and drain assembly for leaks to insure a completed successful installation of your
new Thermocast Cast Acrylic Sink.
UNDER COUNTER INSTALLATION:
When planning to use a Thermocast sink in an under counter installation please check style and size
before authorizing cutting of the countertop. For under mounting to granite or marble or solid surface
materials, contact your granite-marble-solid surface fabricator for installation requirements and proper
fasteners. Under counter installation kits are available, but not required or necessary by all professional
fabricators. Please contact Thermocast Sales Support for details regarding under counter installation kits.
ADDITIONAL ACCESSORY HOLES:
Please contact the Thermocast Sales Support Center for questions and/or instructions on adding
accessory holes to your new Thermocast sink.
308 Bell Park Drive • Woodstock, Georgia U.S.A.
Sales Support Center : 678-445-2022
www.thermocastsinks.com