Transcript
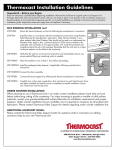
Thermocast Installation Guidelines
Important! – Before you Begin:
Read all instructions carefully before beginning installation. Remove the sink from its original carton and inspect it for
damage. Return the sink to its protective carton until you are ready to place it into position in the countertop. Inspect your
faucet hardware to insure that all components exist for a successful installation as outlined in the faucet and/or hardware
installation guide. Inspect the waste and supply lines and replace if necessary.
RECOMMENDED TOOLS & MATERIALS
SILICONE
Safety Glasses
Jig Saw
100% Silicone Sealant
Masking Tape
Paper Towels
Pencil
Plumbers Putty
Channel Locks
Tape Rule
Regular & Phillips
Screwdriver
Drill
SELF RIMMING INSTALLATION
If this is a replacement for a sink of the same size, no cutting of your existing countertop is necessary.
If this is a new installation, or you are replacing a smaller sink, we offer the following information:
No mounting clips are required.
STEP ONE: Position the sink UPSIDE DOWN in the desired location on the countertop.
Verify the position and desired fit while observing the front overhang that exists on
all countertops.
STEP TWO: With a pencil, trace a line (or apply a border of masking tape) around the outside
edge of the sink on the counter top.
STEP THREE: Remove the sink from the countertop.
STEP FOUR: Measure in 3/4" and draw new lines inside the first sink outline just drawn
(or taped).
STEP FIVE:
Drill a pilot hole inside the line drawn in Step 4 to allow a starting point for
the Jig saw.
STEP SIX:
Following the line drawn in Step 4, carefully cut out the countertop.
STEP SEVEN: Temporarily position the sink in the countertop opening so the sink edges line
up with the pencil line or tape border to insure a successful fit.
STEP EIGHT: Carefully remove the sink and clean the countertop and remove tape (if any).
Continued on Back >>>
308 Bell Park Drive • Woodstock, Georgia U.S.A.
Sales Support Center : 678-445-2022
www.thermocastsinks.com