1
INSTALLATION INSTRUCTIONS
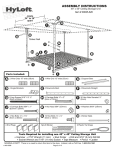
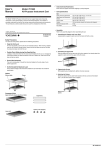
HyLoft 36" x 18" Shelf
MISSING A PART?
There is no need to
return this item to the
store. Instead call our
TOLL FREE HOTLINE.
1-800-990-6003
One Unit Shown
Box Contains TWO complete units
Parts Included:
2 wire grids
2 Large Clothes Rods
4 Shelf Brackets-2 left
and 2 right
F
4 Rubber Stoppers
12 Lag Screws 5/16" X 2 ½"
HyLoft Sticker
1-800-990-6003
150
2 Thinner Clothes Rods
4 Hex Bolts 1/4" x 1/2".
Tools required for installing the 36" x 18" shelves:
• 7/16" (11 mm) Wrench • Stud Finder • Drill and 3/16"(5 mm) drill bit
•Socket Wrench and 7/16"(11 mm) Socket • Tape Measure • Pencil • Level
MISSING A PART? There is no need to return this item to the store. Instead, call us Toll Free 1-800-990-6003
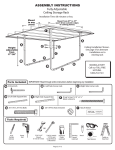
INSTALL SHELF BRACKETS
INTO WALL STUDS
1A
Using Stud finder
locate Studs approximately 32” apart
1B
Mark hole locations
with pencil
and pre-drill
with 3/16” drill bit
IMPORTANT NOTE:
Make sure hole
locations are level
before drilling holes.
1C
Install 2 Lag Screws(C)
using 7/16” nut driver or
socket wrench.
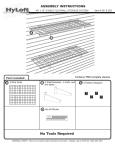
PLACE AND ATTACH GRIDS
Note: 4 cluster wires need to be in the front
and all long wires need to be on the top.
2A
Place grid on top
of brackets
until fully inserted
into slots
F
2B
Place slot in
Rubber Stoppers(F) on
brackets behind shelf.
ATTACH CLOTHING RODS(OPTIONAL)
Insert thin clothes rod (E) into larger clothes rod (D).
Attach rod assembly with ½" screws (G) into ends of
clothes rods (D & E) as shown.
You have now completed the installation are ready to load your new HyLoft Shelf. (Maximum 150 lbs.
per 18" x 36" unit, evenly distributed). Place the sticker provided on a bracket for easy access
to reference information.
Periodically (at least annually) check all connections to ensure that they remain tightly fastened.