1
Home Depot Pergola Assembly Instructions
List of Tools required:
2 People
Drill
7/8” x 8” Drill Bit
3/16” x 4” Drill Bit
15/16” Driver or Wrench(s)
5/16” Driver
Nails or Woodscrews (Galvanized)
Hammer
Framing Square
Bubble Level
Measuring Tape
Pencil
(8) 4ft+ Long Scrap 2x4 for use as temporary bracing
1) Layout Post Anchors
On Level ground mark location of the 4x included post anchors. Ensure that diagonal
measurements are equal to maintain square dimensions.
2) Secure Post Anchors
Install Post anchors in marked location. Consult Simpson installation instructions for proper
procedure.
3) Assemble Posts and Headers
Kit will come with either 3x12 or 3x8 Headers depending on model.
Lay Header [2] out flat on the ground with notched side facing up. Lay Posts [1] on header in
mounting location. Ensure equal 84 ¼” spacing between the entire length of the posts and use a
framing square and bubble level to maintain square dimensions. Mark hole locations on center
of posts and drill through posts and header using 7/8” drill bit. Spacing between holes must be
at least 3 ½” for stability.
Secure Header onto posts using provided hardware
Repeat for opposite side
4) Hoist Assembled Posts and Headers into Anchors
Prepare four scrap 2x4 to temporarily brace the posts after being hoisted into place.
Hoist one post and header structure upright and place bottom end of posts into anchors. Use a
level to ensure that posts are plumb and secure into anchors with choice of hardware. Consult
Simpson installation instructions for proper procedure. Brace the posts laterally using 2x4 to
keep them from falling over during assembly. Secure the 2x4 braces to both the post and the
ground.
Repeat for opposite side.
5) Assemble 2x6 Joists
Place 2x6 Joists [3] into notches between headers and secure with woodscrews through
predrilled holes.
6) Assemble 6x6 Knee Braces
Secure 6x6 Knee Braces [4] to Headers and Joists with woodscrews. Pre-drilling pilot holes is
recommended to prevent splitting. Knee braces must be installed with at least two 6” screws
per side through the Joists and three 8” screws into the Post for stability.
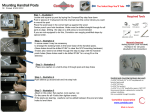
Pre-drill the Knee Braces using a 3/16” diameter drill bit. Place holes according to diagram below
with at least 3” of screw through the brace to ensure stability.