Transcript
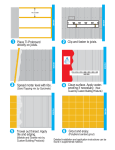
Installation Guide 1. Measure coverage area. Add at least 10% extra material to account for breakage, mis‐cuts during installation or to replace any tile element in the future. 2. Plan the placement of the tiles on your wall prior to installation. If you need to cut a mosaic sheet, cut from the back using a utility knife between tiles along the grout joints. Should you need to cut across tiles in a fashion that is not possible with a utility knife, use a wet saw with a diamond blade to cut through the tiles. 3. Apply setting materials using the notched side of a V‐notched trowel. Using the flat side of the trowel, smooth out all ridges to achieve consistent even 1/8” (3mm) coverage. 4. Apply glass mosaic sheets, mesh side down. Pressing firmly into freshly laid setting material. Using a rubber grout float gently press the tile into the adhesive to ensure complete contact. For best results mix and match from assorted sell units to achieve consistent variation. 5. Natural stone should be sealed prior to grouting. A premium penetrating sealer is recommended for a natural look. Please refer to sealer manufacture’s recommendations for application instructions. 6. After 24 hours mix and apply non‐sanded tile grout. Please refer to grout manufacture’s recommendations for application instructions. 7. Clean all excess grout immediately with a damp sponge. After 12 hours polish off any remaining haze with a dry clean soft cloth.