1
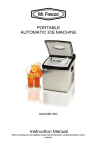
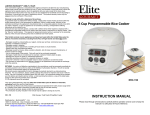
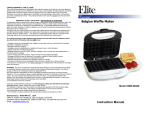
5 Qt. Stainless Steel Slow Cooker With Dipper Model MST-500D Instruction Manual Before operating your new appliance, please read all instructions carefully and keep for future reference. 0 IMPORTANT SAFEGUARDS 1. 2. 3. 4. 5. 6. 7. 8. 9. Should the unit be accidentally READ ALL INSTRUCTIONS immersed in water, immediately Check that the power voltage of unplug the power cord from the your outlet corresponds with the power outlet. Do NOT attempt to voltage that stated on the rating touch the water while the plug of label of the appliance before using the appliance is in the power the appliance. outlet! Do not touch hot surfaces. Use 10. Do not leave the unit unattended handles or knobs. when in use. To protect against electric shock, 11. Should the unit stop working do not immerse cord, plugs, the properly, disconnect the power appliance or its control panel in supply from the wall outlet; do water or any other liquid. NOT attempt to repair the Close supervision is necessary malfunctioning unit unless you are when the appliance is used by or a qualified electrician. near children. Do not operate any appliance with 12. The use of accessory attachments not recommended by the appliance a damaged cord or plug after the manufacturer may cause fire, appliance malfunctions or has been electric shock or personal injuries. damaged in any manner. Return 13. Do not use outdoors. the appliance to the nearest 14. Do not let cord hang over the authorized service facility for edge of a table, counters or touch examination, repair or adjustment. hot surfaces. Unplug from outlet when not in use 15. Do not place the appliance or the and before cleaning. Allow to cool stoneware liner on or near a hot down completely before putting on gas or electric burner, or a heated or removing parts and before oven. cleaning the appliance. 16. Extreme caution must be used The product is not a toy! Please when moving an appliance keep out of reach of children and containing hot oil or other hot pets. This product is not intended liquids. for use by children, or lacking 17. Always attach plug to the appliance experience or knowledge, unless first, then plug cord into the wall they have been given supervision outlet. or instruction concerning the use of To prevent Caution: Hot surface! This unit generates18. heatCAUTION: and hot steam during damage usage; or the product, by a person shock not or cook in the proper precaution mustsafety. be taken to prevent the riskshazard, of eitherdoburns injuries responsible for their Extra main base. Cook in the removable on skin contact, firenecessary breakout or damage to property. caution is always when 1 stoneware liner. using this product. 2 ADDITIONAL IMPORTANT SAFEGUARDS 19. Avoid sudden temperature changes, such as adding refrigerated foods into a heated stoneware liner. 20. Do not use appliance for other than its intended use. 21. This product is not a toy! Please keep out of reach of children and pets. This product is not intended for use by children, by persons with reduced physical, sensory or mental capabilities, or lacking experience or knowledge, unless they have been given supervision or instruction concerning the use of the product by a person responsible for their safety. Extra caution is always necessary when using this product. 22. Should the unit be accidentally immersed in water, immediately unplug the cord from the power outlet. Do NOT attempt to touch the power cord from the power outlet. Do NOT attempt to touch the water while the plug of the appliance is still in the power outlet! 23. Do not leave the unit unattended when in use. 24. Should the unit stop working properly, disconnect the power supply from the wall outlet; do NOT attempt to repair the malfunctioning unit unless you are a qualified electrician. 25. Do NOT use on an unstable, nonheat resistant, non-flat surface. 26. NEVER use the stoneware liner on a gas or electric stove top, or an open flame. 27. Life off the lid carefully and away from your face, to avoid scalding, and allow water to drip into the stoneware liner. 28. To avoid an electrical circuit overload, do not use high-wattage appliance on the same circuit with the slow cooker. 29. Some countertop and table surfaces such as Corian®, wood, and/or laminates are not designed to withstand prolonged exposure to heat generated by certain appliances. It is recommended by countertop manufacturers that a hot pad or trivet be placed under the appliance and a hot stoneware liner to prevent possible damage to the surface. CAUTION: DO NOT IMMERSE IN WATER. SAVE THESE INSTRUCTIONS THIS PRODUCT IS FOR HOUSEHOLD USE ONLY 3 POLARIZED PLUG If this appliance has a polarized plug (meaning one blade is wider than the other one), please follow the below instructions: To reduce the risk of electric shock, this plug is intended to fit into a polarized outlet only in one direction. If the plug does not fit fully into the outlet, reverse the plug. If it still does not fit, contact a qualified electrician. Do not SHORT CORD PURPOSE attempt to modify the plug in any way. NOTE: A short power cord is provided to reduce the risk of personal injury resulting from becoming entangled in or tripping over a longer cord. Longer power-supply cords or extension cords are available and may be used if care is exercised in their use. If an extension cord is used: (1) the marked electrical rating cord should be at least as great as the electrical rating of the the extension cord should be arranged so that it will not drape countertop or tabletop where it can unintentionally be pulled on PARTS & FEATURES by children or pets. 4 of the extension product; (2) over the or tripped over BEFORE FIRST USE Carefully unpack your slow cooker and clean it according to the instructions found in the “CLEANING AND CARE” section. Note: It is necessary to operate the slow cooker one time before placing food in the stoneware liner. 1. 2. Pour 4 cups of water into the 3. stoneware liner and place it into the main base. Cover with the glass lid. 4. Turn the temperature knob to the “High” position, and allow heating for approximately 30 minutes. You may notice a slight odor; this is normal and will quickly disappear. 5. Turn temperature knob to “OFF” and allow cooling for 20 minutes. Wearing oven mitts, grasp the stoneware liner by its handles to carefully lift it and remove it from the main base. Pour out the water from the stoneware liner. Rinse the stoneware liner, dry thoroughly and place it back into the main base. HOW TO USE 1. 2. 3. 4. 5. 6. 7. Prepare your ingredients to be slow 8. cooked directly in the stoneware liner. Do not fill the liner to the top with food. Put the glass lid on the stoneware 9. liner. Always make sure the temperature knob is in “OFF” position before plugging in the unit. Insert the plug into a grounded power socket of 120V, UL type. Select the desired temperature setting (LOW or HIGH) and let the ingredients cook slowly (see 10. section: TEMPERATURE KNOB). When cooking is complete, turn the temperature knob to the OFF position and unplug the unit from the power outlet. 5 Using oven mitts carefully lift the glass lid, using its knob to allow steam to escape. MAKE SURE TO KEEP HANDS AND FACE AWAY FROM THE HOT STEAM, TO PREVENT INJURY. You can either serve the ingredients in the stoneware liner or in another container. When taking the stoneware liner out of the aluminum pan, always use oven mitts to grasp the handles, particularly if you are sensitive to heat. ALWAYS GRASP THE LINER BY ITS HANDLES. Always turn the appliance OFF and unplug it from the electrical outlet and allow it to cool down before cleaning and/or storing it. Note: Even when turned off and unplugged, the Slow Cooker will remain hot for some time after using. HOW TO USE (cont.) WARNING: According to U.S. Department of Agriculture Food Safety and Inspection Service, to avoid a food-borne illness, foods such as meat, fish, and poultry should be thoroughly cooked before eating. Before serving these foods, determine their temperature using a food thermometer (not included). Refer to the USDA web site for information on food temperature rules. TEMPERATURE KNOB According to the preparation of the food, you can cook using the LOW (Low cooking setting) or HIGH (High cooking setting) positions. The LOW heat setting gently simmers food for an extended period of time without overcooking or burning. No stirring is required when using this setting. It is ideal for vegetable dishes and for reheating food. The HIGH heat setting will cook food in half the time required for the LOW heat setting, as food will boil when cooked on the HIGH heat setting. It may be necessary to add extra liquid, depending on the recipe and PRACTICAL ADVICE In order to prolong the appliance's lifespan and to protect the stoneware liner, we advise you not to create thermal shocks during use—put the unit and its parts through extreme changes in temperature. For example, never pour boiling liquid on cold ingredients or, on the contrary, never put frozen food in when the stoneware liner is hot. As a rule, if the liner is hot, do NOT add cold or frozen food and vise versa. 6 Before cooking frozen food, the amount of time in which it is cooked. Occasional stirring of stews and casseroles will improve the flavor distribution. Food should be monitored when using the HIGH setting. You can also alternate between the HIGH and LOW setting while cooking. Using the KEEP WARM position, the slow cooker will keep the food at serving temperature after cooking: approx. 150°F. DO NOT USE THIS SETTING TO COOK FOOD. Power light will light on when the temperature knob is set to any of the three positions: LOW, HIGH or KEEP WARM. Never fill the stoneware liner to the brim as the contents might spill over during the cooking process (leave a minimum of 2 inches of space from the top of the rim) Do not run the unit consecutively for more than 8 hours. DEFROST ANY FROZEN CONTENT BEFORE COOKING INTO THE SLOW COOKER. Remember that frequent lifting of the lid during cooking will increase the cook time. HOW TO USE (cont.) PRACTICAL ADVICE (cont.) It is not recommended to cook When cooking meat and rice, noodles, or pasta for vegetables simultaneously, place extended periods of time. Please the vegetables at the bottom of cook these separately and add the stoneware liner first, and then to the preparation 30 minutes add the meat and other before the end of the cooking ingredients. time. Meat will not brown when slow cooking. If you wish to brown the meat, please brown the meat in a COOKING WITH YOUR SLOW COOKER separate cooking pan before Contrary to conventional cooking putting it into the slow cooker. methods, your appliance does Whole herbs and spices add a not heat food from the bottom, better flavor, than when they have but only from the sides of the been crushed or grounded. appliance with the heat being Remember, liquids do not boil spread over the food. This way away in a slow cooker like they the food does not stick to the would do in a normal pan. bottom of the stoneware liner Reduce the amount of liquids if and may thus cook for a long following a recipe not specifically time. written for slow cooking; All preparations that need slow exceptions to this rule are soups cooking (i.e. foods that need to and rice. If a recipe results in too be simmered), can be prepared much liquid, using the slow cooker; other remove the cover and turn to preparations may be adapted to HIGH setting. this cooking method as well. Most recipes that call for As most food is cooked over a uncooked meat or vegetables will period of 6-9 hours, it can be require about 6-8 hours of slow prepared in advance the evening cooking using the LOW setting. before, refrigerated in the Meat with a high fat content will removable stoneware liner, result in dishes with fewer flavors. placed in the slow cooker after Pre-cooking or browning these reaching room temperature and meats will help reduce the amount switched on in the morning and of fat. The higher the fat content, left to cook all day. When you the less water is needed. When arrive home a delicious, hot cooking meat with a high fat meal will await you. content, cook on a bed of thick The guide below will help onion slices so that the meat will simplify the process of slow not sit and cook in its fat. If cooking, allowing you to obtain necessary, skim off the excess fat 7 ultimate satisfaction from your from the top of the food, using a HOW TO USE (cont.) It’s all in the timing! Always allow sufficient time for the food to cook. Most recipes can be cooked on any one of the temperature settings; however, the respective cooking times will vary. Adapting cooking times Your favorite traditional recipes can be adapted easily, by halving the amount of liquid and increasing the cooking time considerably. See the guide that follows for suggested cooking times and settings when adjusting your favorite recipes. Traditional Recipe Time Slow Cooker Recipe Time 15-30 minutes 4-6 hours on LOW heat setting 60 minutes 6-8 hours on LOW heat setting 1-3 hours 8-12 hours on LOW heat setting Note: These times are an estimate. Times can vary depending on ingredients and quantities in recipes. All food should be cooked with the glass lid well in place. Each time the lid is lifted, heat and moisture will decrease. Cooking times should be adjusted to accommodate this factor. Liquid amounts When food is cooking in your slow cooker, very little moisture boils away. To compensate for this, it is advisable to halve the liquid content of traditional recipes. However, if after cooking the content is excessive, remove and operate the slow cooker HIGH heat setting for 30-45 or until the liquid reduces by desired amount. liquid the lid on the minutes, the 8 Stirring the food Little or no stirring is required when using the LOW or KEEP WARM setting. When using the HIGH heat setting stirring ensures even flavor distribution. HOW TO USE (cont.) REFERENCE TEMPERATURES Please use the following table as a reference for the temperature reached. Operating time 1 2 3 4 5 6 7 8 hour hours hours hours hours hours hours hours Approx. temperature on HIGH setting 61°F 117 °F 165 °F 212 °F 212 °F 212 °F 212 °F 212 °F Approx. temperature on LOW setting 61°F 117 °F 162 °F 180 °F 194 °F 198 °F 200 °F 200 °F DIPPER As an added bonus, a dipper is included. This dipper is a small sized slow cooker (¾ quart) and its setting is always set to HIGH as there is no adjustable Temperature Knob. It can be used to keep sauce warm and ready to serve, and is ideal for chocolate dips. All care and maintenance instructions for your slow cooker apply to the dipper as well. 9 CARE AND MAINTENANCE 1. 2. 3. 4. 5. 6. Avoid putting any of the parts— particularly the lid and stoneware liner—through sudden, extreme temperature changes. For example, do not place a hot glass lid or stoneware liner into cold water or onto a wet surface 7. Do not use the stoneware liner to store food in the refrigerator, and then reheat in the main base. The sudden temperature change may crack the liner. Let the stoneware liner warm up at room temperature before using with the main base. 8. Avoid hard shocks against the liner and lid. 9. Do not use if either the liner or lid are chipped, cracked or severely scratched. 10. Do not attempt to repair or replace a damaged power cord! Contact the manufacturer, its service agent, or a similarly qualified person for repair or replacement of the power cord. Always turn the unit OFF before unplugging it from the outlet. Wait until the unit cools down completely before cleaning it. Remove the lid and take out the stoneware liner using the handles and wash them in hot, soapy water. You can also immerse them in water, but never use scouring pads to clean them. Rinse thoroughly. The stoneware liner and glass lid can also be washed in the dishwater. However care should be taken not to chip or crack the stoneware liner-pot or lid. Wipe the interior and exterior of the main base with a damp sponge. NEVER IMMERSE THE MAIN BASE IN WATER AND NEVER PUT IT IN THE DISHWASHER. Never immerse the appliance in water or any other liquid. Never fill the stoneware liner with water to clean it when it is still in the aluminum pan and while it is still hot. 10 LIMITED WARRANTY* ONE (1) YEAR WARRANTY IS ONLY VALID WITH A DATED PROOF OF PURCHASE 1. Your small kitchen appliance is built with precision, inspected and tested before leaving our factory. 2. It is warranted, to the original purchaser to be free from any manufacturing defects under normal use and conditions for one (1) year, cord excluded. This Warranty applies only to the original purchaser of this product. 3. If you need to exchange the unit, please return it in its original carton, with a sales receipt, to the store where you purchased it. If you are past the store's allowed return policy period, please see the enclosed Warranty. 4. If you use your appliance for household use and according to instructions, it should give you years of satisfactory service. 5. During the one-year warranty period, a product with a defect will be either repaired or replaced with a new or reconditioned comparable model (at our option) when the product is returned to our Service Center. (See the “Returns” section below). 6. The repaired or replacement product will be in warranty for the remaining balance of the one-year warranty period and an additional one-month period. 7. This limited warranty covers appliances purchased and used within the 50 contiguous states plus the District of Columbia and does NOT cover: - Damages caused by unreasonable use, neglect, normal wear and tear, commercial use, improper assembly or installation of product. - Damages caused in shipping. - Damages caused by replacement or resetting of house fuses or circuit breakers. - Defects other than manufacturing defects. - Breakage caused by misuse, abuse, accident, alteration, lack of proper care and maintenance, or incorrect current or voltage. - Lost or missing parts of the product. Parts will need to be purchased separately. - Damages of parts that are not electrical; for example: cracked or broken plastic or glass. - Damage from service or repair by unauthorized personnel. - Extended warranties purchased via a separate company or reseller. - Consumer’s remorse is not an acceptable reason to return a product to our Service Center. *One Year Limited Warranty valid only in the 50 contiguous states plus the District of Columbia, excluding Puerto Rico and the Virgin Islands. 11 This warranty is effective only if the product is purchased and operated in the USA; product usage which is in violation of the written instructions provided with the unit will void this warranty. For international warranty, please contact the local distributor. **Any instruction or policy included in this manual may be subject to change at any time. MAXI-MATIC, USA 18401 E. Arenth Ave. City of Industry, CA 91748 Customer Service Dept: (626) 912-9877 Ext: 120/107 MON-FRI 8am-5pm PST Website: www.maxi-matic.com email: [email protected] RETURN INSTRUCTIONS RETURNS: A. Any return of defective merchandise to the manufacturer must be processed accordingly by first contacting customer service (contact information shown below) to obtain an RA # (Return Authorization Number). We will not accept any returns of merchandise without an applicable RA #. B. IMPORTANT RETURN INSTRUCTIONS. Your Warranty depends on your following these instructions if you are returning the unit to Maxi-Matic USA: 1. Carefully pack the item in its original carton or other suitable box to avoid damage in shipping. 2. Before packing your unit for return, be sure to enclose: a) Your name, full address with zip code, daytime telephone number, and RA#, b) A dated sales receipt or PROOF OF PURCHASE, c) The model number of the unit and the problem you are having (Enclose in an envelope and tape directly to the unit before the box is sealed,) and d) Any parts or accessories related to the problem. 3. Maxi-Matic USA recommends you ship the package U.P.S ground service for tracking purposes. We cannot assume responsibility for lost or damaged products returned to us during incoming shipment. For your protection, always carefully package the product for shipment and insure it with the carrier. C.O.D shipments cannot be accepted. 4. All return shipping charges must be prepaid by you. 5. Mark the outside of your package: MAXI-MATIC USA 18401 E. ARENTH AVE. CITY OF INDUSTRY, CA 91748 1. Once your return has been received by our warehouse, Maxi-Matic USA will repair or replace the product if it is defective in material or workmanship, subject to the conditions in paragraph B. 7. Maxi-Matic will pay the shipping charges to ship the repaired or replacement product back to you. 12 13