1
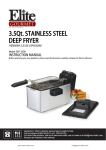
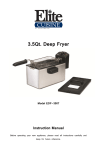
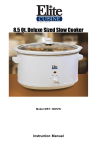
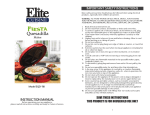
Stainless Steel Slow Cooker Olla de Cocimiento Lento Model MST-350X/MST-450X Instruction Manual Before operating your new appliance, please read all instructions carefully and keep for future reference. 0 IMPORTANT SAFEGUARDS 1. 2. 3. 4. 5. 6. 7. 8. READ ALL INSTRUCTIONS Check that the power voltage of your outlet corresponds with the voltage that stated on the rating label of the appliance before using the appliance. Do not touch hot surfaces. Use handles or knobs. To protect against electric shock, do not immerse cord, plugs, the appliance or its control panel in water or any other liquid. Close supervision is necessary when the appliance is used by or near children. Do not operate any appliance with a damaged cord or plug after the appliance malfunctions or has been damaged in any manner. Return the appliance to the nearest authorized service facility for examination, repair or adjustment. Unplug from outlet when not in use and before cleaning. Allow to cool down completely before putting on or removing parts and before cleaning the appliance. The product is not a toy! Please keep out of reach of children and pets. This product is not intended for use by children, or lacking experience or knowledge, unless they have been given supervision or instruction concerning the use of the product, by a person responsible for their safety. Extra caution is always necessary when using this product. 9. 10. 11. 12. 13. 14. 15. 16. 17. 18. Should the unit be accidentally immersed in water, immediately unplug the power cord from the power outlet. Do NOT attempt to touch the water while the plug of the appliance is in the power outlet! Do not leave the unit unattended when in use. Should the unit stop working properly, disconnect the power supply from the wall outlet; do NOT attempt to repair the malfunctioning unit unless you are a qualified electrician. The use of accessory attachments not recommended by the appliance manufacturer may cause fire, electric shock or personal injuries. Do not use outdoors. Do not let cord hang over the edge of a table, counters or touch hot surfaces. Do not place the appliance or the stoneware liner on or near a hot gas or electric burner, or a heated oven. Extreme caution must be used when moving an appliance containing hot oil or other hot liquids. Always attach plug to the appliance first, then plug cord into the wall outlet. CAUTION: To prevent damage or shock hazard, do not cook in the main base. Cook in the removable stoneware liner. Caution: Hot surface! This unit generates heat and hot steam during usage; proper precaution must be taken to prevent the risks of either burns or injuries on skin contact, fire breakout or damage to property. ADDITIONAL IMPORTANT SAFEGUARDS 19. Avoid sudden temperature changes, such as adding refrigerated foods into a heated stoneware liner. 20. Do not use appliance for other than its intended use. 21. This product is not a toy! Please keep out of reach of children and pets. This product is not intended for use by children, by persons with reduced physical, sensory or mental capabilities, or lacking experience or knowledge, unless they have been given supervision or instruction concerning the use of the product by a person responsible for their safety. Extra caution is always necessary when using this product. 22. Should the unit be accidentally immersed in water, immediately unplug the cord from the power outlet. Do NOT attempt to touch the power cord from the power outlet. Do NOT attempt to touch the water while the plug of the appliance is still in the power outlet! 23. Do not leave the unit unattended when in use. 24. Should the unit stop working properly, disconnect the power supply from the wall outlet; do NOT attempt to repair the malfunctioning unit unless you are a qualified electrician. 25. Do NOT use on an unstable, nonheat resistant, non-flat surface. 26. NEVER use the stoneware liner on a gas or electric stove top, or an open flame. 27. Life off the lid carefully and away from your face, to avoid scalding, and allow water to drip into the stoneware liner. 28. To avoid an electrical circuit overload, do not use highwattage appliance on the same circuit with the slow cooker. 29. Some countertop and table surfaces such as Corian®, wood, and/or laminates are not designed to withstand prolonged exposure to heat generated by certain appliances. It is recommended by countertop manufacturers that a hot pad or trivet be placed under the appliance and a hot stoneware liner to prevent possible damage to the surface. CAUTION: DO NOT IMMERSE IN WATER. SAVE THESE INSTRUCTIONS THIS PRODUCT IS FOR HOUSEHOLD USE ONLY POLARIZED PLUG If this appliance has a polarized plug (meaning one blade is wider than the other one), please follow the below instructions: To reduce the risk of electric shock, this plug is intended to fit into a polarized outlet only in one direction. If the plug does not fit fully into the outlet, reverse the plug. If it still does not fit, contact a qualified electrician. Do not attempt to modify the plug in any way. SHORT CORD PURPOSE NOTE: A short power cord is provided to reduce the risk of personal injury resulting from becoming entangled in or tripping over a longer cord. Longer power-supply cords or extension cords are available and may be used if care is exercised in their use. If an extension cord is used: (1) the marked electrical rating of the extension cord should be at least as great as the electrical rating of the product; (2) the extension cord should be arranged so that it will not drape over the countertop or tabletop where it can unintentionally be pulled on or tripped over by children or pets. PARTS IDENTIFICATION BEFORE FIRST USE Carefully unpack your slow cooker and clean it according to the instructions found in the “CLEANING AND CARE” section. Note: It is necessary to operate the slow cooker one time before placing food in the stoneware liner. 1. 2. Pour 4 cups of water into the 3. stoneware liner and place it into the main base. Cover with the glass lid. 4. Turn the temperature knob to the “High” position, and allow heating for approximately 30 minutes. You may notice a slight odor; this is normal and will quickly disappear. 5. Turn temperature knob to “OFF” and allow cooling for 20 minutes. Wearing oven mitts, grasp the stoneware liner by its handles to carefully lift it and remove it from the main base. Pour out the water from the stoneware liner. Rinse the stoneware liner, dry thoroughly and place it back into the main base. HOW TO USE 1. 2. 3. 4. 5. 6. 7. 8. Prepare your ingredients to be slow cooked directly in the stoneware liner. Do not fill the liner to the top with food. Put the glass lid on the stoneware 9. liner. Always make sure the temperature knob is in “OFF” position before plugging in the unit. Insert the plug into a grounded power socket of 120V, UL type. Select the desired temperature setting (LOW or HIGH) and let the ingredients cook slowly (see 10. section: TEMPERATURE KNOB). When cooking is complete, turn the temperature knob to the OFF position and unplug the unit from the power outlet. Using oven mitts carefully lift the glass lid, using its knob to allow steam to escape. MAKE SURE TO KEEP HANDS AND FACE AWAY FROM THE HOT STEAM, TO PREVENT INJURY. You can either serve the ingredients in the stoneware liner or in another container. When taking the stoneware liner out of the aluminum pan, always use oven mitts to grasp the handles, particularly if you are sensitive to heat. ALWAYS GRASP THE LINER BY ITS HANDLES. Always turn the appliance OFF and unplug it from the electrical outlet and allow it to cool down before cleaning and/or storing it. Note: Even when turned off and unplugged, the Slow Cooker will remain hot for some time after using. HOW TO USE (cont.) WARNING: According to U.S. Department of Agriculture Food Safety and Inspection Service, to avoid a food-borne illness, foods such as meat, fish, and poultry should be thoroughly cooked before eating. Before serving these foods, determine their temperature using a food thermometer (not included). Refer to the USDA web site for information on food temperature rules. TEMPERATURE KNOB According to the preparation of the food, you can cook using the LOW (Low cooking setting) or HIGH (High cooking setting) positions. The LOW heat setting gently simmers food for an extended period of time without overcooking or burning. No stirring is required when using this setting. It is ideal for vegetable dishes and for reheating food. The HIGH heat setting will cook food in half the time required for the LOW heat setting, as food will boil when cooked on the HIGH heat setting. It may be necessary to add extra liquid, depending on the recipe and PRACTICAL ADVICE In order to prolong the appliance's lifespan and to protect the stoneware liner, we advise you not to create thermal shocks during use—put the unit and its parts through extreme changes in temperature. For example, never pour boiling liquid on cold ingredients or, on the contrary, never put frozen food in when the stoneware liner is hot. As a rule, if the liner is hot, do NOT add cold or frozen food and vise versa. Before cooking frozen food, please add some warm liquid. the amount of time in which it is cooked. Occasional stirring of stews and casseroles will improve the flavor distribution. Food should be monitored when using the HIGH setting. You can also alternate between the HIGH and LOW setting while cooking. Using the KEEP WARM position, the slow cooker will keep the food at serving temperature after cooking: approx. 150°F. DO NOT USE THIS SETTING TO COOK FOOD. Power light will light on when the temperature knob is set to any of the three positions: LOW, HIGH or KEEP WARM. Never fill the stoneware liner to the brim as the contents might spill over during the cooking process (leave a minimum of 2 inches of space from the top of the rim) Do not run the unit consecutively for more than 8 hours. DEFROST ANY FROZEN CONTENT BEFORE COOKING INTO THE SLOW COOKER. Remember that frequent lifting of the lid during cooking will increase the cook time. HOW TO USE (cont.) PRACTICAL ADVICE (cont.) When cooking meat and vegetables simultaneously, place the vegetables at the bottom of the stoneware liner first, and then add the meat and other ingredients. Meat will not brown when slow cooking. If you wish to brown the meat, please brown the meat in a separate cooking pan before putting it into the slow cooker. Whole herbs and spices add a better flavor, than when they have been crushed or grounded. Remember, liquids do not boil away in a slow cooker like they would do in a normal pan. Reduce the amount of liquids if following a recipe not specifically written for slow cooking; exceptions to this rule are soups and rice. If a recipe results in too much liquid, remove the cover and turn to HIGH setting. Most recipes that call for uncooked meat or vegetables will require about 6-8 hours of slow cooking using the LOW setting. Meat with a high fat content will result in dishes with fewer flavors. Pre-cooking or browning these meats will help reduce the amount of fat. The higher the fat content, the less water is needed. When cooking meat with a high fat content, cook on a bed of thick onion slices so that the meat will not sit and cook in its fat. If necessary, skim off the excess fat from the top of the food, using a spoon, before serving. Food cut in uniform pieces will cook more evenly and faster than if left whole (i.e. poultry and roasts). It is not recommended to cook rice, noodles, or pasta for extended periods of time. Please cook these separately and add to the preparation 30 minutes before the end of the cooking time. COOKING WITH YOUR SLOW COOKER Contrary to conventional cooking methods, your appliance does not heat food from the bottom, but only from the sides of the appliance with the heat being spread over the food. This way the food does not stick to the bottom of the stoneware liner and may thus cook for a long time. All preparations that need slow cooking (i.e. foods that need to be simmered), can be prepared using the slow cooker; other preparations may be adapted to this cooking method as well. As most food is cooked over a period of 6-9 hours, it can be prepared in advance the evening before, refrigerated in the removable stoneware liner, placed in the slow cooker after reaching room temperature and switched on in the morning and left to cook all day. When you arrive home a delicious, hot meal will await you. The guide below will help simplify the process of slow cooking, allowing you to obtain ultimate satisfaction from your slow cooker. HOW TO USE (cont.) It’s all in the timing! Always allow sufficient time for the food to cook. Most recipes can be cooked on any one of the temperature settings; however, the respective cooking times will vary. Traditional Recipe Time 15-30 minutes 60 minutes 1-3 hours Adapting cooking times Your favorite traditional recipes can be adapted easily, by halving the amount of liquid and increasing the cooking time considerably. See the guide that follows for suggested cooking times and settings when adjusting your favorite recipes. Slow Cooker Recipe Time 4-6 hours on LOW heat setting 6-8 hours on LOW heat setting 8-12 hours on LOW heat setting Note: These times are an estimate. Times can vary depending on ingredients and quantities in recipes. All food should be cooked with the glass lid well in place. Each time the lid is lifted, heat and moisture will decrease. Cooking times should be adjusted to accommodate this factor. Liquid amounts When food is cooking in your slow cooker, very little moisture boils away. To compensate for this, it is advisable to halve the liquid content of traditional recipes. However, if after cooking the liquid content is excessive, remove the lid and operate the slow cooker on the HIGH heat setting for 30-45 minutes, or until the liquid reduces by the desired amount. Stirring the food Little or no stirring is required when using the LOW or KEEP WARM setting. When using the HIGH heat setting stirring ensures even flavor distribution. HOW TO USE (cont.) REFERENCE TEMPERATURES Please use the following table as a reference for the temperature reached. Operating time Approx. temperature on HIGH setting 1 hour 2 hours 3 hours 4 hours 5 hours 6 hours 7 hours 8 hours 61°F 117 °F 165 °F 212 °F 212 °F 212 °F 212 °F 212 °F Approx. temperature on LOW setting 61°F 117 °F 162 °F 180 °F 194 °F 198 °F 200 °F 200 °F CARE AND MAINTENANCE 1. 2. 3. 4. 5. Always turn the unit OFF before unplugging it from the outlet. Wait until the unit cools down completely before cleaning it. Remove the lid and take out the stoneware liner using the handles and wash them in hot, soapy water. You can also immerse them in water, but never use scouring pads to clean them. Rinse thoroughly. The stoneware liner and glass lid can also be washed in the dishwater. However care should be taken not to chip or crack the stoneware liner-pot or lid. Wipe the interior and exterior of the main base with a damp sponge. NEVER IMMERSE THE MAIN BASE IN WATER AND NEVER PUT IT IN THE DISHWASHER. Never immerse the appliance in water or any other liquid. Never fill the stoneware liner with water to clean it when it is still in the aluminum pan and while it is still hot. 6. Avoid putting any of the parts—particularly the lid and stoneware liner—through sudden, extreme temperature changes. For example, do not place a hot glass lid or stoneware liner into cold water or onto a wet surface 7. Do not use the stoneware liner to store food in the refrigerator, and then reheat in the main base. The sudden temperature change may crack the liner. Let the stoneware liner warm up at room temperature before using with the main base. 8. Avoid hard shocks against the liner and lid. 9. Do not use if either the liner or lid are chipped, cracked or severely scratched. 10. Do not attempt to repair or replace a damaged power cord! Contact the manufacturer, its service agent, or a similarly qualified person for repair or replacement of the power cord. RECIPES ITALIAN MEATBALLS 1 lb. ground beef 2 eggs 1/2 C. dry breadcrumbs 1/2 t. garlic powder 1/2 lb. Italian sausage 1/4 C. milk 3 T. grated parmesan cheese salt and pepper In a bowl, beat eggs and add milk. Add beef and Italian sausage. Mix together. Add rest of ingredients and mix until combined. Shape the mixture into 1 inch balls and place on a greased cookie sheet. Bake at 350°F. for 15 minutes. Add to slow cooker. Sauce 1 15 oz. can tomato sauce 1 small onion chopped 1/2 C. beef broth 2 garlic cloves minced 1 t. salt 1 2 t. pepper 1 6 oz. can tomato paste 1/2 C. green pepper 1/3 C. water 1 t. oregano 1 t. sugar Mix all ingredients in a bowl and pour over the meatballs. Cover and cook on Low for 4 - 5 hours. SLOPPY JOES 3 lbs. ground beef 1 C. onions diced 1 C. celery diced 1 C. green pepper diced 1 1/2 C. ketchup 2 T. Worcestershire sauce 1 6 oz. can tomato paste 3/4 C. water 1/2 t. paprika 3 T. vinegar 3 T. brown sugar 1 t. dry mustard salt and pepper Brown ground beef in a skillet and break up into small pieces. Add to slow cooker. Add the rest of the ingredients and mix well. Turn on low and cook for 8 hours. Serve on hamburger buns. CHILI DIP 1 lb. ground beef 2 cans refried beans 1/2 t. chili powder 8 oz. cheddar cheese shredded 1 16 oz. jar mild picante sauce 8 oz. sour cream 1/2 C. chopped onion Jalapenos or mild chilies to taste Brown ground beef and onion in a pan. Drain and add to crockpot. Add beans, picante sauce, jalapenos (if using) and chili powder. Turn on low and cook for 2 - 3 hours. Add cheese and sour cream last 1/2 hour. Serve with tortilla chips. RECIPES WILD MUSHROOM BEEF STEW 2 lbs. beef for stew, cut into 1-inch pieces 1 t. salt 1/2 t. dried thyme leaves, crushed 1/4 C. tomato paste 2 cloves garlic, minced oz. assorted mushrooms, such as shiitake, cremini and oyster, cut into quarters 1 C. baby carrots 1/4 C. all-purpose flour 1/2 t. pepper 3/4 C. ready-to-serve beef broth 1/4 C. dry red wine 1 lb. red-skinned potatoes (1-1/2-8 inch diameter), cut into quarters Fresh parsley (optional) Combine flour, salt, pepper and thyme in small bowl. Place beef in 4-1/2 to 5-1/2-quart crock-pot slow cooker. Sprinkle with flour mixture; toss to coat. Combine broth, tomato paste, wine and garlic in small bowl; mix well. Add to beef. Add potatoes, mushrooms and carrots; mix well. Cover and cook on HIGH 5 to 6 hours or on LOW 8 to 9 hours, or until beef and vegetables are tender. (No stirring is necessary during cooking.) Stir well before serving. Garnish with parsley, if desired. POT ROAST 3 - 4 lb. pot roast 1 C. beef broth 4 - 5 potatoes cut up large onion cut up 1 lb. carrots cut in 2 inch pieces salt and pepper Brown pot roast in a pan on top of the stove. Add vegetables to bottom of slow cooker. Top with roast and pour beef broth over it. Salt and pepper to taste. Cook for 8 hours on low in slow cooker. BBQ MEATLOAF 2 - 2 1/2 lbs. ground beef 1 egg 2 t. Worcestershire sauce 1/2 t. salt 2 t. prepared mustard 1 T. vinegar 3/4 C. barbecue sauce 1 C. crushed soda crackers 1/2 C. diced onion 1/4 C. water 2 T. brown sugar Mix all ingredients in a large bowl. Form into a meatloaf shape that will fit into your slow cooker. Cut a strip of foil to go under the meatloaf in the slow cooker, leaving it long enough so that you can use it to lift the meatloaf out when it is finished cooking. After placing the meatloaf in slow cooker, top the meatloaf with an additional 1/3 C. barbecue sauce. Cook for 8 - 10 hours on Low. RECIPES CHICKEN MERLOT WITH MUSHROOMS 2 1/2 to 3 lbs. boneless, 12 oz. sliced fresh mushrooms skinless chicken thighs 1 large onion, peeled and chopped 2 garlic cloves, peeled and minced 3/4 C. low-sodium chicken broth 1 6-oz. can tomato paste 1/4 C. Merlot or any dry red wine, or 2 T. quick-cooking tapioca additional chicken broth 2 T. chopped fresh basil or 1 1/2 t. dried 2 t. granulated sugar 1/4 t. salt 1/4 t. freshly ground black pepper 2 C. cooked noodles 2 T. freshly grated Parmesan cheese, preferably Parmigiano-Reggiano Rinse chicken, pat dry and set aside. Place the mushrooms, onion and garlic in the insert of the slow cooker. Place the chicken pieces on top of the vegetables. Combine broth, tomato paste, wine, tapioca, dried basil (if using), sugar, salt and pepper in a medium bowl. Pour mixture over the chicken and vegetables. Cover and cook on Low for 7 to 8 hours or on High for 3 1/2 to 4 hours. If you are using fresh basil, stir it in after the chicken is cooked, shortly before serving. To serve, spoon chicken mixture over cooked noodles. Sprinkle with Parmesan cheese. LEMON GARLIC CHICKEN 2 lbs. chicken breasts boneless/skinless 1/2 t. seasoned salt 2 T. butter 4 T. fresh lemon juice 2 t. chicken bouillon 1 1/2 t. oregano leaves crushed 1/4 t. pepper freshly ground 1/4 C. water 4 cloves garlic minced 2 t. fresh chopped parsley Wash chicken and dry on paper towels. Combine oregano, salt and pepper in a small bowl. Sprinkle on the chicken and pat it in. Fry the chicken breasts until browned in the butter. Transfer chicken to the slow cooker. Add the water, lemon juice, bouillon, garlic and parsley to the pan. Scrape any browned bits from the bottom of the pan. Bring mixture to a boil and pour over the chicken. Cover and cook on High for 2 1/2 - 3 hours or on Low for 5 - 6 hours. Add parsley and baste chicken. Cover and cook another 15 - 30 minutes. CHICKEN WINGS IN HONEY SAUCE 3 pounds chicken wings (16 wings) 2 cups honey 1/2 cup ketchup 2 cloves garlic, minced salt and pepper to taste 1 cup soy sauce 1/4 cup oil Rinse chicken and pat dry. Cut off and discard wing tips. Cut each wing at joint to make two sections. Sprinkle wing parts with salt and pepper. Place wing parts on broiler pan. Broil 5-4 inches from heat 20 minutes, 10 minutes a side or until chicken is brown. Transfer chicken to slow cooker. (continue on next page) For sauce, combine honey, soy sauce, ketchup, oil and garlic in bowl. Pour over chicken wings. Cover and cook on low 4-5 hours or on high 2-2 /2 hours. RECIPES SOUTHWESTERN CHICKEN 1 (15-ounce) can whole kernel corn, drained 1 (11-ounce) can Mexicorn, drained 1 (15-ounce) can black beans, rinsed and drained 1 (16-ounce) jar chunky salsa (divided use) 6 boneless, skinless chicken breast halves, rinsed and dried Flour tortillas Shredded cheddar cheese Combine the cans of corn, beans and half the salsa in slow-cooker. Top with the chicken. Pour remaining sauce over. Cover and cook first hour on High, then either 3 more hours on High or 6 on Low until meat juices run clear. Serve with warm tortillas; top with cheese. CHICKEN PAPRIKA WITH DUMPLINGS 6 boneless, skinless chicken breasts 1 medium onion chopped 1 tsp. salt 1/2 tsp. black pepper 1 tbsp. Hungarian paprika 1 cup chicken broth 8 ounces sour cream 1 tbsp. cornstarch or flour Dumplings: 3 eggs 1/3 cup water 2-1/2 cups all-purpose flour, sifted Add onions to slow cooker. Add seasonings, chicken and broth Cover and cook on LOW 5 to 6 hours Shortly before serving, turn on high and stir together sour cream and cornstarch. Stir into slow cooker and heat through. Taste and adjust seasonings (sour cream and cornstarch may be omitted if desired). Serve with dumplings (recipe below) Dumplings Beat 3 eggs, add 1/3 cup water and 2-1/2 cups flour. Beat with a spoon until smooth. Drop from teaspoon into boiling salted water and cook until dumplings rise to the top, approximately 10 minutes. CHEESY SHRIMP PASTA 1 (2-lb.) block Velveeta cheese 1 small onion, chopped 1 lb. raw shrimp 1 (16-oz.) carton half-and-half 4 pods garlic, minced Cooked pasta of choice Place cheese, half-and-half, Ro-tel tomatoes, onion and garlic in slow cooker and cook on Low for 4 hours. RECIPES Add shrimp and cook for another hour on High or until shrimp are pink. Cook pasta of choice and spoon sauce over cooked pasta. FISHERMAN’S SEAFOOD CHOWDER 1 to 1-1/2 lbs. fish (any combination of flounder, ocean perch, pike, trout, haddock or halibut) 1/2 C. chopped onion 1/2 C. chopped celery 1/2 C. chopped carrots 1/4 C. snipped parsley 1/4 t. leaf rosemary 1/2 C. dry white wine 16-oz. can whole tomatoes, mashed 8-oz. bottle of clam juice 1 t. salt 3 T. flour 3 T. butter or margarine, melted 1/3 C. light cream Cut cleaned fish into 1-inch chunks. Combine all ingredients except flour, butter and cream in slow cooker; stir well. Cover and cook on low setting for 7 to 8 hours (3 to 4 hours on high). One hour before serving, combine flour, butter and cream and stir into slow cooker. Continue cooking until mixture is slightly thickened. SALMON BAKE 2 cans salmon, boned and skinned (15 oz. size) 1 teaspoon lemon juice 1 chopped green bell pepper 1 can cream of celery soup 1 teaspoon garlic powder 2 chicken bouillon cubes, crushed 4 cups bread crumbs 1 can tomatoes 1 can cream of onion soup 4 well beaten eggs 1 teaspoon Greek seasoning 1/4 cup milk Grease slow cooker liner. Combine all ingredients except celery soup and milk. Pour into slow cooker. Cover and cook on low heat for approximately 5 hours. Combine cream of celery soup with 1/2 cup of milk and heat in saucepan. Use as a sauce for salmon bake. BAKED STUFFED APPLES 6 medium red tart apples 1/4 C. raisins 1/4 C. butter 3 T. orange juice concentrate 1 C. light brown sugar 1 T. orange peel 2 C. very hot water Wash and core the apples, but don't peel them. In a pan that will fit in your slow cooker, stand up the apples. Butter the pan first. RECIPES Fill the core cavities with the brown sugar, raisins and orange peel. Top with butter. Place the pan in the slow cooker. Pour the hot water around the pan. Sprinkle the orange juice concentrate over the apples. Cover the cooker and cook on low for 3 - 5 hours or until apples are tender. PIÑA COLADA BREAD PUDDING 1 lb. loaf French bread 6 oz. pineapple juice 1/2 C. cream of coconut 3 eggs 1 C. raisins 1 t. lemon peel; grated 10 oz. frozen piña colada drink mix 12 oz. evaporated milk 2 large bananas; sliced 1/4 C. light rum 8 oz. pineapple; crushed w/juice fresh mint sprigs With a sharp knife, peel crust from bread; discard crust or make into bread crumbs for use in another recipe. Cut bread into 1-inch cubes; set aside. In blender or food processor, fitted with a metal blade, combine 1/2 of the following ingredients; drink mix, pineapple juice, evaporated milk, cream of coconut, and banana slices. Process until pureed; pour puree into a 6-cup bowl. Puree remaining 1/2 of liquid ingredients and banana slices as well as eggs and liqueur, if desired. Combine both purees; set aside. Combine raisins and crushed pineapple (and the juice); set aside. Place about 2/3 of bread cubes in slow cooker, sprinkle with 1/2 t. grated lemon peel and spread 1 cup of the raisin-pineapple mixture over bread in slow cooker. Top with remaining bread cubes, then with remaining 1/2 t. lemon peel and raisin-pineapple mixture. Pour pureed ingredients into slow-cooker. Cover and cook on LOW 6 hours. Spread pudding into 8 or 10 dessert dishes and serve hot. Garnish with fresh mint sprigs. BLUEBERRY BUMP CAKE 1 21 oz. can blueberry pie filling 1 package yellow cake mix 1/2 C. butter 1/2 C. chopped walnuts Place pie filling in the slow cooker. Combine dry cake mix and butter, sprinkle over filling. Sprinkle the walnuts on top of that. Cover and cook on low for 2 - 3 hours. Serve warm in bowls. Top with whipped cream or vanilla ice cream. LIMITED WARRANTY* ONE (1) YEAR WARRANTY IS ONLY VALID WITH A DATED PROOF OF PURCHASE 1. Your small kitchen appliance is built with precision, inspected and tested before leaving our factory. 2. It is warranted, to the original purchaser to be free from any manufacturing defects under normal use and conditions for one (1) year, cord excluded. This Warranty applies only to the original purchaser of this product. 3. If you need to exchange the unit, please return it in its original carton, with a sales receipt, to the store where you purchased it. If you are past the store's allowed return policy period, please see the enclosed Warranty. 4. If you use your appliance for household use and according to instructions, it should give you years of satisfactory service. 5. During the one-year warranty period, a product with a defect will be either repaired or replaced with a new or reconditioned comparable model (at our option) when the product is returned to our Service Center. (See the “Returns” section below). 6. The repaired or replacement product will be in warranty for the remaining balance of the one-year warranty period and an additional one-month period. 7. This limited warranty covers appliances purchased and used within the 50 contiguous states plus the District of Columbia and does NOT cover: - Damages caused by unreasonable use, neglect, normal wear and tear, commercial use, improper assembly or installation of product. - Damages caused in shipping. - Damages caused by replacement or resetting of house fuses or circuit breakers. - Defects other than manufacturing defects. - Breakage caused by misuse, abuse, accident, alteration, lack of proper care and maintenance, or incorrect current or voltage. - Lost or missing parts of the product. Parts will need to be purchased separately. - Damages of parts that are not electrical; for example: cracked or broken plastic or glass. - Damage from service or repair by unauthorized personnel. - Extended warranties purchased via a separate company or reseller. - Consumer’s remorse is not an acceptable reason to return a product to our Service Center. *One Year Limited Warranty valid only in the 50 contiguous states plus the District of Columbia, excluding Puerto Rico and the Virgin Islands. This warranty is effective only if the product is purchased and operated in the USA; product usage which is in violation of the written instructions provided with the unit will void this warranty. For international warranty, please contact the local distributor. **Any instruction or policy included in this manual may be subject to change at any time. MAXI-MATIC, USA 18401 E. Arenth Ave. City of Industry, CA 91748 Customer Service Dept: (626) 912-9877 Ext: 120/107 MON-FRI 8am-5pm PST Website: www.maxi-matic.com email: [email protected] RETURN INSTRUCTIONS RETURNS: A. Any return of defective merchandise to the manufacturer must be processed accordingly by first contacting customer service (contact information shown below) to obtain an RA # (Return Authorization Number). We will not accept any returns of merchandise without an applicable RA #. B. IMPORTANT RETURN INSTRUCTIONS. Your Warranty depends on your following these instructions if you are returning the unit to Maxi-Matic USA: 1. Carefully pack the item in its original carton or other suitable box to avoid damage in shipping. 2. Before packing your unit for return, be sure to enclose: a) Your name, full address with zip code, daytime telephone number, and RA#, b) A dated sales receipt or PROOF OF PURCHASE, c) The model number of the unit and the problem you are having (Enclose in an envelope and tape directly to the unit before the box is sealed,) and d) Any parts or accessories related to the problem. 3. Maxi-Matic USA recommends you ship the package U.P.S ground service for tracking purposes. We cannot assume responsibility for lost or damaged products returned to us during incoming shipment. For your protection, always carefully package the product for shipment and insure it with the carrier. C.O.D shipments cannot be accepted. 4. All return shipping charges must be prepaid by you. 5. Mark the outside of your package: MAXI-MATIC USA 18401 E. ARENTH AVE. CITY OF INDUSTRY, CA 91748 1. Once your return has been received by our warehouse, Maxi-Matic USA will repair or replace the product if it is defective in material or workmanship, subject to the conditions in paragraph B. 7. Maxi-Matic will pay the shipping charges to ship the repaired or replacement product back to you. IMPORTANTES MEDIDAS DE SEGURIDAD Cuando use aparatos eléctricos precauciones básicas de seguridad deverán de seguirse, incluyendo lo siguiente: 1. 2. Lea todas las instrucciones cuidadosamente. Para protegerse de una descarga eléctrica no sumerja la unidad en agua o ningún otro líquido. 3. Muy cercana supervición es necesaria cuando el aparato es usado serca de niños. 4. NUNCA PERMITA QUE LOS NINOS UTILIZEN ESTE APARATO. 5. Desconecte la unidad de la toma de corriente cuando no este en uso, antes de quitar, colocar partes y antes de limpiar. 6. El uso de accesorios no recomendados por el fabricante, Podran causar fuego o descargas eléctricas incluyendo serios danos personales. 7. No lo use a la interperie . 8. No deje el cordon eléctrico que cuelgue de la orilla de la mesa o area de trabajo mantengalo lejos de cualquier superficie caliente. 9. Mantenga el aparato alejado de cualquier superficie caliente como hornos y estufas. 10. Extrema precaución devera tomar cuando transporte el aparato conteniendo líquidos o alimentos calientes. 11. No use su aparato para ninguna otra cosa si no para lo que fue diceñado. 12. Nunca encienda la olla sin el tazón de cerámica esta vacia. 13. Permita que el tazón y tapadera enfrie antes de sumergir en agua. 14. Nunca toque la superficie exterior de la unidad cuando este en funcionamiento o antes de que enfrie. Use las agarraderas, botones, guantes o toallas para quitar la tapadera y para transportar líquidos. 15. Nunca cocine directamente en la base de la unidad. Utilize el tazón de cerámica. 16. Nunca use la olla o tapadera si esta danada. 17. Nunca deje la unidad conectada a la toma de corriente cuando no esté en uso. 18. Nunca encienda la unidad, si esta de lado o alrrevez. 19. El tazón y la tapadera de vidrio son sumamente delicados tenga mucha precaución al manejarlos. 20. SI EL CORDON DE ALIMENTACION ES DAÑADO ESTE DEBE SER REMPLAZADO POR EL FABRICANTE, PERSONAL CAPACITADO O SU AGENTE DE SERVICIO PARA EVITAR RIESGOS. 21. Nunca coloque los siguientes materiales dentro de la unidad: Papel, cartón, plásticos o materiales similares que no sean comestibles. 22. Algunos superficies de mesas y mostradores hechos o recubiertos de laminados de CORIAN, MADERA FINA O FORMICA, no estan diceñados para soportar calores prolongados generados por ciertos aparatos eléctricos de cocina. SE RECOMIENDA COLOCAR MANOPLAS DE COCINA O MANTELES RESISTENTES AL CALOR BAJO SU APARATO. GUARDE ESTAS INSTRUCCIONES ESTE PRODUCTO ES DE USO DOMESTICO! ANTES DEL PRIMER USO Antes de usar su olla de cocimiento lento por primera vez. Remueva todo material de empaque. Lave el tazón de cerámica removible de la olla incluyendo la tapa de vidrio con una esponja o trapo en agua caliente y jabón, enjuague y seque perfectamente. IMPORTANTE: Nunca sumerja en agua o ningún otro líquido la base de la olla. Nota: Durante el primer uso de la olla, tal vez usted note un poco de olor a quemado , no se alarme esto es completamente normal y esto se deve a la quema de residuos que fueron dejados en el proceso de manufactura. Esto desaparecerà con varios usos. POSICIÓN DE AUTO/DESCONGELADO: Esto le permitirá al usuario cocinar en la posición de cocinar alimentos congelados(AUTO/DEFROST)por todo el dia y estar listo para servir entre 8 o 10 horas mas tarde. Cuando selecciona la posición de (Auto defrost) la olla cocinará a la temperatura mas alta(High) hasta que los alimentos se descongelen y luego se cambiaraá automaticamente cocinando a una temperatura constante mas baja. No obstante si usted desea extender el periodo de cocinar seleccione la posición de (Slow) pero si decea acortar el periodo de cocimiento seleccione la posicion (High) COMO USARLO Coloque la olla en una superficie resistente al calor, seca y plana, lejos de cualquier orilla del area de trabajo. No lo use en el piso. Ponga los alimentos en el tazón de cerámica y coloque sobre la base. Tape la olla. Si usted nececita dorar primero los alimentos antes de ponerlos en la olla de cocimiento lento, estos deverán ser dorados en un sartén aparte. No trate de utilizar la olla para dorar o precocinar alimentos. Coloque el boton en la pocición de apagado(Off) antes de de conectar la unidad al toma corriente. Apague la unidad y desconecte de la toma de corriente despues de cocinar, utilize guantes para remover el tazón de cerámica de la base. CUIDADO: NO TOQUE LA BASE DE LA OLLA INMEDIATAMENTE DESPUES DE COCINAR ESTA MUY CALIENTE Y PUEDE CAUSARLE GRAVES QUEMADURAS. COCER A FUEGO LENTO El cocer lentamente a sido siempre el mejor metodo para cocinar nutritivamente con un minimo de preparación sin tener que perder mucho tiempo en la cocina. Este moderno estilo de cocinar a sido traido para usted por Elite Cusine Tradicionalmente el cocinar lentamente se a centrado tradicionalmente para Sopas y estofados regulares pero con esta olla de construcción ovalada tambien usted podrá cocinar los mas sofisticados y modernos platillos familiares para sus fiestas. Este lujoso y conveniente tazón lo puede utilizar para llevar y servir los alimentos directamente a la mesa. COMO USARLO Como protección siempre coloque el tazón sobre una cubierta resistente al calor. Este metodo para cocinar es ideal para preparar cortes de carnes muy duros , dandoles el tiempo, para cocinar muy lentamente asegurando la absorción total de los condimentos y el blando terminado de la carne. Alimentos adecuados para preparar y cocinar a fuego lento. Casi todo tipo de alimentos son adecuados para cocinar lentamente ; sin embargo se tiene que seguir ciertas reglas. Corte las raices de los vegetales en partes iguales y pequeñas la razón es que toman mas tiempo que la carne para cocinarse. Las raices deverán de sofreir por unos 2 o 3 minutos antes de cocinarlos lentamente, asegurese de que los inredientes esten sumergidos y las raises de los vegetales estén colocados en el fondo del tazón de serámica. Corte todos los exesos de grasa de la carne antes de ponerlos a cocinar, el metodo de cocimiento lento no permite la evaporación de la grasa. Al adaptar una receta convencional con otra, podra ser necesario disminuir la cantidad de liquído usado. El liquído no se evaporará de la olla de la misma manera que la reseta convencional. Nunca deje alimentos sin cocinar dentro del tazón a la temperatura ambiente Los frijoles deverán de ser enjuagados y hervidos cuando menos por unos 10 minutos para remover impuresas y toxinas previamente antes de ponerlos a cocinar en la olla de cocimiento lento. Para asegurarse que los alimentos a cocinar esten bien cocidos a la temperatura correcta, inserte el termometro en la carne de res, jamón o pollo. Autenticos tazónes de cerámica son manufacturados a altas temperaturas por lo tanto el tazón de serámica podra tener pequeñas imperfecciones, la tapadera podra vibrar un poco devido a esta imperfección. El cocinar lentamente no produce vapor, por lo tanto Habra un poco de pérdida de calor. Devido al desgaste por el uso normal la superficie exterior de la olla empezarán a verse rajaduras superficiales que no afectan de ninguna manera su funcionamiento. No ponga su olla de cocimiento lento o tapadera en el horno, congelador o microhondas. No precaliente la olla antes de poner los alimentos. No exponga la olla a cambios bruscos de temperaturas . Como echar agua dentro de la olla estando muy caliente. Esto podra causar rajaduras en el tazón de cerámica. No deje el tazón sobre agua por largo periodo de tiempo (Puede dejar el tazón remojando en agua). Existe una area en la superficie exterior inferior del tazón que no esta glaseado es de superficie porosa y fue necesario en la manufactura del tazón. Esta area no deverá exponerse o dejar sumergido en agua. COMO USARLO No encienda la unidad cuando el tazón este vácio o fuera de la base. Sugerencias para cocinar lentamente. Para mejores resultados la olla de cocimiento lento deverá de estar a medio llenar. El cocer lentamente retiene húmedad. Si usted decea reducir la húmedad en el tazón, remueva la tapadera despues de cocinar y coloque el control de temperature en (HIGH) si es colocado en (LOW O MEDIUM) dejelo cocinar por 30 o 45 minutos. La tapa no sella completamente, no la remueva si no es necesario, el calor generado dentro de la olla escapará. Cada vez que destape la olla deje otros 10 minutos adicionales cocinando Si cocina sopas o consome deje 5 cm de espacio entre la olla y la superficie de lo que esta cocinando Muchas recetas de cocina demandan todo el dia para cocinar, Si usted no tiene tiempo para preparar los alimentos esa mañana, preparelos en la noche y guarde los alimentos en un recipiente con tapadera en el refrigerador. Cuando tranfiera y precliente los alimentos en la olla de cocimiento lento ponga un poco de consome o agua, seleccione la temperatura (LOW, MEDIUM O HIGH). Casi todas las recetas de cocina para carnes o vegetales requieren de 8 a 10 horas de cocimiento en la posicion de (LOW), 5 a 7 horas en (MEDIUM) y de 4 a 6 horas en (HIGH). Algunos alimentos no son apropiados para cocer lentamente como pasta y mariscos, la leche y crema deverán de ser aderidos solamente casi al final. Muchas cosas pueden afectar la rapidez en que los alimentos puedan estar cocinados, agua, contenido de grasas, temperatura y tamaño del producto a cocinar. Piezas de alimentos cortados en trozos pequeños se cocinarán más rapido. Cierto percentage de errores puede ser requerido para obtener el maximo potencial y beneficio de su olla de cocimiento lento. Los vegetales usualmente toman un poco mas de tiempo que las carnes, por lo tanto trate de colocarlos en la parte media baja del tazón de cerámica. Despues de que los alimentos se hayan cocinado, apague la unidad y mantengalo tapado, Hay suficiente calor generado en el tazón para mantener los alimentos calientes por 30 minutos aproximadamente. Si se require mantener los alimentos calientes por mas tiempo, coloque el control de temperature en(LOW). Todos los alimentos a cocinar deverán estar cubiertos completamente con salsa, consome o agua. Semi guise las cebollas y carnes en un sartén para sellarlos en sus propios jugos asi tambien podrá reducir el contenido de grasas antes de ponerlos en la olla. Hacer esto no es necesario si el tiempo es limitado, pero aumenta el sabor. COMO USARLO Cuando haga asados de carne de rez, jamón y pollo el tamaño y forma es importante. Trate de mantener el asado en las 2/ 3 partes de la parte baja de la olla y cubra completamente con agua. Si es necesario corte en dos pedazos. CUIDADOS Y LIMPIEZA Siempre asegurese de que la unidad este apagada, desconectada del toma corriente y completamente fría antes de limpiar o guardar. - - El tazón de cerámica puede ser lavado en el lavaplatos o puede ser limpiado con agua tíbia y jabón.Para remover cualquier reciduo de alimentos del fondo del tazón de cerámica, simplemente deje remojando la olla toda la noche con agua caliente y jabón, enjuague la mañana siguiente El exterior del producto puede ser limpiado con un trapo húmedo seque perfectamente. NUNCA use limpiadores abrasivos, estropajos de metal o espatulas de metal para limpiar la unidad, al hacerlo la superficie del mismo se dañará. CUIDADO: NUNCA SUMERJA LA UNIDAD COMPLETA EN AGUA O NINGÚN OTRO LÍQUIDO AL HACERLO PODRÍA DAÑAR LA UNIDAD. GARANTÍA LIMITADA DE * UN (1) AÑO LA GARANTIA ES VALIDA CON UNA PRUEBA DE COMPRA FECHADA 1. Su aparato de cocina está construido con precisión, inspeccionados y probados antes de salir de nuestra fábrica. 2. Se garantiza, al comprador original, de estar libres de defectos de fabricación en condiciones de uso normales durante un (1) año, cordones eléctricos están excluidos. Esta garantía se aplica sólo al comprador original de este producto. 3. Si necesita cambiar la unidad, devuélvala en su caja original, con el recibo de compra, a la tienda donde lo compró. Si usted está más allá del plazo concedido para el retorno por la política de la tienda, por favor consulte la garantía incluida. 4. Si utiliza el aparato para uso doméstico y de acuerdo con las instrucciones, debería ofrecerle años de servicio satisfactorio. 5. Durante el período de garantía de un año, un producto con un defecto será reparado o reemplazado por un modelo nuevo o reacondicionado (a nuestro criterio) cuando el producto sea devuelto a nuestro Centro de Servicio. (Consulte la sección "Devoluciones" a continuación). 6. El producto reparado o reemplazado estará garantizado por el saldo restante del período de garantía de un año y un plazo adicional de un mes. 7. Esta garantía limitada no cubre: - Los daños causados por el uso excesivo, negligencia, uso y desgaste normal, uso comercial, montaje o instalación incorrecta del producto. - Los daños causados durante el envío. - Los daños causados por la sustitución o reposiciones de fusibles o accesorios no recomendadas por el fabricante. - Defectos que no sean defectos de fabricación. - Rotura causada por mal uso, abuso, accidente, alteración, falta de cuidado y mantenimiento, o voltaje incorrecto. - Pérdida o falta de alguna pieza del producto. Las piezas se deben comprar por separado. - Daños de piezas que no sean eléctricos; por ejemplo: Accesorios agrietados, o rotos de plástico o de vidrio. - Daños por servicio o reparación por personal no autorizado. - Las garantías extendidas compradas a través de una empresa independiente o revendedor. - Cambio de opinión del consumidor no es una razón aceptable para devolver un producto a nuestro Centro de Servicio. * Un año de garantía limitada es válida solamente en los 50 estados de la Unión Americana y el Distrito de Columbia, excluyendo Alaska Hawái, Puerto Rico y las Islas Vírgenes. Esta garantía es válida sólo si el producto es comprado y operado en los EE.UU., el uso del producto que se encuentra en violación de las instrucciones escritas proporcionadas con la unidad anulará esta garantía. Para la garantía internacional, póngase en contacto con el distribuidor local. ** Cualquier instrucción o política incluida en este manual puede estar sujeta a cambios en cualquier momento. MAXI-MATIC USA. 18401 E. Ave Arenth. City of Industry, CA 91748 Departamento de Atención al Cliente: (626) 912-9877 Ext.: 120/107 Lunes a viernes 8am5pm PST Sitio web: www.maxi-matic.com email: [email protected] INSTRUCCIONES DE DEVOLUCIÓN DEVOLUCIONES: A. Cualquier devolución de mercancía defectuosa al fabricante deben ser procesados apropiadamente contactando primero al servicio al cliente (información de contacto se muestra a continuación) para obtener un # RA (Número de autorización de devolución). No se aceptará ninguna devolución de mercancía sin un # RA aplicable. Favor de contactarse al Teléfono para obtener el #RA: (626) 912-9877 Ext. 107 o 120 de Lunes a Viernes de 8:00am a 5:00pm Tiempo del Pacifico. B. INSTRUCCIONES PARA RETORNAR EL PRODUCTO. Su garantía depende que usted siga estas instrucciones si va a devolver la unidad a Maxi-Matic USA 1. Empaque cuidadosamente el producto en su caja original o en otra caja adecuada para evitar daños durante el envío. 2. Antes del envío de la unidad, asegúrese de adjuntar: a) Su nombre, dirección completa con código postal, número de teléfono durante el día, y #RA b) Un recibo o comprobante de compra fechado c) El número de modelo de la unidad y el problema que tiene (Encierre en un sobre y pegue directamente a la unidad antes de sellar la caja) y d) Todas las piezas o accesorios relacionados con el problema. 3. Maxi-Matic USA. Recomienda enviar el paquete por servicio terrestre de UPS para fines de seguimiento. No podemos asumir la responsabilidad por productos perdidos o dañados devueltos a nosotros durante el transporte. Para su protección, cuidadosamente empaquete el producto para su envío y asegúrelo con la compañía fletera: Envíos C.O.D. no serán aceptados 4. Los gastos de envío de devoluciones debe ser pagado por usted. 5. Retorne el producto a esta dirección MAXI-MATIC USA. 18401 E. ARENTH AVE. CITY OF INDUSTRY, CA 91748 6. Una vez que su devolución ha sido recibida por nuestro almacén, Maxi-Matic USA. Se compromete a reparar o sustituir el producto si presenta defectos de materiales o mano de obra, sujeto a las condiciones de la sección B. 7. Maxi-Matic pagará los gastos de envío para enviar el producto reparado o reemplazado de nuevo a usted.