1
Telescopic Chimney
Applicable models:
DEKOR GLASS 30
DEKOR GLASS 36
DKW001MX 30
DKW001MX 36
CHN001MX 30
CHN001MX 36
1
FI1F7B
WARNING:
•
Read entire instructions before proceeding and Save These Instructions.
•
Approved for Residential Appliances only.
•
PLEASE READ ENTIRE INSTRUCTIONS BEFORE PROCEEDING.
•
INSTALLER: Please leave these Instructions with this unit for the owner.
•
OWNER: Please retain these instructions for future reference.
•
Turn off power circuit at service panel and lock out panel before installing this kit to the appliance.
•
Installation must comply with all local codes.
TELESCOPIC DUCT COVER INSTALLATION OPTIONS, BY MODELS
MODELS
•
•
•
•
DEKOR GLASS 30
DEKOR GLASS 36
DKW001MX 30
DKW001MX 36
• CHN001MX30 (Only for 9' to 10' high ceilings).
• CHN001MX36 (Only for 9' to 10' high ceilings).
Visible Grids
Hidden Grids
From 31 28/32”
To 52 22/32”
•
•
CHN001MX 30
CHN001MX 36
From 28 7/32”
To 48 27/32”
(Only for 8' to 9' high ceilings).
(Only for 8' to 9' high ceilings).
Visible Grids
Hidden Grids
From 19 11/32”
To 29 31/32”
From 19 17/32”
To 33 26/32”
2
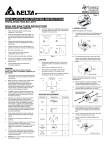
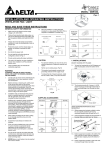
INSTALLATION INSTRUCTIONS
1)
Uninstall the fixed duct cover (if present), duct cover bracket, air deflectors (if present) and ductworks, in
accordance with the hood manual.
2)
Find the centerline of the cook top. Use a level to draw a vertical straight pencil line on the wall.
CHECK TO BE SURE THE LINE IS PERFECTLY PERPENDICULAR TO THE HORIZONTAL COOKING
SURFACE.
Note:
The duct bracket should be installed against the back wall and flush with the ceiling. This bracket will hold the
duct cover in place at the top.
Make sure of using the right type of screws and/or fasteners, depending of the material of your wall.
3)
Secure the bracket to the wall:
•
Align the marked centerline on the bracket with the centerline on the wall.
•
Mark 2 hole locations for the screws in the wall.
•
Drill 5/16" pilot holes in the marked locations.
•
Install wall fastener anchors.
•
Drive the bracket screws (provided with the hood) slowly, into the fasteners to allow anchors to expand.
•
Remove the screws.
•
Secure the bracket to the wall with the bracket screws (provided with the hood).
4)
Reinstall the air deflectors (if present) and ductworks, in accordance with the hood manual.
5)
Mounting the duct cover
•
Position the duct cover over the mounted hood, sliding the bottom of the duct cover into the assigned area.
•
Grab the upper part of the telescopic duct cover, pull it up, and place it in the duct cover mounting bracket.
•
Secure the top of the duct cover with 2 assembly screws (provided with the hood).
•
Secure the bottom of the duct cover with 2 assembly screws (provided with the hood).
3
PRECAUCIÓN:
•
Lea completamente estas instrucciones y guarde estas instrucciones.
•
Aprobado para electrodoméstico residencial únicamente.
•
Por favor lea completamente estas instrucciones antes de proceder.
•
Instalador: Por favor deje estas instrucciones al propietario.
•
Propietario: Por favor mantenga estas instrucciones para futuras referencias.
•
Desconecte esta unidad del tablero de control eléctrico y asegure el panel de control antes de instalar
este accesorio a la campana.
•
La instalación debe cumplir con todos los estatutos locales.
OPCIONES DE INSTALACIÓN DEL CUBRE CONDUCTOS TELESCÓPICO, POR MODELO
MODELOS
•
•
•
•
DEKOR GLASS 30
DEKOR GLASS 36
DKW001MX 30
DKW001MX 36
• CHN001MX30 (Solo para techos de 9' a 10' de altura).
• CHN001MX36 (Solo para techos de 9' a 10' de altura).
Rejillas Visibles
Rejillas Ocultas
De 31 28/32”
A 52 22/32”
•
•
De 28 7/32”
A 48 27/32”
CHN001MX 30 (Solo para techos de 8' a 9' de altura).
CHN001MX 36 (Solo para techos de 8' a 9' de altura).
Rejillas Visibles
Rejillas Ocultas
De 19 17/32”
A 33 26/32”
De 19 11/32”
A 29 31/32”
4
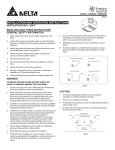
INSTRUCCIONES PARA INSTALACIÓN
1)
Desinstale el cubre conductos fijo (si está presente), el soporte de cubre conductos, el deflector de aire (si está
presente) y conductos, de acuerdo con el manual de la campana.
2)
Encuentre la línea central de la superficie de cocción. Use un nivelador para trazar una línea recta vertical en la
pared.
VERIFIQUE QUE LA LÍNEA SEA PERFECTAMENTE PERPENDICULAR A LA SUPERFICIE DE COCCIÓN
Nota:
El soporte del cubre conductos debe ser instalado donde se une la pared y el techo. Este soporte sostendrá
el cubre conducto hasta la altura máxima de techo.
Asegúrese de utilizar el tipo correcto de tornillos y/o taquetes, dependiendo del material de su pared.
3)
Montando el soporte de cubre conductos en la pared.
•
Alinee el centro del soporte con la línea central marcada en la pared.
•
Marque los dos orificios del soporte en la pared.
•
Taladre orificios de 5/16" en las marcas realizadas.
•
Instale los taquetes en los orificios realizados.
•
Atornille los tornillos del soporte (proveídos en la campana) lentamente, para permitir que los taquetes se
expandan.
•
Remueva los tornillos.
•
Asegure el soporte a la pared con los tornillos (proveídos en la campana).
4)
Instale nuevamente los deflectores de aire (si están presentes) y conductos, de acuerdo con el instructivo de
instalación de la campana.
5)
Instalando el cubre conductos
•
Posicione el cubre conductos sobre la campana montada, deslizando el cubre conducto en el área asignada
en la campana.
•
Tome la parte superior del cobre conductos telescópico, jálelo y posiciónelo en el soporte de cubre conductos.
•
Asegure la parte superior del cubre conducto con dos tornillos de instalación (Proveídos en la campana).
•
Asegure la parte inferior del cobre conducto con dos tornillos de instalación (Proveídos en la campana. La
posición exacta en donde se deben instalar estos tornillos esta señalada en el manual de la campana).
5