1
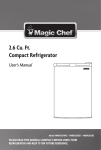
4.9 Cu. Ft. Beer Keg Cooler User's Manual Model MCKC490B2/S2 PLEASE READ THIS MANUAL CAREFULLY BEFORE USING YOUR Keg Cooler AND KEEP IT FOR FUTURE REFERENCE . Product Registration Thank you for purchasing a Magic Chef® product. The first step to protect your new product is to complete the product registration on our website: www.mcappliance.com/register. The benefits of registering your product include the following: 1. Registering your product will allow us to contact you regarding a safety notification or product update. 2. Registering your product will allow for more efficient warranty service processing when warranty service is required. 3. Registering your product could act as your proof of purchase in the event of insurance loss. Once again, thank you for purchasing a Magic Chef® product. 2 TABLE OF CONTENTS NAME OF THE PARTS .............................................................................................................4 IMPORTANT SATETY INSTRUCTIONS................................................................................ 5-6 INSTALLATION INSTRUCTION BEFORE USING YOUR BEER DISPENSER .....................................................................6 INSTALLATION OF YOUR BEER DISPENSER ..............................................................6-7 ELECTRICAL CONNECTION..............................................................................................7 INSTALLATION INSTRUCTIONS FOR BEER KEG.............................................................. 8-11 DISPENSING OF BEER ...........................................................................................................11 OPERATING YOUR BEER DISPENSER SETTING THE TEMPERATURE.......................................................................................12 AUTOMATIC DEFROSTNG .............................................................................................12 CONVERTING TO AN ‘ALL REFRIGERATOR ’.................................................................12 CHANGING THE REVERSIBLE DOOR ...................................................................................13 CARE AND MAINTENANCE CLEANING YOUR BEER DISPENSER ............................................................................14 VACATION TIME ..............................................................................................................14 MOVING YOUR BEER DISPENSER ................................................................................14 TROUBLESHOOTING GUIDE .................................................................................................14 LIMITED WARRANT Y...............................................................................................................15 3 NAMES OF THE PARTS MODEL NO.: MCKC490B2 /MCKC490S2 1 2 3 4 5 6 7 8 9 10 11 12 13 14 Beer Tower Plastic Gasket Safety Guard Rail Drip Tray Adjustable Thermostat CO2 Regulator CO2 Gas Cylinder CO2 Gas Cylinder Support Evaporator Reversible Door Beer Keg (not included) Metal Plate Metal Gasket(2) Castors with Lock (4) 4 IMPORTANT SAFETY INSTRUCTIONS To reduce the risk of fire, electrical shock, or injury follow these basic precautions when using your beer keg cooler . 1) 2) 3) 4) 5) 6) 7) 8) 9) 10) 11) 12) 13) WARNING----Keep ventilation openings, in the appliance enclosure or in the built-in structure, clear of obstruction. WARNING----Do not use mechanical devices or other means to accelerate the defrosting process, other than those recommended by the manufacturer. WARNING----Do not damage the refrigerant tubing to increase the risk of a leak when handle, move and use of beer keg cooler. . WARNING----Do not use electrical appliances inside the food storage compartments of the appliances, unless they are of the type recommended by the manufacturer. WARNING----DANGER: Never allow children to play with, operate, or crawl inside the beer keg cooler.. Risk of child entrapment. Before you throw away your old beer keg cooler or freezer: • Take off the doors • Leave the shelves in place so that children may not easily climb inside. The appliance has to be unplugged before carrying out user maintenance on the appliance. This appliance can be used by children age 8 years and above and persons with reduced physical sensory or mental capabilities or lack of experience and knowledge if they have been given supervision or instruction concerning use of the appliance in a safe way and understand the hazards involved. Children should not play with the appliance. Cleaning and maintenance should not be made by children without supervision. If the component part is damaged, it must be replaced by the manufacturer, its service agent or similar qualified persons in order to avoid a hazard. Please abandon the refrigerator according to local regulations as the unit contains flam mable blowing gas and refrigerant. Follow local regulations regarding disposal of the appliance due to flammable refrigerant and blowing gas. All beer keg cooler products contain refrigerants, which under the guidelines of federal law must be removed before disposal. It is the consumer's responsibility to comply with federal and local regulations when disposing of this product. This appliance is intended to be used in household and similar environments; such as: • sta kitchen areas in shops, o ces and other working environments; • farm houses and by clients in hotels, motels and other residential type environments; • bed and breakfast type environments; • catering and similar non-retail applications. Do not store or use gasoline or any inflammable liquors and liquids inside or in the vicinity of beer keg cooler. . Do not use an extension cord with this appliance. If the power cord is too short, have a qualified electrician install an outlet near the appliance. Use of an extension can negatively a ect the unit”s performance. IT IS HAZARDOUS FOR ANYONE OTHER THAN AUTHORIZED SERVICE PERSONNEL TO CARRY OUT SERVICES OR REPAIRS INVOLVING THE REMOVAL OF COVERS. TO AVOID THE RISK OF AN ELECTRICAL SHOCK DO NOT ATTEMPT REPAIRS YOURSELF. 5 6 7 INSTALLATION INSTRUCTIONS FOR BEER KEG Keg Installation Sketch · Install the four castors with lock provided into the unit’s bottom (four screw holes pre-supplied) The two metal gaskets are usded to the front two Castors. Figure (1) before installation. Figure (II) is the final version. GASKET (I) (II) 8 Installation Of CO2 Cylinder Support Install the metal support provided onto the 4 studs located on the exterior back wall. Align the holes in the support with the studs and push down firmly. (See Figure 1) Installation Of CO2 Cylinder Install your fully charged cylinder into the support stand. Installation Of CO2 Regulator Attach the CO2 regulator to the cylinder by turning the regulator nut onto cylinder valve, making sure washer is securely inserted into connecting nut. Tighten snug using an adjustable wrench (not supplied) and assure there are no leaks. (See Figure 2) Installation Of CO2 Air Line Outside Cabinet Remove plug located at the exterior back (top left hand corner). Save it for later use if you decide to convert unit to an all refrigerator. Insert the open end of the air line (red) line the cabinet through the uncovered hole. (See Figure 4) Installation Of CO2 Air Line Hose To Regulator Attach the open end of the red hose to the hose barb connection on the regulator Secure hose by using one clamp provided. Use pliers/screwdriver to tighten clamp to prevent leaks. (See Figure 3) Installation Of The Beer Tower Remove the top plug by twisting and pulling out, saving it for later use if you decide to convert unit to an all refrigerator unit. Unravel the beer line (clear hose) from the tower and insert the beer line and wing nut through the uncovered hole on top. Lock the beer tower assembly to the top and make sure to position the beer faucet so it is aligned with the cabinet front (6 o’clock position). You accomplish this by aligning the bottom of the beer tower to the 3 grooves on the top cabinet and tighten by hand clockwise to properly lock. Installation Of Protective Metal Plate This plate should always be installed when the keg is in place to protect against unnecessary damage to the floor of the cabinet. Fig. 1 Fig. 2 Fig. 3 Installation Of The Beer Keg Position the beer keg directly in front of the open door. Using keg handles only, carefully lift the beer keg. (See Figure 5) To place the beer keg inside the cabinet, brace your knees behind the beer keg. Lift the front of the keg just enough so the front edge of the keg is resting on the front edge of the Beer Dispenser 9 bottom cabinet. (See Figure 6) Grasp the keg handles and slide it all the way into the cabinet. Fig. 4 Fig. 5 Fig. 6 Installation Of The Keg Coupler Insert the keg coupler provided into the locking neck of the beer keg and turn it clockwise to lock into position, making sure the keg coupler is in the closed position. (See Figure 7) Installation Of The CO2 Air Line Hose Attach the end of the air line(red) hose provided to the hose connection on the keg coupler. Secure hose by using the clamps and make sure there are no leaks. Connecting the beer tower to coupler Make sure the washer is properly inserted into the wing nut. Place wing nut into the top of the coupler turning until tight. How To Tap A Keg Of Beer Make sure the beer tower faucet is in the closed position. Pull tapping handle out and press downward until it locks into position. (See Figure 8) The keg is now tapped. Opening The CO2 Cylinder Main Valve Before doing that, make sure the secondary shut-off valve is closed, as shown in figure 9. To open the main CO2 cylinder valve, slowly turn the main valve counter-clockwise until fully open. Notice the needle on the gauge start to climb. Adjusting The CO2 Regulator The gauge monitors low internal keg pressure and should be adjusted to read between 10-12 psi. (See Figure 10) In order to do that: 1. Release adjustment lock nut marked 2. 2. Using a flat screwdriver, turn regulator screw marked 3. If increased low pressure is sought, rotate screw clockwise. By rotating it counter clockwise, low pressure will be decreased when the required operating pressure is attained, retighten lock nut 2. 3. Open secondary shut off valve to let CO2 flow into the keg. 10 11 COLDER WARMER 12 CHANGING THE REVERSIBLE DOOR This Beer Dispenser has the capability of either opening the door from the left or right side. The unit is delivered to you with the door opening from the left side. Should you desire to reverse the opening direction, please follow below instructions. Caution: To avoid personal injury to yourself and/or property, we ecommend that someone assist you during the door reversal process. 13 CARE AND MAINTENANCE Cleaning Your Beer Dispenser Turn the temperature control to "OFF", unplug the Beer Dispenser, and remove the contents. Wash the inside surfaces with a warm water and baking soda solution. The solution should be about 2 tablespoons of baking soda to a quart of water. Wash the shelves and stand with a mild detergent solution. Wring excess water out of the sponge or cloth when cleaning area of the controls, or any electrical parts. Wash the outside cabinet with warm water and mild liquid detergent. Rinse well and wipe dry with a clean soft cloth. Vacation Time Short vacations: Leave the Beer Dispenser operating during vacations of less than three weeks. Long vacations: If the appliance will not be used for several months, remove all contents and unplug the power cord. Clean and dry the interior thoroughly. To prevent odor and mold growth, leave the door open slightly: blocking it open if necessary. Moving Your Beer Dispenser Remove all the contents. Securely tape down all loose items inside your Beer Dispenser. Tape the door shut. Be sure the Beer Dispenser stays secure in the upright position during transportation. Also protect outside of Beer Dispenser with a blanket, or similar item. TROUBLESHOOTING GUIDE You can solve many common Beer Dispenser problems easily, saving you the cost of a possible service call. Try the suggestions below to see if you can solve the problem before calling the servicer. PROBLEM Beer Dispenser does not operate. Turns on and off frequently. Vibrations. The Beer Dispenser seems to make too much noise. The door will not close properly. POSSIBLE CAUSE Not plugged in. The circuit breaker tripped or blown fuse. The room temperature is hotter than normal. The door is open too often. The door is not closed completely. The temperature control is not set correctly. The door gasket does not seal properly. The Beer Dispenser does not have the correct clearances. Check to assure that the Beer Dispenser is level. The rattling noise may come from the flow of the refrigerant, which is normal. As each cycle ends, you may hear gurgling sounds caused by the flow of refrigerant in your Beer Dispenser. Contraction and expansion of the inside walls may cause popping and crackling noises. The Beer Dispenser is not level. The Beer Dispenser is not level. The door was reversed and not properly installed. The gasket is dirty. The shelves or stand are out of position. 14 Limited Warranty MC Appliance Corporation warrants each new Compact Beer keg coolerto be free from defects in material and workmanship, and agrees to remedyany such defect or to furnish a new part(s), at the company’s option, for any part(s) of the unit that has failed during the warranty period. Parts and labor expenses are covered on this unit for a period of one year from the date of purchase. A copy of the dated sales receipt or invoice is required to receive warranty service, replacement or refund. In addition, MC Appliance Corporation warrants the compressor (parts only) to be free from defects in material and workmanship for a period of five years. The consumer is responsible for all labor and transportation expenses related to the diagnosis and replacement of the compressor after the initial one-year warranty expires. In the event the unit requires replacement or refund under the terms of this warranty, the consumer is responsible for all transportation expenses to return the unit to our factory prior to receiving a replacement unit or refund. A copy of the dated sales receipt/invoice is required to receive warranty service, replacement or refund. This warranty covers appliances in use within the contiguous United States, Alaska, Hawaii and Puerto Rico. This warranty does not cover the following: • • • • • • • • • • • • • • Damages due to shipping damage or improper installation. Damages due to misuse or abuse. Content losses due to failure of the unit. Inside components such as door panels, door shelves, racks, light bulbs, etc. Repairs performed by unauthorized service agents. Service calls that do not involve defects in material and workmanship such as instructions on proper use of the product or improper installation. Replacement or resetting of house fuses or circuit breakers. Failure of this product if used for other purposes than its intended purpose. Disposal costs for any failed unit not returned to our factory. Any delivery/installation costs incurred as the result of a unit that fails to perform as specified. Expenses for travel and transportation for product service if your appliance is located in a remote area where service by an authorized service technician is not available. The removal and reinstallation of your appliance if it is installed in an inaccessible location or is not installed in accordance with published installation instructions. Refunds for non repairable products are limited to the price paid for the unit per the sales receipt. This warranty is non transferable. This warranty applies only to the original purchaser and does not extend to any subsequent owner(s). Limitations of Remedies and Exclusions: Product repair in accordance with the terms herein, is your sole and exclusive remedy under this limited warranty. Any and all implied warranties including merchantability and fitness for a particular purpose are hereby limited to one year or the shortest period allowed by law. MC Appliance Corporation is not liable for incidental or consequential damages and no representative or person is authorized to assume for us any other liability in connection with the sale of this product. Under no circumstances is the consumer permitted to return this unit to the factory without the prior written consent of MC Appliance Corporation. Some states prohibit the exclusion or limitation of incidental or consequential damages, or limitations on implied warranties. This warranty gives you specific legal rights, and you may also have other rights which vary from state to state. Model MCKC490B2 MCKC490S2 Parts & Labor One Year One Year Compressor (Parts Only) Five Years Five Years Type of Service Carry In Carry In For Service or Assistance please call 888-775-0202 or visit us on the web at www.mcappliance.com to request warranty service or order parts. 15 CNA International, Inc. d/b/a MC Appliance Corporation. All rights reserved. Magic Chef® logo is a registered trademark of CNA International, Inc. www.mcappliance.com Printed in China