1
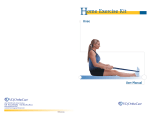
Ro
g Lad
ar
n
i
ll
der Hardw e Kits
LIFETIME WARRANTY
Rolling
Patent Pending
on Rolling Hoo
k Top Hardware
La
dd
er H
ardware Ki
ts
2 - Top Roller Guides
4 - 1/4” x 20 Thread 35 mm
4 - Acorn nut 1/4” x 20
4 - Flat head # 10 x 3/4”
2 - Top Rolling Hook Guides
4 - 1/4” x 20 Thread 35 mm
4 - Acorn nut 1/4” x 20
4 - Flat head # 10 x 3/4”
Swivel Upper guide
Vertical
Brackets
Roller
Rolling
Hook
Horizontal
Brackets
2 - Bottom Rollers
2 - 1/4” x 20 Thread 35 mm
2 - Acorn nut 1/4” x 20
2 - Pan head #14 x 3/4”
• Quiet Glide Rolling Ladders
Here is an easy way to order your Hardware Kits
Determine what type of Ladder Hardware Kit you will need.
1
Hardware Kit includes:
• Top Roller Guides (2)
• Bottom Rollers (2)
• Rung support kits (7) enough for 8” ladder
• Fasteners
Satin Nickel
Black
Hammered
Antique Brass
Pattern may vary
Oil Rubbed
Bronze
1A Ladder Hardware Kits with standard wheel
Part#
Description
Finish
QG.200.08
Rolling
Black
QG.200.03*
Rolling
Hammered Antique Brass
QG.200.07
Rolling
Oil Rubbed Bronze
QG.200.02
Rolling
Satin Nickel
QG.500.08
Rolling Hook **
Black
QG.500.03*
Rolling Hook**
Hammered Antique Brass
QG.500.07
Rolling Hook **
Oil Rubbed Bronze
QG.500.02
Rolling Hook **
Satin Nickel
QG.700.08
Swivel**
Black
QG.700.03*
Swivel**
Hammered Antique Brass
QG.700.07
Swivel **
Oil Rubbed Bronze
QG.700.02
Swivel **
*Finish Pattern may vary
STANDARD
WHEEL
Satin Nickel
**Patent Pending
1B
Ladder Hardware Kits with lower brake wheel
Part#
Description
QG.210.08
Rolling
QG.210.03*
Rolling
QG.210.07
Rolling
QG.210.02
Rolling
QG.510.08
Rolling Hook **
QG.510.03* Rolling Hook **
QG.510.07
Rolling Hook **
QG.510.02
Rolling Hook **
QG.710.08
Swivel**
QG.710.03*
Swivel**
QG.710.07
Swivel**
QG.710.02
Swivel**
*Finish Pattern may vary
Finish
Black
Hammered Antique Brass
Oil Rubbed Bronze
Satin Nickel
Black
Hammered Antique Brass
Oil Rubbed Bronze
Satin Nickel
Black
Hammered Antique Brass
Oil Rubbed Bronze
Satin Nickel
**Patent Pending
Spring loaded wheel locks when weight is applied on the ladder,
wheel unlocks when weight is taken off.
BRAKE
WHEEL
Brake tension can be
adjusted with allen
wrench.
1C
Ladder Hardware Kits with contemporary wheel
Part#
Description
Finish
QG.220.08
Rolling
QG.220.03*
Rolling
QG.220.07
Rolling
QG.220.02
Rolling
QG.520.08
Rolling Hook **
QG.520.03* Rolling Hook **
QG.520.07
Rolling Hook **
QG.520.02
Rolling Hook **
QG.720.08
Swivel**
QG.720.03*
Swivel**
QG.720.07
Swivel**
QG.720.02
Swivel**
* Finish Pattern may vary
Black
Hammered Antique Brass
Oil Rubbed Bronze
Satin Nickel
Black
Hammered Antique Brass
Oil Rubbed Bronze
Satin Nickel
Black
Hammered Antique Brass
Oil Rubbed Bronze
Satin Nickel
**Patent Pending
CONTEMPORARY
WHEEL
2 Select Rail Components
Photo Provided by:
VisionQuest Builders Inc.
Alexandria, VA
2A Determine how many feet (use splice kits to join rails, 2C)
Rail & Bracket
Rail - 1”diameter solid aluminum
rail
Part#
Part#
QG.4006.02
QG.4006.03
QG.4006.07
QG.4006.08
8ft Length
900 Corner
0
e
insid cor
”
30
900 Corner
0
ne
r
90 0 Inside Corner 30”Radius - 5’ length
Color
Part#
4ft Length
Satin Nickel
Hammered Ant Brass
Oil Rubbed Bronze
Black
450 Corner
inside corn
”
16
0
135
inside corne
r
”
Radius
Radius
QG.40CRV.08
QG.40CRV.03
QG.40CRV.07
QG.40CRV.02
Part#
QG.4004.02
QG.4004.03*
QG.4004.07
QG.4004.08
er
90
Satin Nickel
Hammered Ant Brass
Oil Rubbed Bronze
Black
90
QG.4008.02
QG.4008.03*
QG.4008.07
QG.4008.08
6ft Length
Satin Nickel
Hammered Ant Brass
Oil Rubbed Bronze
Black
Part#
QG.40CRV16.08
QG.40CRV16.03
QG.40CRV16.07
QG.40CRV16.02
Black
Hammered Ant Brass
Oil Rubbed Bronze
Satin Nickel
90 0 Inside Corner 16”Radius - 5’ length
Color
Black
Hammered Ant Brass
Oil Rubbed Bronze
Satin Nickel
30
Radius
Part#
QG.40CRV135.08
QG.40CRV135.03
QG.40CRV135.07
QG.40CRV135.02
1350 Inside Corner30” Radius - 5’ length
Color
Black
Hammered Ant Brass
Oil Rubbed Bronze
Satin Nickel
For curve rail applications only use swivel hardware for the ladder
Ladders must be lifted slightly off the floor when traveling around the curve, bottom wheels do not swivel
2B Select how many Vertical or Horizontal Brackets
for your rail you will need
(choose correct bracket for Rolling, Rolling Hook application)
You will need 1 bracket for every 32” or 4 brackets for
an 8ft rail
Vertical Rail Bracket Kit
Part#
Description
QG.201.08
QG.201.03*
QG.201.07
QG.201.02
QG.301.08
Rolling bracket
Rolling bracket
Rolling bracket
Rolling bracket
Rolling Hook
QG.301.03* Rolling Hook
QG.301.07
Rolling Hook
QG.301.02
Rolling Hook
* Finish Pattern may vary
Finish
Black
Hammered Antique Brass
Oil Rubbed Bronze
Satin Nickel
Black
Hammered Antique Brass
Oil Rubbed Bronze
Satin Nickel
Rolling
Vertical
Brackets
Horizontal
Brackets
Rolling Hook
Horizontal Rail Bracket Kit
QG.202.08
Rolling bracket
QG.202.03* Rolling bracket
QG.202.07
Rolling bracket
QG.202.02
Rolling bracket
QG.302.08
Rolling Hook
QG.302.03* Rolling Hook
QG.302.07
Rolling Hook
QG.302.02
Rolling Hook
* Finish Pattern may vary
Rolling bracket
Black
Hammered Antique Brass
Oil Rubbed Bronze
Satin Nickel
Black
Hammered Antique Brass
Oil Rubbed Bronze
Satin Nickel
Rolling Hook
bracket
2C Select how many Splice Kits you will need
(How many rails will you be joining together?)
Part#
Description
QG.41
Splice Kit for joining two rails
Splice Kit
2D Select how many End Cap Kits you will need
*2 End stops per kit
Part#
Description - End Cap Kit for Rails
QG.40.08
QG.40.03*
QG.40.07
QG.40.02
QG.401.08
QG.401.03*
QG.401.07
QG.401.02
*Pattern may vary
2E
Black
Hammered Antique Brass
Oil Rubbed Bronze
Satin Nickel
Black
Hammered Antique Brass
Oil Rubbed Bronze
Satin Nickel
3C
End Cap QG.40.**
Species
Part#
Cherry
Hickory
Maple
Red Oak
Walnut
End Cap QG.401.**
QG.6309.CH
QG.6309.HC
QG.6309.MA
QG.6309.RO
QG.6309.WA
Sanded to 120 grit with predrilled assembly holes
Specify black or nickel fasteners (included)
Tap to thread rails for end Caps
Part#
Steam Bent Solid Wood Hand Rails
sold in pairs
7”
Description
QG.TAP1420
1/4” x 20 Tap for rail
Tap
3
47”
Select the wood ladder and accessories
3A Ladder-in stock (includes top turned rung)
8ft
Species
Part#
Red Oak
Maple
Cherry
Walnut
QG.6008.RO
QG.6008.MA
QG.6008.CH
QG.6008.WA
Part#
Red Oak
Maple
Cherry
Walnut
Part#
3D Additional Step Supports
9ft
for 9’ and 10’ ladders
QG.6009.RO
QG.6009.MA
QG.6009.CH
QG.6009.WA
* For ladders over 8’ or if you build your own ladder.
For 16” wide ladders.
10ft
QG.6010.RO
QG.6010.MA
QG.6010.CH
QG.6010.WA
Sanded to 120 grit, flat cut, pre-drilled holes for fasteners, sides dadoed
for steps, ready to finish & assemble.
Part#
Description
QG.620.08
QG.620.02
Extra Step Support- Black
Extra Step Support- Satin Nickel
3E Top turned Rungs For 16” wide ladder
When building your own ladder.
Species
3B Custom Ladder
Custom lengths and wood species available, 2-3 week
lead time. Plus Shipping includes top turned rung and
supports.
Ladders above 8’ require additional rung supports.
Species
Alder
Birch-White
Cherry
Hickory
Maple
Afr. Mahogany
Oak-Red
Oak-White Qrt Sawn
Walnut
up to 8’
up to 9’
up to 10’
Other species available, Call for pricing & lead time
up to 11’
up to 12’
up to 13’
Red Oak
Maple
Cherry
Walnut
Part#
QG.610.RO
QG.610.MA
QG.610.CH
QG.610.WA
* Included with ladders above
up to 14’
3F
Non - Skid Step Tread Clear
QG.61 Clear
Walnut
GENERAL INSTALLATION/SPECIFICATION GUIDE
Please Note!!
Step 1: Rail Installation
Tools Required For Assembly
4mm & 5mm allen wrenches.
#2 Phillips & #2 Square screw driver.
1/4” x 20 thread tap.
1/4” Drill bit
(A) Slide brackets into rail, recommended maximum spacing 32 inches apart. Pre-drill holes in wood if
needed and screw brackets in place.
Aluminum Rail Rod
Horizontal Bracket
(Roller type)
Vertical Bracket
(Roller type)
Vertical Bracket
(Hook type)
End View
(B) Use the splice kit to connect rails together. (If applicable)
Rolled steel pin
Insert roll pin halfway into one of the rails. Slide the steel bar half-way into rail.
Secure the splice kit to rail on both sides by tightening the set screws.
(C) Tap the end of the rail with a ¼” x 20 tap (not supplied) to screw in the end stop finial (done before installation
of rail). Install end cap with screw provided using a 4mm Allen wrench.
Note: Leave at least a 7 inch clearance above the rail for the top guide hardware to operate properly, and allow the
ladder to move against the wall for storage.
Step 2: Ladder Assembly (if applicable)
Assemble the steps onto the side rails with glue and screws. Glue and pin nail the top turned rung into place.
Step 3: Ladder Hardware Installation
(A) Install steps support rods under each step using 5mm allen
(B) Drill holes and install top guides to ladder centering
the top dowel (top dowel recommended) of the ladder.
The placement of the holes will allow a small adjustment
of height of ladder, either up or down.
Install Top Turned Rungs
Use a forstner bit, drill 7/8” hole part way
through for the turned rungs
Top Turned Rung
16-1/4” long x 1-1/4”Dia., 7/8” Dia. ends.
14-3/8” Inside Width Unfinished
(C) Line up bottom rollers vertical to the floor
when ladder is in the climbing position Pre-drill
holes and install bottom rollers.
Ladder in the
climbing position
Ladder in the
stored position
Note: Proper Pre-drilling of holes for the wood screws on the bottom of the ladder will prevent splitting of the ladder side rails
Top Ladder Hardware
Top Roller
Rolling Hook
7/8”
4” CC
5-1/2”
Patent Pending
on Rolling Hoo
k Top Hardware
2-1/8” dia
6-1/2”
4” CC
5-1/2”
1-3/4”
5-1/2”
7/8”
6-1/2”
2-1/2”
2” dia
Patent Pending
4”
1-3/4”
Bottom Ladder Hardware
Standard Wheel
Brake Wheel
1-3/8”
1-7/16”
5”
8-1/4”
8”
Contemporary Wheel
1-3/4”
7/8”
7/8”
7/8”
5-3/8”
6-1/8”
5-7/8”
Rail Height and distance
for 8’, 9’, 10’ standard ladders
Hand Rail dimensions
7”
45°angle
(approximately)
5” radius
to floor
Stock = 1-1/4” x 1-1/4”
with 3/16” radius corners
5/8” radius ends
2- Predrilled holes 17/64”
2-1/8”CC on each end
located 3/4” from end
”
C
”C
47”
47”
Approximately
3/4
/8
2-1
Top Ladder Clearance
Curved rail radius dimensions
1-3/8”
Hook top Hardware cannot be used with curved rails!
Bracket
Splice kit
Rail Diameter = 1”
90°
Bracket
Rail Height & Ladder Distanc
Rail Bracket - Vertical Roller type
Upper Roller Guide only
s
R
0”
u
di
a
7/8”
Rail heights
( center of Rail )
3
2”CC 2-5/8”
Straight section
of curved rail
103”
6”
Protrusion
2-3/8” 91”
23/32”
38”
Rail Bracket - Vertical
Hook or Rolling Hook type
Upper Hook Guide only
9’ 10’
19.35”
135°
ius
Bracket
8’
15/16”
Rad
Bracket
Splice kit
30”
14
1-3/4”
2”
/
-1
115”
20.5”
2-1/16”CC
2-11/16”
21.7”
Distance from wall ( ladder in climbing position
1-3/4”
Straight section
of curved rail
Rev 1-5-09
21”
Protrusion
1-7/8”
3 -7/8”
23/32”
28-3/4”
Rail Bracket - Horizontal
Rolling Hook type
1-3/8”
Bracket
Splice kit
90°
1”
CC
Center of Rail
1”
5/8”
11/16”
Bracket
1-3/4”
s
Rail Bracket
Horizontal Roller type
iu
”
16
d
Ra
Bottom of
Horizontal Bracket
1-7/8”
Straight section
of curved rail
Upper Roller Guide only
7/8”
17”
9”
35-1/2”
7/8”
15/16”
1-3/4”
2-3/8”
Make your own Ladder
To determine length of ladder: Measure from the center of rail to the floor,
then add five inches to the measurement.
13/16
13/16
Distance varies depending on
length of ladder
ing
e
Pat
end
nt P
Rol
on
ent
Pat
e
war
ard
ve
lusi
c
- Ex
k
Hoo
ling
Rolling Ladder Hardware Kits
Top
H
Rolling Hook
upper guide
Roller
upper guide
LIFETIME WARRANTY
rev 6-2-15