1
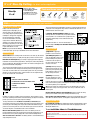
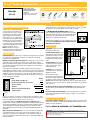
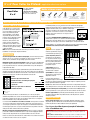
2' x 4' Glue-Up Ceiling—for direct surface application
Glue-Up
2' x 4'
All these styles have
Bead and Button, Pattern
or 1/2" Flat Lip for
Overlapping Connection:
Traditional 1, 2, 3, 4, 5, 10; Art
Deco, Rosette, Hammered
Tools and items you will need:
(optional)
Tape
measure
Tin snips
or scissors
Utility
knife
Steel
straight
edge
Isopropyl
alcohol
Loctite® PL Premium®
or PL Premium® Fast
Grab adhesive
Nails or
staples for
J-Trim
READ this entire installation guide before beginning your installation
TRIM INSTALLATION TIPS
If Edge J-trims were purchased for
finishing off your ceiling edges, you can
attach the trim to the ceiling panels or
to the ceiling along the perimeter, before
installing the ceiling panels. If applying
the trim to perimeter of ceiling first,
the trim can be bonded to the ceiling
using Loctite PL Premium adhesive by
applying a 1/8" bead to the back of the
trim and pressing firmly on to the ceiling.
Nails or staples can be used to tack trim
in place until adhesive is cured.
NOTE: If you purchased Crown Molding
to finish your edges, you can go to fasadeideas.com for more information
PREPARATION
Clean surfaces. Before starting, make sure all surfaces are clean, dry, flat, smooth,
and free from dust, grease, etc. Lightly sand any glossy surfaces to remove sheen.
Determine the room layout. Map your ceiling on graph paper before beginning
installation. Locate and draw any light fixtures, heating vents, intersecting hallways,
closets and doorways. Occasionally these features can influence starting points, tile
placement and finished ceiling design.
To ensure professional looking results, the room layout should be balanced with
panels centered in the room and equal size border panels used on opposite sides
of the room. To find out what size to cut the border panels in the 24" panel width
direction, see the formula below. Then, repeat formula for the 48" length direction,
but use 48" instead of 24" in the formula.
Formula:
Example
• Measure room in one direction 17' 6"
• Round down to closest even number of feet
16'
• Subtract those numbers 17' 6" – 16' = 18"
• Add 24"
18" + 24" = 42"
• Divide by 2 to get border tile size
42" ÷ 2 = 21"
The preferred method for installing Glue-Up panels is to apply the adhesive directly
to the back of the ceiling panels using Loctite® PL Premium tube adhesive in a 1/8"
diameter bead as shown to the right.
For Art Deco, Rosette, Traditional 3 and 5 style panels
with large flat areas, we advise that you spread the adhesive
out evenly with a 1/8" notched trowel or a putty knife. This
will reduce visible bumps or lines of adhesive that fail to
spread evenly.
Tube Adhesive
Application
Keep adhesive about 1/2" from the outside edges to
prevent leakage. Carefully read and follow manufacturer’s directions for
the adhesive.
INSTALLATION
1) Edge Trim. If applying to
perimeter of room, install now.
2) Installing first panel. If you
chose to apply Edge J-trim to panel
before installing, insert panel into
to trim. Place this first panel at
the corner farthest from the main
entrance of the room.
3) Overlap. Overlap subsequent
border panels by laying your next
panel on top of the previous panel's
bead and button, pattern or 1/2"
Flat Lip overlap connection.
4) Working in rows across
the room, add panels in order
according to diagram to the right.
Install the full panels by overlapping
each new row over the previous row. Complete each row by cutting and installing
the remaining border panels if applicable.
Tip: You must remove any adhesive that gets on the finished side of the panel
before it dries. Using a cloth or paper towel, clean off any residue with water or
mineral spirits.
One hour after the ceiling has been completed, firmly press on ALL the ceiling
panels you’ve installed to ensure proper bonding and adhesive set-up.
Establish your string (or chalkline) at this measurement, along perimeter of room.
These lines should be parallel with the walls and will help you align the first border
panels. If your room is out of square, adjust accordingly.
The deep indentations in the Traditional 3 & 5, Art Deco, and Rosette styles
prevent them from being cut in the middle and resting properly at the border areas
as a border panel. Accordingly, these styles look best when the Hammered style
panels are used on the perimeter of the room. All other styles can be cut and used
as a border fill panel. See Fasadeideas.com for more information.
Measure and cut border panels. Measure and cut the border panel to the
previously determined size. After cutting the panel and before applying glue, clean
the back surface of the panel by wiping with a clean cloth and rubbing alcohol.
Refer to manufacturer's directions. Use rubbing alcohol in a well-ventilated area
away from ignition sources.
Once you have your ceiling installed, the panels can be cleaned with warm, soapy
water. Never use abrasive cleaners, scouring pads or anything with harsh chemicals.
INSTALLATION TIP
For speeding up cure time, after applying the Loctite PL Premium adhesive to panel,
lightly spray the adhesive with a fine mist of clean water after applying to panel. This
will help the adhesive cure.
To see installation videos visit Fasadeideas.com
CAUTION: Even though these panels are “Class A” fire rated, they can be deformed with excessive heat.
Never expose to heat over 140˚F.
Never use abrasive materials such as scouring pads to clean surface; use only a soft cloth or sponge with
mild soap and water.