1
PRIVACY AND SHADOWBOX FENCE KIT INSTALLATION INSTRUCTIONS, CONTINUED
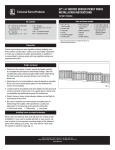
Connecting backer rails to posts
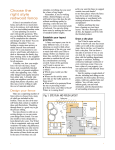
•There are several ways to attach the backer rails to the posts
(fig. 4). Face nailed is the recommended method of attachment.
•Suggested positions for backer rails: starting from the ground,
measure 9-1/2", 34" and 62" (fig. 5). Mark these points.
•Place the bottom of the rails at these marks. Your finished
product will be much more appealing if proper attention is
given to this detail.
Toe Nailed
Face Nailed
fig. 4
Panel construction
Level
•To install pickets to backer rails, use the provided fasteners.
Position pickets a recommended 2" above the ground. Start
at one end of the rail and check for plumb every three or four
pickets. If you wish to build a solid privacy fence, abut the
pickets without leaving a gap between them (fig. 5).
62"
•To build a Shadowbox fence – Start at the end of the rail and
alternate pickets on both sides of the fence. A recommended
spacing between moulded pickets is 4-7/8". Use a level to
check for plumb every few pickets (fig. 6).
34"
9-1/2"
2"
Gate installation
fig. 5
Privacy fence panel construction
•Determine desired swing direction of the gate (left- or righthand option).
•Mount hinge hardware to gate frame at the proper height,
predrilling all the screw holes.
4-7/8"
•Mount gate to gate posts, predrilling all screw holes.
Level
•Check for full gate swing clearance.
•Mount latch hardware, predrilling all screw holes.
62"
Care and maintenance
PrivacyPnlFig5.ai
•Apply either a clear coat or stain to seal the fence. Apply to all
exposed surfaces.
•Continuous changes in weather conditions are hard on your
fence. Your initial maintenance plan should be determined by
water absorption and loss, mildew growth and UV discoloration.
•Future periodic preventative maintenance – Depending on the
location of your fence with regard to direct sun exposure, foliage
coverage, etc., it may be sufficient to clean/brighten and recoat
every two years. A power washer may be necessary to properly
clean your fence.
34"
9-1/2"
2"
fig. 6
Shadowbox fence panel construction
THE DIAGRAMS AND INSTRUCTIONS IN THIS BROCHURE ARE FOR ILLUSTRATION PURPOSES ONLY AND ARE NOT MEANT TO REPLACE A LICENSED PROFESSIONAL. ANY CONSTRUCTION OR
USE OF THE PRODUCT MUST BE IN ACCORDANCE WITH ALL LOCAL ZONING AND/OR BUILDING CODES. THE CONSUMER ASSUMES ALL RISKS AND LIABILITY ASSOCIATED WITH THE
CONSTRUCTION OR USE OF THIS PRODUCT. THE CONSUMER OR CONTRACTOR SHOULD TAKE ALL NECESSARY STEPS TO ENSURE THE SAFETY OF EVERYONE INVOLVED IN THE PROJECT,
INCLUDING, BUT NOT LIMITED TO, WEARING THE APPROPRIATE SAFETY EQUIPMENT. EXCEPT AS CONTAINED IN THE WRITTEN LIMITED WARRANTY, THE WARRANTOR DOES NOT
PROVIDE ANY OTHER WARRANTY, EITHER EXPRESS OR IMPLIED, AND SHALL NOT BE LIABLE FOR ANY DAMAGES, INCLUDING CONSEQUENTIAL DAMAGES.
©2014 Universal Forest Products, Inc. All rights reserved.
50415 Herbert Street, Granger, IN 46530 574.277.7670 7934_10/14
www.ufpi.com
PrivacyPnlFig6.ai