1
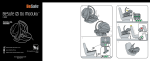
HINGE
Pro Series
Hayward Privacy Gate
Installation Tips
POST CAP
LATCH
A
Planning
• Prior to construction, check with your local regulatory agency for
special code requirements in your area.
• Contact your utility supplier to locate and mark underground
lines.
• Careful planning and measuring of your fence project is essential, as moving posts after the concrete sets is extremely difficult.
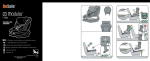
Distance Between Posts (inside to inside)
• For a single gate, measure the actual width of the gate and add
2”. (For instance: A 48” wide gate would have an inside to inside
post distance of 50”)
• For double gates, measure the actual total width of both gates
and add 3”. (For instance: Two 60” wide gate leafs would have
an inside to inside post distance of 123”)
Digging Post Holes
• Dig post holes 12” to 16” in diameter and 36” to 42” deep (depending on local ordinance or expected frost depth in winter).
POST
Setting and Installing Posts and Panels
• Insert a post into the hole. Level and adjust the height as needed
using gravel.
• Fill holes with concrete, mix thoroughly and follow directions on the
bag. Check to make sure posts are still level. Let concrete properly
cure according to manufacturer’s recommendations before hanging gate(s).
B
GATE STOP
C
Hanging the Gate(s)
• Lay the gate on a flat surface or ground. Add hinges to gate
frame (as per DETAIL B). IMPORTANT NOTE: Double check
before adding hinges that desired swing direction and latch
position is correct.
• Place gate against hinge post, adjust height accordingly, attach
hinges to post using provided screws (DETAIL B).
• Adjust gate hinges (if necessary) to achieve 1” spacing between
latch post and gate and that the gate is square overall.
• Add latch to gate with screws provided. IMPORTANT NOTE: Before
you add screw, make sure the latch is in correct position to accomodate for the swing of the gate. (DETAIL A)
• It is highly recommended to add a gate stop to the bottom of the
gate to protect from damage through slamming (DETAIL C).
• Install a post cap on each post using PVC glue or an exterior adhesive.
• For double drive gates, it is strongly recommended to use a
drop rod on each leaf of the gate.
Customer Service 855-556-1852
www.ufpi.com
DETAIL A
DETAIL B
12”-16”
Width
DETAIL C
DETAIL D
The diagrams and instructions shown are for illustration purposes only and are not meant to replace a licensed professional. Any construction or use of the product must be in accordance with all local zoning and building codes. The consumer assumes all risks and liability associated with the construction or use of this product. The consumer or contractor
should take all necessary steps to ensure the safety or everyone involved in the project, including, but not limited to, wearing the appropriate safety equipment. EXCEPT AS CONTAINED
IN THE WRITTEN LIMITED WARRANTY, THE WARRANTOR DOES NOT PROVIDE ANY OTHER WARRANTY, EITHER EXPRESS OR IMPLIED, AND SHALL NOT BE LIABLE FOR ANY DAMAGES,
INCLUDING CONSEQUENTIAL DAMAGES.
© 2012 All rights reserved. Made in the USA.