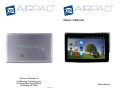
1
TM
TM
Owner’s Manual
X10.com, a Division of
X10 Wireless Technology, Inc.
400 Forge Way, Suite 409-412,
Rockaway, NJ 07866
Model Airpad 1
CM002-11/11
Read First
Contents
FCC Caution
THIS DEVICE COMPLIES WITH PART 15 OF THE FCC RULES.
OPERATION IS SUBJECT TO THE FOLLOWING TWO CONDITIONS:
(1) THIS DEVICE MAY NOT CAUSE HARMFUL INTERFERENCE, AND
(2) THIS DEVICE MUST ACCEPT ANY INTERFERENCE RECEIVED,
INCLUDING INTERFERENCE THAT MAY CAUSE UNDESIRED OPERATION.
NOTE: This equipment has been tested and found to comply with the limits
for a Class B digital device, pursuant to part 15 of the FCC Rules. These limits
are designed to provide reasonable protection against harmful interference in a
residential installation.
This equipment generates, uses and can radiate radio frequency energy and, if
not installed and used in accordance with the instructions, may cause harmful
interference to radio communications. However, there is no guarantee that
interference will not occur in a particular installation. If this equipment does
cause harmful interference to radio or television reception, which can be
determined by turning the equipment off and on, the user is encouraged to try to
correct the interference by one or more of the following measures:
• Reorient or relocate the receiving antenna.
• Increase the separation between the equipment and receiver.
• Connect the equipment into an outlet on a circuit different from that to which
the receiver is connected.
• Consult the dealer or an experienced radio/TV technician for help.
NOTE: Modifications to this product will void the user’s authority to operate this
equipment.
WARRANTY & RETURN POLICY: You may return your AirPad for a full refund
within 14 days of purchase. X10.com, a division of X10 Wireless Technology, Inc.
(X10) warrants your AirPad to be free from defective material and workmanship
for a period of 90 days from the original date of purchase. X10 agrees to repair or
replace with new or refurbished product, at its sole discretion, a defective AirPad if
returned to X10 within the warranty period in like new condition, with all original
packaging and accessories, a proof of purchase, and RMA. A 15% restocking fee
will be charged for non-defective opened product. If service is required under this
warranty or to request an RMA: Please call 1-800-442-5065, visit www.x10.com,
or e-mail [email protected].
2
Introduction ......................................................................................4
Getting Started .................................................................................6
Setting the Date and Time ................................................................7
How to use Wi-Fi on the AirPad ......................................................9
Installing Apps ...............................................................................10
Uninstalling Apps...........................................................................12
Moving Apps between screens.......................................................13
Transferring files from your PC .....................................................15
How to listen to Music ...................................................................16
How to watch Movies and Videos .................................................17
Using Wallpaper .............................................................................17
Using a Wi-Fi Hotspot ...................................................................17
How to connect the AirPad to a TV ...............................................18
Using and external microSD card .................................................19
How to move Apps to a microSD Card .........................................19
Battery Performance ......................................................................20
Wi-Fi Sleep Options.......................................................................21
Resetting to Factory Settings .........................................................23
Specifications
CPU: 1.2 GHz Rockchip 2918 Cortex A8 processor + 600 MHz DSP.
Display: 7” 800x480 resolution TFT LCD screen.
Touch-screen: Capacitive multi-touch, 5 point touch.
OS: Android 2.3 (Gingerbread), with Flash 10.1.
Camera: 2 Megapixel camera with video recording and playback.
Sensors: 3-axis accelerometer.
RAM: 512 MB.
Memory: 4 GB onboard, up to 32 GB with microSD card.
Battery Life: 6 hours movie, 20 hours music, 6 hours Wi-Fi
Internet access.
Network: Wi-Fi (802.11b/g).
Ports: HDMI supporting 1080P output, USB.
Size: 195 mm x 120 mm x 13 mm, Weight 400g (14 oz).
Battery: 4000 mAh rechargeable lithium polymer.
3
Introduction
Introduction, cont.
Congratulations! You’re now the proud owner of the newest
technology in tablets. Powered by Android 2.3, the X10 AirPad
is equipped with a powerful 1.2 GHz Rockchip 2918 Cortex A8
processor, it has a brilliant color screen, 4 GB onboard memory
(plus an additional 32 GB with microSD card, not included), a
built-in camera/video recording device, and access to thousands
of Apps in the Amazon Market. You’ll find your AirPad to be
extremely fast, with a very responsive touch screen.
Your AirPad has all of the features you could want. It’s like you’re
fitting a movie screen, MP3 player, e-book reader, Internet, video
game console and more into your pocket.
Now you don’t have to buy a Kindle, you can download the App
FREE from the Amazon Market.
Entertainment
You can get Pandora Radio, free from the Amazon Market. It
lets you select different genres of music and stream them to your
AirPad. Just go to Amazon Market, search for and download
Pandora Internet Radio, then create and sign in to your account.
Shazam – just tap on the screen and Shazam listens to and
identifies any song it hears. It even tells you who sang it, what
album it’s on, and gives you the opportunity to buy it on-line.
Play videos and movies – Download YouTube from Google, watch
Flash content with your Browser.
Download the Netflix App and watch streaming videos on your
AirPad (requires a Netflix account).
Here’s some of the many other things your AirPad can do:
Install the RedBox App and rent movies that you pick up from any
RedBox kiosk (requires a RedBox account).
Games
There are many free games available on the Amazon Market. Just
a few examples are Angry Birds, Sudoku, Fruit Ninja, and Dragon
Fly. Just go to the Amazon Market, search for the name and
download it.
Transfer movies from your laptop or PC to your AirPad via a mini
USB cable (included with your AirPad).
Or purchase a microSD card that you can plug into your PC,
transfer movies to, then plug into your AirPad.
Productivity
You can get useful Apps like Facebook, Twitter, Skype, DropBox
(file sharing), OpenTable (restaurant reservations), Mapquest,
Wikipedia, Photoshop Mobile – all run very nicely on your AirPad
and make life on the go easy and fun.
You can connect your AirPad to a TV, via an HDMI cable (sold
separately) so you can watch video on a big screen.
And of course e-mail. If you don’t already have an account just go
to mail.google.com and sign up for a free Gmail account, or get
other e-mail such as Yahoo or AOL via your browser.
All trademarks are the property of their respective owners.
4
5
Getting Started
Getting Started, cont.
First charge the battery in your AirPad,
connect the included power supply to the
jack on the side of your AirPad (labeled
DC 5V) and plug the power supply into
an AC outlet. It may take up to 4 hours to
fully charge the unit.
The AirPad does NOT charge via the included USB cable.
For best battery performance leave your AirPad charging overnight
or when not in use. See also page 20.
You can read various sections of this manual at any time to learn
how to accomplish specific tasks. You can also visit X10’s Wiki
on-line at: http://kbase.x10.com/wiki/airpad
Also see our AirPad Forums at: http://forums.x10.com
To turn your AirPad on
Press and hold the round ON/OFF button on the top of the unit until
the Android logo appears in the top left hand corner of the screen.
Release the button and wait while the unit “boots up.” Then swipe
the lock icon with your finger to unlock it.
To suspend the AirPad (Sleep mode)
Note that this still uses power and can run the battery down quite
quickly if Wi-Fi is turned on. The AirPad will go to sleep by itself if
you do nothing for a while. To force it to go into sleep mode, press
and release the round ON/OFF button on the top of the unit.
ESC Menu On/Off Reset/Mic
USB Host USB DC 5V Headphones HDMI out MicroSD card slot
The House symbol
takes you to your Home screen at any
time. It shows up in a few places but it’s always visible in the top
left hand corner of the screen.
The back symbol
at the top right hand corner of the screen
takes you back one screen each time you touch it. (You can also
press the hard key on the top of your AirPad (labeled on the back
of the AirPad as ESC).
Setting the Date and Time
To Set the Date and Time
1. On your Home screen, touch on the Settings icon.
2. Scroll down and touch Date & time. (If you don’t see it, you
might need to touch the Back icon to get to the correct screen).
To turn the AirPad completely off (shut it down)
Press and hold the round ON/OFF button on the top of the unit until
you see a screen that shows the option to Power off. Touch that button
on the screen. Then touch OK. Next time you power on you will need
to follow the steps above. If however the AirPad was just “asleep”
then just pressing the ON/OFF button displays a screen where you
can swipe the lock icon with your finger to unlock it.
6
7
Setting the Date and Time, cont.
Using Wi-Fi
In order to connect to the Internet you’ll need to turn on Wi-Fi.
(See also Wi-Fi Hotspot on page 19 and Wi-Fi Sleep options on
page 21).
3. Touch Set time.
How to Use Wi-Fi on the AirPad
1. On your Home screen, touch on the Settings icon.
2. Touch Wireless & Networks. (If you don’t see it, you might
need to touch the Back icon to get to the correct screen).
4. Set the correct time and touch Set.
3. Touch Wi-Fi Turn on Wi-Fi.
5. Touch Select time zone. Scroll and select your time zone.
6. Touch Set date. Select the correct date and touch Set.
7. Similarly, set other options such as time and date format.
8. Touch the Home icon
to exit back to your Home screen.
You can also repeatedly touch the back
icon.
Note: (if the Back or Home icon is not present on a particular
screen, repeatedly press the hard ESC key on the top of your
AirPad).
4. Touch Wi-Fi Settings.
5. Available networks will be displayed.
6. Touch your network and enter your password.
7. Touch the Home icon
8
to exit back to your Home screen.
9
Installing Apps
Installing Apps, cont.
You’ll want to install the Amazon Android Appstore so you can
download FREE Apps, and purchase other ones. Note you will first
need to go to amazon.com and set up a free account if you don’t
already have one.
Your AirPad makes an excellent e-book reader. You can download
and install FREE readers from the Amazon Android Appstore,
including the popular Kindle.
How to install a typical App from Amazon Android Appstore
1. On your Home screen, touch on the Settings icon.
2. Touch Applications, (you might need to touch the back icon to
find it).
3. If unchecked, click Unknown sources. If Unknown sources is
already checked, skip to step 5.
4. Click OK on the Attention dialog. Unknown sources will now
have a green check mark.
5. Open your Browser and type in www.amazon.com/app-email.
The Amazon Android Appstore app will download to your
AirPad. You’ll notice the download arrow in the left
corner of your notifications bar near the Home icon.
6. Touch and pull down your notifications bar at the top of the
screen and touch Amazon_Appstore-release.apk (see note
below).
7. Touch the INSTALL button.
8. After the installation finishes, touch the OPEN button and sign
into your Amazon account. Below shows the Appstore.
Note, this might say Amazon_Appstore-release-x.apk (where x is
a number).
10
We will use the Kindle App as an example. These basic procedures
work for other Apps too.
on the right hand
1. On your Home screen, touch this icon
side of the screen to access the main Apps screen.
2. Touch the Amazon Android Appstore icon. The screen
shown at the bottom of page 10 is displayed.
3. In the Search Market box, type: KINDLE. As you type, various
matches will be displayed. When you see KINDLE FOR
ANDROID TABLET displayed, touch it.
4. Touch the Kindle for Android icon.
5. Touch Install (FREE). Then touch OK. You’ll see the App being
downloaded and installed. Then “Kindle successfully installed”
will be displayed.
6. Touch the Home icon to exit back to your Home screen.
7. Touch the Amazon Kindle icon on the main Apps screen to
launch Kindle.
11
Uninstalling Apps
Moving Apps between screens
Uninstalling Apps
The Home Screen.
1. On your Home screen, touch the Menu icon
in the upper right corner.
2. Touch Manage apps.
Touch to access the
main Apps Screen.
3. Scroll to and then touch the application you want to uninstall.
Here, we demonstrate the uninstallation of Tap Tap Revenge 4.
Touch the dots (or
swipe the screen) to
access other screens.
Copying App icons from your main Apps screen to your Home
Screen
on the right hand
1. On your Home screen, touch this icon
side of the screen to access the main Apps screen.
2. Find and touch the icon for the App you want to copy to your
Home screen.
3. Hold your finger on the App icon until your Home screen
appears.
4. Release your finger from the icon.
5. A copy of the icon for that App is now duplicated on your Home
screen.
4. Touch Uninstall.
5. Touch OK.
To remove an App icon from your Home Screen, touch and hold
the icon until the trash can appears (on the right side of the screen)
and then drag the icon to the trash.
6. When you see Uninstall Finished, touch OK.
7. Touch the Home icon
to exit back to your Home screen.
12
13
Moving Apps between screens, cont.
Moving Apps between the 5 screens
Transferring files from your PC
You will need the included USB A to Mini-B cable to do this:
You will notice a combination of 1 to 4 dots in the bottom left and
bottom right of the screen. These represent 5 discrete screens on
your AirPad.
Your Home screen is the screen in the middle of the 5 screens, and
so when there are 2 dots on each side of the screen you are looking
at your Home screen.
You can access the screens by touching on the dots, or by swiping
your finger across the screen.
To move Apps around on a screen, or from one screen to another,
touch and hold the icon for the App you want to move. You will
notice that you can then drag the icon around the screen. Drag it to
an open spot on that screen, or drag it off to the left or right of the
screen and hold it until the screen you want to move it to is shown,
then release your finger from the screen.
Some practice might be necessary to get the hang of how to hold
your finger on an icon for an App, how to move your finger off the
edge of the screen, and when to release your finger.
14
1. Connect the cable to your PC and to the AirPad.
2. Hold the AirPad in a horizontal orientation. You will see a
USB symbol in the notification bar at the top left of your
AirPad’s screen.
3. Touch the USB symbol and drag it down to bring up the
notification menu.
4. Tap USB Connected.
5. In the window that appears, touch the Turn On USB storage
button.
15
Transferring files from your PC, cont.
6. Touch OK in the window that appears.
How to watch Movies or Videos
1. Download video files from the Internet, or transfer them to your
AirPad from your PC or laptop. (See Transferring files from
your PC on page 15).
2. In the main menu or on your Home screen, find and touch the
Video icon.
3. Find and touch the video file you want to play.
Using Wallpaper
Your AirPad will now appear as two different Removable Storage
Devices in “My Computer” - one for the main device memory, and
one for the MicroSD card.
1. On your Home screen, touch the Menu icon
in the upper right corner.
2. Touch the Wallpaper button.
Transfer files like you would transfer from any drive to another.
Once you are finished transferring files, be sure to follow these
steps:
1. Click on the Safely Remove Hardware icon in your PC’s System
Tray, next to the clock. Click on Safely Remove USB Mass
Storage Device.
2. On your AirPad, touch Turn off USB storage.
3. Touch the Home icon to exit back to your Home screen.
How to listen to Music
1. Download music files from the Internet, or transfer them to your
AirPad from your PC or laptop. (See Transferring files from
your PC on page 15).
2. In the main menu or on your Home screen, find and touch the
Music icon.
3. Find and touch the music file you want to play.
16
3. Select the wallpaper you desire, and touch Set wallpaper.
Note that Live wallpaper consumes battery power.
Using a Wi-Fi Hotspot
You can connect to the Internet from your AirPad by Wi-Fi if
you are near a Wi-Fi router, such as in your home or office. (See
turning on Wi-Fi on page 9). Or by using a local Hotspot such
as you can find at Airports, Hotels, and some coffee shops, for
example. Some cell phones act as a Wi-Fi Hotspot, allowing you
to connect your AirPad to your cell phone via Wi-Fi and then
connect to the Internet via your cell phone. You can also purchase
a stand-alone Wi-Fi Hotspot from many major cell phone service
providers (contract required from your provider). The AirPad
connects to the Hotspot via Wi-Fi and then the Hotspot connects to
the Internet via 3G or 4G broadband.
17
Connecting to a TV
Managing your AirPad
How to connect the AirPad to a TV
Using an external microSD card
First, make sure your TV has an HDMI input, you will also need a
mini HDMI cable (sold separately). Connect the AirPad to your TV
with the cable, then follow the instructions in your TV’s manual to
view the correct HDMI video input.
You can add more memory to your AirPad by purchasing a
microSD card, they come in various capacities. Care should be
taken when inserting the card - it is possible to “jam it in” if you
insert it incorrectly. Make sure you hold the card parallel to the
slot (not at an angle) and push it in. You will feel a slight resistance
before it seats itself.
1. On the Home screen, touch on the Settings icon.
2. Touch HDMI setting. (If you don’t see it, you might need to
touch the Back icon to get to the correct screen).
Wrong!
Correct.
Fully inserted.
To remove the microSD card: Go to Settings, Storage, and touch
Unmount SD card. Press on the card and it will pop out.
3. Check the box next to Turn on HDMI.
How to move Apps to a microSD Card
After you’ve installed a lot of Apps on your AirPad, you might get
a message saying that there’s not enough memory left to install
another App. You can free up some memory by moving some Apps
from the main memory to the microSD card:
4. Touch HDMI Resolution. Typically set this to 1920 x 1080p
60Hz.
5. Touch the Home icon
to exit back to your Home screen.
18
1. On your Home screen, touch the Menu icon
in the upper right corner.
2. Touch Manage Apps.
3. Scroll to and touch the App you want to move.
19
Managing your AirPad, cont.
How to move Apps to a microSD Card, cont.
4. Touch Move to SD card, the button changes to Moving. After
it’s moved, or if the App is already on the SD card, you will see
an option to Move to Device.
Wi-Fi Sleep Options
When your AirPad goes to sleep (i.e. the screen turns off) you
might assume that it’s not consuming any battery power. However,
it can still use up a lot of battery power if Wi-Fi is turned on. By
default your AirPad is set to turn Wi-Fi off when it goes to sleep.
To change this:
1. On your Home screen, touch on the Settings icon.
5. Touch the Home icon
to exit back to your Home screen.
Battery Performance
2. Touch Wireless & Networks.
For best battery performance leave your AirPad charging overnight
or when not in use.
Under some circumstances the battery indicator (shown in Settings,
About device, Status, Battery level) can show a reading that is less
than the actual battery life left. To reset the battery indicator plug
in the charger while the AirPad is turned on.
You can get longer battery life if you don’t use active wallpaper.
See how to change your wallpaper on page 17.
3. Touch Wi-Fi Settings.
4. Touch the Menu icon
in the upper right
corner of the screen.
Turn off Wi-Fi when you don’t need it. See also Wi-Fi Sleep
options on the next page.
20
21
Wi-Fi Sleep Options, cont.
5. Touch Advanced (at the bottom right corner of the screen).
Resetting to Factory Settings
If you play around and install a bunch of Apps to get familiar with
your AirPad you might want to know how to put your AirPad back
to its factory condition. Follow these instructions to do this:
1. On your Home screen, touch on the Settings icon.
2. Touch Privacy. (If you don’t see it, you might need to touch the
Back icon to get to the correct screen).
6. Touch Wi-Fi Sleep Policy.
3. Touch Factory data reset.
7. Touch the option you desire - Turn Wi-Fi off when the screen
turns off, never turn Wi-Fi off when the AirPad is plugged in,
or never turn Wi-Fi off EVER (select this if you want to stream
live music from Pandora, for example).
4. Touch Reset device (at the bottom of the screen).
5. If you really want to reset your AirPad, touch Erase everything
Be careful since this is not reversible.
6. Wait a few minutes while your AirPad restarts.
22
23