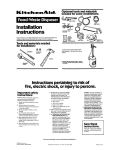
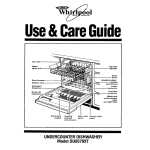
1
0
NO-FROST
UPRIGHT
FREEZER
Model EVISHK
freezers
Relrlgeralor-Treezers.
Ice Makers
Dishwashers.
BullI-In
Ovens
and
SurfaceUn~ls. Ranges.MIcrowave
Ovens,
Trash Compactors.
Room AM Condllwners.
Oehumldlflers
Please read this
Use and Care Guide
before you do anything else...
This booklet tells you how to start your freezer,
clean it and adjust controls.
Treat your new freezer with care. Use it only to
do what home freezers are designed to do.
Parts and features
W
2-Position
Top Shelf
Juice Can
Shelves
-
Stationary
Door
Shelves
Model and
1 ( ‘opt vo I~~Flodel and Serial Numbers here...
rtilce, or call with a questlorl
I
‘,.
i
2
;*’
,1 Complele
t’ C>t+ I Eat6
2. ,r~ t :xe
‘,Vl I th#.
t33Ok ,:,~r
hanav t,.ac.
tclrn k~of-c
warrantv ser
~+ady
.I
I 2’;’ clnd Serfal Numbers [from the
1 j ~“1 &I)
I(::+. ‘r 1’ soles slip
I..rrrlUi ‘n In these spaces Keep this
%/urrar,t, and soles slip together
in a
TtTere IC no warrantv reqlstratlon to repbrchC)sC’ IS ~111that IS required for inlx
Model Number
Serial Number
Purchase Date
Service Company
and Telephone
Number
Contents
Paae
SAFETY FIRST
BEFOREYOU PLUG IT IN
:
Install Properly
Level Freezer
Remove Sales Labels
Clear-It
Plug It In
USING YOUR kl%kZER.
Setiing the Temperature Control
Adjusting the Temperature Control
Cooling Freezer First
The Power Saving Control
Removingland
Adjusting Freezer Shelf
Adjusttng :he Freezer Shelves
Changing the Light Bulb
Removing the Bottom Basket
The Key Eject Lock
-3
3
4
4
4
4
4
5
5
2
5
5
5
6
6
6
The Signal Light
Optional Automatic ice Maker
:
Energy Saving Tips
CLEANING YOUR FREEZER.
Cleaning Chart
FREEZING FOOD IN YOUR FREEZER : : :
Packaging and Sealing Food
To Wrap Foods
Loading
: ‘, ,“,: “’
1’ .:’
Storing Frozen Food
VACATION AND MOVING Ck,
:: ::
IF YOU NEED SERVICE OR ASSISTANCE
I. Before Calling for Assistance
2 If You Need Assistance
3. IfYouNeedService.
4. If You Have a Problem
c 1985 Whirlpool
Pam
-6
7
7
7
8
9
9
9
10
10
10
11
11
11
11
11
Corporation
Before you plug it in
IMPORTANT
Before using your freezer, you are personally responsible for making sure that It
l IS Installed
and levelled on a floorthat WIII hold the
weight, and 11~
an area suitable for its size and use
l is connected
nnly to the right kind of outlet, with the
right electrical
supply and grounding
(Refer to
your “Electrical
Requirements
and Grounding
Instructions”)
l IS used only for jobs expected
of home freezers
l IS not near ar oven, radiator
or other heat source
l
l
l
l
l
l
IS properly maintained.
is out of the weather.
IS used in an area where the room temperature
will not exceed 110°F (43 3’C).
is not run where there are explosive fumes.
IS not used by those who may not understand
how it should be used.
is not loaded with food before it has time to get
properly cold.
Install
properly...
Remove sales labels...
do
3 inches
Remove the Consumer Buy Gurde label and any
inside labels before using the freezer
To remove any remaining
glue:
1 Rub briskly with thumb to make a ball, then
remove
OR
2 Soak area with dishwashrng detergent solutton (I
teaspoon detergent
In 1 quart warm water] before removing glue as described
in step 1
DO NOT USE rubbing alcohol or flammable
or
toxic solvents, such as acetone,
gasoline,
carbon tetrachloride,
etc. These can damage
the
surface finish.
NOTE: DO NOT REMOVE the Tech Sheet fastened under the freezer at the front.
Clean it .. .
’ Check the strerlgth of the floor It should hoid the
werght of a fL,lly loaded freezer.
L Pick a safe place,
indoors,
away from inflammables
such as gasoline.
? Alloti 3 IncheL [I L cm] arr space or top of freezer
for proper ve ~trra+lOrI
-: Allow at lecc t a7 pch (2 5 cm; between
the
freezer cond-srser on the back cf the unrt. and
the wall
‘, Allow
inch, .‘t cm] on each side ‘1f the freezer
for ease \:f rn Vc~llatlor;
6. If the freezer I ‘o be rn a corner, you rnrght wart to
leave extra sy ‘ace on the hinge sde so the door
can be open,t:ci wider
’ The four bolts ‘-at herd your freezer in the shrpprng
crate are desIgned to be the levelling legs Screw
the legs far erlough Into the bolt holes, in each of
the four bott:)ni corners, so the freezer stands
ab#sJ ’ rnch
5 ;m) ‘sff the floor
Level freezer...
so the door 4
Clean your freezer befor
using rt See cleaning
instructions on page 7
Plug- it in...
3-prong grounding
type wall receptacle
Retaining
Clip
eF
stay oaen at any posrtror
Freezer 1
Power Plug
Recommended
4
Thusfreeze: n’as 2 threaded leveling legs that are
shopped in a separate package.
1 Screw these legs all the way into bolt holes In the
bottom front corners of the freezer
2. Slide the freezer into place
3 Adjust frorr legs to level the freezer
~ To raise front, turn legs clockwise
- To lower front, turn legs counterclockwrse
4. Check with level
5. After freezer ISfully loaded, recheck with level
..
I
’ -”
grounding-plug
Grounding
Method
A 115 Volt, 60 Hz., AC only15 or 20 ampere fused
and properly
grounded
electrical
supply is required. It is recommended
that a separate
circuit
serving only this appliance
be provided.
Use a
receptacle
which cannot
be turned off with a
switch or pull chain. Do not use an extension
cord.
Attach retaining
clip over power cord plug
from literature package
inside the freezer.
Using your freezer
Setting the temperature
control...
To start, turn control to the middle of the dial This
setting IS designed to morntarn the temperature
at
:lr near 0 F (~ 17 8 ‘C] under normal operatrng
::ondrtions
Adjusting
the temperature
control...
1 Turn control to higher number for colder temperatures
2 Turn to lower number for less cold temperatures.
Cooling freezer first...
1 Allow freezerto cool 6 to 8 hours before frlllng wrth
frozen food.
2 ,et It cool overnight before adurng large amount
of unfrozen food.
Note: ‘When freezer 1sfirs? started, the compressor
sti~llrun constantly unttl the cabinet IScooled It may
take IJP to 6 to 8 hours or longer, depending
on room
temperature
and the r,umber of times the freezer
door 1sopened
After the cabinet IS cooled, the compressor will
‘urn ‘:IN and OFF as needed to keep the freezer at
the proper temperature
The Power Saving Control...
operates electrrc heaters. These heaters help prevent morsture from forming on the outstde of the
freezer when hurnrdity is high
1 Use the OFF setting to save energy when humidrtv IS
low
? Use the ON setting only if moisture forms or the outside of the freezer
Removing and adjusting
freezer shelf...
the top
To remove shelf:
1. Loftfront, then back off supports
2 Replace in reverse order
To adjust shelf:
1 Remove shelf
2 Remove supp4s by slicing upwOrds
3 Replace supl;cxts on desired level
4 Replace shelf
Adjusting the freezer shelves...
To remove shelf:
1 Remove food from shelf
2 Slide shelf strc ght out to star>
S ,ift fron:
4 Slide the rest : r the way out
To replace
shelf:
1 Fit bock of shelf on top of gurdes with wire stops on
bottom of gui; les
2 Loft front ther slide shelf until It clears the guide
stops
Changing the light bulb...
WARNING:
Light Shield
I
:I
I
II
To avoid possible shocks, first unplug
freezer or turn off electricity
leadlng
to freezer at the main power supply.
1 Remove the light shield from the side of the control
panel. Depress the bock of the shield to release the
tabs, then pull away.
2. Replace bulb with a 40.watt appliance
bulb.
3. Replace the light shield. Insert the shield tabs in the
slots, then press the shield to snap into place
4. Plug in power cord or switch on electricity.
Removing the bottom basket...
To remove:
1 Lift front of basket out of supports.
2. Pull out
Lift the Front,
Then Pull Out
To replace:
1 PosItton bock of basket on the rear wall supports
2 Lower front Into place.
I
The key eject lock...
con heir,
entrapment
reduce
the
hazard
of
child
To lock or unlock the freezer you must hold the
key in the lock while turning The lock IS spring
loaded so the key cannot be left in the lock.
If the key IS lost, contact
your WHIRLPOOL
dealer for a replacement.
Always give the complete model and serial number of your freezer
when requesting
a replacement
key.
The signal light...
automatically
warns of any unexpected
power failure.
-Signal
Light
/
l
l
l
If the signal light is not glowing, immediately
for power interruption,
for on unplugged
power cord,
for a burned out signal light
check.
To replace
burned out signal light:
1, Unplug power cord from outlet
2 Open the freezer door.
3. Unplug burned out light and replace with one of
same wattage and size. Signal light con be
ordered from your WHIRLPOOL dealer,
Part No. 1103680
4. Close freezer door and plug power cord into outlet.
Optional automatic
ice maker.. .
If you have the automatic ice maker accessory or
plan to add one later [Part No. ECKMF-83 and wiring
harness 1103831), there are a few things you will need
to know:
l
l
The ON OFF lever ISa wire srgnal arm
Down for making ice automatically.
Up...to shut off the ice maker
Shake the bin occasronally
to keep cubes separated, and to obtarn increased storage capacity.
On
l
l
l
l
l
l
l
Raise Signal
Arm to Stop Ice Maker.
Lower Signal
Arm to Start It.
It IS normal for ice crescents to be attached
by a
corner They will break apart easrly.
You will hear water running when ice maker IS
working. You’ll hear ice fall into the brn Don’t let
these sounds bother you.
The ice maker WIII not operate until the freezer is
cold enough to make Ice. This can take overnight.
Because of new plumbing
connections.
the frrsf
Ice may be drscolored or off-flavored. Discard the
first few batches of Ice.
If you remove the ice bin, raise the signal arm to
shut off the ice maker. When you return the bin,
push It all the way in and lower the arm to the ON
position.
If cubes are stored too long, they may develop an
off-flavor...like stale water Throw them away. They
will be replaced
Cubes in the Ice bin can also
become smaller by evaporation.
The ice maker water supply should not be softened water. The chemicals could damage the Ice
maker molds.
Energy saving tips...
‘$0~ can help your freezer use less electrrcity
Check door gasket and level freezer to assure a
good door seal
l Clean
the condenser COIISregularly
9 Keep door operrngs to a minrmum Remove several
Items at one time Keep contents organized to eliminote searching
l FIII to capacity
Follow recommended
procedures
for freezing foods. See pages 9 and IO.
l
Set Temperature Control to provide temperatures
around 0°F ( - 17.8”C) There is no need to store foods
below 0°F
9 Keep door locked to ensure door closure
l Keep Power Savtng Control on OFF when humidity
is
l
Cleaning your freezer
This freezer IS a No-Frost model and defrosts automatically
cleaning, however, should be done at least once a year
Complete
After cleaning:
1 Replace shelves and basket
2 Plug in power cord.
3. See directions for “Setting the Temperature
trol:’ page 5.
To clean:
1 Turn Temperat\ Ire Control to OFF
2 Unplug power cord
3 lake out all foild
Note: Wrap frozen foods and packages
in several
layers of newspaper and cover with a blanket Food
WIII stay frozen fcr several hours
4 Remove shelves and basket
5 Clean freezer according to the following directions
WARNING:
When moving the freezer, wipe up
any water that may have spilled
from the defrost pan. Spilled water
can cause slipping and injury.
Con-
Cleaning chart...
How to clean
Part
What to use
Removable
parts
(she!ves, basket, etc.)
Sponge or cloth; mild
detergent and warm
water
Outside
l
l
Sponge. cloth or paper
towel. mild detergert
appliance
wax [or good
auto paste wax]
l
l
l
Waxing
Inside walls
(Freezer should be
allowed
to warm
up so cloth won’t stick.)
painted
metal
Wash with worm water and o mild detergeni
Rinse and dry
Wash with warm water and a mild detergent Do not use abrasive
or harsh
cleansers.
Rrnse and dry
Wax painted metal surfaces at least
twce a year with applrance wax or a
good auto paste wax. Apply wax with
a clean, soft cloth Do not use wax
on plastic pafts.
surfaces
provides
rust protection.
9 Wash with warm water and mild detergent;
OR with solutron of 2 tablespoons (26 g) bakrng
soda to 1 quart ( 95 L) worm water
l Rinse ond dry
Sponge, soft cloth ‘or
paper towel, baktng
soda, worm water
mild detergent
DO NOT USE cleaning
waxes, concentrated
detergents,
or cleansers
containing
petroleum
on plastic because
damage
these parts.
Door liner and gasket
Sponge, soft cloth or
paper towel, mi!d deter
gent ana worm woter
l
l
Wash mirth warm water and mild detergent
Rrnse and dry
DO NOT USE cleaning
waxes, concentrated
detergents,
or cleansers
containing
petroleum
on plastic because
damage
these parts.
8
Defrost pan (behind
freezer on top of
compressor)
Sponge, soft cloth or
paper towel, mrid deter
gent and warm water
Condenser
Use vacuum cleaner
with brush attachment
WARNING: Watch out
for sharp wire ends at
top of condenser
coils. They can cause
injury or damage
brush.
coils
bleaches
they may
bleaches
they may
l Slide freezer out away
from wall
8 Wash defrost pan with warm water and mild
detergent Do not remove defrost pan to
clean.
l Rinse and dry
l Make sure defrost drain tube points into pan
l Slide freezer bock
into place.
. Slide freezer out away from the wall.
Clean dust and lint from condenser cotls behind
the freezer at least every other month.
l
Freezing food in your freezer
To wrap foods...
1. Cut sheet of wrapping
material about onethird longer than distance around food to be
wrapped. Place wrapping
sheet on flat surface with food In center of sheet
When frec~rer has cooled to a safe storage
temperature
It may be loaded with frozen food.
When you plan to freeze unfrozen food, see
the following chart for the amount to freeze at
one time.
These amoLjnts ore based or USDA rec;mmer
aotlons It tc? many packages
of urlfrcrer fc:,rj
the freezer ‘he rate
are packet
.3t me time ~r-~+o
<if ‘ree2 rq :c ‘00 s!c or 4x r ~~:J(~F~ pr :~CI~,:Ys resd +
2. Bring front and back of wrapping
together
and fold in toward food, making at least two
one-Inch (2 5 cm) folds until food fits tightly
against wrapping
3. Crease
ends close to food to eliminate
air
Packaging and sealing food...
Artlght p lckaglng
IS Important
in freezing
foods Con1 liners apd ‘tiNrappings should be
moisture ant Svapor-proof and packages should
be sealed c ~ref& +o keep moisture or and air
Ok’
4. Press all CN from package
+w ce Make sure fold
against end of package
Fold each end over
is tight and fasten
with freezer tape
NOTE: When packaging
meats that have not
been Doned. pad sharp edges with extra wrap
or use stockinette to protect agatnst tearing or
puncturing
Use heavy-duty aluminum freezer foil, kraft paper with cellophane
bonded to It, special freezer
bags. jars. cartons and freezer sealing tape for
packaging
your food items You’ll find them at the
supermarket or freezer dealer
Freezer b lrn can result if food IS not properly
wrapped. When this happens food dehydrates
and IS of pc’2r qual$
See booklet,
“How to Preserve Foods the
Modern Way with Your WHIRLPOOL Freezer,”
for complete
information
and tips on home
freezing.
9
Loading...
Storing frozen food...
After food is frozen, stack packages anywhere
in the freezer Packages should not extend beyond the shelf edge or they may keep the door
from closrng and sealing properly
1. Before freezing large quantities of food,
perature Control to highest setting and
operate for several hours. After loading
items, return Temperature
Control to
I
I I,
turn Ternlet freezer
all food
the usual
Basket - Store heavy and bulky packages here.
Basket should be In place at all times for proper
air crrculation.
2. To speed freezrng, lay packages
in a single layer
so each rests on the surface of a shelf. Leave space
between packages.
/
3. Add more unfrozen food after first load IS
frozen (approxrmately
18 to 24 hours)
Door storage
~ Store packages
shelves behind the retaining bar
;I;zw;can
shelves
on the door
~ Store juice cans on door as
Vacation and moving care
Vacations...
Arrange for someone to make regular checks of
your freezer to make sure it is operating and electrrcrty
has not been interrupted
Shutting
off and moving...
If treezer is shut off for more than 24 hours:
1. Remove and store all food
2. Unplug freezer
3. Clean thoroughly
See “Cleaning
your freezer,”
page 7
4. Block door open for air crrculatron Turn lock to
locked posrtrorr with door open Place blocks between door and cabrnet and tape in place with
self-adhesive filament tape
10
If you move the freezer:
1. Remove shelves and basket.
2. Tape doors shut.
3. Do not place objects inside cabinet.
4. Level properly to ensure good door seal.
WARNING:
Do not allow children near the freezer when the
door is blocked
open. They may become
injured or trapped.
When moving the freezer, clean up any water
that may have spilled
from the defrost
pan.
Spilled water can cause slipping
and injury.
To restart freezer, see “Using your freezer,” page
5
If you need service or assistance, we suggest
you follow these four steps:
1. Before calling for assistance...
2. If you need assistance*...
Performance problems often result from little things
iou can find and fix yourself without tools of any kind
Call Whirlpool COOL-LINE” service assistance
telephone
number. Dial free from:
Continental
U.S. . . . . . . . . . . . (800) 253-1301
Michigan
. . . . . . . . . . . . . . . . . . (800) 632-2243
Alaska & Hawaii
. . . . . . . . . . (800) 253-1121
and talk with one of our trained Consultants
The
Consultant can instruct you In how to obtain satlsfactory operation from your appliance
or, tf service IS
necessary. recommend a qualified service company
in vour area.
If electricity
goes off:
long
power WIII be off by calling the
power compar i
l
;f service IS to :~e interrupted 24 hours or less, keep
freezer closeo Most food WIII stay frozen
l
if service IS io ne interrupted longer than 24 hours,
do this
1. I?emove 0 Jnfrozen food and store in a frozen
fooa locker OR...
2. Place 2 Ibs. (0 9 kg] of dry Ice in freezer for every cu
ft of freezer space. This will keep frozen foods for 2
to 4 days. Wear gloves to protect your hands from
dry Ice burns.
3. If neither fo#X iocker storage or dry Ice IS available. use or can perishable food at once
l
-he length of 4 me food WI/I stay frozen depends OP
several factor:, For Instance a full freezer will reman
:olc longer bar
a freezer patiiclly fllled. And a
freezer full of meat WIII stay cold longer than a
freezer fllied Beth baked goods Also. If the food still
=ontans Ice ( rysials, It may be safely refrozen, al;hough the qballty and flavor may be affected Use
!hls food as %on as convenient
If the condition of
the food IS pc,>r or IS in any way questionable,
it IS
Learn
swse
how
to
dlspor+
of
cord IS plugged
into the
9 Check ‘use bL TXor circuit breaker
l
‘Ckjeck electn, company for a power faililre
l
Be sure Temperature Control IS turned ON
If compressor
seems to run too long:
9 Check to see that condenser, located on buck of
freezer, IS free xf dust and lint
l
On hot summer days or if room IShot, compressor will
runlongerto~rovldethecorrectamouniofcoollng
If large amounts of unfrozen food have been put
into the freezer, compressor WIII run longer
Check to see that there IS enough air clrculatlon
space above and in back of the freezer
0
FSP
R
APPLIANCES
- HOUSEHOLDMAJOR-SERVICE
8 REPAIR
ELECTRICAL
APPLIANCESMAJOR - REPAIRING
8 PARTS
OR
niltlet
l
Whirlpool has a nationwide
network
of
franchised TECH-CARE R
Service
Companies
TECH-CARE
service
technicians are tralned
to fulfill the product
warranty and provide
after-warranty
service,
1 FRANCHISED SERVICE 1 anywhere In the United
States
To
locate
TECH-CARE sewice in your urea, call our COOL-LINE
sewice assistance telephone number (see Step 2) or
look in your telephone directory Yellow Pages under:
it
If freezer stops running:
9 Check to set if power
l
3. If you need service*...
HHIRLPDOL APPLIANCES
FRANCHISED TECH~CARE SERVICE
WHIRLPOOL APPLIANCES
FRANCHISED TECH~CARE SERVICE
SEH\ I(‘& ro.H/!4n/h:.s
XYZ SERVICE CO
123 Maole
999-9999
.5I;H\‘I~‘t
(‘Oil/‘\
XYL SERVICE CO
123 Maple
VI/-\
399 9999
OR
WASHING
MACHINES.
8 IRONERS-SERVICING
DRYERS
WHIRLPOOL APPLIANCES
FRANCHISED IECH~CARE SERVILF
.YtH\‘I(‘E
XYZ SEHVICE CO
121 MaDIe
r’o.wl!t.\lFi
999~9999
4. If you have a problem*...
Call our COOL-LINE sewice asststance telephone
number (see Step 2) and talk with one of our
Consultants, or If you prefer, write to
Mr Stephen E. Upton, Sr. Vice President
Whirlpool Corporation
Administrative Center
2000 US-33 North
Benton Harbor, MI 49022
<If you must call or write, please provide
model
number, serial number, date of purchase,
and a
complete description of the problem. This informa
tion is needed in order to better respond to your
request for assistance.
11
Whirlpool
Home
Making
your world
L Appliances
a llttle easier.
Part No. 1103667 Rev A
‘c; 1985 Whirlpool
Corporation
Makers.
DIshwashers.
Bwlt-In
Ovens
and Surface
Units.
Printed
Ranges.
Mwwave
Ovens.
Trash Compactors,
Room Air Condltmners,
Oehumldlflers,
Aulomatlc
in U.S.A.
Washers,
Clothes
Oryer