1
Whirlpool
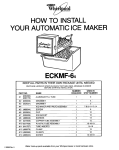
HOW TO INSTALL
YOUR AUTOMATIC ICE MAKER
KEEP ALL PARTS
IN THEIR OWN PACKAGE
UNTIL NEEDED
PARTS ARE LISTED IN ORDER OF USAGE.
ARRANGE IN ORDER BEFORE STARTING INSTALLATION.
USED IN
STEP NUMBER
PART NUMBER
NAME
#l
#2
(939029)
(836489)
WIRING ASSEMBLY
WATER TUBE FITTING
1
1
3, 5
4
#3
#4
(470168)
(939027)
GRAY SEALER (PERMAGUM)
WATER INLET TUBE (ALUMINUM)
1
1
4, 9
5
#5
#6
(939025)
(538533)
SHIELD
CLIPS
1
5
2
5
#7
#8
#9
(489069)
(626457)
(939529)
SCREWS
ICE MAKER-VALVE
ICE BUCKET
3
1
1
5, 6
6, 10, 11
QUANTITY
ASSEMBLY
# 10 (488878)
CLAMP
1
6
7
# 11 (488645)
SCREW
3
7, 14, 15
#12 (841707)
TUBE INSERT
1
7
# 13 (488366)
CLAMPS
2
15
#14 (939033)
# 15 (488649)
GROMMET
SCREWS
1
1
9
11
# 16 (488500)
SCREWS
1
12
#17 (627709)
#18 (941593)
#19 (939009)
PLASTIC TUBE ASSEMBLY
COPPER TUBE ASSEMBLY
CLAMP
1
7, 13
1
14
1
16
Tools and Other Items You Will Need
TOOLS NEEDED
Phillips head screwdriver
. 5” (total length) slot head screwdriver
Pliers
l
l
MATERIALS NEEDED
%I” O.D. Copper Tubing-See
1-Shut-off
valve-%”
outlet
1-Tube Union-%”
x l/4”
Step D2 for length
These parts available from your Whirlpool dealer or local hardware store.
941596
Install Clips And Shield
Unplug Electric
Plug From Wall
Place SHIELD #5 (939025)
over 3 holes in srde sail of
freezer. AHach clap #6 (536533)
and screw #7 (469069)
through each of lop 2 holes
rn shield. Leave screws loose.
CL
up
IS i
CONNECTING ICE MAKER
TO FREEZER WALL
Remove Plugs and2 Cover From Freezer
Wall
Snap off wiring/entrance
1 untrl ICE MAKER
ace on SHIELD.
’
Slip TUBE over
WATER INLET
INLET TUBE
lab
must be on lop.
ernstall INTERIOR
TUBE COVER
-/,
WIRING ASSEMBLY
(about 4-5 Inches 01 wrrrng assembly
should be rn the freezer compartment.)
3 Remove Plugs From I r Refrigerator Back
Remove WATER FILL COVER
Remove screws
save reuse m step 4.
-
JUNCTION
BOX
yd
,
Remove WIRING
HOLECOVER
I
WARNING-DO
NOT PINCH WIRES BETWEEN
BRACKET AND SIDE OF FREEZER.
Rotate CLIPS down and trqhlen SCREWS.
CARDBOARD
(or maskrng tape)
lOI prolectlon.
hole on b&k 01 refrigerator.
BUCKET
2%
id under
ER.
*
Install Water Tube#2 (836489)
WATER TUBE
7
Connect Water Line‘
Between Water Valve
TUBE INSERT
k-- WfRlNG- ASSEMBLY
_--._TAN WIRE
-3
BE ASSEMBLY
# 17
Install Wiring Harness
Wiring and
Connections
Remove
16
Remove
SCREW.
Reinstall SCREW.
N,NG-T:,
:I:
Pit-d-(
bTE
BETWEEN JUNCTION BOX AND CABINET
WlRE
’
rommet Plate -
--a%
Slide CLAMP
468366)
Remdve SCREW.
Install CLAMP
#19 (939009).
Reuse SCREW.
# ,13
over
f USING and
install SCREW
#ll (488645)
\
NATER VALVE PLUG
INSTALLING WATER VALVE
CONNECT ICE MAKER
TO WATER SUPPLY
WATER VALVE #8
to terminals so
are not exposed.
YOU WILL NEED ENOUGH
%-INCH O.D.COPPER
TUBING TO CONNECT REFRIGERATOR TO WATER
SOURCE. (SEE STEP 2 ON NEXT PAGE.)
P/PO% WAYS TO CONNECTTO
WATER SUPPLY
Tti130~0~
m20~
TO BASEMENT
COLD
WATER PIPE.
I-KXE
CONNECTOR
WATER PIPE
Onto valve thre
UNDER SINK TO
COLD WATER PIPE
CAUTI&:
ICE MAKEI
BE INSTALLED WHEF
FALL BELOW FREEZI
IN CRAWL SPACE UNDER
TO COLD
WATER
HOME
PIPE
UBING SHOULD NOT
TEMPERATURE MAY
Connect Ice-Maker
To Water (Contd.)
1.
Find a %-inch to 1-inch vertical COLD water pipe near
the refrigerator. (Horizontal pipe will work.. but extra
precautions must be taken.) (See ’ in Step 4.)
2.
Measure from inlet on rear of refrigerator to water pipe.
Add 7 feet to allow for moving refrigerator for cleaning.
This is the length of %-inch O.D. copper tubing you
will need for the job (length from inlet tube to water
pipe PLUS 7 feet). Be sure both ends of copper tubing
are cut square.
3.
Turn OFF main water supply. Turn ON nearest faucet
long enough to clear line of water.
4.
Using a grounded
drill, drill a 3/16-inch hole in the
vertical cold water pipe you have selected.
Some water almost always remains in pipes. If it
enters the drill, it can cause lethal shock. BE SURE
YOUR DRILL IS GROUNDED.
Fasten a separate ground wire from drill to a good
ground that complies to local electrical codes. (If in
doubt, consult a licensed electrician.)
UNLESS
PROPER GROUNDING IS FOLLOWED, YOU ARE
NOT PROTECTED AGAINSTSEVERE
OR LETHAL
SHOCK.
If you must use a horizontal
pipe, take extra
precautions:
Drill on the top or side of the pipe, not bottom.
This helps keep water away from the drill. Also, it
keeps normal sediment from collecting in the valve.
l
7.
Assemble compression nuts on tubing as shown in
diagram. Insert ends of tubing into connector and
tighten compression nuts. Be sure ends of tubing are
squarely in connector as far as they will go. Do not
over-tighten.
‘/!I” TUBE TO
SHUTOFF VALVE
CONNECTOR
SLEEVE
NUT
WATER VALVE TUBE
Step 7
5.
6.
Fasten shutoff valve to cold water pipe with pipe
clamp. Be sureinlet end is solidly in the 3/16-inch drilled
hole in the water pipe and that washer is under the
pipe clamp. Tighten packing nut. Tighten the pipe
clamp screws carefully and evenly so washer makes
a watertight connection. Do not overtighten or you
may crush copper tubing, especially if soft copper
tubing is used. Now you are ready to connect the
copper tubing.
Slip compression nut and compression sleeve on
copper tubing as shown in diagram. Insert end of
tubing into out/et end squarely as far as it will go.
Screw compression nut to outlet end with adjustable
wrench. Do not overtighten. Turn ON main water
supply and flush out tubing until water is clear. Turn
OFF shutoff valve on the water pipe. You are now
ready to connect other end of %-inch copper tubing
to inlet tube or water valve on back of refrigerator.
8.
Turn shutoff valve on. TIGHTEN
TIONS OR NUTS THAT LEAK.
ANY CONNEC-
9.
Copper tubing may now be fastened to baseboard.
10.
The Ice Maker has a built-in water strainer on the inlet
side of the water valve. Use a second water strainer
when local water conditions require periodic cleaning
or a well is your source of water. The strainer can be
installed in the X-inch water line.
11.
Water pressure should not be below (15 P.S.I.) or
above (125 P.S.I.). If problem occurs call your Utility
Company.
12.
PLUG IN YOUR REFRIGERATOR.
When you have your first batch of ice you may throw
away extra parts.
IMPORTANT:
It may take up to 24 hours for your Ice Maker to begin
producing
ice crescents.
To enjoy your Ice Maker most PLEASE READ CAREFULLY THE ICE MAKER SECTION OF YOUR USE AND
CARE GUIDE.




![j:j_"Xt$l"j:]:":,lg]:"r/Human Resources have been duty - e](http://vs1.manualzilla.com/store/data/005657435_1-26d97049bf04f0fd92265d73e45a9ab3-150x150.png)