1
e. Navigate to Start>Printers and Faxes. On
the Printers and Faxes screen, right click on
the Wasp LabelWriter 330 Turbo-USB, then
select Properties:
g. While the test page is printing, a screen
similar to the following appears. Click OK
on the screen if the test page prints
correctly.
If it does not print correctly, click
Troubleshoot to access the Printer Help
and Support Page.
The Properties screen appears.
f.
On the Properties screen, click Print Test
Page:
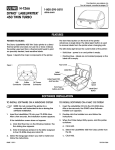
Wasp
LabelWriter 330
Turbo Printer
Quick Start
Guide
Note: The test page will consist of a
Windows Logo. The logo will appear
partially cut off on the label. This is
normal and should be a successfully
printed test page.
© 2006 Wasp Technologies
# 000000
Setting up the 330 Turbo Printer
The install wizard will automatically search
for the Installation CD.
c.
1. Unpack
Remove the printer from the box and place it
on a stable, flat surface. The box will contain:
• Printer
• Power cord and adapter
• USB Cable
• 1 roll of labels
• Installation CD with printable documentation
You may receive a message similar to the
one shown below:
The Found New Hardware Wizard will
appear.
4. Install the Printer
a.
Insert the Installation CD. On the Found
New Hardware Wizard screen, click No, Not
This Time, then click Next:
2. Connect the Power
a.
b.
Plug the power cord into the power adapter
and then to the bottom of the printer (see
figure in Step 3).
If you receive this message, click Continue
Anyway to proceed with the installation.
Plug the wall plug into a grounded and surge
protected outlet or power strip.
The software will install.
d.
3. Connect the USB Cable
a.
Plug the USB cable into the USB Port on the
bottom of the printer:
USB
Power
Cable Channel
b.
Insert the power and USB cables into the
cable channel and set the printer down on
your work surface.
c.
Plug the USB cable into an available USB
port on your computer. A message similar to
the following will appear:
b.
Select Install the Software Automatically,
then click Next.
When the installation is complete, click
Finish: