1
VD03
Dear Customer,
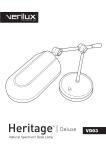
Thank you for purchasing the Verilux® Heritage™ Desk Lamp.
You have received a quality product, backed by a three-year
limited warranty. As a Verilux® customer, your satisfaction
means everything to us. We look forward to serving you
now and in the future.
Many other healthy lighting products are available through our
catalog and online. To request a copy of our catalog,
call our toll-free number 1-888-544-4865. You may also visit
us on the web at www.Verilux.com to learn more about Verilux
products.
Have a Bright Day!
Nicholas Harmon
President and CEO
2
IMPORTANT SAFETY INSTRUCTIONS
SAVE THESE INSTRUCTIONS
Thank you for purchasing the Heritage Desk Lamp. Please read the following
safety information before using. To reduce the risk of fire, electrical shock, or
injury to persons:
•
•
•
•
•
Do NOT dismantle.
Do NOT alter power cord.
Turn off/unplug and allow to cool before replacing bulb or cleaning.
For indoor use only.
This portable lamp has a polarized plug (one blade is wider than the other). As
a safety feature, this plug will fit in a polarized outlet only one way. If the plug
does not fit fully in the outlet, reverse the plug. If it still does not fit, contact a
qualified electrician. Never use with an extension cord or adapter unless plug
can be fully inserted. Do not attempt to defeat this safety feature.
• The Heritage Desk Lamp is an electrical device. DO NOT USE NEAR WATER
GENERAL PRECAUTIONS
• Before plugging in the Heritage Desk Lamp, check to make sure the voltage
corresponds with the main voltage of your location (120 volts).
• Do not use the Heritage Desk Lamp outside or in wet locations such as
bathrooms. It is intended for indoor, dry use only.
• Not for use with light dimmers, timers, motion detectors or extension cords.
• This product may cause interference with radios, cordless telephones,
or devices that use a wireless remote control, such as televisions. If
interference occurs, move the product away from the device, plug the
product or device into a different outlet, or move the lamp out of the line of
sight of the remote control receiver. This lamp complies with part 18 of FCC.
• The light bulb may become loose during transit. To reinstall the light bulb,
see the bulb installation instructions on page 7.
• Do NOT use lubricating agent in assembly; please see troubleshooting
section or call Client Relations if you are having difficulty assembling your
lamp (1-800-786-6850).
• Unplug from electrical outlet for extended periods of non-use or during
lightning storms to ensure protection of the electronics.
3
GETTING STARTED
Main Parts & Controls
A. Lamp Head
G. Vertical Shaft
B. Switch
H. Lamp Base
C. Lamp Head Swivel Knob
I. Power Cord
D. Lamp Arm
J. Power Supply (Ballast)
E. Center Swivel Knob
K. Optix® Glare Control Filter
F. Counter Weight Arm
L. Bulb
A
C
D
E
F
Close-up of Lamp Head
L
B
G
H
I
J
A
4
ASSEMBLY INSTRUCTIONS
Please Read Operating Instructions Carefully Before Using the
Heritage Desk Lamp:
1. Set lamp base on the desk and insert the counter weight arm (F)
onto the center swivel (E) and screw clockwise to tighten. (Fig.1)
2. To lift lamp head, loosen swivel knob (C), adjust head to desired
angle. Tighten swivel knob.
3. Attaching the Optix® glare control filter:
• Remove glare control filter from protective plastic bag. Take care
to hold filter by the edges only.
• Insert tabs on bottom of filter into opening. (Fig. 2)
• Press into place using thumb tab.
Do not touch or press on the filter material itself.
C
E
F
Fig. 1
Note: Do not
touch material
Fig. 2
5
ASSEMBLY INSTRUCTIONS cont.
4. Attach the ballast to the power
cord. Use care to align the 4-pin
plug properly. DO NOT FORCE
– the 4-pin plug was designed to
fit in only one orientation. (Fig. 3)
Fig. 3
5. Plug ballast into a standard 120V 50/60Hz
outlet. Turn lamp on. The green LED indicator
on center of the ballast should be illuminated.
(Fig. 4) If the LED indicator does not illuminate,
please refer to the troubleshooting section of
this manual. (See page 9)
6. If bulb does not illuminate instantly, please refer
to the troubleshooting section of this manual.
7. Adjust lamp brightness to the desired level (lowmedium-high).
WARNING: Do not block vents on ballast. Vents
are necessary for proper function of the ballast;
blocking them may cause overheating of the
ballast and increase risk of fire.
Attention!
Lift your lamp by the vertical shaft.
6
Fig. 4
ADJUSTING THE HERITAGE DESK LAMP
The Heritage™ Desk Lamp
adjusts several ways:
D
E
1. To adjust lamp height – hold lamp
arm with one hand, loosen center
swivel knob (E). Raise or lower lamp
arm (D) to desired height. Tighten
knob. (Fig. 5)
Fig.5
Swivel
Knob
2. To adjust lamp head angle up
or down – loosen swivel knob
counterclockwise, place head at
desired angle, tighten swivel knob to
secure. (Fig. 6)
Fig. 6
3. To tilt lamp head toward you or
away from you – simply move
head to desired position. (Fig. 7)
Fig. 7
7
BULB REPLACEMENT INSTRUCTIONS
Removal
1. Unplug lamp from power source.
2. To access the bulb, remove Optix®
glare control filter by depressing the
thumb tab and lifting it out.
3. Firmly hold bulb base (B) and pull
bulb (C) from the socket (A) in an
outward motion. (Fig. 8)
Installation
1. Unplug lamp from power source.
2. Firmly hold base (B) and push bulb
(C) into the socket (A).
3. Be sure bulb is firmly seated in the
socket (see below) and snapped
into the metal bulb clip (D). (Fig. 9)
4. Replace Optix® glare control filter.
YES
NO
No
gap
Notice
large gap
Correctly seated bulb
Incorrectly seated bulb
8
TROUBLESHOOTING
Your Verilux® desk lamp uses advanced micro-electronics to power
the revolutionary Trucolite™ bulb. These electronics are housed in a
specially designed ballast located at the power plug. The LED indicator
light on the ballast allows you to troubleshoot any problems with the
lamp’s function. When replacing your Verilux® ballast, take care to plug
in the power cord properly. The 4-pin plug was designed to fit in only
one orientation (See Assembly Instructions on page 5).
Before requesting service on your Verilux® lamp, please check the
following:
• Make sure all power connectors, cords, and plugs are inserted fully
and securely.
• Be sure the bulb is securely seated into the socket. (See page 8).
• Unplug the lamp for a few minutes (this allows the electronics in the
ballast to reset).
• Make sure there is power to the wall outlet or try another outlet.
WARNING: Do not block vents on ballast. Vents are necessary for
proper function of the ballast; blocking them may cause overheating of
the ballast and increase risk of fire.
9
CARE & CLEANING
Your desk lamp is made from high quality materials that will last for
many years with minimum care. You may want to periodically clean the
lamp, using a mild non-abrasive cleaner and soft cloth. When cleaning,
make sure you have turned off and unplugged the unit, and allowed
sufficient time for the unit to cool. All liquid should be properly wiped
away and dried prior to restoring power.
DO NOT USE SOLVENTS OR CLEANERS CONTAINING
ABRASIVES, OR AMMONIA BASED CLEANERS
Note: Do not use any cleaning agents, including window cleaner, on the
Optix glare control filter. If needed, dust with a clean, dry cloth.
10
WARRANTY
Three-Year Limited Warranty
ATTENTION! ONCE OPENED, PLEASE DO NOT RETURN THIS PRODUCT TO THE
STORE WHERE IT WAS PURCHASED FOR REPAIR OR REPLACEMENT!
Many questions may be answered by visiting www.Verilux.com, or you may call our
customer service department at 1-888-544-4865.
This limited warranty is provided by:
Verilux, Inc., 340 Mad River Park, Waitsfield, VT 05673
Verilux® warrants this product to be free from defects in material and workmanship for a period of three years from the
date of the original retail purchase. During the limited warranty period, Verilux, Inc. will, at its option, repair or replace
defective parts of this product, at no charge to the customer, subject to the following limitations. This limited warranty
does not include any postage, freight, insurance or delivery fees. This warranty does not cover damage, defect or failure
caused by or resulting from accident, external destruction, alteration, modification, abuse, misuse, or misapplication of
this product.
If, during the first three years of ownership, this product fails to operate properly, it should be returned as specified below:
Please pack the defective product in its original protective packing and box, with a copy of your sales receipt, along with
$6.95 (check or money order to cover shipping and handling), and send to:
For U.S. Postal Service Only:
Verilux Warranty
Service Center, c/o WTB
P.O. Box 119, West Redding, CT 06896
For Fed Ex & UPS Only:
Verilux Warranty
Service Center, c/o WTB
32 Henry Street, Bldg 17A, Bethel, CT 06801
Please allow 4-6 weeks before you receive the repaired or replaced product.
ATTENTION: When returning a product, be aware that damage during shipping is the
responsibility of the purchaser and will void any warranty claim. We recommend that
you insure the shipment by shipper when returning this product or any parts. Be sure to
return product in original packaging.
Note: Verilux® recommends using a quality surge suppressor on all electronics equipment. Voltage variations
and spikes can damage electronic components in any system. A quality suppressor can eliminate the vast
majority of failures attributed to surges and may be purchased at electronics stores.
Due to ongoing improvements, actual product may have slight variations from the product described in this manual.
11
Please visit our web site at: www.Verilux.com
340 Mad River Park, Waitsfield, VT 05673
1-888-544-4865
VD09-MAN-Rev3
Printed in China for Verilux, Inc.
© Copyright 2007 Verilux, Inc. All rights reserved.