1
VEC401_Manual_030705
3/9/05
2:45 PM
Page 12
VEC401
ONE YEAR LIMITED WARRANTY REGISTRATION FORM
™
This limited warranty program is the only one that applies to this product, and it sets forth all the
responsibilities of Vector Manufacturing, Ltd., regarding this product. There is no other warranty, other than
those described herein.
This Vector Manufacturing, Ltd. product is warranted, to the original purchaser only, to be free of defects in
materials and workmanship for one year from the date of purchase without additional charge. The
warranty does not extend to subsequent purchasers or users. Vector Manufacturing, Ltd. will not be
responsible for any amount of damage in excess of the retail purchase price of the product under any
circumstances. Incidental and consequential damages are specifically excluded from coverage under this
warranty.
This product is not intended for commercial use. This warranty does not apply to accessories or damage to
units from misuse or incorrect installation. Misuse includes wiring or connecting to improper polarity power
sources.
RETURN/REPAIR POLICY: Defective products, other than accessories, may be returned postage
prepaid to Vector Manufacturing. Any defective product, other than accessories, that is returned to Vector
Manufacturing within 30 days of the date of purchase will be replaced free of charge. If such a product is
returned more than 30 days but less than one year from the purchase date, Vector Manufacturing will repair
the unit or, at its option, replace it free of charge. If the unit is repaired, new or reconditioned replacement
parts may be used, at Vector Manufacturing’s option. A unit may be replaced with a new or reconditioned
unit of the same or comparable design. The repaired or replaced unit will then be warranted under the
terms of the remainder of the warranty period. The customer is responsible for the shipping charges on all
returned items after 30 days. During the warranty period, manufacturer will be responsible for the return
shipping charges.
LIMITATIONS: This warranty does not cover accessories, bulbs, fuses and batteries, defects resulting from
normal wear and tear (including chips, scratches, abrasions, discoloration or fading due to usage or
exposure to sunlight), accidents, damage during shipping to our service facility, alterations, unauthorized
use or repair, neglect, misuse, abuse, failure to follow instructions for care and maintenance, fire, flood and
Acts of God.
If your problem is not covered by this warranty, call our Technical Support Department toll free at
(866) 584-5504 for general repair information and charges if applicable. You may also contact us through
our website at www.vectormfg.com.
STATE LAW RIGHTS: This warranty gives you specific legal rights. Some states do not allow limitations on
how long an implied warranty lasts or the exclusion or limitation of incidental or consequential damages,
so the exclusions or limitations stated herein may not apply. This warranty gives the purchaser specific legal
rights; other rights, which vary from state to state, may apply.
TO REQUEST WARRANTY SERVICE FOR THIS PRODUCT: Contact Vector Manufacturing Technical Support
by telephone, fax or mail (see below). We suggest that you keep the original packaging in case you need
to ship the unit. When returning a product, include your name, address, phone number, dated sales receipt
(or copy) and a description of the reason for return and product serial number. After repairing or replacing
the unit, we will make every effort to return it to you within four weeks.
WARRANTY ACTIVATION: Please complete Warranty Activation Card and mail to Vector Manufacturing.
Enter “VEC401” as Game Power Mobile Gaming System” as Product Type. All Vector Manufacturing, Ltd.
products must be registered within (30) days of purchase to activate this warranty. Mail the completed
registration form, along with a copy of the original sales receipt to:
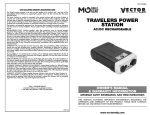
GAME POWER
MOBILE GAMING SYSTEM
OWNER’S MANUAL
& WARRANTY INFORMATION
ATTN.: CUSTOMER SERVICE
4140 SW 28th Way, Ft. Lauderdale, FL 33312
• TOLL FREE: (866) 584-5504• FAX: (954) 584-5556 •
IMPORTANT SAFETY INFORMATION, SAVE THESE INSTRUCTIONS
BD030705
THIS MANUAL CONTAINS IMPORTANT INFORMATION REGARDING THE
OPERATION AND WARRANTY OF THIS PRODUCT. PLEASE READ CAREFULLY
BEFORE USE AND RETAIN FOR FUTURE REFERENCE
© 2005 VECTOR MANUFACTURING, Ltd.
FT. LAUDERDALE, FL 33312 MADE IN CHINA
12
www.vectormfg.com
VEC401_Manual_030705
3/9/05
2:45 PM
Page ii
IMPORTANT SAFETY INSTRUCTIONS
TO REDUCE THE RISK OF FIRE, ELECTRIC SHOCK, EXPLOSION OR INJURY:
• Do not open the unit. There are no servicable parts inside.
• Do not operate in rain, snow or wet conditions.
• Do not use with high voltage or heat generating appliances.
• Do not use in locations that may accumulate flammable fumes and gases.
• Do not expose to extreme heat or flames.
• Do not replace fuse with one of a higher amperage rating.
• Do not block ventilation slots.
• Disconnect from vehicle when not in use.
WARNING
Inverter produces 120 volt AC current.
SAVE THESE INSTRUCTIONS
This device complies with part 15 of the FCC rules. Operation is subject to
the following two conditions: (1) this device may not cause harmful
interference, and (2) this device must accept any interference received,
including interference that may cause undesired operation.
This equipment has been tested and found to comply with the limits for a
Class B digital device, pursuant to part 15 of the FCC Rules. These limits are
designed to provide reasonable protection against harmful interference in a
residential installation. This equipment generates, uses and can radiate radio
frequency energy and, if not installed and used in accordance with the
instructions, may cause harmful interference to radio communications.
However, there is no guarantee that interference will not occur in a particular
installation. If equipment does cause harmful interference to radio or
television reception, which can be determined by turning the equipment off
and on, the user is encouraged to try to correct the interference by one or
more of the following measures:
• Reorient or relocate the receiving antenna.
• Increase the separation between equipment and receiver.
• Connect the equipment into an outlet on a circuit different from that to
which the receiver is connected.
• Consult the dealer or an experienced radio/TV technician for help.
CAUTION: Changes or modifications not expressly approved by the
party responsible for compliance could void the user's authority to operate
the equipment.
ii
iii
VEC401_Manual_030705
3/9/05
2:45 PM
Page iv
TABLE OF CONTENTS
Introduction . . . . . . . . . . . . . . . . . . . . . . . . . . . . . . . . . . . . . . . . . . . . . . . . . . . 1
Features . . . . . . . . . . . . . . . . . . . . . . . . . . . . . . . . . . . . . . . . . . . . . . . . . . . . . 1
Controls and Functions . . . . . . . . . . . . . . . . . . . . . . . . . . . . . . . . . . . . . . . . . . . .2
Instructions . . . . . . . . . . . . . . . . . . . . . . . . . . . . . . . . . . . . . . . . . . . . . . . . . . . . 4
Using the DC Power Cord . . . . . . . . . . . . . . . . . . . . . . . . . . . . . . . . . . . . . . 4
Using the AC Adapter . . . . . . . . . . . . . . . . . . . . . . . . . . . . . . . . . . . . . . . . 4
Opening the Game Power Mobile Gaming System . . . . . . . . . . . . . . . . . . . . 4
Setting Up the Gaming Platform . . . . . . . . . . . . . . . . . . . . . . . . . . . . . . . . . . 5
Connecting the Game Power Mobile Gaming System
to an External Viewing Device . . . . . . . . . . . . . . . . . . . . . . . . . . . . . . . . . 6
Attaching the Game Power Mobile Gaming System
to a Seat Back . . . . . . . . . . . . . . . . . . . . . . . . . . . . . . . . . . . . . . . . . . . . 7
Using the Game Power Menu . . . . . . . . . . . . . . . . . . . . . . . . . . . . . . . . . . . 8
Care and Maintenance . . . . . . . . . . . . . . . . . . . . . . . . . . . . . . . . . . . . . . . . . . 9
Cleaning . . . . . . . . . . . . . . . . . . . . . . . . . . . . . . . . . . . . . . . . . . . . . . . . . . . 9
Fuse Replacement . . . . . . . . . . . . . . . . . . . . . . . . . . . . . . . . . . . . . . . . . . . . 9
Troubleshooting . . . . . . . . . . . . . . . . . . . . . . . . . . . . . . . . . . . . . . . . . . . . . . . 10
Specifications . . . . . . . . . . . . . . . . . . . . . . . . . . . . . . . . . . . . . . . . . . . . . . . . . 11
INTRODUCTION
Thank you for purchasing the VEC401 Game Power Mobile Gaming
System. Please read this guide carefully before use to ensure optimum
performance and to avoid damage to the unit.
FEATURES
•
•
•
•
•
•
•
•
•
iv
7" wide-screen color LCD for both 16:9 and 4:3 video
100 watt power inverter with automatic shutdown
Video/audio in, video/audio out
Will power video game machines, DVDs, Camcorders and VCRs
Headphone outlet (headphone not included)
AC and DC powered
Built-in high-output stereo speakers
High-quality stereo sound
Includes adjustable vehicle seat mounting strap and carry bag
1
VEC401_Manual_030705
3/9/05
2:45 PM
Page 2
LEFT AUDIO OUT
2 MENU ADJUSTMENT
PUSHBUTTONS
VIEW SCREEN
MENU PUSHBUTTON
INVERTER
SWITCH
ADJUSTMENT
KNOB
POWER PUSHBUTTON
3 LED INDICATORS
12 VOLT DC
IN
VIDEO OUT
RIGHT AUDIO OUT
Right Side View
ADJUSTABLE
SEAT MOUNTING
STRAP
9' POWER CORD
& ACCESSORY PLUG STEREO
SPEAKERS
VENTILATION
SLOTS
Open View
RIGHT AUDIO IN
VIDEO
IN
HEADPHONE
OUTLET
FOLD-DOWN
RELEASE LATCH
INTEGERATED 120
VOLT AC,100 WATT
POWER INVERTER
LEFT AUDIO IN
Left Side View
Top View
2
3
VEC401_Manual_030705
3/9/05
2:45 PM
Page 4
INSTRUCTIONS
Setting Up the Game Power Mobile Gaming System
Powering the Mobile Gaming System Using the DC Power Cord
Open the 12 volt DC Power Cord Storage Compartment on the bottom of the unit.
1. Follow the instructions for powering up the Mobile Gaming System on the
previous page.
2. Open up the Mobile Gaming System by sliding the Fold-Down Release Latch.
FOLD-DOWN
RELEASE LATCH
ATTACHED 12
VOLT DC POWER
CORD STORAGE
COMPARTMENT
Connect the attached 12 volt DC Power Cord to the 12 volt DC Accessory Plug.
Plug the Accessory Plug into a vehicle’s accessory power outlet (or other 12 volt DC
power source that can supply at least 10 amperes).
Note: This may require the vehicle’s ignition switch to be turned on.
DC POWER CORD TO
DC ACCESSORY PLUG CONNECTION
3. Plug your game system, DVD player or other unit’s power cord into the 120 volt
AC outlet on the left side of the Game Power Mobile Gaming System (see
below).
Note: If using the included Household Use AC/DC Adapter to power the Mobile
Gaming System at home, plug the video game or DVD player power cord
directly into a 120 volt AC household outlet.
4. Plug the video game or DVD’s “Video Out” plug into the Mobile Gaming
System’s (yellow) Video In jack.
3. Plug the video game or DVD’s “Left Audio” plug into the (white) AUDIO L jack.
ATTACHED 12 VOLT DC
POWER CORD
4. Plug the video game or DVD’s “Right Audio” into the (red) AUDIO R jack.
5. If desired, plug headphones (not included) into the headphone jack.
12 VOLT DC
ACCESSORY PLUG
Note: Headphones are not required.
CAUTION
If amber LED lights, the vehicle’s voltage is too low. Stop use and
charge the vehicle’s battery before continuing.
VIDEO IN
Powering the Mobile Gaming System
Using the Household Use AC/DC Adapter
Plug the barrel connector of the Household Use AC/DC Adapter into the jack
labeled DC IN 12V on the right side of the Game Power Mobile Gaming System.
Connect the Household Use AC/DC Adapter’s plug into a 120 volt AC household
outlet.
HOUEHOLD USE
AC/DC
ADAPTER
RIGHT
AUDIO
LEFT
AUDIO
HEADPHONE
JACK
6. Press the power switch on the screen and the green LED will light. The power
switch controls power to the screen only.
LEDS
POWER
SWITCH
12 VOLT DC IN
Note: The AC/DC Adapter cannot power the built-in power inverter.
4
120 VOLT AC OUTLET
5
VEC401_Manual_030705
3/9/05
2:45 PM
Page 6
7. To provide power to the game unit, flip the ON/OFF inverter switch on the right
side of the device. The red LED will light.
ON/OFF
INVERTER SWITCH
Note: The inverter shuts down automatically when overloaded or overheated. To
Attaching the Game Power Mobile Gaming System
to a Seat Back
Seat Back Mounting
Attach the adjustable seat mounting strap by unscrewing the adjustment knobs,
sliding the strap ends over the bolts and reattaching the adjustment knobs.
Loop the adjustable seat mounting strap around the front seat and adjust until it is
snug and secure. Then open the game until it is at a comfortable viewing angle.
rest the inverter, disconnect the game or DVD and turn inverter switch OFF
and then ON again.
Connecting the Game Power Mobile Gaming System to an
External Viewing Device
On the right side of the Game Power Mobile Gaming System (see below):
• Connect the VIDEO OUT to the external viewing device’s (yellow) “Video In” port.
• Connect the L AUDIO to the external viewing device’s Left (white) “Audio In”port.
• Connect the R AUDIO to the external viewing device’s Right (red) “Audio In” port.
INVERTER
SWITCH
VIDEO OUT
LEFT AUDIO
OUT
RIGHT AUDIO
OUT
12 VOLT DC IN
Monitor Adjustment
ADJUSTMENT
KNOB
ADJUSTMENT
KNOB
The monitor can be adjusted so that it lies flat against the seatback.
Simply loosen the adjustment knobs; open the Game Power until it lies flat against
the seat back; then tighten the adjustment knobs to hold it in place.
6
7
VEC401_Manual_030705
3/9/05
2:45 PM
Page 8
Using the Game Power Menu
1. To make a selection on the menu, press the MENU pushbutton repeatedly to
select the various control functions (in order — Volume, Brightness, Contrast,
Color, Tint, Zoom and Reset).
CARE AND MAINTENANCE
Cleaning
1. Wipe clean with a soft dry cloth.
2. Do not scrape, scratch or puncture the surface of the Game Power with sharp
objects or abrasives.
MENU BUTTON
3. Store in a cool, dry place.
4. Always make sure the power cord is disconnected before storing.
2. Once a selection is made the PLUS “+” and MINUS “–” pushbuttons may be
used to control one of the following:
Volume: To increase or decrease speaker volume
Brightness: To increase or decrease the level of brightness
Contrast: To increase or decrease the level of contrast
Color: To increase or decrease the level of color
Tint: To increase or decrease the level of tint
Zoom: To select 16:9 wide screen or 4:3 regular video
Reset: To restore the default settings
5. Never allow the Game Power to be immersed in liquid.
Fuse Replacement
The power cord is protected against short-circuiting by a 15 amp fuse located in
the tip of the 12 volt DC plug. If the DC socket is powered, but the unit does not
operate, then the fuse may be open.
To inspect or replace the DC power cord fuse:
1. Unscrew the end-cap of the power cord plug.
2. Remove fuse; inspect it for an open element; and replace with a new 15-amp
fuse, if needed.
3. Re-attach the end-cap to the plug.
8
9
VEC401_Manual_030705
3/9/05
2:45 PM
Page 10
TROUBLESHOOTING GUIDE
No function using DC power cord
No function using AC power cord
No AC output from inverter
SPECIFICATIONS
1. Check power cord connection to
vehicle.
2. Check if vechicle ignition switch is on.
3. Check fuse in DC accessory plug.
1. Check AC power source.
2. Check AC/DC adapter connection.
1. Check DC power cord connection.
2. Make sure power switch is on.
3. Check for excess load — remove load,
turn unit off, then on again.
4. Check that unit is not overheating —
make sure the vent on the bottom is not
blocked. Turn the unit off for five minutes,
then turn it back on.
5. Check for sufficient vehicle voltage.
If voltage is low, charge the vehicle
battery.
No audio
1. Check audio cable connection.
2. Check audio signal source.
3. Adjust the volume control.
No video
1. Check video cable connection.
2. Check video signal source.
3. Adjust brightness and color.
Distorted or poor video
1. Select zoom to proper format.
2. Adjust brightness, contrast, color
and tint.
10
Input Voltage:
12 volt DC
Input Current:
10 amps
Low Battery Voltage
Indicator:
10.5 volts
AC Adapter:
120 volt AC in / 12 volt DC 1500 mA out
AC Output:
120 volt* AC, 60 Hz, 100 watts
AC Output Waveform: Modified sine wave
Video Input Signal:
0.7-1.5 V P/p 75 ohm NTSC composite
Video Output:
1.0 V P/p NTSC composite
Audio Input:
2 channel stereo
Audio Output:
2 channel stereo
Audio Power:
2 watts / channel
Monitor Resolution:
1440(H)x 234(V)
Display Format:
16:9 Wide Screen or 4:3 Regular
*AC 120 volt output power varies depending on DC input and variable load conditions.
11