1
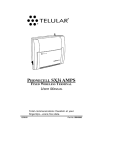
PHONECELL® SX4D GSM
DESKTOP PHONE
900 MHZ VOICE MODEL
and
1800 MHZ VOICE MODEL
USER MANUAL
Digital call clarity and privacy at your fingertips
03/09/01
Part No. 56020401
PHONECELL® SX4D GSM
DESKTOP PHONE
900 MHZ VOICE MODEL
and
1800 MHZ VOICE MODEL
USER MANUAL
Introduction
AC
Power
Power
Supply
Thank you for choosing the Phonecell® SX4D GSM Desktop Phone from Telular. This
innovative product allows you to connect to a cellular network for voice communications
flexibility.
Please follow this guide to unpack, set up and operate your new
Phonecell® SX4D GSM Desktop Phone safely and properly.
Telular is proud to welcome you as a valued customer.
Your satisfaction is our most important concern.
Telular Corporation
Corporate Headquarters
647 North Lakeview Parkway
Vernon Hills, Illinois 60061, USA
TECHNICAL SUPPORT
Tel: 847-247-9400 · Fax: 847-247-0021
E-mail: [email protected] · http://www.telular.com
Patents:
Telular Corporation products are protected and manufactured under
one or more of the following U.S. patents and related
international patents and patents pending relating thereto:
4,658,096; 4,737,975; 4,775,997; 4,868,519; 4,922,517; 5,134,651;
5,361,297; 5,469,494; 5,046,085; 5,715,296; 5,812,637; 5,859,894;
5,946,616; 5,966,428; 6,035,220.
Trademarks: Telular Corporation owns the following registered trademarks:
TELULAR, TELULAR plus design, CELJACK, PCSone, TELCEL,
HEXAGON LOGO, PHONECELL, CELSERV, TELGUARD, and CPX.
PLEASE SEE PAGES 7 and 8 FOR IMPORTANT
RESTRICTIONS ON USE, AS WELL AS, WARRANTY
AND INDEMNIFICATION
Part No. 56020401
SX4D GSM 900 • SX4D GSM 1800
©2001 Telular Corporation, all rights reserved.
2
USER MANUAL
Table of Contents
Introduction.............................................................................................. 2
Technical Support .................................................................................. 2
Safety Information ................................................................................... 4
Important Notices ...................................................................................... 7
Getting Started......................................................................................... 9
Unpacking Your Phonecell SX4D .......................................................... 9
Pre-Installation Checklist ....................................................................... 9
Installation Summary ............................................................................ 10
Step 1. Antenna Setup........................................................................... 11
Antenna Setup ......................................................................................11
Antenna Tips .........................................................................................11
Step 2. Connect Phonecell SX4D to AC Power .................................. 12
Step 3. SIM Card Installation and Setup ............................................. 13
SIM PIN Programming ........................................................................ 14
Step 4. Determine Phonecell SX4D Location ..................................... 16
Step 5. Wall-Mount Installation ............................................................ 17
Wall-Mount Instructions ....................................................................... 17
Phonecell SX4D Operation ................................................................... 18
LCD Display ........................................................................................ 18
Phonecell SX4D Power Mode ............................................................. 19
Phonecell SX4D Normal Mode ........................................................... 19
Phonecell SX4D Controls.................................................................... 22
How to Place a Call............................................................................. 23
How to Receive a Call......................................................................... 23
How to End a Call ............................................................................... 23
Hookflash Function.............................................................................. 23
Important Tones and Alerts.................................................................. 23
Variable Dial Time (Auto SEND Delay) Option.................................... 24
Zero Dial Delay for Frequently Called Numbers ................................. 24
Mobile Equipment Personalization (MEP)............................................24
Three-Digit Dialing................................................................................24
Using Supplementary Services ............................................................24
Phonecell SX4D Troubleshooting........................................................ 29
Phonecell SX4D Programming..............................................................30
Phonecell SX4D Programming Mode Overview ..................................30
Phonecell SX4D User-Programming Commands ................................31
Phonecell SX4D Technician-Programming Commands .......................32
SX4D GSM 900 • SX4D GSM 1800
3
USER MANUAL
Safety Information
IMPORTANT!
To ensure safe and efficient operation, please read the following information
and observe these guidelines whenever using your Phonecell SX4D.
Your Phonecell SX4D GSM 900 and SX4D GSM 1800 Desktop Phones
function as both a radio transmitter and receiver. When it is ON, the Desktop
Phone receives and sends out radio frequency (RF) energy. The GSM 900
unit operates in the frequency range between 890 and 960 MHz, and the
GSM 1800 between 1710 MHz and 1880 MHz. Both employ commonly used
phase/frequency modulation techniques. When you use your Phonecell
SX4D Desktop Phone, the cellular system handling your call controls the
power level at which your unit transmits. Nominal power output for the GSM
900 unit is 2 watts and for the GSM 1800 unit is 1 watt.
Exposure to RF (Radio Frequency) Energy
In 1991, the Institute of Electrical and Electronics Engineers (IEEE), and in 1992, the
American National Standards Institute (ANSI), updated the 1982 ANSI Standard for
safety levels with respect to human exposure to RF energy. After reviewing the
available body of research, more than 120 scientists, engineers and physicians from
universities, government health agencies and industry developed this updated
Standard. In March, 1993, the U.S. Federal Communications Commission (FCC)
proposed the adoption of this updated Standard.
The design of your Telular Phonecell SX4D complies with this updated Standard. Of
course, if you want to limit RF exposure even further than the updated ANSI Standard,
you may choose to control the duration of your calls and operate your phone in the
most power-efficient manner.
Safe Operation Requirement
Do not operate your Phonecell SX4D when any person is within 1 inch (2,5 cm) of the
antenna.
Temperature Environment
Operating Temperature:: From -10°C (14°F) to +50°C (122°F);
Up to 95% relative humidity (non-condensing)
Storage Temperature: From -20°C (-4°F) to +60°C (140°F);
Up to 95% relative humidity (non-condensing)
!
WARNING!
Your Phonecell SX4D must be placed or mounted on a flat surface to allow
proper ventilation. Do not block the air vents or the space beneath your
Phonecell SX4D as this could cause the unit to overheat and fail.
SX4D GSM 900 • SX4D GSM 1800
4
USER MANUAL
Safety Information - continued
Antenna Care and Replacement
Do not use the Phonecell SX4D with a damaged antenna. If a damaged antenna comes into contact with the skin, a minor burn may result. Have your antenna replaced by a qualified technician immediately. Use only a manufacturerapproved antenna. Unauthorized antennas, modifications, or attachments
could damage the Phonecell SX4D.
Driving
Check the laws and regulations on the use of cellular products
in the areas where you drive. Some jurisdictions prohibit your
using a cellular device while driving a vehicle. Even if your
jurisdiction does not have such a law, we strongly suggest that,
for safety reasons, the driver use extreme caution when operating the cellular
device while the vehicle is in motion. Always obey the law.
Electronic Devices
Most modern electronic equipment is shielded from RF energy. However, RF
energy from cellular devices may affect inadequately shielded electronic
equipment.
RF energy may affect improperly installed or inadequately shielded electronic
operating and entertainment systems in motor vehicles. Check with the
manufacturer or its representative to determine if these systems are adequately
shielded from external RF energy. You should also check with the manufacturer of
any equipment that has been added to your vehicle.
Consult the manufacturer of any personal medical devices (such as pacemakers,
hearing aids, etc.) to determine if they are adequately shielded from external RF
energy.
Turn your Phonecell SX4D OFF in health care facilities when any regulations
posted in the areas instruct you to do so. Hospitals or health care facilities may be
using equipment that could be sensitive to external RF energy.
Aircraft
Turn OFF your Phonecell SX4D before boarding any aircraft.
• Use it on the ground only with crew permission.
• Do not use it in the air.
To prevent possible interference with aircraft systems, U.S.
Federal Aviation Administration (FAA) regulations require you to have permission
from a crew member to use your cellular phone (or any other cellular product)
while the plane is on the ground. To prevent interference with aircraft systems,
FCC regulations prohibit using your cellular device while the plane is in the air.
Children
Do not allow children to play with your Phonecell SX4D to prevent damage to the unit.
Blasting Areas
Construction crews often use remote control RF devices to set off explosives.
Therefore, to avoid interfering with blasting operations, turn your Phonecell SX4D
OFF when in a "blasting area" or in areas posted: "Turn off two-way radio."
SX4D GSM 900 • SX4D GSM 1800
5
USER MANUAL
Safety Information - continued
Potentially Explosive Atmospheres
Turn your Phonecell SX4D OFF when in any area with a potentially explosive atmosphere. It is rare, but your Phonecell SX4D or its
accessories could generate sparks. Sparks in such areas could
cause an explosion or fire resulting in bodily injury or even death.
Areas with a potentially explosive atmosphere are often, but not
always, clearly marked. They include fueling areas such as gas
stations; below deck on boats; fuel or chemical transfer or storage facilities; areas
where the air contains chemicals or particles, such as grain, dust, or metal powders; and any other area where you would normally be advised to turn off your
vehicle engine.
Do not transport or store flammable gas, liquid or explosives in the area of your
Phonecell or accessories.
Vehicles using liquefied petroleum gas (such as propane or butane) must comply
with the National Fire Protection Standard (FPA-58). For a copy of this standard,
contact the National Fire Protection Association, One Batterymarch Park, Quincy,
MA 02269, Attn: Publications Sales Division.
FCC Part 15 Class B Compliance
The Phonecell SX4D GSM 900 and GSM 1800 models have been tested and
found to comply with the limits for a Class B digital device, pursuant to Part 15 of the
FCC rules. These limits are designed to provide reasonable protection against
harmful interference in a residential installation. This equipment generates, uses and
can radiate radio frequency energy and, if not installed and used in accordance with
the instructions, may cause harmful interference to radio communications. However,
there is no guarantee that interference will not occur in a particular installation. If this
equipment does cause harmful interference to radio or television reception, which
can be determined by turning the equipment OFF and ON, the user is encouraged
to try to correct the interference by one or more of the following measures:
• Reorient or relocate the antenna.
• Increase the separation between the equipment and the terminal.
• Connect the equipment into an outlet on a circuit different from that to which the
terminal is connected.
• Consult your Authorized Telular Distributor or an experienced radio/TV
technician for help.
GSM Type Acceptance
The cellular mobile radio, known as TC-2101 and located inside the Phonecell
SX4D GSM 900 model, has GSM Type Acceptance BABT/98/6270, dated 14
October 98. The Phonecell SX4D GSM 900 operates on 900 MHz GSM networks.
The cellular mobile radio, known as TC-2201 and located inside the Phonecell SX4D
GSM 1800 model, has GSM Type Acceptance BABT/NC/000005, dated 18 May 2000.
The Phonecell SX4D GSM 1800 operates on 1800 MHz GSM networks.
SX4D GSM 900 • SX4D GSM 1800
6
USER MANUAL
Important Notices
TERMS AND CONDITIONS FOR USE OF PHONECELL® PRODUCTS ("Product")
These Terms and Conditions are a legal contract between you and Telular Corporation for the title to and use of
the Product. BY RETAINING AND USING THE PRODUCT AFTER RECEIPT OF IT, YOU AGREE TO THE TERMS
AND CONDITIONS INCLUDING WARRANTY DISCLAIMERS, LIMITATIONS OF LIABILITY AND INDEMNIFICATION PROVISIONS BELOW. IF YOU DO NOT AGREE TO THE TERMS AND CONDITIONS, DO NOT USE THE
PRODUCT AND IMMEDIATELY RETURN THE UNUSED PRODUCT FOR A COMPLETE REFUND. You agree to
accept sole responsibility for any misuse of the Product by you; and, in addition, any negligent or illegal act or omission of your or your agents, contractors, servants, employees, or other users of the Product so long as the Product
was obtained from you, in the use and operation of the Product.
INDEMNIFICATION OF TELULAR CORPORATION ("TELULAR")
YOU SHALL INDEMNIFY, DEFEND AND HOLD HARMLESS TELULAR FOR ANY OF THE COST, INCLUDING
REASONABLE ATTORNEYS' FEES, AND FROM CLAIMS ARISING OUT OF YOU, YOUR CLIENTS' OR
OTHER THIRD PARTIES' USE OR OPERATION OF THE PRODUCT: (i) FOR MISUSE OR IN A MANNER NOT
CONTEMPLATED BY YOU AND TELULAR OR INCONSISTENT WITH THE PROVISIONS OF THIS MANUAL;
(ii) IN AN ILLEGAL MANNER OR AGAINST PUBLIC POLICY; (iii) IN A MANNER SPECIFICALLY UNAUTHORIZED IN THIS MANUAL; (iv) IN A MANNER HARMFUL OR DANGEROUS TO THIRD PARTIES; (v) FROM
CLAIMS BY ANYONE RESPECTING PROBLEMS, ERRORS OR MISTAKES OF THE PRODUCT; OR (vi) COMBINATION OF THE PRODUCT WITH MATERIAL, MODIFICATION OF THE PRODUCT OR USE OF THE PRODUCT IN AN ENVIRONMENT NOT PROVIDED, OR PERMITTED, BY TELULAR IN WRITING. THE PARTIES
SHALL GIVE EACH OTHER PROMPT NOTICE OF ANY SUCH COST OR CLAIMS AND COOPERATE, EACH
WITH THE OTHER, TO EFFECTUATE THIS INDEMNIFICATION, DEFENSE AND HOLD HARMLESS.
WARRANTY
I. WHAT THIS WARRANTY COVERS AND FOR HOW LONG:
TELULAR CORPORATION ('Telular") warrants to a distributor Buyer, or to a customer only if the customer is a
Buyer directly from Telular, that the Products (including accessories) shall comply with the applicable Specifications
and shall be free from defects in material and workmanship under normal use and service for a period of fifteen
(15) months from date of shipment from Telular. Telular, at its option, shall at no charge either repair, replace or
refund the purchase price of the Product during the warranty period, provided it is returned by Buyer in accordance
with the terms of this warranty to the Telular designated repair center. Repair or replacement, at Telular's option,
may include the replacement of parts, boards or Products with functionally equivalent reconditioned items.
Repaired and replacement items are warranted for the balance of the original warranty period. All replaced items
shall become the property of Telular. SUCH ACTION ON THE PART OF TELULAR SHALL BE THE FULL
EXTENT OF TELULAR'S LIABILITY HEREUNDER, AND BUYERS EXCLUSIVE REMEDY. Buyer shall be
responsible for all costs and expenses incurred by Buyer including without limitation any handling, labor or transportation charges. OTHER THAN AFORESAID, THIS EXPRESS WARRANTY IS EXTENDED BY TELULAR TO
BUYER ONLY AND NOT TO BUYER'S CUSTOMERS OR USERS OF BUYER'S PRODUCTS.
II. HOW TO OBTAIN WARRANTY SERVICE
Product covered under this warranty shall only be accepted from and returned to Buyer's designated repair center. Buyer's dealers, distributors, agents, and end users cannot submit items to Telular under this warranty. To
receive warranty service an RMA number must first be obtained from Telular Technical Support. The defective or
non-compliant Product should be sent by Buyer freight pre-paid to: Telular Corporation, 647 North Lakeview
Parkway, Vernon Hills, IL 60061, USA or other designated location. The product must be packaged in the original
carton and packing material or an equivalent package and must have the assigned RMA number clearly marked
on the carton. Returned Product received without an RMA number will be returned to the sender.
III. WARRANTY CONDITIONS:
This is the complete warranty for the Products manufactured by Telular and sold to Buyer. Telular assumes no
obligation or liability for additions or modifications to this warranty unless made in writing and signed by an officer
of Telular. Unless made in separate written agreement between Telular and Buyer, Telular does not warrant the
installation, field maintenance or service of the Products or parts.
SX4D GSM 900 • SX4D GSM 1800
7
USER MANUAL
Important Notices - continued
TELULAR CANNOT BE RESPONSIBLE IN ANY WAY FOR ANY ANCILLARY EQUIPMENT NOT FURNISHED
BY TELULAR WHICH IS ATTACHED TO OR USED IN CONNECTION WITH THE PRODUCTS OR FOR OPERATION OF THE PRODUCTS WITH ANY ANCILLARY EQUIPMENT AND ALL SUCH EQUIPMENT IS
EXPRESSLY EXCLUDED FROM THIS WARRANTY. FURTHERMORE, TELULAR CANNOT BE RESPONSIBLE FOR ANY DAMAGE TO THE PRODUCTS RESULTING FROM THE USE OF ANCILLARY EQUIPMENT
NOT FURNISHED BY TELULAR FOR USE WITH THE PRODUCTS.
WHEN THE PRODUCT IS USED IN CONJUNCTION WITH ANCILLARY OR PERIPHERAL EQUIPMENT NOT
MANUFACTURED BY TELULAR, TELULAR DOES NOT WARRANT THE OPERATION OF THE
PRODUCT/PERIPHERAL COMBINATION, AND TELULAR SHALL HONOR NO WARRANTY CLAIM WHERE
THE PRODUCT IS USED IN SUCH A COMBINATION AND IT IS DETERMINED BY TELULAR THAT THERE IS
NO FAULT WITH THE PRODUCT. TELULAR DISCLAIMS LIABILITY FOR RANGE, COVERAGE, AVAILABILITY, OR OPERATION OF THE CELLULAR SYSTEM WHICH IS PROVIDED BY THE CARRIER.
IV. WHAT THIS WARRANTY DOES NOT COVER:
(a) Subsequent upgrades and enhancements to the Product. (b) Defects, non-compliance or damage resulting
from use of the Product in other than its normal and customary manner or environment. (c) Defects, noncompliance or damage from misuse, lightening, accident or neglect. (d) Defects, noncompliance or damage from improper testing, operation, maintenance, installation, adjustment, or any alteration or modification of any kind. (e)
Product disassembled or repaired in such a manner as to adversely affect performance or prevent adequate
inspection and testing to verify any warranty claim. (f) Product which has had the serial number removed or made
illegible. (g) Defects, non-compliance or damage due to spills of food or liquid. (h) All plastic surfaces and all other
externally exposed parts that are scratched or damaged due to customer normal use. (i) Costs and expenses,
including without limitation handling, labor and transportation, incurred in returning Product for warranty service to
Telular's Repair Center. (j) Repair, programming or servicing by someone other than Telular.
V. GENERAL PROVISIONS:
THIS WARRANTY IS GIVEN IN LIEU OF ALL OTHER EXPRESS OR STATUTORY WARRANTIES. IMPLIED
WARRANTIES, INCLUDING WITHOUT LIMITATION IMPLIED WARRANTIES OF MERCHANTABILITY, FITNESS FOR A PARTICULAR PURPOSE, TITLE, INFRINGEMENT, DELIVERY, NEGLIGENCE AND PERSONAL INJURY, ARE DISCLAIMED. FURTHER, AS THE CELLULAR CARRIER IS NOT CONTROLLED BY TELULAR, NO WARRANTY IS MADE AS TO COVERAGE, AVAILABILITY OR GRADE OF SERVICE PROVIDED BY
THE CELLULAR CARRIER. IN NO EVENT SHALL TELULAR BE LIABLE FOR DAMAGES IN EXCESS OF THE
PURCHASE PRICE OF THE PRODUCT, FOR ANY LOSS OF USE, LOSS OF TIME, INCONVENIENCE, COMMERCIAL LOSS, LOST PROFITS OR SAVINGS OR OTHER INCIDENTAL, SPECIAL OR CONSEQUENTIAL
DAMAGES ARISING OUT OF THE USE OR INABILITY TO USE SUCH PRODUCT TO THE FULL EXTENT
SUCH MAY BE DISCLAIMED BY LAW. SOME JURISDICTIONS DO NOT ALLOW THE EXCLUSION OR LIMITATIONS OF INCIDENTAL OR CONSEQUENTIAL DAMAGES OR LIMITATION ON HOW LONG AN IMPLIED
WARRANTY LASTS.
VI. SOFTWARE PROVISIONS:
Laws in the United States and other countries preserve for Telular certain exclusive rights for copyrighted Telular
software such as the exclusive rights to reproduce in copies and distribute copies of such Telular software. Telular
software may be copied into, used in and redistributed with only the Product associated with such Telular software.
No other use, including without limitation, disassembly of such Telular software or exercise of exclusive rights in
such Telular software is permitted and Telular reserves all rights not expressly granted in this Limited Commercial
Warranty.
SX4D GSM 900 • SX4D GSM 1800
8
USER MANUAL
Getting Started...
Un-Packing Your Phonecell SX4D
➊
➋
➌
The Phonecell SX4D GSM 900 and SX4D GSM 1800 come with the following:
➊ Phonecell SX4D Desktop Phone
➋ Antenna
➌ 6 VDC Power Supply (AC-to-DC)
Carefully remove the unit from the shipping carton and check for evidence of
shipping damage. If damage is found, contact your Authorized Telular
Distributor or shipping agent immediately.
Pre-Installation Checklist
Before attempting Phonecell SX4D installation, make sure you have the following
components, tools and materials.
Additional Components Needed
Qty.
1
Description
Mini-SIM (Subscriber ID Module) Card*
Supplied
Not Supplied
✔
*Supplied by your Network Service Provider
Tools & Materials Needed – for Wall-Mount Installation Only
Qty.
1
1
2
Description
Drill & Drill Bit
Screwdriver
11/2-inch (3.75 cm) Mounting Screws
Supplied
Not Supplied
✔
✔
✔
Supplied
Not Supplied
✔
Optional Components
Qty.
6
Description
AAA Alkaline Batteries
(The Phonecell SX4D does not support
Rechargeable Batteries)
SX4D GSM 900 • SX4D GSM 1800
9
USER MANUAL
Installation Summary
The following steps summarize the installation of the Phonecell
SX4D. These steps are explained in detail in the remainder of this
manual.
Step 1. Antenna Setup (page 11)
• Connect the antenna. Finger-tighten the antenna;
do not overtighten.
WARNING!
!
DO NOT power unit until antenna
is connected, as it may burn out
the radio transmitter.
Step 2. Connect the Phonecell SX4D to AC
Power (page 12)
• Connect the DC barrel connector of the power
supply to the rear panel receptacle of the
Phonecell SX4D.
• Then, connect the wall 6 VDC power supply to AC
power.
NOTE: If your Phonecell SX4D did not come with
a pre-installed mini-SIM (Subscriber Identity
Module) card, you need to perform the SIM Card
Installation and Setup procedure in Step 3. Then,
return to this Step 2.
Step 3. SIM Card Installation & Setup
(pages 13 - 15)
• If your Phonecell did not come with a pre-installed
mini-SIM card, you need to perform the SIM Card
Installation and SIM PIN Setup.
• Otherwise, continue to Step 4.
AC
Power
Step 4. Determine Phonecell SX4D Location
(page 16)
• Determine the desired location for the Phonecell
SX4D.
Step 5. Optional Wall-Mount Installation
(page 17)
• The Phonecell SX4D may be mounted on a wall.
After you have selected a location and made the
necessary connections, your Phonecell SX4D is
ready for wall-mounting.
SX4D GSM 900 • SX4D GSM 1800
10
USER MANUAL
Step 1. Antenna Setup
The Phonecell SX4D comes with an antenna. However, your coverage area may
require a higher-gain antenna for optimal call clarity and performance. The Phonecell
SX4D is compatible with a variety of antenna options, including magnetic-mount and
Yagi models – not supplied.
Your Phonecell receives operating commands from the cellular network and relies
upon signal strength for proper operation. Therefore, finding an antenna location with
good signal strength is critical for optimal call clarity. After you choose a good location,
connect the antenna, test the signal strength and adjust the location accordingly.
Antenna Setup:
Connect the antenna to the TNC
antenna connector on the rear panel of
the Phonecell SX4D - see Figure 1.
Optional Yagi
Antenna Tips:
• Locate the antenna above ground
and as close to windows (or exterior
walls) as possible - see Figure 2.
• Standard, magnetic-mount and
elevated feed antennas must
always point directly upward.
• Yagi antennas must be directed
toward the service provider’s nearest cellular tower.
• Keep antenna cable as short as
possible – long cables may reduce
call quality.
• Never splice antenna cable.
Standard
Antenna
Optional
Magnetic
Mount
TNC Antenna
Connector
Figure 1 – Phonecell SX4D antenna options.
Figure 2 – Optional Yagi antenna installed on the
building’s exterior. Be sure to direct the antenna
toward your service provider’s nearest cellular tower.
SX4D GSM 900 • SX4D GSM 1800
11
USER MANUAL
Step 2. Connect Phonecell SX4D to AC Power
1) Connect the DC barrel connector of the
6 VDC Power Supply to the rear panel
receptacle of the Phonecell SX4D - see
Figure 3.
WARNING!
!
Never operate your Phonecell
SX4D when any person is within
1 inch (2,5 cm) of the antenna.
2) Plug the 6 VDC power supply into the AC
socket - see Figure 4.
Wait for the unit to acquire service - see the
Phonecell SX4D Operation section of this
manual.
DC
Receptacle
Figure 3 – Wall 6 VDC, 3-wire power
supply DC connection.
Emergency Battery Backup
The Phonecell SX4D can accommodate six (6)
standard AAA alkaline batteries (not supplied)
for operation when AC power is not available.
To install batteries, set the unit upside down,
remove the screw to the battery access door,
press the battery access door tab and remove
the battery access door. Install the batteries and
reinstall the battery access door - see Figure 9.
A switch is used to select either AC or internal
battery operation - see Figure 17. When the
battery operation is selected, the Phonecell
SX4D will operate for approximately 10 minutes
of talk time with fresh batteries.
NOTE: The Phonecell SX4D does not support
rechargeable AAA batteries.
AC
Power
Figure 4 – 6 VDC power supply
connection to AC power.
SX4D GSM 900 • SX4D GSM 1800
12
USER MANUAL
Step 3. SIM Card Installation and Setup
IMPORTANT!
If your Phonecell SX4D did NOT come with a pre-installed mini-SIM (Subscriber
Identity Module) card, OR if you’re experiencing SIM card-related problems, follow the steps below. Otherwise, continue with STEP 5.
How to Install the Mini-SIM Card
The GSM module within the Phonecell
SX4D requires a Subscriber
Identification Module (SIM) for normal
operation. The service provider supplies a SIM card, which carries the
account information needed to operate
the Phonecell. The mini-SIM compartment is on the back of the Phonecell see Figure 5.
NOTE: If your mini-SIM card is
already installed, skip to the SIM PIN
Programming section on page 14.
If you don’t have a mini-SIM card,
contact your network service
provider.
1) Remove the 6 VDC power supply.
2) Remove the SIM compartment cover
Figure 5 – Mini-SIM Compartment.
by removing the screw - see Figure 6.
3) Open the SIM compartment holder.
4) Line up the mini-SIM card with the
arrow on the SIM card holder.
Mini-SIM Card Holder
5) Gently insert the mini-SIM card in
the slot of the SIM card holder- see
Figure 6.
Mini-SIM Card
6) Close the SIM card holder.
NOTE: If you insert the SIM card
improperly, the holder will not
close. Do not force the holder
shut. Make sure the SIM card is
aligned properly with the directional
arrow on the holder.
7) Reattach the SIM compartment
cover with the screw.
SIM Compartment Cover
8) Attach the 6 VDC power supply.
9) Proceed with SIM PIN Programming.
Figure 6 – Mini-SIM Card Installation.
SX4D GSM 900 • SX4D GSM 1800
13
USER MANUAL
SIM PIN Programming
The mini-SIM may require entry of a Personal Identification Number (PIN). The
PIN is a four- to eight-digit number provided with the SIM card. If the service
provider has set the SIM to require PIN entry, the Phonecell will request the PIN
each time it is powered ON or the SIM is removed and replaced. The PIN can be
stored within the Phonecell for automatic entry when required. To use the automatic PIN entry feature, the PIN must be correctly programmed and automatic
PIN entry must be enabled.
If PIN entry is requested while automatic PIN entry is disabled, the Phonecell
SX4D emits a non-registered service tone. The SIM PIN can be manually entered
at that time:
Press: <4-digit SIM number> #
If entry is successful, the non-registered service tone will be replaced by service
dial tone.
IMPORTANT!
You must enter the PIN correctly. After three attempts to load an incorrect PIN, the
SIM will be blocked and the SIM card will have to be unblocked. If you do not
have the unblocking key, the SIM will have to be returned to the service provider
for reactivation. See How to Unblock a SIM PIN to unblock a SIM card.
How to Set a New PIN in the SIM
REMINDER: Automatic PIN entry must be disabled - before and while the SIM PIN
is changed - until programming of the new PIN and Auto PIN Entry (see previous
page) is completed.
1) Lift up the handset (take off-hook).
2) Press:
**
04
*
< old_PIN>
*
<new PIN>
*
<new PIN> #
NOTE: You must know the old PIN to change it and the new PIN must be 4 to 8
digits (0 − 9) in length.
3) Incorrect entry of the old PIN will be indicated by a short, three tone sequence
of rising frequencies. Hang up the handset and start over at step 1 with the correct old PIN.
Incorrect length (less than 4 or more than 8 digits) of the new PIN or not entering the same value in both new PIN entries will result in silence. Hang up the
telephone handset and start over at step1.
Correct entry will be confirmed by a short beep. Hang up the handset.
For Example: To set up a new SIM with PIN "5678", where the old PIN is
04
1234
5678
5678 #
“1234,” dial:
**
*
*
*
NOTE: In case of PIN2, substitute the following step 2:
SX4D GSM 900 • SX4D GSM 1800
14
USER MANUAL
SIM PIN Programming - continued
2) Press:
**
042
*
<old_PIN2>
<new PIN2>
*
*
<new PIN2> #
NOTE: You must know the old PIN2 to change it and the new PIN2 must be 4
to 8 digits (0 − 9) in length.
For Example: To set up a new SIM with PIN2 "5678", where the old PIN2 is
1234 * 5678 * 5678 #
“1234,” dial: * * 042
*
NOTE: This procedure will change the PIN encoded on the SIM. It will not change
the PIN stored in the Phonecell SX4D for automatic entry of the PIN when requested by the GSM module. (See previous page for instructions on how to enter the autoentry PIN value).
How to Unblock a SIM PIN
Use the following key sequence to unblock a SIM card:
1)
2)
Press:
* * 05
<new PIN>
<PIN unblocking key>
*
Press:
* * 052
<new PIN2>
*
*
<PIN2 unblocking key>
<new PIN>
*
*
<new PIN2>
*
NOTE: This procedure will change the PIN encoded on the SIM. It will not change
the PIN stored in the Phonecell SX4D for automatic entry of the PIN when requested by the GSM module. (See previous page for instructions on how to enter the autoentry PIN value).
Enter Automatic PIN Entry Option
The following key sequence is used to enable or disable the automatic PIN entry:
Label: ENABLE AUTO PIN
Data: <auto_PIN>
*
<PIN>
The auto PIN value is set to 0 to disable automatic PIN entry; set to 1 to enable
automatic PIN entry. If the auto PIN value is neither 0 nor 1, it is considered
invalid. The factory default value is 0 (disabled). The factory default setting for the
PIN is "1234".
Enter PIN For Automatic PIN Entry
The following key sequence is used to change the SIM PIN for automatic PIN entry:
Label: CHANGE AUTO PIN
Data: <old_PIN>
*
<new_PIN>
The factory default setting for the PIN is "1234". The new SIM PIN is supplied by
the service provider with a new SIM.
NOTE: This command does not change the PIN encoded on the SIM by the service
provider. It only changes the PIN supplied for automatic PIN entry by the FWT to match
that encoded on the SIM. See the SIM Card Installation and Setup section of this manual
for instructions to change the PINs encoded on the SIM.
SX4D GSM 900 • SX4D GSM 1800
15
USER MANUAL
Step 4. Determine Phonecell SX4D Location
The Phonecell SX4D operates using the existing cellular network and relies upon
the cellular signal for proper operation. It is highly recommended that you place
the unit in a location with a strong cellular signal. The strength and quality of the
cellular signal is one of the most important factors in achieving high-quality
telephone communications.
The Phonecell SX4D will usually be placed on a desk or table, but may be hung
on a wall if that is more convenient for the user. For best results, the unit should
be mounted near a window or on an exterior wall - see Figure 7 and Figure 8.
Figure 7 – Phonecell SX4D placed on a flat surface (desk/table). For best results, the antenna
should be pointed up and the Phonecell SX4D
should be placed near a window (or exterior
walls).
SX4D GSM 900 • SX4D GSM 1800
Figure 8 – Phonecell SX4D mounted on a
wall. For best results, the antenna should be
pointed up and the Phonecell SX4D should
be placed near a window (or exterior walls).
16
USER MANUAL
Step 5. Optional Wall-Mount Installation
Your Phonecell SX4D may be mounted on a wall. Be sure to test call quality in the
selected location before you permanently mount the Phonecell SX4D to the wall.
83 mm (3-1/4 inches)
Pre-Installation Tips:
• Make sure the location is dry, away from
overhead water pipes, and protected
from weather conditions.
• The area should be free of airborne contaminants.
• The Phonecell SX4D power supply
should be located within two meters (six
feet) of an AC power outlet.
Wall-Mount Instructions:
83 mm (3-1/4 inches)
1) The Phonecell SX4D comes equipped
with a handset mounting clip for wallmounting applications. Remove the clip
from the cradle - see Figures 10 and 11.
2) Insert the handset mounting clip with
the tab pointing up - see Figures 10
Battery
Battery
Mounting
and 11.
Access
Access
Hooks
3) To mount the Phonecell SX4D on a
Door
Door Tab
wall, mark two hole locations 83 mm (31/4 inches) apart. Use the tick marks on Figure 9 – Phonecell SX4D mounting hooks and
the edge of this page as a template.
battery access door located on the back of the unit.
These hole locations match the mountInsert
ing hooks on the back of the unit - see
Mounting
Figure 9.
Clip into
4) Using the two hole locations marked
the Cradle
above, drill two holes into the wall.
Remove
(tab up)
5) Install the screws (not supplied), into
Mounting
the wall,leaving a gap (approximately 3
Clip from
mm (1/8 inch)) between screw head
the Cradle
and wall.
(tab down)
6) Mount the Phonecell SX4D onto the
screws - see Figure 12.
Figure 10 – Handset mounting clip assembly for
wall-mount applications.
Mounting
Clip in
Cradle
(tab up)
Figure 12
SX4D GSM 900 • SX4D GSM 1800
Figure 11 – Handset mounting clip assembly.
17
USER MANUAL
Phonecell SX4D Operation
Once your Phonecell SX4D is installed, it is ready for operation.
LCD Display
The Phonecell SX4D’s LCD displays three
rows of information: Legends, Dialed Digits
and Alpha - see Figure 13.
Legends
The top row consists of the following legends
and icons:
• PM - Indicates programming mode. Used
only in the Programming Mode.
• NEW - Indicates a change in stored data.
Used only in the Programming Mode.
• Call Timer - Indicates the time (minutes
and seconds) of a call. Used only in the
Normal Mode.
• Battery - Indicates that the Phonecell
SX4D is operating on the internal batteries.
Used in all modes.
Dialed Digits
The middle row is used to display dialed
digits from the keypad, as well as incoming
CalIer ID information. Numeric digits from 0-9,
the star (*) key, and the hash (#) key are
included.
Alpha
The bottom row is used to display Received
Signal Strength, In-Use Indicator, Roam
Indicator and Cellular Service State Indicator.
Legends
Dialed Digits
Alpha
Figure 13 – Phonecell SX4D LCD Display.
SX4D GSM 900 • SX4D GSM 1800
18
USER MANUAL
Phonecell SX4D Operation - continued
Phonecell SX4D Normal Power Mode
When the Phonecell SX4D is powered on, the unit automatically proceeds through the following steps:
Time Elapsed
LCD Display
16 seconds
"Initializing"
2 seconds
All LCD fields illuminated
2 seconds
Phonecell software version
2 seconds
Radio software version
Normal mode of operation
NOTE: When the AC/Battery switch is changed, the normal
operation screen is displayed for one second, then the normal Power Mode sequence will commence.
NOTE: When exiting the Programming Mode, the normal
operation screen will be displayed.
Phonecell SX4D Normal Mode
The Phonecell SX4D operates in the Normal Mode. The
functions of the Phonecell SX4D are displayed on the LCD.
Legends Row (Top Row)
Battery
The Battery icon appears only when the Phonecell SX4D is
operating on its internal batteries.
Call-Timer
The Call Timer icon appears when the Phonecell SX4D
begins a connected phone call. The call timer begins as all
zeros and increments every subsequent second. The timer
will roll over back to 0:00 after 29:59. When the handset is
placed on-hook (ends call), the call timer stops and displays
the accumulated call time for thirty seconds. The Call Timer
icon is then turned off.
If the handset goes off-hook and a digit is pressed within the
thirty second period, the call time display will immediately
turn blank.
SX4D GSM 900 • SX4D GSM 1800
19
USER MANUAL
Phonecell SX4D Operation - continued
Phonecell SX4D Normal Mode
- continued
Dialed Digits
Dialed Digits (Middle Row)
Outgoing Calls
When you make an outgoing call (the
handset is off-hook), the numeric digits
entered are displayed on the LCD Display
- see Figure 14.
• The star (*) key displays "–."
≡."
• The hash (#) key displays "≡
NOTE: When the handset is on-hook and Figure 14 – Phonecell SX4D LCD Display
keys are pressed, numeric digits are displayed only when the Phonecell SX4D is
in the programming mode.
Dialed digits move from right to left as
they are entered. The dialed digit row is
completely cleared when the handset
goes on-hook in the Normal Mode.
Incoming Calls
When the Phonecell SX4D receives an
incoming call, the Dialed Digits row displays the incoming call number (Caller ID)
when the on-hook call Alert sounds. The
incoming call number display is turned off
when the call is answered (handset is offhook). Caller ID will also be shown for offhook call alerts.
NOTE: The incoming call number (Caller
ID) feature requires that Caller ID is provided by the cellular network. If the service is not provided, or the caller ID is
blocked or unknown, the display remains
blank on incoming calls.
Alpha (Bottom Row)
The Alpha Row displays the following
status information:
• Received Signal Strength
• Roam Indicator
• In-Use Indicator
• Cellular Service Indicator
Received Signal Strength
The Received Signal Strength is displayed
by the first 11 characters (from left to right) in
the Alpha Row - see Figure 15. Received
signal strength can be displayed by either a
signal strength bar graph or a direct readout
of the signal strength in dBm.
SX4D GSM 900 • SX4D GSM 1800
20
USER MANUAL
Phonecell SX4D Operation - continued
Phonecell SX4D Normal Mode
- continued
Direct Readout Mode displays the signal
strength as "-XXXDBM", where XXX refers
to the signal strength. The factory setting is
the Direct Readout Mode. This setting is field
programmable - see the Phonecell SX4D
Programming section of this manual.
Signal Strength Bar Graph displays the
signal strength as a series of solid block
characters. The stronger the signal, the more
characters are illuminated from left to right.
NOTE: The 12th character (from left to right)
is used as a separator only and does not provide information - see Figure 15. A "||" character is displayed and is always illuminated.
In-Use Indicator
The In-Use Indicator displays a “U” in the
14th character position when the Phonecell
SX4D is in use (i.e. call data is sent to the
cellular base station). The 14th character
remains blank when the Phonecell SX4D is
not in use.
Cellular Service Indicator
The Cellular Service Indicator displays the
cellular status in the 15th character position
with the following:
• N = No service
• L = Limited (non-registered) service
• S = Service
• R = Roaming
In-Use
Indicator
Cellular Service
Indicator
Received
Signal Strength
Alpha
Row
Figure 15 – Phonecell SX4D LCD - Alpha Row.
SX4D GSM 900 • SX4D GSM 1800
21
USER MANUAL
Phonecell Operation - continued
Phonecell SX4D Controls
Front Panel
All controls for the Phonecell SX4D are located on the
front panel - see Figure 16. Pressing any of the front
panel controls will cause the unit to beep for approximately 100 milliseconds when the key is depressed.
Keypad
The keypad includes all digits 0 through 9 and special
characters hash (#) and star (*). All data entry and programming activities are performed using the keypad.
Flash
The flash key is used to produce a hookflash.
See the Hookflash Function section of this manual.
Redial
The redial key redials the last dialed phone
number.
Up/Down Keys
When off-hook, the Up/Down keys control the
volume of the earpiece in the handset. The available range is ±12 dB of the nominal earpiece
output level. Each adjustment increment is 6 dB. The
volume setting persists until changed by the user, or
the volume setting is returned to nominal by resetting
the Phonecell (power Off/On).
Figure 16 – Phonecell SX4D
front panel.
Voicemail Retrieval
The Voicemail Retrieval key causes the
Phonecell SX4D to dial a programmable DTMF
digit string, allowing the user to retrieve voicemail messages. To program the voicemail retrieval number, see
the Programming Commands section of this manual.
NOTE: The Voicemail Retrieval feature is dependent
upon network availability.
AC/Battery
Switch
Back Panel
AC/Battery Switch
The AC/Battery switch allows the user to switch
between external power (wall cube) and internal
(emergency) battery - see Figure 17.
Figure 17 – Phonecell SX4D
back panel.
NOTE: When the setting of the AC/Battery switch is
changed, the Phonecell SX4D resets itself prior to
resuming normal operation - see the Phonecell SX4D
Power Mode section of this manual.
IMPORTANT!
The AC/Battery switch should be left in the AC position unless the user needs
to make a call using the emergency batteries (the batteries provide a useful
call time of about 10 minutes before replacement is required).
SX4D GSM 900 • SX4D GSM 1800
22
USER MANUAL
Phonecell Operation - continued
How to Place a Call
1) Pick up your Phonecell SX4D handset (your phone is now “off-hook”).
2) Listen for dial tone (If service is not available, a No-Service tone is produced
and the letter “N” is displayed on the LCD in the Alpha (bottom) row. Hang-up
the Phonecell SX4D and try again. If the No-Service tone continues and the
“N” continues to be displayed, contact your service provider to make sure cellular service is activated.).
3) Dial the phone number.
How to Receive a Call
• When your Phonecell SX4D rings, pick up the handset and begin talking.
How to End a Call
• Hang-up the phone (place the handset back onto the Phonecell SX4D cradle).
The Hookflash Function
When you initiate the Hookflash function, it automatically lets you:
• Speed up the connection after you dial a phone number.
• Answer an incoming call that occurs when you’re dialing a phone number.
• Use special (supplementary) cellular services which may be available in your
cellular service area.
How to Use the Hookflash Function
There are two ways to initiate the Hookflash function:
• Press the “FLASH” key on your Phonecell SX4D.
• Press the hang-up or switch-hook mechanism on your Phonecell SX4D once
quickly (approximately 1/2-second).
Important Tones and Alerts
No-Service Tone – When cellular service is not available, the receiver emits a
No-Service (fast-beeping) tone instead of the normal (steady) dial tone.
ROH (Receiver Off-Hook) Tone – If the Phonecell SX4D handset remains offhook (off its cradle) with no dialing activity for 30 seconds, the receiver emits an
ROH tone for 45 seconds.
Incoming Call Alert – If you’re dialing a number and an incoming call occurs,
the receiver will emit an audible ring. To answer the incoming call:
• Press the “FLASH” button once. This will connect the incoming call.
• OR hang-up immediately. This will cause the phone to start ringing.
Roam Dial Tone – When cellular service is available, but the Phonecell SX4D
is in a Roam area, the receiver may emit a different dial tone to indicate the
roaming condition. However, unless the Phonecell SX4D is re-programmed in
the field, the factory default tone is set the same as normal service dial tone.
SX4D GSM 900 • SX4D GSM 1800
23
USER MANUAL
Phonecell Operation - continued
Variable Dial Time (Auto SEND Delay) Option
When you place a call, your Phonecell SX4D automatically sends the phone
number over the cellular network after you dial the last digit. However, to make
sure you have enough time to dial the last digit, a 3-second Auto SEND Delay is
programmed into the unit at the factory. To change the Auto SEND Delay setting,
see the User Programming Commands section of this manual.
Zero Dial Delay for Frequently Called Numbers
A new patented feature enables the Phonecell SX4D to recognize your frequently
called phone numbers and send them immediately – without the 3-second Auto
SEND Delay. The Phonecell SX4D stores a list of up to 50 different numbers in its
memory. This list contains the last 50 numbers that have been called at least
twice successfully.
NOTE: Cycling (turning OFF/ON) the power will erase the current list. A new list
will be started when power is re-applied. To enable or disable this feature, see
the User Programming Commands section of this manual.
Mobile Equipment Personalization (MEP)
The terminal will support all five lock type features of GSM 02.22. Personalization
features check information stored in the terminal which limits the SIMs with which the
terminal will operate. Factory default is all lock types set to be deactivated. Please
contact Telular Corporation if you need more information on this feature.
Three-Digit Dialing
In many countries, three-digit dialing is needed to access emergency services, information services, and voicemail. The Phonecell SX4D accepts three-digit dialing.
Using Standard Supplementary Services
Your Phonecell SX4D is compatible with a variety of special services, including:
• Call Forwarding
• Call Barring
• Call Waiting
• Three-Way Calling
• Caller ID
• Voice Mail
and more...
Depending upon your cellular provider, these services may be available on a
subscription basis. However, certain dialing sequences must be entered. Please
consult your service provider for the dialing instructions for your system.
Standard supplementary services are defined as those supplementary services
handled while not in a call. Depending on the supplementary service, several
commands may be available. The command list is defined below:
SX4D GSM 900 • SX4D GSM 1800
24
USER MANUAL
Phonecell Operation - continued
Registration - The programming by the user of information to enable subsequent
operation of a service. This action involves input of specific supplementary information. For example, when call-forwarding registration is initiated by the user, a
forwarding number must be supplied.
Erasure - The deletion of information stored against a particular service by a previous registration.
Activation - An action taken by the Desktop Phone user to enable a previously
registered process to run.
Deactivation - An action taken by the Desktop phone user to terminate the
process started at activation.
Depending on the supplementary service, additional parameters may be required
to successfully complete an operation, such as phone number or password.
Some supplementary services have optional parameters, such as Teleservice
and/or Delay settings. Delay is the amount of time to wait before completing performance of a service that has a condition controlling its activity; for example, call
forward on no answer waits an amount of time equal to the "delay" for the phone
to be answered before declaring no answer and forwarding the call.
Teleservice: 10 = All Teleservices, 11 = Speech, 12 = Data, 13 = Fax, 16 = SMS,
19 = All Teleservices except SMS.
Delay:
5-30 seconds
PhoneNo:
Up to 20 digits (0-9)
NOTE: <send> is provided by the hookflash function -see the Hookflash
Function section of this manual (pg 24).
Call Forwarding Unconditional:
Allows a called subscriber to have the network send immediately all incoming calls,
or just those associated with a specific teleservice, addressed to the called subscriber's directory number to another directory number.
Register:
**
21
*
Ph No
*
Teleservice # <Send>
or
No
# <Send>
*# #2121* PhTeleservice
* Teleservice
Erase:
# <Send>
*Teleservice # <Send>
Activate:
* 21 * Teleservice
Deactivate: # 21
# <Send>
*
Call Forwarding on Mobile Subscriber Busy:
Allows a called subscriber to have the network send immediately all incoming calls,
or just those associated with a specific basic service group, addressed to the called
subscriber's directory number and which meet "subscriber busy" to another directory number.
Register:
Erase:
Activate:
Deactivate:
* * 67 * Ph Noor* Teleservice # <Send>
No
# <Send>
*# #6767* PhTeleservice
* Teleservice
# <Send>
*Teleservice # <Send>
67
*# 67
* Teleservice
# <Send>
*
SX4D GSM 900 • SX4D GSM 1800
25
USER MANUAL
Phonecell Operation - continued
Call Forwarding on No Reply:
Allows a called subscriber to have the network send all incoming calls, or just those associated with a specific basic service group, addressed to the called subscriber's directory number
and which meet "no reply" for a specific amount of time to another directory number.
Register:
61
No
*# #* 61
* Ph
* Teleservice * Delay # <Send>
Erase:
Teleservice # <Send>
*
Activate:
Teleservice # <Send>
* 61 * Teleservice
Deactivate: # 61
# <Send>
*
Call Forwarding on Mobile Subscriber Not Reachable:
Allows a called subscriber to have the network send all incoming calls, or just those
associated with a specific Teleservice group, addressed to the called mobile subscriber's directory number, but which is determined to be "not reachable", to another
directory number.
Register:
Ph No
# <Send>
* * 62 * Teleservice
* Teleservice
Erase:
# # 62
# <Send>
*Teleservice # <Send>
Activate:
62
*
*
Deactivate: # 62
Teleservice # <Send>
*
Call Forwarding All Call Forwarding:
Allows a called subscriber to have the network send-after the stated delay-all incoming
calls, or just those associated with a specific teleservice, addressed to the called subscriber's directory number to another directory number.
Register:
* * 002 * Ph No * Teleservice * Delay #
<Send>
Erase:
# # 002
Teleservice # <Send>
*Teleservice
Activate:
002
# <Send>
*
*
Deactivate: # 002
Teleservice # <Send>
*
Call Forwarding Conditional Call Forwarding:
Register:
* * 004 * Ph No * Teleservice * Delay #
<Send>
Erase:
# # 004
Teleservice # <Send>
*Teleservice
Activate:
004
# <Send>
*
*
Deactivate: # 004
Teleservice # <Send>
*
Calling Line Identification Restriction:
If subscribed to in temporary mode, enable the calling party to countermand the
subscribed-to presentation of its line identity to the called party for a specific
call (i.e., the next call) only. (If subscribed to in permanent mode, the network
will prevent presentation of the calling party’s line identity to the calling party for
every outgoing call.)
If subscribed to in temporary mode with default value “presentation restricted,”
the user may suppress CLIR, for the specific call only:
Register:
*
31 # Call Phone Number <Send>
If subscribed to in temporary mode with default value “presentation not
restricted,” the user may invoke CLIR, for the specific call only:
Register:
# 31 # Call Phone Number <Send>
SX4D GSM 900 • SX4D GSM 1800
26
USER MANUAL
Phonecell Operation - continued
Barring of All Outgoing Calls:
Allows a subscriber to have barring of certain categories of outgoing calls
according to a barring program which is selected from a set of one or more
barring programs chosen at provision time and is valid for all outgoing calls,
or just those associated with a specific Teleservice.
Activate:
* 33
Deactivate: # 33
*
*
Password
Password
*
*
TeleService # <Send>
TeleService # <Send>
Barring of Outgoing International Calls:
Outgoing call setup possibilities exist only to subscribers of the PLMN(s) and the
fixed network(s) of the country where the mobile subscriber is presently located.
Activate:
* 331
Deactivate: # 331
* Password * TeleService # <Send>
* Password * TeleService # <Send>
Barring of Outgoing International Calls Except Those Directed to the Home
PLMN Country:
Outgoing call setup possibilities exist only to subscribers of the PLMN(s) and the
fixed network(s) of the country where the subscriber is presently located or to
subscribers of the home PLMN country of the served subscriber and to subscribers of the fixed network(s) in the home PLMN country.
Activate:
* 332
Deactivate: # 332
*
*
Password
Password
*
*
TeleService # <Send>
TeleService # <Send>
Barring of All Incoming Calls:
Allows a subscriber to have barring of certain categories of incoming calls
according to a barring program which is selected from a set of one or more
barring programs chosen at provision time and is valid for all incoming calls,
or just those associated with a specific basic service group.
Activate:
* 35
Deactivate: # 35
*
*
Password
Password
*
*
TeleService # <Send>
TeleService # <Send>
Barring of Incoming Calls when Roaming Outside the Home PLMN Country:
Calls which are terminated for the served subscriber is barred if the subscriber is
roaming outside the home PLMN country.
Activate:
* 351
Deactivate: # 351
*
*
Password
Password
*
*
TeleService # <Send>
TeleService # <Send>
All Call Barring:
On activation all calls is barred; on deactivation all call barring is disabled.
Activate:
* 330
Deactivate: # 330
*
*
Password
Password
*
*
TeleService # <Send>
TeleService # <Send>
All Outgoing Call Barring:
On activation all outgoing calls is barred; on deactivation all outgoing call barring
is disabled.
Activate:
* 333
Deactivate: # 333
SX4D GSM 900 · SX4D GSM 1800
*
*
Password
Password
27
*
*
TeleService # <Send>
TeleService # <Send>
USER MANUAL
Phonecell Operation - continued
All Incoming Call Barring:
On activation all incoming calls are barred; on deactivation all call
barring is disabled.
Activate:
* 353
Deactivate: # 353
*
*
Password
Password
*
*
TeleService # <Send>
TeleService # <Send>
Unstructured Supplementary Services:
Allows a user and a PLMN operator-defined application to communicate in a way
that is transparent to the terminal and to intermediate network entities.
“any characters defined in GSM 03.08 Default Alphabet” # <Send>
or
“1 or 2 characters defined in GSM 03.08 Default Alphabet” # <Send>
SX4D GSM 900 • SX4D GSM 1800
28
USER MANUAL
Phonecell SX4D Troubleshooting
Cellular Telephone Service is Not Working
If the cellular telephone service is not working, contact your cellular provider.
Unable to Receive Incoming Calls
Verify that the Phonecell SX4D is “on-hook” (hung up).
Moisture or Ventilation Problems
Visually inspect your Phonecell SX4D’s enclosure. Moisture can damage the
equipment. Ventilation is also very important. If there are moisture or ventilation
problems, move your Phonecell SX4D to correct as necessary, see the
Temperature Environment section of this manual.
No Power
To properly operate, the Phonecell SX4D must either be connected to AC power
or have the required batteries loaded in the battery compartment. Upon loss of
power to the Phonecell SX4D, verify proper connection to AC. If AC power is
unavailable, verify that the batteries are in good condition and that the battery
switch is in the battery power active position.
Battery Backup Failure
The Phonecell SX4D can accommodate 6 standard AAA alkaline batteries for
operation when AC power is not available. A switch is used to select either AC or
internal battery operation. When the internal battery operation is selected, the
Phonecell SX4D will operate for approximately 10 minutes of talk time with fresh
batteries. Replace the batteries if necessary.
NOTE: The Phonecell SX4D does not support rechargeable batteries
WARNING!
!
Only Authorized Service Personnel should remove the cover of your
Phonecell SX4D. For further assistance, contact your Authorized Telular
Representative. Please have the model and serial number ready (model and
serial numbers are located on the label on the bottom of the unit).
SX4D GSM 900 • SX4D GSM 1800
29
USER MANUAL
Phonecell SX4D Programming
Phonecell SX4D Programming Mode Overview
The Phonecell SX4D has several programmable options for unique customer or
network applications. These options are stored in the Phonecell SX4D’s nonvolatile memory and are retained during power cycling.
Programming Mode
The Phonecell SX4D’s non-volatile memory can be accessed in the Programming
Mode. The handset must be “on-hook” before entering the programming mode.
Normal Mode operation is suspended during programming and is available when
the programming mode is exited.
Enter Programming Mode
To enter the user programming mode, simultaneously press the “Flash” and star
(*) keys. The PM (Programming Mode) icon will illuminate on the LCD.
Programming Mode Overview:
1. Stored data appears on the Dialed Digits (middle) row of the LCD.
2. A descriptive label appears on the Alpha (bottom) row of the LCD. The label
order is identical in both the user and technician command modes.
3. The Up/Down keys are used to scroll through the menu items.
4. Pressing any numeric key(or, if allowed, the or # key) when a label is displayed causes:
*
• The Dialed Digits row to turn off
• The NEW icon to illuminate
• The pressed key to appear at the rightmost Dialed Digits row position.
5. Pressing the Redial key after a numeric entry will attempt to store the data.
6. A correct entry will cause the NEW icon to disappear and the new stored data
to be displayed on the Dialed Digits row.
7. An incorrect entry causes the Dialed Digits row to flash. When a numeric key
is then pressed, it causes:
• The Dialed Digits row to turn off
• The NEW icon to remain illuminated
• The pressed key to appear at the rightmost Dialed Digits row position.
8. When entering data, the NEW icon is illuminated. Pressing the Flash key at
any time will cancel the operation and redisplay the stored data on the Dialed
Digits row. The NEW icon will then turn off.
During programming, the unit automatically proceeds through the following steps:
Time Elapsed
LCD Display
1 second
Blank
1 second
Programming
1 second
Blank
Normal mode of operation
SX4D GSM 900 • SX4D GSM 1800
30
USER MANUAL
Phonecell SX4D Programming - continued
Exit Programming Mode
The programming mode can be exited by any one of the following:
1. Go “off-hook” (pick up handset)
2. Failure to enter the correct password three times (technician mode only)
3. Failure to enter any digit within two minutes.
The PM (Programming Mode) icon is then turned off, returning the Phonecell
SX4D to the Normal Mode.
Phonecell SX4D User-Programming Commands
The following commands are displayed when in the user programming mode. An
<entered value> is comprised of the digits 0 through 9.
How to Enter Call Alert Volume
The following key sequence is used to enter the volume of the call alert:
Label: CALL ALERT VOL
Data: <volume>
The volume value is set to 0 for off; 1 for low; and 2 for high. If the
volume value is greater than 2, it is considered invalid. The factory
default is 2.
Enter Auto Send Delay
The following key sequence is used to enter the auto send delay:
Label: AUTO SEND DELAY
Data: <delay>
If the delay is not in the range of 2 to 20 seconds, it is considered
invalid. The factory default is 3.
Enter RSSI Display Type Option
The following key sequence is used to select the RSSI display option:
Label: RSSI DISPLAY
Data: <type>
The type value is set to 0 for direct readout in dBm or 1 for bar graph.
If the RSSI display type value is greater than 1, it is considered invalid.
The factory default is 0.
Enter LCD Display Contrast
The following key sequence is used to enter the LCD Display Contrast:
Label: LCD CONTRAST
Data: <contrast>
If the LCD contrast is not in the range of 0 (darkest contrast) to 19
(lightest contrast), it is considered invalid. The factory default is 10.
Enter Zero-Delay Dial
The following key sequence is used to enter the Zero Delay Dial option:
Label: ZERO-DELAY DIAL
Data: <zero-delay dial>
The zero delay dial value is set to 0 for Disable and 1 for Enable. The
factory default is 1 (Enable).
SX4D GSM 900 • SX4D GSM 1800
31
USER MANUAL
Phonecell SX4D Programming - continued
IMPORTANT!
!
The following commands may be used by a trained service technician to change
the configuration of the Phonecell SX4D. WARNING: these commands are
intended for use by trained service technicians only. Untrained users could
damage the Phonecell SX4D, violate local regulations and breach the service
agreement with the cellular provider. For further assistance, please contact your
Authorized Telular Representative.
Phonecell SX4D Technician Commands
The following commands are to used by trained field technicians to set up the
Phonecell SX4D for operation in the network. Since these commands can directly
affect the proper operation of the unit, there is an additional level of security to
prevent casual access.
While in the User Programming mode, the technician presses the flash and redial
keys simultaneously. A "PASSWORD" label will be displayed on the alpha row.
The technician enters the password. As the password digits are entered from the
keypad, only the center segment of the dialed digits row will illuminate. Note that
as an exception to entry rule #4, the NEW icon will not illuminate, since the password data is not being changed. When the technician presses the Redial key, the
password is processed. If the password is correct, the "DTRCT" label is displayed
on the alpha row. If not, the incorrect entry rule #7 will be followed, except that the
NEW icon will not be illuminated. If the user fails to enter the correct password
after three tries, the programming mode is exited without flashing the dialed digit
row.
The following commands are displayed when the technician enters the programming mode. In the following sections, an <entered value> is comprised of the digits 0 through 9.
Enter Dial Tone After Remote Call Terminate Option
The following key sequence is used to enter the dial tone after remote
call terminate option:
Label: DTRCT
Data: <dial tone option>
The dial tone value is set to 0 for no tone after a remote on-hook; 1 to
enable dial tone after remote on hook. If the value is neither 0 nor 1, it is
considered invalid. The factory default is 1.
Enter Post Receiver Off-Hook Option
The following key sequence is used to enter the post receiver off-hook
option:
Label: POST ROH
Data: <post ROH option>
The post ROH value is set to 0 for continuous ROH tone; 1 to disable
ROH tone and periodically check for an on-hook condition. If the post
ROH value is neither 0 nor 1, it is considered invalid. The factory default
is 1.
SX4D GSM 900 • SX4D GSM 1800
32
USER MANUAL
Phonecell SX4D Programming - continued
Enter Periodic Self Test Time Option
The following key sequence is used to program periodic self test time
interval:
Label: SELF TEST TIME
Data: <self-test interval>
The self-test interval is programmed in 1-minute increments from 1 to
65,535. A value of 0 disables periodic self test. If the value is not between 0
and 65,535, inclusive, it will be considered invalid. The factory default is
180.
Enter Dial Tone Type Selection Option
The following key sequence is used to select the dial tone type option:
Label: DIAL TONE TYPE
Data: <dial tone frequency>
The dial tone frequency selection option value is set to 0 to select the North
American dial tone frequency pair (350 + 440 Hz); set to 1 to select
European dial tone frequency (425 Hz). If the dial tone frequency selection
option value is neither 0 nor 1, it is considered invalid and the Phonecell will
not update or store this value; the currently stored value will remain. The
factory default is 1.
Enter In-Call DTMF Signaling Option
The following key sequence is used to select if in-call DTMF signaling
is enabled:
Label: IN CALL DTMF
Data: <in-call DTMF signaling enabled>
The in-call DTMF signaling value is set to 0 for disabled or 1 for
enabled. If the in-call DTMF signaling value is neither 0 nor 1, it is considered invalid. The factory default is 1.
Enter Mobile Equipment Personalization for SIM
The following key sequence is used to enter the MEP option:
Label: MEP: SIM
Data: <MEP Operation>
*
<MEP Password>
MEP operation value is set to 0 to deactivate personalization; 1 to activate
personalization; 2 to disable personalization; 3 is reserved for future use. If
the MEP operation value is not in the range 0 to 3, it is considered invalid.
The MEP password is a special value available only to authorized personnel.
The factory default is set to 0 deactivated.
Enter Mobile Equipment Personalization for Network
The following key sequence is used to enter the MEP option:
Label: MEP: NETWORK
Data: <MEP Operation>
*
<MEP Password>
MEP operation value is set to 0 to deactivate personalization; 1 to activate
personalization; 2 to disable personalization; 3 is reserved for future use. If
the MEP operation value is not in the range 0 to 3, it is considered invalid.
The MEP password is a special value available only to authorized personnel.
The factory default is set to 0 deactivated.
SX4D GSM 900 • SX4D GSM 1800
33
USER MANUAL
Phonecell SX4D Programming - continued
Enter Mobile Equipment Personalization for Network Subset
The following key sequence is used to enter the MEP option:
Label: MEP: NETWRK SUB
<MEP Password>
Data: <MEP Operation>
*
MEP operation value is set to 0 to deactivate personalization; 1 to activate
personalization; 2 to disable personalization; 3 is reserved for future use. If
the MEP operation value is not in the range 0 to 3, it is considered invalid.
The MEP password is a special value available only to authorized personnel.
The factory default is set to 0 deactivated.
Enter Mobile Equipment Personalization for Corporate
The following key sequence is used to enter the MEP option:
Label: MEP: CORPORATE
Data: <MEP Operation>
* <MEP Password>
MEP operation value is set to 0 to deactivate personalization; 1 to activate
personalization; 2 to disable personalization; 3 is reserved for future
use. If the MEP operation value is not in the range 0 to 3, it is considered invalid. The MEP password is a special value available only to
authorized personnel. The factory default is set to 0 deactivated.
Enter Mobile Equipment Personalization for Service Provider
The following key sequence is used to enter the MEP option:
Label: MEP: SERV PROVD
Data: <MEP Operation>
* <MEP Password>
MEP operation value is set to 0 to deactivate personalization; 1 to activate
personalization; 2 to disable personalization; 3 is reserved for future
use. If the MEP operation value is not in the range 0 to 3, it is considered invalid. The MEP password is a special value available only to
authorized personnel. The factory default is set to 0 deactivated.
Enter Voicemail Retrieval Digit String
The following key sequence is used to enter the Voicemail Retrieval
Digit String:
Label: VOICE MAIL NUM
Data: < voicemail retrieval digit string >
This command will accept the digits 0 through 9. If the Voicemail
Retrieval Digit String is less than 3 characters or more than 10
characters, it is considered invalid and the Phonecell SX4D will not
update or store this value; the currently stored value will remain. The
factory default is unprogrammed.
SX4D GSM 900 • SX4D GSM 1800
34
USER MANUAL
©2001 TELULAR CORPORATION
Part No. 56020401