1
Telex
Operating Instructions
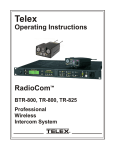
BTR-300
RadioComä
Portable Transmit On
Ext Intercom
Aux Audio
Power
1
2
4
3
Headset Controls
Portable Station Connect
Volume
Headset
RadioComä
TR-300
PROFESSIONAL
WIRELESS
INTERCOM SYSTEM
TR-300, BTR-300
R
Talk
Gain
Push Twice to Latch
O/M
TABLE OF CONTENTS
INTRODUCTION . . . . . . . . . . . . . . . . . . . . . . . . . . . . . . . . . . . . . . . . . . . . . . . . . . . . . . . . . . . 1
GENERAL DESCRIPTION . . . . . . . . . . . . . . . . . . . . . . . . . . . . . . . . . . . . . . . . . . . . . . . . . . 1
BTR-300 BASE STATION TRANSCEIVER . . . . . . . . . . . . . . . . . . . . . . . . . . . . . . . . . . . . . 3
SPECIFICATIONS . . . . . . . . . . . . . . . . . . . . . . . . . . . . . . . . . . . . . . . . . . . . . . . . . . . . . 3
FEATURES . . . . . . . . . . . . . . . . . . . . . . . . . . . . . . . . . . . . . . . . . . . . . . . . . . . . . . . . . . . 4
CONTROLS AND CONNECTIONS. . . . . . . . . . . . . . . . . . . . . . . . . . . . . . . . . . . . . . . . . . . 5
TR-300 BELT-PACK TRANSCEIVER . . . . . . . . . . . . . . . . . . . . . . . . . . . . . . . . . . . . . . . . . 9
SPECIFICATIONS . . . . . . . . . . . . . . . . . . . . . . . . . . . . . . . . . . . . . . . . . . . . . . . . . . . . . 9
FEATURES . . . . . . . . . . . . . . . . . . . . . . . . . . . . . . . . . . . . . . . . . . . . . . . . . . . . . . . . . . 10
CONTROLS AND CONNECTIONS. . . . . . . . . . . . . . . . . . . . . . . . . . . . . . . . . . . . . . . . . . 10
EQUIPMENT SET-UP . . . . . . . . . . . . . . . . . . . . . . . . . . . . . . . . . . . . . . . . . . . . . . . . . . . . . . 13
BTR-300 SET-UP . . . . . . . . . . . . . . . . . . . . . . . . . . . . . . . . . . . . . . . . . . . . . . . . . . . . . . . . . 13
ANTENNA INFORMATION . . . . . . . . . . . . . . . . . . . . . . . . . . . . . . . . . . . . . . . . . . . . . . . 16
TR-300 SET-UP . . . . . . . . . . . . . . . . . . . . . . . . . . . . . . . . . . . . . . . . . . . . . . . . . . . . . . . . . . . . 23
PRE-WALK-THRU CHECKLIST . . . . . . . . . . . . . . . . . . . . . . . . . . . . . . . . . . . . . . . . . . . . 24
SYSTEM OPERATION . . . . . . . . . . . . . . . . . . . . . . . . . . . . . . . . . . . . . . . . . . . . . . . . . . . . . 25
BTR-300 OPERATION . . . . . . . . . . . . . . . . . . . . . . . . . . . . . . . . . . . . . . . . . . . . . . . . . . . . 25
TR-300 OPERATION. . . . . . . . . . . . . . . . . . . . . . . . . . . . . . . . . . . . . . . . . . . . . . . . . . . . . . 26
ENABLING AUDIO . . . . . . . . . . . . . . . . . . . . . . . . . . . . . . . . . . . . . . . . . . . . . . . . . . . . . . 27
SETTING SYSTEM GAIN LEVELS . . . . . . . . . . . . . . . . . . . . . . . . . . . . . . . . . . . . . . . . . 28
SYSTEM WALK-THRU . . . . . . . . . . . . . . . . . . . . . . . . . . . . . . . . . . . . . . . . . . . . . . . . . . . . 29
TROUBLESHOOTING . . . . . . . . . . . . . . . . . . . . . . . . . . . . . . . . . . . . . . . . . . . . . . . . . . . . . 30
BATTERY INFORMATION . . . . . . . . . . . . . . . . . . . . . . . . . . . . . . . . . . . . . . . . . . . . . . . . . 31
ACCESSORIES . . . . . . . . . . . . . . . . . . . . . . . . . . . . . . . . . . . . . . . . . . . . . . . . . . . . . . . . . . . . 33
CUSTOMER SERVICE INFORMATION. . . . . . . . . . . . . . . . . . . . . . . . . . . . . . . . . . . . . . 34
FCC INFORMATION. . . . . . . . . . . . . . . . . . . . . . . . . . . . . . . . . . . . . . . . . . . . . . . . . . . . . . . 35
-i-
INTRODUCTION
GENERAL DESCRIPTION
This manual covers the BTR-300 Base Station
and the TR-300 Portable Transceiver.
At the BTR-300 operator’s command, the
remotes may communicate with each other,
with a wired intercom system or with an auxiliary system. The BTR-300 Base Station with
its one transmit and four receive channels is
designed to operate in full duplex (simultaneous two-way communications) with up to
four TR-300 Belt Pack transceivers. See block
diagram in Figure 1.
The RadioCom Models BTR-300 and TR-300
were specifically designed to provide the user
with a highly flexible wireless two-way communication system with the capability to interface with a wired intercom system and other
auxiliary audio.
WIRED
INTERCOM
ANT
HEADSET
TR- 300
MICROPHONE
TRANSMITTER
BTR- 300
RF
F CARRIER
SIGNAL
ANT
EARPHONE
RECEIVER
ANT
ANT
R F CARRIER
SIGNAL
FM
RECEIVER
REC
1
REC REC
2
3
REC
4
TRANSMITTER
AUXILIARY
INPUT
Figure 1
Block Diagram of System
-1-
HEADSET
AUXILIARY
OUTPUT
EARPHONE
MICROPHONE
The system operates on selected frequencies
within the 150-216 MHz band.
The TR-300 Transceiver operates in the continuous transmit mode with the audio activated by a switch. As many as four TR-300
belt-pack transceivers can operate in a fully
duplex network with one RadioCom Model
BTR-300 Base Station.
The BTR-300 system is fully compatible with
a number of other wired intercom manufacturers units. See the BTR-300 Setup Section for
additional information.
-2-
BTR-300 BASE STATION TRANSCEIVER
TECHNICAL INFORMATION
SPECIFICATIONS BTR-300
Input Power (minimum) ....................................................................................12V AC/DC at 360 mA
Intercom Output ........330 mV (Low) or 1 V (Hi) RMS into 300 ohm load typical (at rated deviation)
Intercom Input (Gain Minimum) .........................................300 mV RMS typical (for rated deviation)
Auxiliary Output.............................................2 V RMS into 600 ohm load typical (at rated deviation)
Auxiliary Input (Gain Maximum) .........................................60 mV RMS typical (for rated deviation)
Local Headset Input.......................................................................................2 mV RMS input nominal
1.5 mV RMS input at compression (Dynamic)
Local Headset Output .............................................................32 mV maximum output into 600 ohmst
Speaker/Local Monitor Output (into 8 Ohms) ............................................2 Watts (at rated deviation)
Temperature Range ................................................................................-4°F to 130°F (-20°C to 55°C)
Dimensions.............................................................................................15.75” W x 1.75” H x 10.5” D
(40 cm x 4.5 cm x 26 cm)
Weight................................................................................................................................4.5 lbs (2 kg)
Transmit
RF Frequency Range ........................................................................................................150-216 MHz
RF Frequency Stability................................................................................Crystal Controlled, 0.005%
RF Power Output............................................................................................................50 mW Typical
Modulation ...........................................................................................................FM, 3 KHz deviation.
115 micro-seconds Pre-emphasis
Transmit Antenna....................................................................................................5/8-wave (supplied)
SO239 connector on chassis
Modulation Limiter ................................................................................................Internal Compressor
Modulation Frequency Range ............................................................................300 to 5000 Hz ±2 dB
Radiated Harmonics and Spurious Emissions ..........................................................................-45 dBC,
Exceeds FCC Specifications
FCC ............................................................................................Type Accepted Under Parts 90 and 74
-3-
SPECIFICATIONS BTR-300 (Cont.)
Receive
RF Frequency Range .......................................................................................................150-216 MHz
RF Frequency Stability................................................................................Crystal Controlled, 0.005%
Type ...........................................................................................Dual conversion superheterodyne, FM
RF Sensitivity ................................................................................Less than 0.6 µV for 12 dB SINAD
IF Selectivity ........................................................................3 dB at 30 kHz (4 pole Monolythic Filter)
Image Rejection ..............................................................................................................65 dB or better
Squelch Quieting ...........................................................................................................................90 dB
Squelch Threshold........................................................................................................1.0 µV (Internal)
Signal-to-Noise Ratio ....................................................................................................................90 dB
Receive Antenna .....................................................................................................5/8-wave (supplied)
SO239 connector on chassis
Distortion.................................................................................................Less than 1% at Rated Output
FEATURES
The RadioCom Model BTR-300 is a Base
Station with one transmitter and four receivers. It is designed for portable two way
communication with the capability for interface to other audio systems. Features include:
· Intercom connections with the ability to interface with most wired intercom systems.
· An extremely flexible unit that has the capability to communicate at one time with up to
four portable stations and wired stations (intercom and/or other audio source).
· All metal case for superior shielding.
· RF light indicator for each portable station.
· Table or rack mountable.
· Powered by an external AC supply via the
power jack on the rear of the unit. It can
also be powered by any 12V AC/DC 700
mA source.
-4-
CONTROLS and CONNECTIONS
FRONT PANEL (Refer to Figure 3)
Mic On-Push-to-Talk/Lock-to-Talk Switch:
Enables the local headset microphone audio
function.
Power ON/OFF Switch: Push this switch
once to turn power ON; push it again to turn
the power OFF.
NOTE: DOES NOT control base station RF
transmit.
Power ON Indicator: The Power ON light is
illuminated when the Power ON/OFF Switch
is pushed in the ON Position.
Local Push-to-Talk Indicator: Will be illuminated whenever the talk function is on.
Local Headset Connector: Four pin XLR
Connector for Input/Output (plug for Telex
units and jack for RTS units). The headset
jack will accept many Telex model headsets.
Compatible with other intercom headsets with
four pin XLR connectors that are wired as
shown in Figure 2.
MICROPHONE
GROUND (1)
BALANCED
AUDIO OUT
(3 AND 4)
4
1
2
Local Microphone Gain Control and
Overmodulation Indicator: A screwdriver
adjustable control is provided to control the
input level of the local headset mic. This input
is protected from overloads by means of a
gain compressor whose operation is signaled
by the gain light indicator.
3
MICROPHONE
AUDIO (2)
Plug for Telex Unit
BALANCED
AUDIO OUT
(3 AND 4)
MICROPHONE
GROUND (1)
4
3
1
2
MICROPHONE
AUDIO (2)
Jack for RTS Unit
Figure 2
Headset XLR Connector Wiring
Local Headset Volume: Adjusts volume to
Local Headset. DOES NOT AFFECT MICROPHONE GAIN.
-5-
Portable Enable Switches and Indicators:
When in the “IN” position, the Enable
switches allow the user of the corresponding
portable unit to be heard by others connected
to the system. When in the “OUT” position,
the respective portable will be muted, but this
portable will still be able to hear all other selected remotes and interfaces. The indicators
(Portable Transmit On) normally show the
presence of a portable transceiver in use on
the channel corresponding to that indicator.
Headset Microphone Select Switch: This
switch allows the user to select either an
Electret or Dynamic microphone.
External Intercom Switch, Level Control,
and indicator: This switch enables the wired
intercom interface when “IN”, and disables it
when “OUT”. For RTS intercoms, the “IN”
position is channel 1 and the “OUT” position
is channel 2. A screwdriver adjustable control
is provided to control the input level of the
wired intercom.
Intercom Connectors: Connections to interface the BTR-300 with a wired intercom system.
Auxiliary Output/Input Connectors: Can be
used for 2-way (four wire) input and output to
the BTR-300 or as a simplex input or output.
Typical uses are 4 wire intercom’s, tape recorders, public address inputs or outputs.
Auxiliary Audio Enable Switch, Level Control, and Indicator: The switch enables and
disables the Auxiliary interface when “IN”
and “OUT”, respectively. The function of the
level control here is the same as that described
for the intercom.
Power Jack: For external AC supply adaptor
(supplied).
REAR PANEL (Refer to Figure 4)
Speaker Jack: Allows the use of an external
monitor if desired. An 8 ohm speaker is recommended.
Transmit and Receive Antenna Connectors:
Attach 5/8-wave antennas (supplied) to these
connectors; Antenna color should match the
“color dot.”
Speaker Volume Control: Screwdriver adjustable. Adjust clockwise to increase speaker
volume or counterclockwise to decrease
speaker volume.
Transmit Switch: Slide switch that allows the
operator to select one of three transmit modes.
In the “OFF” position, the transmitter is always off. This mode may be used if the base is
functioning solely as a monitor. In the
“CONT” position, the transmitter is always
on. This continuous mode is recommended
over the “REMOTE” mode. In the “REMOTE” position, the transmitter is enabled
only when one or more portables are active.
NOTE: Leave setting counterclockwise if no
speaker is attached.
-6-
-7-
LOCAL HEADSET CONNECTOR
POWER ON-OFF SWITCH
Headset
Power
POWER ON
INDICATOR
Aux Audio
EXTERNAL
INTERCOM
AUXILIARY
AUDIO
Ext Intercom
1
2
3
Portable Transmit On
4
Headset Controls
LOCAL MIC
OVERMODULATION
INDICATOR
Talk
Gain
Push Twice to Latch
LOCAL PUSH-TO-TALK INDICATOR
Volume
BTR-300
O/M
LOCAL MIC GAIN CONTROL
LOCAL HEADSET VOLUME
MIC ON PUSH-TO-TALK/
LOCK-TO-TALK SWITCH
Portable Station Connect
Figure 3
Front Panel BTR-300
RadioComä
PORTABLE ENABLE
SWITCHES AND INDICATORS
-8-
Auxiliary
Audio Output
ANTENNA
COLOR DOT
Transmit
Antenna
TRANSMIT ANTENNA
CONNECTOR
Dyn
Cont
Off
Remote
Transmit
BTR-300
Intercom
Loop Thru
MADE IN U.S.A.
Telex Communications Inc.
Intercom
Loop-Thru
ANTENNA
COLOR DOT
POWER JACK
AC/DC 12V
700 mA
Power
Receive
Antenna
RECEIVE
ANTENNA CONNECTOR
MIN.)
SPEAKER VOLUME CONTROL
Speaker
8
Volume
SPEAKER / LOCAL MONITOR ( 8
Figure 4
Rear Panel BTR-300
PUSH
INTERCOM CONNECTORS
TRANSMITTER SWITCH
Elt
Headset Mic
Auxiliary
Audio Input
HEADSET MIC SELECT SWITCH
PUSH
AUXILIARY INPUT CONNECTOR
AUXILIARY OUTPUT CONNECTOR
TR-300 BELT-PACK TRANSCEIVER
TECHNICAL INFORMATION
SPECIFICATIONS TR-300
Overall
Power Requirements ..............................................................6 AA cells (Alkaline, NEDA, MN 1500)
Nickel-metal hydride optional
Current Drain....................................................................................................................typical 82 mA
Temperature Range ................................................................................-4°F to 130°F (-20°C to 55°C)
Dimensions...............................................................................................4.25” W x 4.125” H x 2.0” D
(108mm x 105mm x 51 mm)
Weight ..........................................................................................................13 oz (369g) with batteries
Transmit Antenna............................................................................................1/4-wave wire (attached)
Receive Antenna .............................................................................................1/4-wave wire (attached)
Transmit
RF Frequency Range ........................................................................................................150-216 MHz
RF Frequency Stability................................................................................Crystal Controlled, 0.005%
RF Power Output............................................................................................................50 mW Typical
Modulation........................................................................................................FM, 3000 Hz deviation,
115 micro-seconds Pre-emphasis
Modulation Limiter ................................................................................................Internal Compressor
Modulation Frequency Range .........................................................................300 to 5000 Hz +/_ 2 dB
Microphone Audio Input ..............................................................................................30 to 3500 ohms
Microphone Input Sensitivity.................................................................2 mV Dynamic, 4 mV Electret
Radiated Harmonics and Spurious Emissions ..........................................................................-45 dBC,
Exceeds FCC Specifications
FCC ............................................................................................Type Accepted Under Parts 90 and 74
Receive
RF Frequency Range ........................................................................................................150-216 MHz
RF Frequency Stability ......................................................................Crystal Controlled, 0.005% Type
Dual Conversion Superheterodyne, FM
RF Sensitivity .................................................................................Less than 0.5 µV for 12 dB SINAD
IF Selectivity ........................................................................................3 dB at 30 kHz (Ceramic Filter)
Image Rejection ..............................................................................................................70 dB or better
Squelch Quieting ...........................................................................................................................90 dB
Squelch Threshold........................................................................................................3.0 µV (Internal)
Signal-to-Noise Ratio ....................................................................................................................90 dB
Audio Output ......................................................................................32 mW into 600 ohms (Headset)
Distortion.................................................................................................Less than 1% at Rated Output
-9-
FEATURES
· Lig h twei ght ,
self-contained.
s m al l
s i ze
and
is
· 2 separate antennas, one for transmit, the
other for receive.
· Push-to-Talk with Lock-to-Talk feature
switch for the TR-300 and Push-to-Transmit
with Lock-to-Transmit feature for the
TR-300P.
CONTROLS AND CONNECTIONS
EXTERNAL CONTROLS (Refer to Figure 6)
Volume OFF/ON Control: This thumbwheel
control serves as both an off/on switch and as
a volume control.
Low Battery and Overmodulation
Indicator Light:
Low Battery Indicator: Part of the battery
check circuit. When the power switch is
placed in the “ON” position the light will
flash one or more times if the battery is
good. A poor battery will cause the light to
illuminate continuously and a bad or unusable battery will not cause any illumination
at all.
Headset Connector: A four pin XLR connector for Input/Output. (Plug for Telex, Jack for
RTS units). The headset jack will accept many
different Telex model headsets. Compatible
with other intercom headsets with four pin
XLR connectors that are wired as shown in
Figure 5.
MICROPHONE
GROUND (1)
BALANCED
AUDIO OUT
(3 and 4)
MICROPHONE
AUDIO (2)
Plug for Telex Units
Overmodulation Indicator: Uses the same
light as the low battery indicator. During
the talk mode, if the microphone gain is too
high, the light will illuminate when talking.
MICROPHONE
GROUND (1)
BALANCED
AUDIO
OUTPUT
(3 and 4)
Push-To-Talk, Lock-To-Talk Switch:
This switch enables the talk function.
MICROPHONE
AUDIO (2)
Talk Indicator Light: (Labeled “talk”) will
be illuminated whenever the talk function on
the TR-300 is enabled.
Jack for RTS Units
Figure 5
Headset XLR Connector Wiring
Charge Jack: Allows nickel-metal hydride
batteries to be charged without removing them
from the unit.
-10-
LOW BATTERY / OVERMODULATION
INDICATOR LIGHT
TALK INDICATOR LIGHT
PUSH-TO-TALK/
LOCK-TO-TALK SWITCH
talk
Bat/ talk
ovmod
BELT CLIP
VOLUME OFF/ON CONTROL
HEADSET
CONNECTOR
BATTERY
CHARGE
JACK
TRANSMIT ANTENNA
Figure 6
External Controls, TR-300
-11-
RECEIVE ANTENNA
DYNAMIC / ELECTRET
SWITCH
FCC ID: B5DMXXX
S/N:
ACCESS TO MICROPHONE
GAIN CONTROL
CANADA IIIIIIIIIII
MIC
D
E
BATTERY COMPARTMENT
Figure 7
Internal controls, TR-300
INTERNAL CONTROLS (Refer to Figure 7)
Microphone Gain Control: Screwdriver adjustable by removing belt clip and prying out
the small rubber plug to the right of the screw
boss.
Dynamic/Electret Switch: This switch allows
selection of “D” when using a Dynamic Microphone or “E” when using and Electret Microphone.
Battery Compartment: Holds 6 AA batteries
in a removable battery holder (supplied).
-12-
EQUIPMENT SET-UP
BTR-300 SET-UP
UNPACKING
Unpack your BTR-300 and TR-300 System. If
there are any damages or shortages, refer to
the “Warranty Service Information” section in
this manual.
INTERNAL INTERCOM SWITCHES
The BTR-300 has internal switches that allow
it to accommodate intercom systems other
than what it was set to interface with when
manufactured. Product No. 71276XXXX is set
for Telex Audio Com and similar systems.
Product No. 71280XXXX is set for RTS 2
wire and similar systems. Units originally set
for Telex may be set to RTS and vice versa.
Both models may be set to interface with
Clearcom, and 4 wire RTS/McCurdy matrix
type systems. The following paragraphs explain how to change the switches if necessary.
Remove Cover: Remove the cover screws
(13) and lift off the cover.
DIP Switch: See Figure 8 and Table 1. Set the
DIP switch as shown in the table.
High/Low Switch: See Figure 8 and Table 2.
Set the high/low switch as shown in the table.
Intercom Switch: See Figure 8 and Table 2. Set
the switch to 2 wire for all 2 wire systems. Set
the switch to 4 wire if the BTR is to be connected to a balanced 4 wire intercom system
through the Auxiliary input and output jacks.
Note: Do not connect both 4 wire and 2 wire systems at the same time. Loud feedback may result.
Replace Cover: Carefully align the cover and
replace the screws.
INTERCOM JACK WIRING
CONFIGURATIONS
See Table 3 for the wiring of the intercom and
auxiliary jacks.
DIP SWITCH POSITION
1
2
3
4
5
6
7
8
9
Telex Audiocom
ON
ON
OFF
ON
OFF
ON
OFF
OFF
ON
RTS 2 wire
OFF
OFF
ON
OFF
ON
OFF
ON
ON
OFF
Clearcom
ON
OFF
ON
ON
OFF
OFF
OFF
ON
ON
4 Wire
N/A
N/A
N/A
N/A
N/A
N/A
N/A
N/A
N/A
Table 1
INTERCOM
TYPE
Telex
Audio Com
RTS
Clearcom
4 wire
LOW/HIGH
SWITCH
INTERCOM
SWITCH
Low
High
Low
N/A
2 wire
2 wire
2 wire
4 wire
Table 2
-13-
Internal
Switch
Settings
Auxiliary Audio Out
Pin 1
Pin 2
Pin 3
Auxiliary Audio Input
Pin1
Intercom Loop Thru
(both jacks)
Pin 2
Pin 3
Pin 1
Pin 2
Pin 3
Telex Audio
Com
Ground
600 ohm
Balanced
600 ohm
Balanced
Ground
2.2K ohm
Balanced
2.2K ohm
Balanced
Ground
Balanced Balanced
RTS 2 wire
Ground
600 ohm
Balanced
600 ohm
Balanced
Ground
2.2K ohm
Balanced
2.2K ohm
Balanced
Ground
Channel
1
Channel
2
Clearcom
Ground
600 ohm
Balanced
600 ohm
Balanced
Ground
2.2K ohm
Balanced
2.2K ohm
Balanced
Ground
Power
Audio
4 wire
Ground
Balanced
Intercom
Out
Balanced
Intercom
Out
Ground
Balanced
Intercom
In
Balanced
Intercom
In
Do Not
Use
Do Not
Use
Do Not
Use
Table 3
Pin Wiring for Rear Panel Jacks
CA101
LOW
HIGH
1 2 3 4 5 6 7
ON
8
9
DIP SWITCH
FRONT
Figure 8
Internal Intercom Switches
-14-
INTERCOM
4
2
W
W
I
I
R
R
E
E
RACK MOUNTING
To rack mount the BTR-300 base transceiver
do the following:
Remove the front two #6-32 x 3/8” screws
on each side of the transceiver as shown in
Figure 9.
Place the rack mount brackets (supplied) on
either side of the unit and insert three #6-32 x
3/8” screws for each bracket. Tighten the
screws securely.
Insert the BTR-300 into your 19” rack enclosure and insert four (4) #10-32 x 3/8” Phillips
pan head screws (supplied) in each corner of
the rack mount brackets and secure to your enclosure.
REMOVE SCREWS
(TYPICAL BOTH SIDES)
BT
R30
0
Figure 9
Attaching Brackets for Rack Mounting
-15-
ANTENNA INFORMATION
ANTENNA CONNECTIONS
The BTR-300 is supplied with two (2) antennas. One 5/8-wave antenna for Transmit and
one 5/8-wave antenna for Transmit and one
5/8-wave for Receive.
Assemble the 5/8-wave antenna by screwing
the two sections together as shown in Figure
10. Both sections of the BTR-300 5/8-wave antennas must be used. Leaving off the top section will result in reduced range.
DO
To insure that the frequency of the antennas
match the receiver and transmitter of the
BTR-300, match the color dot on the antenna
with the color dot on the BTR-300
Attach the antennas to the antenna input receptacles unless the BTR is rack mounted.
Tighten the connector securely.
DON’T
COLOR DOTS
Figure 11
Attaching 5/8-wave Antenna
Figure 10
5/8-wave Antenna Assembly
-16-
You will also need to remote the transmit antenna in the same manner. Connect a coax cable assembly to the transmit antenna
receptacle. Mount the 5/8-wave antenna by attaching it to a bracket (not supplied).
Remoting Antennas: It will be necessary to
remote both the transmit and receive antennas
on the BTR-300 when it is rack mounted.
Connect the coax cable assembly (not supplied), to the receive antenna receptacle and
mount the 5/8-wave antenna. The antenna can
be attached to either a wall mount bracket or a
microphone stand bracket (not supplied). See
“Accessory” section for order information.
6 FT (2m)
or more
is best
2 FT (60cm)
minimum
distance
BTR-300
RadioComä
Portable Transmit On
Ext Intercom
Power
Headset
Aux Audio
1
2
3
4
Headset Controls
Portable Station Connect
Volume
Figure 12
Remoting Antennas when Rack Mounted
-17-
Talk
Gain
Push Twice to Latch
O/M
ANTENNA POLARIZATION
The Telex Wireless Intercom System is “Vertically Polarized”. This means both the transmitting and receiving antennas should operate
in the vertical position.
RadioComä
TR-300
BTR-300
RadioComä
Portable Transmit On
Ext Intercom
Power
Headset
Headset
Aux Audio
1
2
3
4
Headset Controls
Portable Station Connect
Volume
Talk
Gain
Push Twice to Latch
O/M
RadioComä
Figure 14
Proper Dressing of the Antennas
TR-300
K e e p t h e d i st a n c e b e t w e e n t h e b a s e
(BTR-300) and the belt pack (TR-300) antennas as short as possible. The greater the distance, the weaker the signal. However, the
portables should be a minimum distance of 10
feet from the base station and each other for
best performance.
Figure 13
Vertically Polarized Antennas
ANTENNA PLACEMENT
Proper antenna placement probably has the
most effect on you TELEX Wireless intercom
System’s overall performance. The following
suggestions will result in optimum performance.
Make sure the “signal paths” between the
BTR-300 and remotes are unobstructed. You
should always be able to visibly locate the antennas for best performance.
RadioComä
TR-300
Proper placement of the TR-300 can be critical. The trailing antennas should “dangle”
freely. “Wadding” the antennas up and placing
them in a pocket, etc., will reduce system
range.
BTR-300
RadioComä
Portable Transmit On
Ext Intercom
Power
Headset
Aux Audio
1
2
3
4
Headset Controls
Portable Station Connect
Volume
Talk
Gain
Push Twice to Latch
O/M
RadioComä
It is suggested that the unit be worn on the belt
or pocket with both antenna’s hung vertically
for best operating range and performance.
TR-300
SIGNAL REACHES
ANTENNA AT FULL
STRENGTH WITH NO
OBSTRUCTIONS
Figure 15
Keeping Site Clear to Antenna
-18-
Attempting to operate the wireless intercom
system through or around walls, ceilings,
metal objects, etc. will reduce system range
and performance.
DO NOT - mount the BTR-300 5/8-wave antennas next to metal such as beams, walls
with metal studs, equipment racks, etc. This
also applies to the antennas when assembled
directly to the BTR-300. This will “detune”
the receiving antenna which can result in
noise or loss of RF signal at the BTR-300.
See Figure 17.
SIGNAL REFLECTION OFF A METAL OBSTRUCTION
CAUSES REDUCED SIGNAL AND “MULTIPATH”
BTR-300
RadioComä
RadioComä
Portable Transmit On
Ext Intercom
Power
Aux Audio
1
2
4
3
Headset Controls
Portable Station Connect
Volume
Headset
Talk
Gain
Push Twice to Latch
O/M
TR-300
Figure 16
Operating System Near Obstructions
1. Placing the unit in an
2. Placing the unit on top of
equipment rack and
remoting the antennas
is GOOD.
a shelf or equipment rack
unobstructed without
remoting the antennas is
GOOD.
1
GOOD
3
BAD
BTR-300
RadioComä
Portable Transmit On
Ext Intercom
Power
Aux Audio
1
2
3
4
Headset Controls
Portable Station Connect
Volume
Talk
Gain
Push Twice to Latch
O/M
BTR-300
RadioComä
Aux Audio
1
2
3
BTR-300
RadioComä
Portable Transmit On
Ext Intercom
Power
equipment rack with
the antennas mounted
on the BTR-300 or the
side of the rack is BAD.
2
GOOD
Headset
Headset
3. Placing the unit in an
4
Portable Transmit On
Headset Controls
Portable Station Connect
Volume
Talk
Gain
Push Twice to Latch
O/M
Ext Intercom
Power
Headset
Figure 17
BTR-300 Antenna Placement
-19-
Aux Audio
1
2
3
4
Headset Controls
Portable Station Connect
Volume
Talk
Gain
Push Twice to Latch
O/M
LOCAL HEADSET CONNECTION
Insert the headset/microphone into the 4 pin
XLR connector on the front panel. See the microphone connection diagram (Figure 2) if
other than a Telex Headset is used.
HEADSET MICROPHONE SELECT
SWITCH
If the headset you are using has an Electret
microphone, the local microphone select
switch must be in the “ELT” position
(Electret). This switch is located on the rear
panel. A +5 volt bias is available at the microphone plug for electret use.
If you are using a headset with a dynamic microphone, place the local microphone select
switch in the “DYN” position (Dynamic).
NOTE: FOR PROPER OPERATION YOU
MUST MATCH THE TYPE OF MICROPHONE YOU ARE USING WITH THE
DYNAMIC/ELECTRET SWITCH LOCATED ON THE REAR OF THE UNIT.
Figure 18
Connecting Headset to the BTR-300
Headset Mic
Elt
Dyn
TRANSMIT SWITCH
Allows the operator to select three different
types of transmitting modes; continuous transmitter, transmitter off, or remote transmitter.
For most operations, place the transmitter
switch in the “CONT” position (Continuous
mode).
In the Continuous mode the transmitter will be
on at all times regardless of whether the
portables are on or not.
In the Remote mode, the only time the base
can transmit is when a portable unit is turned
on.
In the Off mode the BTR-300 base station will
not transmit to the remote belt-packs. This
mode might be used if the base is to be a monitor station only.
-20-
Figure 19
Headset Microphone Select Switch
Transmit
Cont
Off
Remote
Figure 20
Transmit Switch
Connect the intercom cable to the back of the
BTR-300. There are two intercom connections
on the back of the unit, one being a male connector, the other a female connector, connected in parallel with each other. Either
works as an input or output.
INTERCONNECTION to a HARD-WIRED
INTERCOM SYSTEM
The RADIOCOM wireless system can be
integrated into Telex intercom systems and
most existing wired intercom systems including RTS and Clearcom.
BINAURAL
BELTPACK
EXTERNAL
SPEAKER
BINAURAL
BELTPACK
LOCAL MONITOR
BELTPACK
INTERCOM
BTR-300
RadioComä
BTR-300
Portable Transmit On
Ext Intercom
Aux Audio
1
2
3
4
Headset Controls
Portable Station Connect
Power
Volume
Headset
Talk
Gain
Push Twice to Latch
O/M
AUX
IN OUT
PA SYSTEM
OR OTHER AUDIO INPUT
RadioComä
TR-300
TR-300
RadioComä
TR-300
TR-300
RadioComä
TR-300
TR-300
Figure 21
Typical Interface to Wired System
-21-
RadioComä
TR-300
TR-300
Transmit
Antenna
PUSH
Telex Communications Inc.
Auxiliary
Audio Input
BTR-300
Auxiliary
Audio Output
Dyn
Elt
PUSH
Intercom
Loop Thru
Receive
Antenna
Intercom
Loop-Thru
Transmit
Headset Mic
Cont
Off
Power
Volume
Remote
MADE IN U.S.A.
Speaker
8
AC/DC 12V
700 mA
DUMMY LOAD
(IF USED)
Transmit
Antenna
PUSH
Auxiliary
Audio Output
Telex Communications Inc.
Auxiliary
Audio Input
BTR-300
Dyn
Elt
PUSH
Intercom
Loop Thru
Receive
Antenna
Intercom
Loop-Thru
Transmit
Headset Mic
Cont
Off
Power
Volume
Remote
MADE IN U.S.A.
Speaker
8
AC/DC 12V
700 mA
Figure 22
Connecting Two BTR-300’s
CONNECTING AUXILIARY AUDIO SYSTEM
Connect the BTR-300 to your auxiliary audio
via the Auxiliary input/output receptacles on
the rear of the unit.
DUMMY LOAD
In the case where a wired intercom will not be
used with the BTR-300, it is important that the
dummy load (supplied) be installed. The
dummy load should be plugged into the “Intercom Loop-Thru” connector. See Figure 22.
CONNECTING BTR-300’s
Connect the first BTR-300 to other BTR-300s
by using short XLR type cables (not supplied)
plugged into either of the intercom jacks. See
Figure 22.
NOTE: If the dummy load is not used an annoying squeal may result that may cause damage to the ears.
Note that the stations need to be on different
frequencies.
POWER
BTR 300
AC/DC 12 OV 700mA
POWER CONNECTION
Insure the Power ON/OFF Switch on the front
of the BTR-300 is in the “OFF” position. Connect the AC power supply cord to the BTR at
the socket labeled “POWER”. Plug the power
supply unit into an AC outlet.
U
Figure 23
Connecting the Power Supply
-22-
TR-300 SET-UP
HEADSET CONNECTION
BATTERY INSTALLATION
Inset the headset/microphone into the connector on the bottom of the unit. See the connection diagram (Figure 5) if headsets other than
Telex are used.
Insure that the OFF/ON Volume control knob
is turned OFF. Access the battery compartment by removing the belt clip on the back of
the unit. Release the 1/4 turn fastener located
on the back of the belt clip and remove belt
clip/cover.
ä
Remove the battery holder from the box. Insert six (6) AA batteries in the holder, paying
close attention to polarities of the batteries. It
may be necessary to turn the batteries with the
thumb and forefinger the first few times the
batteries are inserted into the battery holder to
insure good positive contact. Insert the holder
into the case and replace the belt clip/battery
cover and engage the 1/4 turn fastener.
TO HEADSET
Figure 24
Connecting Headset
DYNAMIC/ELECTRET SWITCH
If the headset you are using has an electret microphone, the dynamic/electret switch must be
in the “E” position. This switch is accessible
by removing the belt clip and removing the
battery holder. A +5 volt bias is available at
the microphone plug for electret use.
If you are using a headset with a dynamic microphone, place the dynamic/electret switch in
the “D” position.
NOTE: for proper operation you must match
the type of microphone you are using with the
dynamic/electret switch located inside the battery compartment.
FCC ID: B5DMXXX
S/N:
CANADA IIIIIIIIIII
MIC
E
ELECTRET
D
DYNAMIC
Figure 25
Dynamic/Electret Switch
Figure 26
Battery Installation
NOTE: For maximum uninterrupted service it
is suggested that new 1.5 volt alkaline AA batteries be installed prior to each use. Avoid
“shelf worn” or “economical” batteries. Operation from nickel metal hydride batteries is
also permissible. Typical life of fresh alkaline
batteries with the TR-300 is approximately 24
hours maximum, 15-17 hours is typical of
fully charged nickel-metal hydride batteries.
NOTE: Rechargeable batteries can be charged
r i g h t i n t h e T R - 3 0 0 u si n g t h e T e l e x
BC-300NM1 Battery Charger. Refer to “Battery Information” Section. Rechargeable batteries in the holder can be charged using the
Telex BC-300NM2 charger.
-23-
PRE-WALK-THRU CHECKLIST
Following the instructions fully to this point,
you have successfully completed the following checklist:
Set transmit switch on BTR-300.
Connected headsets to BTR-300
and all TR-300’s
Set (if necessary) the internal intercom switches to correspond with
the wired intercom.
Connected the BTR-300 to any auxiliary audio, intercom or external
speaker.
Located the BTR-300 transceiver
properly.
Connected power to BTR-300
transceiver.
Connected the antennas to the
BTR-300 with matched color codes.
Installed batteries in the TR-300
Remote Transceiver.
If you missed any of the above instructions, go
back and complete that instruction before going on.
Set Dynamic/Electret switches in
both BTR-300 and TR-300.
-24-
SYSTEM OPERATION
BTR-300 OPERATION
POWER
If you have followed the instructions until this
point, you should now be ready to turn both
the TR-300 and the BTR-300 “ON”.
Place the power switch on the BTR-300 in the
“ON” position. The red power on indicator
light should illuminate.
PUSH TO
SWITCH
TALK/LOCK-TO-TALK
To enable the talk function on the BTR-300,
press and hold down on the talk button and
begin talking. Releasing the talk button will
discontinue the microphone audio. For continuous talk, quickly press the talk button twice.
This enables the talk function as long as you
want. To release the talk function press the
talk button once more and the talk function
will cease.
NOTE: The talk light will be illuminated
whenever the talk function is activated.
TALK LIGHT
OFF
BTR-300
ON
Figure 27
Power ON/OFF - Volume Control Knob
Talk
Gain
Push Twice to Latch
O/M
PUSH TO TALK
LOCK TO TALK SWITCH
LOCAL HEADSET VOLUME
Adjust the volume control on the BTR-300 by
rotating the volume control either clockwise
or counterclockwise as required for comfortable listening volume.
INCREASES
VOLUME
Volume
LOCAL HEADSET VOLUME
Figure 28
Volume Control - BTR-300
-25-
Figure 29
Push-to-Talk/Lock-to-Talk Switch
TR-300 OPERATION
POWER
PUSH TO TALK/PUSH TO TRANSMIT
You should now be ready to turn the TR-300
“ON”. Rotate the OFF/ON Volume Control
Switch on the TR-300 clockwise to turn the
unit on.
To enable the talk function on the Model
TR-300 press and hold down on the talk button and begin talking. Releasing the talk button will discontinue the microphone audio.
For continuous talk, quickly press the talk button twice. This locks on the talk function. To
release the talk function press the talk button
once. Note that the TR-300 transmits any time
that the power is on.
BATTERY CHECK
As you turn the unit on, note that the battery
light (labeled bat/ovmod) should flash one or
more times with good batteries. Low batteries
will cause the light to be illuminated continuously and a bad battery will not cause any
illumination at all.
bat/
ovmod
NOTE: The talk light will be illuminated
whenever the talk function is activated.
talk
TALK LIGHT
Figure 30
Low Battery/ Overmodulation
and Talk Indicator Lights
talk
HEADSET VOLUME
PUSH-TO-TALK/LOCK-TO-TALK SWITCH
After batteries have been checked, adjust the
volume control by rotating the control as required for comfortable listening volume.
RadioComä
talk
ON/ INCREASES
VOLUME
ON / OFF SWITCH AND
VOLUME CONTROL
TR-300
Figure 31
Power ON/OFF - Volume Control - TR-300
-26-
Figure 32
Push-to-Talk/Lock-to-Talk Switch
ENABLING AUDIO
PORTABLE TRANSCEIVERS
Select the TR-300 portables that will be used
with the BTR-300. Push in the portable enable
switches that correspond to the TR-300
remotes that you will be using. The numbers
of the portable stations (1, 2, 3, and 4), are the
last digit of the product number on the back of
the TR-300. The Portable Transmit On light
will illuminate when the remote on that frequency is turned on. The indicators may also
light in response to outside interference on
that channel or to intermodulation arising
from portables being used at too close a distance to the base. To prevent these sources
from creating undesirable noise, all unused
channels should be disabled.
When using a RTS system wired intercom the
switch will act as a channel selector switch for
selecting of either channel 1 or channel 2.
AUXILIARY
The AUX Switch on the front of the BTR-300
will enable any auxiliary audio input (or 4
wire intercom) that is supplied to the unit.
Portable Transmit On
Ext Intercom
Aux Audio
1
2
3
Portable Station Connect
INTERCOM SWITCH
The intercom switch in the front of the unit
will act as an enabling switch when the unit is
being used with either a Telex Audiocom
wired intercom or Clearcom wired intercom.
-27-
Figure 33
Enable Switches
4
SETTING SYSTEM GAIN LEVELS
ADJUSTING GAIN
BTR-300 BASE STATION
The gain may need to be adjusted for various
audio conditions. The overmodulation light
will indicate when the gain is too high. If the
light is illuminated when you are talking, the
gain is too high and will need to be decreased.
If the light does not flash at all, and the audio
is low, the gain may need to be increased. An
occasional flash of the overmodulation indicator is fine.
The microphone overmodulation indicator
light for the BTR-300 headset can be found on
the right side of the front panel. The microphone gain control potentiometer is located to
the left of the indicator light.
Using a plastic screwdriver (supplied), adjust
the control clockwise to increase the gain or
counterclockwise to decrease the gain. Note
that the gain can also be adjusted by changing
the spacing between the microphone and your
mouth.
TR-300 PORTABLE
The overmodulation circuitry in the TR-300
uses the same light as the low battery circuitry. If modulation is too high this light will
illuminate when talking.
If the gain needs to be adjusted, remove the
belt clip on the rear of the unit and pry out the
small rubber plug to the right of the screw
boss. This will reveal the microphone gain
control potentiometer. Once adjusted, replace
the rubber plug.
CAUTION
Telex / EV
REMOVE BELT CLIP
Telex / EV
INCREASE
DO NOT remove
this plug or attempt
to adjust. This beltpack
has been precisely tuned
and any attempt to alter
this adjustment will result
in a non-operational unit.
BTR-300
DECREASE
Mic On
GAIN
REMOVE THIS RUBBER
PLUG FOR ACCESS TO
THE MICROPHONE GAIN
CONTROL
Push Twice to Latch
OVERMODULATION
INDICATOR
bat/
ovmod
talk
Figure 35
Adjusting Microphone Gain - TR-300
Figure 34
Adjusting Microphone Gain - BTR-300
-28-
INTERCOM GAIN
AUXILIARY GAIN
If the audio volume at the intercom input is
too high, the light will be illuminated when
the person on the intercom is talking. Decrease the gain until the light does not illuminate while talking at normal volume.
Occasional flashing of the light is allowable.
See Figure 36.
If the audio volume at the auxiliary input, is
too high, the Aux light will be illuminated
when the person on the auxiliary is talking.
Decrease the auxiliary gain until the auxiliary
light does not illuminate while talking at normal volume. Occasional flashing of the auxiliary light is allowable. The auxiliary indicator
has three states: OFF, HALF BRIGHT, and
FULL BRIGHT. When the switch is ”OUT”,
the indicator is OFF. When the switch is “IN”
it becomes HALF BRIGHT, and when the input is overmodulated it becomes FULL
BRIGHT.
OVERMODULATION
INDICATORS
Ext Intercom
Aux Audio
Figure 36
Auxiliary Gain controls
SYSTEM WALK-THRU
Now that you have successfully “set up” your
RadioCom Wireless Intercom System and
turned on any auxiliary equipment you are
ready to test the overall performance by
“Walking” the RadioCom system through the
areas in which you will be using it.
Before you begin your walk-thru check the
following:
TR-300 Battery Check.
Set microphone gain in both the
TR-300 and the BTR-300
C heck t hat t he pus h- t o -t a l k
s w i t ches ar e engaged i n t h e
Lock-to-talk position and the light
is illuminated.
Portable units to be used are enabled at the Base.
The “system walk-thru” can detect problems
of weak signal strength caused by:
·
Poor antenna location
·
Wrong antenna for receiver and/or transmitter.
·
RF “Trouble Spots”
·
Operating distance beyond system capability.
·
Old or used batteries in the TR-300
Under normal conditions the Portable Transmit On lights on the BTR-300 should always
be lit when portables are transmitting. “Weak
Signal” conditions will result in flashing of
the Transmit light.
In 99% of all instances you will set up your
RadioCom Wireless Intercom System, walk it
through and achieve error-free performance. If
in the rare instance your RadioCom System
does not “pass” during your walk-thru evaluation, refer to the last section of this manual
which deals with system troubleshooting.
-29-
TROUBLESHOOTING
Reread the sections of this manual to make
sure you have completed system set-up properly.
If you are unable to solve the problem, contract the dealer from whom you purchased the
system for assistance.
PROBLEM
SOLUTION
DISTORTION - System’s audio quality
seems distorted at medium to high input
levels.
Reduce microphone gain by adjusting microphone gain control.
HISS - System seems to produce a “hiss”
which is undesirable.
Check the gain setting on all beltpacks and
the base. They may be too low.
LOW OUTPUT - System produces a
low output level.
Check the gain setting on both the beltpacks
and the base. They may be too low.
FEEDBACK - Moving around area of
use produces “squeal” or “howl” in various location using ext. speakers.
Reduce the gain settings on both the
beltpacks and the base. They may be too
high.
DROPOUTS - When moving around the
area of use there seems to be locations
where the signal “swooshes” or completely disappears.
Make sure both antennas on the base are
connected and follow the location suggestions. Change the location of the base unit
and antennas or avoid the bad areas with
the remote beltpacks.
INTERFERENCE - System picks up
signals other than wireless Intercoms.
Make sure the TR-300 beltpack is turned
on - this will usually eliminate the interfering signal. If not using a beltpack, make
sure the corresponding enable switch at the
base is disengaged.
If problems persist with the TR-300
beltpack on, you will probably need to have
your system’s frequency changed to another channel.
Check Transmitter switch on base, use
CONT or REMOTE position. Check
push-to-talk function - is the switch ON?
NO AUDIO from BASE or BELTPACK
headsets.
-30-
BATTERY INFORMATION
GENERAL
Improper battery selection, use, installation,
and care are the cause of numerous wireless
system failures.
Alkaline Batteries: Alkaline batteries such as
Mallory’s DURACELL or Everready’s ENERGIZER provide the most reliable operation
in wireless transceivers. The use of low cost
carbon-zinc batteries is NOT recommended.
BC-300NM1 BATTERY CHARGER
NOTE: The BC-300NM1 is not supplied with
the TR-300. See the “Accessory” section for
ordering information.
CAUTION
DO NOT ATTEMPT TO CHARGE
ANY ALKALINE BATTERIES WITH
THIS CHARGER.
The BC-300NM1 will charge nickel-metal
hydride batteries in a TR-300. Insert the plug
from the charger into the jack on the side of
the TR-300 and plug the charger into a 110
volt outlet.
Full charge of the battery pack is obtained after 12 to 14 hours. A full charge will last
15-17 hours with nickel metal hydride batteries.
Extensive over-charging may damage or destroy the batteries. Please ensure the charging
time does not exceed 24 hours.
Unplug the charger when not in use.
Figure 37
BC-300NM1 Battery Charger
ENERGIZER® is a registered trademark of Union Carbide Corporation.
DURACELL® is a registered trademark of Duracell Inc.
-31-
BC-300NM2 BATTERY CHARGER
NOTE: The BC-300NM2 is not supplied with
the TR-300. See “Accessory” Section for ordering information.
Full charge of the battery pack is obtained after 12 to 14 hours. A full charge will last 15
-17 hours with nickel-metal hydride batteries.
Remove the battery holder from the TR-300.
Extensive over-charging may damage or destroy the batteries. Please ensure the charging
time does not exceed 24 hours.
CAUTION
DO NOT ATTEMPT TO CHARGE
ANY ALKALINE BATTERIES WITH
THIS CHARGER.
Unplug the charger when not in use.
Snap the terminal connector onto the battery
holder and plug the charger into a 110 Volt
outlet.
Figure 38
BC-300NM2 Battery Charger
-32-
ACCESSORIES
AB-300 Microphone Stand/Surface Mount
Bracket - for 5/8-wave antenna.
Includes necessary hardware.
Order No. 63906-100
BC-300NM1 Battery Charger Order No. 70741-001
Includes 6 nickel-metal hydride batteries and
1 carrier. Charges a TR-300 without removing
the battery pack.
25’ Coax Cable
Order No. 63901-000
BC-300NM2 Battery Charger
Order No. 70741-002
Includes 6 nickel-metal hydride batteries and
1 carrier. Charges 1 set of batteries outside of
the TR-300.
4’ Coax Cable
Order No. 63901-001
5/8-Wave Antenna Screw apart for easy storing.
NMBP Battery Pack
Order No. 70741-003
6 nickel-metal hydride batteries and carrier.
For use with BC-300NM1 and BC-300NM2.
Order No.
Color
Code
Frequency
Range
879248-1
879248-2
879248-3
879248-4
Blue
Yellow
White
Red
150-168.9 MHz
169-184.9 MHz
185-199.9 MHz
200-216 MHz
Headsets
Telex Configuration
AC Power Supply 12 Volt, 60 HZ
Order No. 730139-000
Order No.
PH-44 . . . . . 300853-100
PH-88 . . . . . 300852-100
HR-1. . . . . . 300534-007
HR-2. . . . . . 300534-000
RTS Configuration
Order No.
PH-44R . . . 300853-101
PH-88R . . . 300852-101
HR-1R . . . . 300534-008
HR-2R . . . . 300534-001
-33-
CUSTOMER SERVICE INFORMATION
If your receiver or transmitter should need servicing under the warranty, please contact:
Customer Service Department
TELEX COMMUNICATIONS, INC.
8601 East Cornhusker Highway,
P.O. Box 5579,
Lincoln, Nebraska 68505-5579 U.S.A.
Phone: (402) 467-5321 or 465-7021
All claims of defect or shortage should be sent to the above address. When returning items
for service, you must provide date and proof of purchase, such as a copy of the sales receipt, to establish warranty. A letter should be included outlining all symptoms and claimed
defects. Information on how the equipment was installed and used is very helpful. Please
include your phone number and return address in case our service technicians need to contact you.
Units that have been modified cannot be accepted for repair.
Include all information requested by the Service Department. Then pack the unit as follows:
Check the unit to see that all parts and screws are in place. Then wrap it in heavy paper or
put it in a plastic bag. If the original carton is not available, place the unit in a strong carton
that is at least six inches bigger in all three dimensions than the unit. Fill the carton equally
around the unit with resilient packing material (shredded paper, foam, etc.). Seal it with
gummed paper tape, tie it with a strong cord, and ship it by prepaid express, United Parcel
Service or insured parcel post to the Telex Service Department.
It is very important that the shipment be well-packed and fully insured. Damage claims
must be settled between you and the carrier and this can delay repair and return of the unit
to you.
Telex reserves the right to make changes in design and improvement on its product without
assuming any obligation to install the same on any of its products previously manufactured. Further Telex reserves the right to ship new and/or improved products which are
similar to the form, fit and function of products originally ordered.
-34-
FCC INFORMATION
The Telex Models BTR-300 and TR-300 transceivers are Type Accepted
under United States Federal Communications Commission Parts 90 and
74. Licensing of Telex equipment is the user’s responsibility and
licensability depends upon the user’s classification, user’s application,
and frequency selected. Telex strongly urges the user to contact the appropriate telecommunications authority before ordering and choosing frequencies.
CAUTION: Changes or modifications made by the user could void the
user’s authority to operate the equipment.
-35-
R
TELEX COMMUNICATIONS, INC. 12000 Portland Ave. South, Burnsville, MN 55337, U.S.A.
PN 803008-2
JAN 2001
Made in U.S.A