1
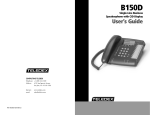
B250D
Two-Line Business
Speakerphone with CID Display
User’s Guide
B250D TELEPHONE DIAGRAM
DELETE KEY
DIAL KEY
REVIEW KEYS
MESSAGE
WAITING
INDICATOR
PHONE BOOK KEY
CONTRAST KEY
MEMORY BUTTONS
VOLUME KEYS
SPEAKER/HEADSET KEY
MUTE KEY
CONFERENCE KEY
LINE 2 KEY
LINE 1 KEY
PRGM KEY
REDIAL KEY
FLASH/LINK KEY
HOLD KEY
RELEASE KEY
CONGRATULATIONS AND THANK YOU!
Congratulations on your purchase of this
quality Teledex analog business telephone.
If you have any questions concerning this
telephone or its operation, please contact us
via one of the methods at right. We appreciate your purchase!
CONTACTING TELEDEX
Telephone: +1 (408) 363-3100
Address:
6311 San Ignacio Avenue
San Jose, CA 95119 USA
Internet:
email:
Copyright © 2003 Teledex LLC. All Rights Reserved.
www.teledex.com
[email protected]
Part Number 600-0480-53
TABLE OF CONTENTS
1)
2)
3)
4)
FEATURES
IMPORTANT CALLER ID INFORMATION
IMPORTANT NOTICE BEFORE INSTALLATION
INSTALLATION
4.1
4.2
5)
6)
7)
8)
9)
10)
11)
14)
15)
16)
17)
18)
19)
20)
21)
22)
23)
24)
25)
26)
27)
28)
29)
30)
31)
32)
33)
4
4
4
5
5
5
5
AUTOMATIC LINE SELECTION
PLACING AND ANSWERING CALLS WITH THE HANDSET
PLACING AND ANSWERING CALLS WITH THE SPEAKERPHONE
SWITCHING BETWEEN THE HANDSET AND THE SPEAKERPHONE
CONFERENCE CALLING
ADJUSTING THE HANDSET VOLUME
ADJUSTING THE SPEAKERPHONE VOLUME
USING REDIAL
USING AND PROGRAMMING THE FLASH/LINK KEY
USING HOLD
USING MUTE
MEMORY DIALING
STORING A NUMBER IN MEMORY
ENTERING A PAUSE IN A MEMORY NUMBER
STORING NUMBERS FROM CALLER ID RECORDS
DIALING A MEMORY NUMBER
CHAIN DIALING
12) USING THE PHONE BOOK
13) STORING NUMBERS IN THE PHONE BOOK
13.1
13.2
2
2
3
DESKTOP INSTALLATION
WALL MOUNTING
USING THE DATA PORT
SETTING THE RING CADENCES
ADJUSTING THE RINGER VOLUME
SETTING THE DATE AND TIME
SETTING THE AREA CODE
ADJUSTING THE DISPLAY CONTRAST
OPERATION
11.1
11.2
11.3
11.4
11.5
11.6
11.7
11.8
11.9
11.10
11.11
11.12
11.13
11.14
11.15
11.16
11.17
2
8
8
WITH NO NUMBER DISPLAYED
WITH A NUMBER ALREADY DISPLAYED
RETRIEVING A STORED NUMBER IN MEMORY / ON HOOK MODE
DELETING A NAME AND NUMBER IN THE DIRECTORY
CONNECTING AN OPTIONAL HEADSET
ADJUSTING HEADSET VOLUME
CALLER ID, CALL WAITING
LED STATUS
REVIEWING CALLER ID RECORDS
CALLER ID MESSAGES
USING THE DIAL KEY
DELETING CALLER ID RECORDS
PRIORITY (VIP) CALL
MESSAGE WAITING
TROUBLESHOOTING
CARE AND MAINTENANCE
WHAT THE FCC WANTS YOU TO KNOW
LIGHTNING
REQUIREMENTS OF PART 68 – FCC RULES
REQUIREMENTS OF PART 15 – FCC RULES
INDUSTRY OF CANADA REQUIREMENTS
IMPORTANT SAFETY INSTRUCTIONS
9
10
10
10
10
11
11
11
12
12
12
13
13
14
14
14
15
15
15
16
FEATURES
1) FEATURES
Your B250D has these useful features:
Two Lines – For making or accepting multiple calls simultaneously
Conference Calling – For easy three-way conversations
Auto Line Selection – Automatically selects the correct line
99-Memory Caller ID – stores up to 99 Caller ID records
99-Memory Phone Book – stores up to 99 phone book records
3-Line Liquid Crystal Display – allows you to view an entire caller ID record at once
Call Summary – displays the number of calls you received
Call Waiting Caller ID – displays information about an incoming call while you are
on another call
New Call Summary – shows the number of new calls you have received
Review Scrolling – lets you easily scroll through all records in Caller ID memory
Delete Button – lets you erase call records one at a time, or all at once
Repeat Calls – a REPEAT icon will light up during reviewing of calls, to tell you
that this is a repeat entry
Message Waiting – lets you know that you have received a voice mail message
Priority Call – lets you save up to twenty phone book records in a priority list, and
sounds an alert tone when any of those callers call
Clock – shows the date and time as provided to Caller ID service subscribers
Contrast Control – lets you adjust the display contrast for best viewing
Dial Key – lets you dial the phone number in a Caller ID record with one touch
Speakerphone – for convenient hands-free conversations
10 One-Touch Memory Locations – for quick access to frequently dialed numbers or
Flash/Link – sends an electronic switch-hook signal for use with special phone services
On-Hook Automatic Dialing – automatically dials numbers on screen
Call Timer – automatically times the duration of each call
5-Number Redial Buffer – to quickly dial a recently dialed number
Hold – places a call on hold
Mute – mutes the microphone of the handset or speakerphone
Release – to re-access another line quickly
Volume Control – controls handset, headset, speakerphone and ringer
Headset Jack – for connecting optional headset for hands-free convenience
Data Jack – for quick connection of an additional phone ordevice
Hearing Aid Compatible – for using hearing aids that have a T (telephone) switch
2) IMPORTANT CALLER ID INFORMATION
To use the phone’s Caller ID and call waiting features, you must be in an area where
the services are available, and you must subscribe to the services. Where Caller ID is
offered, one or more of the following options are generally available:
a)
b)
c)
Caller’s number only
Caller’s name only
Caller’s name and number
3) IMPORTANT NOTICE BEFORE INSTALLATION
Each device that you connect to the phone line draws power from the phone line.
This power draw is referred to as the device’s ringer equivalence number, or REN.
The REN for the B250D is located on the bottom of the telephone.
If you are using more than one phone or other devices on the same line, add up the
value of all the RENs. If the total is greater than five (three in rural areas), your phone
might not ring. If the ringer operation is impaired, the problem can often be rectified
by removing a device from the line to reduce the total REN to the number allowed.
2
Teledex B250D Users Manual
P/N 600-0480-53
INSTALLATION
FCC STATEMENT
Your B250D complies with Part 68 of FCC Rules. You must, upon request, provide
the FCC Registration Number and the REN to your telephone company or other
service provider. Both of these numbers are located on the bottom of the B250D.
You must not connect your B250D to either coin-operated systems or party line
systems.
The B250D also complies with the limits for a Class B device as specified in Part 15
of the FCC Rules. These limits provide reasonable protection against radio and TV
interference in a residential area. However, your telephone might cause TV or radio
interference, even when it is operating properly. To eliminate interference, you can
try one or more of the following corrective measures:
a)
b)
Reorient or relocate the TV or radio’s reception antenna
Increase the distance between the telephone and the radio or TV.
Consult your local dealer or service center if the problem persists.
4) INSTALLATION
When installing your B250D, please select a location that is located near an
unswitched AC outlet, near a modular phone line jack, and out of the way of
activities that may interfere with the telephone’s operation.
NOTE: The USOC number of the jack to be installed is RJ11C (RJ11W for a wall plate jack.)
CAUTION: You must use a Class 2 power source that supplies 12 volts AC, and delivers at least
500 mA. The supplied adapter meets these specifications. Using an adapter that does
not meet these specifications could damage the LCD display or the adapter.
4.1
DESKTOP INSTALLATION
1)
2)
3)
4)
5)
4.2
Plug one end of the handset coiled cord into the handset modular jack,
located on the left side of the phone base. Plug the other end into the
handset jack.
Install wall mount bracket into four slots at the bottom of the B250D.
Plug one end of the thinner, four-conductor line cord into the jack labeled
LINE on the power adapter. Plug the other end into a standard RJ-11
telephone wall jack.
Plug one end of the thicker, six-conductor phone cord into the jack labeled
PHONE on the power adapter. Plug the other end into the LINE jack at the
bottom of the B250D.
Plug the adapter into a standard AC wall outlet.
WALL MOUNTING
1)
2)
Place the flat end of the wall mount bracket upward. Install the wall
mount bracket into the four slots on the bottom of the B250D.
Follow steps #3 and #4 in section 4.1 Desktop Installation above for
installation of line and phone cords. Route the adapter cord through the
wall mount line cord slot.
Contents Copyright © 2003 Teledex LLC
Teledex B250D Users Manual
3
USING THE DATA PORT
3)
4)
Align the phone’s keyhole slots with the wall plate studs and slide the
phone downward to secure it.
Plug the adapter into a standard AC outlet.
THINNER, 4-WIRE
LINE CORD
THICKER, 6-WIRE
PHONE CORD
5) USING THE DATA PORT
The data port is located on the right hand side of the telephone (as it is facing you.)
Use this jack to connect a laptop or desktop computer, fax machine or answering
machine in parallel on the same phone line to which the telephone is connected.
Plug one end of the modular cord into the DATA jack of the B250D, and then plug
the other end into the jack of another phone or answering machine.
6) SETTING THE RING CADENCES
Follow these steps to select one of four different ringer cadences (telephone must be
on-hook):
1)
2)
3)
4)
5)
Press PRGM. The PROGRAM MODE prompt will appear.
Press REVIEW . The SET LINE 1 RING prompt will appear.
Press REVIEW or to sample the available ring tones.
Press PRGM key to select the desired ring tone. After setting the ring tone
of line 1, the SET LINE 2 RING prompt will appear for two (2) seconds, then
LINE 2 RING appears on the display.
Press REVIEW or to sample the available ring tones. Press PRGM to
confirm the setting of your desired tone. A confirmation tone will be
heard and the LCD will return to clock display.
NOTE: The ring cadence is preset at the factory to ring tone #1 for line 1 and ring tone #2
for line 2.
7) ADJUSTING THE RINGER VOLUME
Your phone has three ringer volume levels: OFF, LOW, AND HIGH. Follow these steps to
adjust the ringer volume (telephone must be on-hook):
1)
2)
3)
Press VOLUME or VOLUME to adjust the ringer volume.
To turn off the ringer volume, repeatedly press VOLUME until the
ringing stops and the ringer is off.
To adjust a line’s ringer volume when that line rings, press VOLUME or
VOLUME .
NOTE: The ringer volume is preset to “Low.”
4
Teledex B250D Users Manual
P/N 600-0480-53
SETTING DATE AND TIME
8) SETTING THE DATE AND TIME
Follow these steps to set the date and time:
1)
2)
3)
4)
5)
Press PRGM. The PROGRAM MODE prompt will appear.
Press REVIEW with the month cursor flashing. SET DATE/TIME prompt
will appear.
Enter the desired date using a number key.
Enter the current time using a number key when the hour cursor flashes.
*= AM #= PM appears.
Press * to select AM or # to select PM. The phone beeps and the set time
display returns.
NOTE: If you make a mistake on the settings, wait 20 seconds. The backlight will turn off to exit
setup. Then start again at Step 1. Date and time are preset to January 1 & 12:00 AM
9) SETTING THE AREA CODE
Follow these steps to store your home area code:
1)
2)
3)
4)
Press PRGM. The PROGRAM MODE prompt will appear.
Press DIAL. SET AREA CODE and 000 will appear. The first 0 flashes.
Enter the desired area code.
When you set the area code’s last digit, press the PRGM key. The B250D
will beep once to confirm the setting. To reset the area code, simply
repeat the above steps.
NOTE: If you make a mistake while setting the area code, repeat the above steps.
10) ADJUSTING THE DISPLAY CONTRAST
Repeatedly press CONTRAST to adjust the display contrast. The B250D will beep once
when it reaches the darkest or the lightest contrast. There are four (4) levels of contrast settings. The default level is CONTRAST 1.
11) OPERATION
11.1 AUTOMATIC LINE SELECTION
The B250D will automatically select LINE 1 when you lift the handset or press the
SPKR key. This feature is disabled when either line is in use. You may then manually
select the desired line by pressing the appropriate line key.
You may confirm which phone number is assigned to which line by pressing LINE 1
and dialing one of the phone numbers associated with your phone. If the LINE 2 indicator flashes, the number you dialed is assigned to LINE 2. If you receive a busy signal,
the number you dialed is assigned to LINE 1.
11.2 PLACING AND ANSWERING CALLS WITH THE HANDSET
To make a call with the handset, pick up the handset. The B250D will automatically
select the correct line, or you may elect to use another line by pressing the appropriate line key. The call timer will begin counting the elapsed time of your call. Dial the
desired number; the number will appear in the display as you dial. To answer an
incoming call, pick up the handset. To end a call, place the handset back on the base.
11.3 PLACING AND ANSWERING CALLS WITH THE SPEAKERPHONE
To make or answer a call using the speakerphone, press the SPEAKER/HEADSET key or
LINE 1 or LINE 2 key. The call timer will begin counting the elapsed time of your call.
The SPEAKER indicator will light. Dial the desired number. To end a speakerphone
call, press the SPEAKER/HEADSET key. The SPEAKER indicator will turn off.
To answer an incoming call using the speakerphone, press the SPEAKER/HEADSET key
or LINE 1 or LINE 2 key. The call timer will begin counting the elapsed time of your
Contents Copyright © 2003 Teledex LLC
Teledex B250D Users Manual
5
OPERATION
call. The SPEAKER indicator and appropriate line key LED will light.
Notes: The speakerphone does not operate without AC power. During a power failure, use
the handset instead. If background noise interferes with the speakerphone’s operation, you can
press the MUTE key to turn off the base’s microphone while the other party is speaking. You
cannot use the speakerphone with a headset connected to the phone.
11.4 SWITCHING BETWEEN THE HANDSET AND THE SPEAKERPHONE
To switch from handset to the speakerphone during a call, press SPEAKER/HEADSET, then
place the handset on the base.
To switch from the speakerphone to the handset, lift the handset and resume your
conversation. The speakerphone will automatically turn off.
11.5 CONFERENCE CALLING
Conference calling lets you conduct a three-way conversation, joining LINE 1 and LINE 2
into one phone call. To place a conference call, follow these steps:
1)
2)
3)
4)
5)
6)
Place a call to one party.
Press HOLD to put the first call on hold.
Press either LINE 1 or LINE 2 for the line not in use, then place a call to
another party.
After the second party answers, press CONF.
The CONF indicator lights, and the text message ON CONFERENCE appears
on the display. All three parties are now connected and may converse.
To end the conference call with both lines, hang up the handset.
Note: To talk on only one line without disconnecting the other line, press HOLD. Then, press the
button for the line you want to continue talking on. To return to the three-way conversation, press
CONFERENCE. To disconnect one line and continue talking on the other, press either LINE 1 or LINE 2.
11.6 ADJUSTING THE HANDSET VOLUME
When you pick up the handset to make or receive a call, the handset volume is preset
to the normal volume. To increase or decrease the handset volume, press VOLUME or VOLUME .
11.7 ADJUSTING THE SPEAKERPHONE VOLUME
There are seven (7) volume levels for the speakerphone mode. To increase or
decrease the speakerphone volume, press VOLUME or VOLUME . The speakerphone
volume level is preset to level 2.
11.8 USING REDIAL
The redial function allows you to retrieve any of the last five numbers you dialed.
Press REDIAL; the display will show the last number dialed. Press REVIEW key to
scroll to the 4th number stored, or continue to press REVIEW key to scroll to the
3rd, 2nd, or 1st number stored. Once you have scrolled to the right number, you
may dial the number by either pressing the SPEAKER/HEADSET key or picking up the
handset. Either action will initiate a call to the number in the display.
NOTES: The redial memory only stores the last 32 digits of any number dialed. The redial memory
does not store a LINK entry, but stores any digits you press after FLASH/LINK (see “USING AND
PROGRAMMING THE FLASH/LINK KEY”.)
11.9 USING AND PROGRAMMING THE FLASH/LINK KEY
FLASH/LINK performs the electronic equivalent of a hookswitch operation for
special services, such as call waiting. For example, if you have call waiting, press
FLASH/LINK to answer an incoming call without disconnecting the current call. Press
FLASH/LINK again to return to the first call.
6
Teledex B250D Users Manual
P/N 600-0480-53
OPERATION
CAUTION: If you do not have any special phone services, such as call waiting, etc., pressing the
FLASH/LINK key may disconnect the current call.
You can program the FLASH/LINK timing to suit your PBX requirements. Timings
available are: 0.1s / 0.2s / 0.3s / 0.4s / 0.5s / 0.6s / 0.7s / 0.8s / 0.9s / 1s. The timing is
preset to 0.6s. Follow these steps to reprogram the Flash/Link timing:
1)
2)
3)
4)
5)
Press PRGM. PROGRAM MODE appears on the display.
Press FLASH/LINK. SET LINK TIME appears on the display for two (2) seconds,
then LINK TIME 0.6 S appears.
Press REVIEW or REVIEW to the desired link time.
Press PRGM to confirm the setting.
The phone beeps and the set time display returns.
NOTE: To reset the FLASH/LINK timing, or if you made a mistake, repeat the above steps.
11.10 USING HOLD
To place a call on hold, press the HOLD key. The LINE 1 or LINE 2 indicator will flash,
then the text message CALL ON HOLD will appear on the LCD. You can now hang up
the handset without disconnecting the call.
To resume the call, press the appropriate line key, or pick up the handset, or pick up
any extension phone on the same line. If you put a call on hold while using the
speakerphone, press the appropriate line key to resume the call.
11.11 USING MUTE
To temporarily switch off the microphone of either the speakerphone or handset,
press the MUTE key. The MUTE indicator lights and the microphone will turn off, but
you can still hear the person on the other end of the phone. Press MUTE again to
resume your conversation. Pressing the MUTE key while the handset is on-hook and
the phone is off-line will enter a one second pause into a number string.
11.12 MEMORY DIALING
You can store up to ten (10) phone numbers and names in the direct memory locations,
then quickly and conveniently call a number you have stored. These memory buttons
may also be used to store number strings used to access PBX or Centrex services or
features.
11.13 STORING A NUMBER IN MEMORY
Follow these steps to store numbers in the memory locations. Each memory location
can store up to sixteen (16) digits.
1)
2)
3)
4)
5)
6)
Press PRGM. The PROGRAM MODE prompt will appear.
Select the memory location where you want to store the number.
ENTER NUMBER will appear in the display.
Enter the phone number or number string you wish to store. If you enter
a digit by mistake, press DELETE to delete the last number entered.
Pressing DELETE once will delete the last digit, pressing twice will delete
the prior digit, etc.
When you are done entering the desired number, press the PRGM key.
The display will now read ENTER NAME. Press the letters on the keypad
corresponding to A through Z. (Please refer to the Keypad Legend on page 9 for
assistance.) To enter a space between letters, press the “1” key.
If you enter a letter by mistake, press the DELETE key. Pressing once will
delete the last letter, pressing twice will delete the prior letter, etc.
Once the correct letters are entered, press the PRGM key. You will hear
a long beep, and the display will show NUMBER STORED to confirm
your entry. The current time display will return.
NOTE: You will hear a dial tone during most steps of this procedure. The phone does not
Contents Copyright © 2003 Teledex LLC
Teledex B250D Users Manual
7
USING THE PHONE BOOK
actually dial the number as you store it, but you may also hear a busy tone or a recorded
operator’s voice after a few seconds.
NOTE: To keep your private numbers secure, it is not recommended that you store your personal
access codes for services (such as bank-by-phone, etc.) in a memory location.
NOTE: To change a number in memory, store a new one in its place.
11.14 ENTERING A PAUSE IN A MEMORY NUMBER
Some telephone systems require that you dial an access code (9, for example) and
wait for a second dial tone before you can dial an outside number. You can store this
access code with the desired number; however it may be necessary to store a pause
after the access code to allow time for the outside line to connect. To enter a pause,
press the MUTE key while storing a number into memory. This enters a one (1) second
pause into the number string being stored. For a longer pause, press MUTE again to
store additional pauses in one second increments. Each pause stored uses one digit of
memory.
11.15 STORING NUMBERS FROM CALLER ID RECORDS
You can easily store a number from a Caller ID record. Repeatedly press REVIEW or REVIEW to select the desired phone number. Press the PRGM key. PROGRAM MODE
will appear. Then press the memory button where you would like the number to be
stored. You will hear a long beep to confirm, and the display will read NUMBER STORED.
11.16 DIALING A MEMORY NUMBER
To dial a number stored in memory, press the appropriate memory button, then lift
the handset or press SPEAKER/HEADSET.
12) USING THE PHONE BOOK
Your B250D allows you to store up to ninety-nine (99) entries in alphabetical order,
so that you can dial a number directly from the directory. The directory organizes the
names by the first character stored. If you want the directory to store information by
the last name, enter the last name first when entering names.
NOTE: If you do not enter a name, the number will still be stored. Entries that have only a
number appear at the beginning of the directory.
13) STORING NUMBERS IN THE PHONE BOOK
13.1 WITH NO NUMBER DISPLAYED
1)
Press the PRGM key. The display will show PROGRAM MODE.
2)
Press the PHONE BOOK key. The display will show ENTER NUMBER.
3)
4)
5)
6)
Enter the number to be stored by pressing the keys on the keypad.
When you have entered the entire number, press PRGM.
The display will then show ENTER NAME.
Press the letters on the keypad A through Z for name entry.
(Please refer to Keypad Legend for assistance.)
7)
8)
9)
10)
8
To enter a space between the first and last name, press the “1” key.
If you enter a digit or letter by mistake, press DELETE to delete the last
digit or letter entered. Pressing DELETE once will delete the last character,
pressing twice will delete the prior character, etc.
Once the letters are entered, press the PRGM key again. You will hear a
long beep and the display will show NUMBER STORED. The current
time display will return.
If a name and/or number has already been entered into the directory, the
B250D will prompt you that this listing already exists. The display will
read DUPLICATE, erase one of the duplicates and return to time display.
Teledex B250D Users Manual
P/N 600-0480-53
USING THE PHONE BOOK
USING THE PHONE BOOK
actually dial the number as you store it, but you may also hear a busy tone or a recorded
operator’s voice after a few seconds.
NOTE: To keep your private numbers secure, it is not recommended that you store your personal
access codes for services (such as bank-by-phone, etc.) in a memory location.
13.2 WITH A NUMBER ALREADY ON THE DISPLAY
Your Caller ID data stored in memory may also be entered into your phone book
directory by the following sequence:
1)
2)
3)
NOTE: To change a number in memory, store a new one in its place.
11.14 ENTERING A PAUSE IN A MEMORY NUMBER
Some telephone systems require that you dial an access code (9, for example) and
wait for a second dial tone before you can dial an outside number. You can store this
access code with the desired number; however it may be necessary to store a pause
after the access code to allow time for the outside line to connect. To enter a pause,
press the MUTE key while storing a number into memory. This enters a one (1) second
pause into the number string being stored. For a longer pause, press MUTE again to
store additional pauses in one second increments. Each pause stored uses one digit of
memory.
4)
Make sure the Caller ID data you wish to enter into the phone book
directory is displayed on the LCD screen.
Press the PRGM key for a few seconds until display reads PROGRAM MODE.
Press the PHONE BOOK key. You will hear a long beep confirming the entry
and the display will read NUMBER STORED.
If a name and/or number has already been entered into the directory, the
B250D will prompt you that this listing already exists. The display will
read DUPLICATE, erase one of the duplicates and return to time display.
KEYPAD LEGEND – A GUIDE TO ENTERING TEXT
NUMBER OF TIMES TO PRESS EACH KEY
11.15 STORING NUMBERS FROM CALLER ID RECORDS
11.16 DIALING A MEMORY NUMBER
To dial a number stored in memory, press the appropriate memory button, then lift
the handset or press SPEAKER/HEADSET.
12) USING THE PHONE BOOK
Your B250D allows you to store up to ninety-nine (99) entries in alphabetical order,
so that you can dial a number directly from the directory. The directory organizes the
names by the first character stored. If you want the directory to store information by
the last name, enter the last name first when entering names.
NOTE: If you do not enter a name, the number will still be stored. Entries that have only a
number appear at the beginning of the directory.
2
3
4
5
6
7
8
_
‘
&
.
(
)
1
2
A
B
C
2
3
D
E
F
3
4
G
H
I
4
5
5
J
K
L
6
M
N
O
6
7
P
Q
R
S
8
T
U
V
8
9
W
X
Y
Z
*
*
0
0
#
#
7
9
13) STORING NUMBERS IN THE PHONE BOOK
Press the proper key on keypad the specified number of times to generate a character denoted in the shaded portion of the chart.
(Examples: To generate the letter ‘Q’, press the ‘7’ key twice. To generate the letter ‘C’, press the “2” key three times, etc.)
13.1 WITH NO NUMBER DISPLAYED
1)
Press the PRGM key. The display will show PROGRAM MODE.
2)
Press the PHONE BOOK key. The display will show ENTER NUMBER.
14) RETRIEVING A STORED NUMBER (ON-HOOK MODE)
3)
4)
5)
6)
Enter the number to be stored by pressing the keys on the keypad.
When you have entered the entire number, press PRGM.
The display will then show ENTER NAME.
Press the letters on the keypad A through Z for name entry.
(Please refer to Keypad Legend for assistance.)
7)
8)
9)
10)
8
1
1
PRESS THIS KEY ON THE KEYPAD
You can easily store a number from a Caller ID record. Repeatedly press REVIEW or REVIEW to select the desired phone number. Press the PRGM key. PROGRAM MODE
will appear. Then press the memory button where you would like the number to be
stored. You will hear a long beep to confirm, and the display will read NUMBER STORED.
To enter a space between the first and last name, press the “1” key.
If you enter a digit or letter by mistake, press DELETE to delete the last
digit or letter entered. Pressing DELETE once will delete the last character,
pressing twice will delete the prior character, etc.
Once the letters are entered, press the PRGM key again. You will hear a
long beep and the display will show NUMBER STORED. The current
time display will return.
If a name and/or number has already been entered into the directory, the
B250D will prompt you that this listing already exists. The display will
read DUPLICATE, erase one of the duplicates and return to time display.
Teledex B250D Users Manual
P/N 600-0480-53
1)
2)
3)
4)
5)
6)
Press the PHONE BOOK key.
Display will show the first name and number stored, and the
memory location.
Press the REVIEW key to scroll to the number you wish to retrieve.
If you scroll past the number you are looking for, press the REVIEW key to scroll upwards. You may place a call to the number on the display
by either picking the handset or pressing the SPEAKER/HEADSET key.
Alternately, you may “jump” to a section of your phone book, without
having to scroll through the entire list, by entering the letter of the section
you wish to search. For example, you can jump directly to the “C” section
of your phone book (all names beginning with the letter “C”) by entering
the letter C on the key pad (press the number 2 three times in succession.)
To exit the directory at any time, press the PHONE BOOK key.
Contents Copyright © 2003 Teledex LLC
Teledex B250D Users Manual
9
USING THE DIRECTORY
15) DELETING A NAME AND NUMBER IN THE DIRECTORY
1)
2)
3)
Press the PHONE BOOK key. The display will show the first name and
number entered in the directory.
Using the REVIEW keys, scroll to the name and number you wish to
delete, and press the DELETE key.
The display will show the prompt DELETE?. Press the DELETE key
once, and this name and number will be erased from your phone book.
16) CONNECTING AN OPTIONAL HEADSET
Your B250D is equipped with a headset jack that allows you to connect an optional
headset, for convenient hands-free conversations. The jack accepts standard 2.5mm
headset plugs. To use your headset:
1)
2)
3)
4)
Insert the headset’s plug into the headset jack, located on the right side of
the base (Refer to figure below.)
Place the headset on your head, with the earpiece over either ear and
adjust the microphone boom until it is about even with your chin.
Press the SPEAKER/HEADSET key to make or receive calls.
When you finish a conversation, press SPEAKER/HEADSET to hang up.
17) ADJUSTING HEADSET VOLUME
When you pick up the headset to make or receive a call, the headset volume is preset
to a normal level. To increase or decrease the headset volume level, press the
VOLUME or VOLUME keys.
18) CALLER ID, CALL WAITING
18.1 CALLER ID
Caller ID is a service provided by your telephone company or service provider. When
you subscribe to this service, the telephone company sends the incoming caller’s telephone number (and name, if available), and the call’s date and time, between the first
and second rings. The CID display receives and displays this information for each
call, and updates the display with the current date and time. The display also shows
if the caller information is not available, or if the sender blocks that information.
Your B250D will save up to ninety-nine (99) call records, after which it replaces the
oldest call record with each new one.
18.2 CALL WAITING
If you are using the telephone when a new call comes in, and you subscribe to call
waiting service from your telephone company, the display indicates that a new call
is being received. To answer the incoming call, press the FLASH/LINK key. To resume
the previous conversation, press the FLASH/LINK key again.
10
Teledex B250D Users Manual
P/N 600-0480-53
USING CALLER ID
19) LED STATUS
The red, oval-shaped LED on the top right-hand side of the B250D provides multiple
indications. Here is how to tell what each signal means:
Blinking slowly – You have a voice message waiting
Constantly illuminated – You have a new call in your Caller ID memory
Blinking quickly – You have a new incoming call
20) REVIEWING CALLER ID RECORDS
Each time you receive a call, your B250D stores a Caller ID record that you can
review later. A Caller ID record includes:
– Call number (in the order the calls are received)
– The time and date of the call
– Caller’s telephone number (if available)
– Caller’s name (if available)
To review all the Caller ID records, repeatedly press REVIEW or REVIEW .
The display will indicate END OF LIST when you reach the first or the last record in the
list.
NOTE: The display shows up to eleven (11) digits of a phone number. If an incoming phone number
is longer, the display shows only the last 11 digits. The B250D returns to the time and date display
after about twenty (20) seconds, if you do not press a key during that time.
21) CALLER ID MESSAGES
DISPLAY READS
DESCRIPTION
# TOTAL # NEW
Appears as new calls are received. (#) indicates the number of total
calls and new calls.
CALL WAITING
Another caller is trying to reach you. The indicator lights.
PRIVATE CALLER
The caller is blocking the name and/or telephone number from being sent.
PRIVATE NAME
Appears when the caller has blocked just the name from being sent.
PRIVATE CALL
Appears when the caller has blocked just the number from being sent.
END OF LIST
You have reached the end of your call records. Press either REVIEW key
to see them again.
UNKNOWN CALLER
The caller is not within a Caller ID service area. No caller name and
number appear.
UNKNOWN NAME
The caller is not within a Caller ID service area. Only the number
appears, but the name is unknown.
UNKNOWN CALL
Appears when the caller is not within a Caller ID service area.
The number is unknown.
NO CALLS
No new call records are in the Caller ID’s memory.
MSG WAITING
You have a message waiting.
PICK UP PHONE
Appears after the B250D dials a number when you press DIAL.
(see “Using DIAL”).
SET AREA CODE
Prompts you to set the area code (see “Setting the Area Code”)
Contents Copyright © 2003 Teledex LLC
Teledex B250D Users Manual
11
USING CALLER ID
22) USING THE DIAL KEY
You can quickly dial a Caller ID number by simply pressing the DIAL key.
NOTE: You must store your home area code in order to use this feature. If you are calling a
number that originated in your home area code, the Caller ID record will show only the seven digit
number (without an area code.)
Follow these steps to dial a number from a Caller ID record:
1)
2)
3)
4)
Repeatedly press REVIEW or REVIEW to select the desired Caller ID
record. If the displayed phone number matches your phone system’s
dialing pattern, press DIAL twice to dial the number. If the phone number
does not match your phone system’s dialing pattern, follow steps 2
through 4 below.
Press DIAL. The messages DIALING MENU and USE REVIEW KEY alternately flash
on the display.
Repeatedly press REVIEW or REVIEW to select the desired dialing patterns.
Press DIAL. The phone number appears in the display. After the B250D
dials the number, the message PICKUP PHONE appears in the display.
NOTES: If the phone number’s area code matches the area code you have stored, the Caller ID
provides you with four dialing pattern choices: an 8-digit number (1 plus the phone number);
a 10-digit number (area code plus the phone number); an 11-digit number (1 plus the area code
plus the phone number); a 7-digit number.
If the phone number’s area code does not match the area code you stored, you can select whether
or not to dial a ‘1’ before the phone number.
If you have not yet stored an area code, the displays reads: SET AREA CODE 000, and the first ‘0’
flashes.
23) DELETING CALLER ID RECORDS
The B250D allows you to delete individual Caller ID records, or all Caller ID records
that have been reviewed. It will not allow the deletion of Caller ID records that have
not been reviewed. You cannot delete Caller ID records during a call.
To delete a single Caller ID record:
1)
2)
Repeatedly press REVIEW or REVIEW to select a record, then press
DELETE. The display will show the prompt DELETE?.
Press the DELETE key once again. The name and number will be deleted
from the phone book log. If there are no other records, NO CALLS will
appear on display.
To delete all Caller ID records:
1)
Wait until the B250D shows the clock display, then hold down the DELETE
key for approximately four seconds. ERASE ALL flashes twice in the display,
then the phone beeps once to confirm that all records were deleted.
24) PRIORITY (VIP) CALL
This feature alerts you when an important (VIP) call is being received, from up to twenty
(20) numbers of your choosing. When you receive a call from a number matching one
stored in the VIP call record, the B250D sounds two quick beeps each time the phone
rings, until you answer the call.
NOTE:
12
VIP call records are protected so you cannot delete them by mistake. To delete a
VIP call record, you must first “unmark” it, using the steps in “Unmarking a VIP Call
Teledex B250D Users Manual
P/N 600-0480-53
MESSAGE WAITING
Record,” then delete the record using the steps in outlined in the section “Deleting a
single Caller ID record”.
24.1 MARKING A VIP CALL RECORD
1) Press the PHONE BOOK key.
2) Repeatedly press either REVIEW key, until you see the call record you
3)
wish to mark as a VIP call.
Press the STAR (*) key on the keypad until PRIORITY CALL appears in the
display. The B250D beeps once and marks the call record as a VIP
record.
NOTE: As you press either REVIEW key to review stored records, PRIORITY CALL appears on
each record that you marked as a VIP call record. If the VIP memory is full, the B250D will beep
three (3) times when you hold down the STAR (*) key. To store another VIP call record, you must
first delete an existing one.
24.2 UNMARKING A VIP CALL RECORD
1) Press the PHONE BOOK key, then repeatedly press either REVIEW key until
2)
you see the VIP call record you want to unmark.
Press and hold the STAR (*) key until PRIORITY CALL disappears from the
display. The B250D beeps once to confirm your unmarking this record.
25) MESSAGE WAITING
If you subscribe to your telephone company’s message waiting service, the B250D
tells you when you have a message waiting. The message waiting indicator icon will
appear in the display, and remains until you retrieve the message. Depending on the
type of message waiting service provided, the red message waiting light on the upper
right corner of the top of the B250D will also blink. The indicator(s) will remain on
until you retrieve the message(s.)
NOTE: Refer to instructions provided by your service provider on how to retrieve messages.
There are three types of message waiting:
1)
STUTTER DIAL TONE – if you subscribe to the telephone company’s message
2)
FSK – if you subscribe to the telephone company’s CID message
3)
waiting service.
waiting service.
MULTI-X – if you are behind a PBX system with message waiting service.
For STUTTER DIAL TONE and FSK message waiting, set the message waiting switch at the
bottom of the phone to FSK. For MULTI-X message waiting, set the message waiting
switch to VMWI.
26) TROUBLESHOOTING
Should you experience difficulty with the operation of your B250D, check for the
following:
NO DIAL TONE
Phone line and/or handset cord may not be connected securely.
BLANK DISPLAY
AC adapter may not be plugged in entirely, or line cords incorrectly installed.
VOLUME DROPS
WHILE ON A CALL
Someone may have picked up an extension on the same line.
NOISE ON THE LINE
Phone line and/or handset cord may not be connected securely.
Contents Copyright © 2003 Teledex LLC
Teledex B250D Users Manual
13
CARE AND MAINTENANCE
If you still experience problems, disconnect the phone. If other phones on the same
line work properly, the fault may be with this particular phone, or have something to
do with its installation. If you cannot determine the problem, take your telephone to
your local dealer for assistance.
27) CARE AND MAINTENANCE
These suggestions will help you care for your phone so you can enjoy trouble-free
service for many years:
– Keep the telephone dry. If it gets wet, wipe it dry immediately. Liquids might
contain minerals that can corrode the electronic circuitry.
– Use and store the B250D only in normal temperature environments. Extreme
temperatures can shorten the life of electronic components, and distort or melt
plastic parts.
– Keep the telephone away from dust and dirt, which can cause premature
wearing of parts.
– Handle the B250D gently and carefully. Dropping it can damage internal circuit
boards and components, causing the phone to work improperly.
– Wipe the B250D with a damp cloth occasionally to remove dust and dirt.
Do not use harsh chemicals, cleaning solvents, or strong detergents to clean the
telephone.
– Modifying or tampering with internal components can cause a malfunction and
might invalidate the warranty, as well as void your FCC authorization to operate
the telephone. If your B250D is not performing as it should, see your dealer for
assistance. If the trouble is affecting the telephone lines, the telephone company
or service provider may ask you to disconnect your telephone until the problem
is resolved.
28) WHAT THE FCC WANTS YOU TO KNOW
In the unlikely event that your B250D causes problems on the phone line, the telephone company can temporarily discontinue your service. If this happens, the telephone company attempts to notify you in advance. If advance notice is not practical,
the telephone company notifies you as soon as possible and advises you of your right
to file a complaint with the FCC. Also, the telephone company can make changes to
its lines, equipment, operations, or procedures that could affect the operation of this
telephone. The telephone company notifies you of these changes in advance, so you
can take the necessary steps to prevent interruption of your phone service.
29) LIGHTNING
Your B250D has built-in protection circuits to reduce the risk of damage from surges
in telephone line and power line current. These protection circuits meet or exceed
FCC requirements. However, lightning striking the telephone or power lines can
damage your phone. Lightning damage is not common. Nevertheless, if you live in
an area that has severe electrical storms, we suggest that you unplug your phone
during storms to reduce the possibility of damage.
14
Teledex B250D Users Manual
P/N 600-0480-53
NOTICES AND REQUIREMENTS
30) REQUIREMENTS OF PART 68- FCC RULES
This device has been granted a registration number by the Federal Communications Commission, under
Part 68 rules and regulations for direct connection to the telephone lines. In order to comply with these
FCC rules, the following instructions must be carefully read and applicable portions followed completely:
1) Direct connection to the telephone lines may be made only through the standard modular cord furnished, to the utility installed jack. No connection may be made to party or coin phone lines. On the bottom
of the phone is a label that contains among other information, the FCC Registration Number and the
Ringer Equivalence number (REN) for this equipment. If requested, this information must be provided to
the telephone company. The USOC jack for this equipment is RJIIC.
2) The telephone company may, under certain circumstances, temporarily discontinue and make changes
in facilities and services which may affect the operation of the users’ equipment; however, the user shall be
given adequate notice in writing to allow the user to maintain uninterrupted service.
3) In certain circumstances, it may be necessary for the telephone company to request information from
you concerning the equipment which you have connected to your telephone line. Upon request of the telephone company, provide the FCC registration number and the ringer equivalence number of the equipment
which is connected to your line. This information will be found on the bottom of your telephone.
4) If any of your telephone equipment is not operating properly, you should immediately remove it from the
telephone line. It may cause harm to the telephone network.
5) If the telephone company notes a problem, they may temporarily discontinue service. When practical,
they will notify you in advance of disconnection. If advance notice is not feasible, the telephone company
must: Promptly notify you of such temporary discontinuance; Afford the opportunity to correct the condition;
Inform you of your rights to bring a complaint to the FCC under their rules.
6) Repairs to the device may be made only by the manufacturer or an authorized service agency. This
applies at any time during and after warranty. If unauthorized repair is performed, registration, connection
to the telephone lines and remainder of warranty period all become null and void.
7) This equipment is hearing aid compatible.
8) This telephone must be connected behind a PBX.
31) REQUIREMENTS OF PART 15- FCC RULES
NOTE: This equipment has been tested and found to comply with the limits for a Class B digital device,
pursuant to Part 15 of the FCC Rules. These limits are designed to provide reasonable protection against
harmful interference in a residential installation. This equipment generates, uses, and can radiate radio frequency energy and, if not installed and used in accordance with the instruction, may cause harmful interference to radio communications. However, there is not a guarantee that interference will not occur in a
particular installation. If this equipment does cause harmful interference to radio or television reception,
which can be determined by turning the equipment off and on, the user is encouraged to try to correct the
interference by one or more of the following measures: 1) Move the telephone away from the receiver. 2)
Consult the dealer or an experienced radio/TV technician for help. Any changes made by the user not
approved by the manufacturer can void the user’s authority to operate the telephone.
32) INDUSTRY OF CANADA REQUIREMENTS
NOTICE: The Industry Canada label identifies certified equipment. This certification means that the equipment meets certain telecommunications network protective operational and safety requirements as prescribed in the appropriate Terminal Equipment Technical Requirements documents. The department does
not guarantee the equipment will operate to the user satisfaction.
Before installing this equipment, users should ensure that it is permissible to be connected to the facilities
of the local telecommunications company. The equipment must also be installed using an acceptable
method of connection.
Contents Copyright © 2003 Teledex LLC
Teledex B250D Users Manual
15
SAFETY
The customer should be aware that compliance with the above conditions may not prevent degradation
of service in some situations. Repairs to certified equipment should be coordinated by a representative
designated by the supplier. Any repairs or alterations made by the user to this equipment, or equipment
malfunctions, may give the telecommunications company cause to request the user to disconnect the
equipment.
Users should ensure for their own protection that the electrical ground connections of the power utility, telephone lines, and internal metallic water pipe systems, if present, are connected together. This precaution
may be particularly important in rural areas.
CAUTION: Users should not attempt to make such connections themselves, but should contact the
appropriate electric inspection authority or electrician, as appropriate. The Ringer Equivalence Number
(REN) of this device is z.
NOTICE: The Ringer Equivalence Number (REN) assigned to each terminal device provides an indication
of the maximum number of terminals allowed to be connected to a telephone interface. The termination on
an interface may consist of any combination of devices subject only to the requirement that the sum of the
Ringer Equivalence Numbers of all the devices does not exceed 5. This telephone connects to the telephone network under the connecting arrangement code CA11A.
33) IMPORTANT SAFETY INSTRUCTIONS
WHEN USING YOUR TELEPHONE EQUIPMENT, BASIC SAFETY PRECAUTIONS SHOULD ALWAYS
BE FOLLOWED TO REDUCE THE RISK OF FIRE, ELECTRIC SHOCK AND INJURY TO PERSONS,
INCLUDING THE FOLLOWING:
1. READ AND UNDERSTAND ALL INSTRUCTIONS.
2. FOLLOW ALL WARNINGS AND INSTRUCTIONS MARKED ON THE PRODUCT.
3. UNPLUG THE PRODUCT FROM THE WALL OUTLET BEFORE CLEANING. DO NOT USE LIQUID
CLEANER OR AEROSOL CLEANERS. USE A DAMP CLOTH FOR CLEANING.
4. DO NOT USE THIS PRODUCT NEAR WATER, FOR EXAMPLE: NEAR A BATHTUB, WASH BOWL,
KITCHEN SINK OR LAUNDRY TUB, IN A WET BASEMENT, OR NEAR A SWIMMING POOL.
5. DO NOT PLACE THIS PRODUCT ON AN UNSTABLE CART, STAND OR TABLE. THE PRODUCT
MAY FALL, CAUSING SERIOUS DAMAGE TO THE PRODUCT.
6. SLOTS AND OPENINGS IN THE CABINET AND THE BACK OF BOTTOM ARE PROVIDED FOR
VENTILATION. THESE OPENINGS MUST NOT BE BLOCKED OR COVERED. THE OPENINGS
SHOULD NEVER BE BLOCKED BY PLACING THE PRODUCT ON A BED, SOFA, RUG OR ANY
OTHER SIMILAR SURFACE. THIS PRODUCT SHOULD NEVER BE PLACED NEAR OR OVER A RADIATOR OR HEAT REGISTER. THIS PRODUCT SHOULD NOT BE PLACED IN A BUILT-IN INSTALLATION UNLESS PROPER VENTILATION IS PROVIDED.
7. NEVER PUSH OBJECTS OF ANY KIND INTO THIS PRODUCT THROUGH CABINET SLOTS AS
THEY MAY TOUCH DANGEROUS VOLTAGE POINTS OR CAUSE A SHORT CIRCUIT THAT COULD
RESULT IN A FIRE OR ELECTRIC SHOCK. NEVER SPILL LIQUID OF ANY KIND ON THE PRODUCT.
8. TO REDUCE THE RISK OF ELECTRIC SHOCK, DO NOT DISASSEMBLE THIS PRODUCT. IF SERVICE IS NECESSARY, SEND OR TAKE THE TELEPHONE TO A QUALIFIED SERVICE FACILITY.
OPENING OR REMOVING COVERS MAY EXPOSE YOU TO DANGEROUS VOLTAGES OR OTHER
RISKS. INCORRECT REASSEMBLY CAN CAUSE ELECTRIC SHOCK WHEN THE APPLIANCE IS
SUBSEQUENTLY USED.
9. UNPLUG THIS PRODUCT FROM THE WALL OUTLET AND REFER SERVICING TO QUALIFIED
SERVICE PERSONNEL UNDER THE FOLLOWING CONDITIONS:
•
•
•
•
•
16
IF THE POWER SUPPLY CORD OR PLUG IS DAMAGED OR FRAYED
ID LIQUID HAS BEEN SPILLED INTO THE PRODUCT
IF THE PRODUCT HAS BEEN EXPOSED TO RAIN OR WATER
IF THE PRODUCT DOES NOT OPERATE NORMALLY BY FOLLOWING THE OPERATING
INSTRUCTIONS. ADJUST ONLY THOSE CONTROLS THAT ARE COVERED BY THE OPERAT
ING INSTRUCTIONS, AS IMPROPER ADJUSTMENT OF OTHER CONTROLS MAY RESULT IN
DAMAGE AND WILL OFTEN REQUIRE EXTENSIVE WORK BY A QUALIFED TECHNICIAN
TO RESTORE THE PRODUCT TO NORMAL OPERATION.
IF THE PRODUCT HAS BEEN DROPPED OR THE CABINET HAS BEEN DAMAGED.
Teledex B250D Users Manual
P/N 600-0480-53
SAFETY INSTRUCTIONS
•
IF THE PRODUCT EXHIBITS A DISTINCT CHANGE IN PERFORMANCE.
10. AVOID USING THE TELEPHONE DURING AN ELECTRICAL STORM. THERE MAY BE A REMOTE
RISK OF ELECTRIC SHOCK FROM LIGHTNING.
11. DO NOT USE THE TELEPHONE TO REPORT A GAS LEAK IN THE VICINITY OF THE LEAK.
Contents Copyright © 2003 Teledex LLC
Teledex B250D Users Manual
17
CONTACTING TELEDEX
Telephone: +1 (408) 363-3100
Address:
6311 San Ignacio Avenue
San Jose, CA 95119 USA
Internet:
email:
PART NUMBER 600-0480-53
www.teledex.com
[email protected]