1
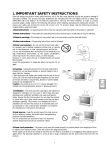
42pb120S4-en 2/07/04 11:32 Page 1 Table of contents Important safety instructions Warnings and precautions Installation Care and maintenance Trademarks Compliance with CE standards Package contents Understanding your set Front panel Remote control Using the remote control for other equipment Programming the remote control Switching on Channel set-up Initial set-up Manual installation General operation Switching the set on and off Volume Displaying status information Accessing TV channels Accessing AV programmes Adjusting the picture In TV mode In PC mode Adjusting the sound Picture in picture (PIP) Other functions Sleep timer Zoom Customizing your TV set Using the Teletext Connecting other equipment Connecting a DVD player Connecting a videorecorder Connecting external amplified speakers Connecting an amplifier Connecting a PC Signal frequency information Troubleshooting Specifications Wall mount installation (optional) Package contents Installation 2 2 3 3 3 3 4 5 5 6 7 8 9 10 10 12 13 13 13 13 13 13 14 14 14 15 16 17 17 17 17 18 20 20 20 21 21 21 22 23 24 25 25 26 EN 1 42pb120S4-en 2/07/04 11:32 Page 2 Important safety instructions Warnings and precautions EN 2 Ensure that your domestic mains supply voltage matches the voltage indicated on the identification label located at the back of the set. The TV set’s components are sensitive to heat.The maximum ambient temperature should not exceed 35° Celsius. Do not cover the vents at the back of the TV set. Leave sufficient space around it to allow adequate ventilation. Install the TV set away from any source of dust or heat (radiator, etc.). Do not expose it to direct sunlight. Moisture in rooms where the set is installed should not exceed 85% humidity. If you have to use the TV set outdoors, do not expose it to rain or splashing water. Moving the set from a cold place to a warm one can cause condensation on the screen (and on some inside components). Let the condensation evaporate before switching the TV set on again. During thunderstorms, we recommend that you disconnect the set from the mains and aerial so that it is not affected by electrical or electromagnetic surges that could damage it. For this reason, keep the mains and aerial sockets accessible so they can be disconnected if needed. Unplug the set immediately if you notice it giving off a smell of burning or smoke.You must never, under any circumstances, open the set yourself, as you risk an electric shock in doing so. If you intend to be away for a long period, switch the set off at the on/off switch located on the rear panel (see the figure below). Even when off, some components remain in contact with the mains electricity supply.To completely isolate the set you must remove the plug from the mains supply socket. This product is fitted with a 3-pin grounded plug, which will only fit into a grounded power outlet.This is a safety feature. Do not alter the plug, as this would defeat the safety feature. Avoid any intrusion of liquid or small metallic objects inside the set. If such an incident were to occur, immediately disconnect the TV set from the mains supply and refer servicing to qualified service personnel. Use the screen saver when using a computer. Switch the TV set to standby mode when you do not use it. The top of the TV set is usually very hot due to the high temperature of exhaust air released through the ventilation openings. Do not place your hands or face close to these openings to avoid burns or personal injuries. Do not place any object close to the ventilation openings to avoid any damage to the object or to the TV set itself. Make sure that all cables are disconnected before moving the TV set, to avoid damaging the cables and thus cause fire or electric shock danger. 100 ~ 240 V 50/60 Hz main power switch 42pb120S4-en 2/07/04 11:32 Page 3 Important safety instructions Installation Care and maintenance Install the TV set in a properly ventilated room. Do not install this product on an unstable cart, stand or table. Do not place it on a bed, sofa, rug, or other similar surfaces. Do not install the TV set in an enclosed area unless proper ventilation is provided. Do not rest objects on the power cord and avoid placing power cord near high traffic areas. Do not overload wall outlets and extension cords as this can result in a risk of fire or electric shock. To reduce the risk of screen burning, do not display still images for extended periods of time. Examples of still images include still computer and video game images, logos, pictures, text and images displayed in 4:3 format. When displaying tables, graphics, etc.: - Decrease the contrast and brightness of the picture as much as possible. - Display pictures presenting many colours and grading of colours (photographs). - Adjust contrast to obtain the least noticeable transition between dark and light areas (white characters on a black background). If the picture displayed is in any way abnormal, turn off the set using the main power switch located at the back and disconnect it from the electric outlet. This TV set must be installed and used in compliance with this document. It should not be used for other purposes, including industrial purposes. Screen burns are not covered by the warranty. Always disconnect the TV set from the mains supply before any cleaning operation. Clean the screen with a glass-cleaning product. Never use abrasive products. Clean the front and cabinet using a soft cloth impregnated with a neutral detergent. Using solvents, abrasive or alcohol-based products could damage the set. Regularly dust the air vents located at the back. Trademarks VGA is a trademark of IBM Corporation. Macintosh is a registered trademark of Apple Computer Corporation. SVGA is a registered trademark of the Video Electronics Standard Association. All other trademarks are the properties of their respective owners. Compliance with CE standards The CE label on this product indicates that it complies with the 89/336/EEC directive on electromagnetic compatibility and safety rules as defined in the 73/23/EEC and 93/68/EEC low voltage directives.This product is protected against interferences from other electronic devices, provided that these devices comply with the standards in force. Sporadic interferences may happen nevertheless. HELPLINE You can contact THOMSON by dialling: 0871 712 1312 (for United Kingdom, £0.10/mn inc VAT) www.thomson-europe.com THOMSON is not liable if the product is not used in accordance with this manual. In our endeavour to improve the quality of our products we reserve the right to modify their features.The information in this manual is therefore likely to change and is not contractually binding. EN 3 42pb120S4-en 2/07/04 11:32 Page 4 Package contents Remote control with batteries TV set EN 4 SIZE AAA 1,5 V 0%MERCURY EXTRA HEAVY DUTY GREENELL + - - + GR EE EX TR NE AH EA SIZ VY LL E AA A 1,5 DU V TY 0%ME RCUR Y User manual 42P B1 20S 4 M an Be Ma Us Ma er nu die nu ma al u el nu al e nu de d’ u ng sa di nle u til al u til til iz ac isa itu t io n ng iz z az io n e ió n Optional accessory You can purchase from your local sales representative an optional wall mount under the following reference: ACC913. Power cord 42pb120S4-en 2/07/04 11:32 Page 5 Understanding your set Front panel EN 5 Power (standby) button Menu On / standby To access the menus. Status light To control the volume. Horizontal scrolling in menus. +/Off When the TV set is connected to the mains, and the main power switch on the rear panel is on the OFF position, the light is off. Orange When the TV set is connected to the mains and the main power switch is on the ON position, but the power button on the front panel is off, the light is orange. Green When the set is on, the light is green. PR+/To change channels. Vertical scrolling in menus. 42pb120S4-en 2/07/04 11:32 Page 6 Remote control Most of your television’s functions are available via the menus that appear on the screen.The remote control supplied with your set can be used to navigate through the menus and to configure all the general settings. EN 6 TV VCR DVD SAT AUX AMP light PIP SWAP/ SLEEP PIP+/PIPZOOM/ FREEZE/ LIGHT PRESETS LIST INFO GUIDE TEXT OK MENU EXIT +/RETURN PR+/0-9 AV DEMO IMPORTANT: If the batteries in your remote control are run down, you can use the buttons on the front of the set, as they have the same functions as those of the remote control. Standby / quit standby. To access TV mode. Press this button to control the television. To access VCR mode. To access DVD mode. To access SAT mode. To access AUX mode. To access AMP mode. To provide information: -it lights up when you press a button, -it indicates the status when the remote control is being programmed (see page 8 ), -if the batteries are run down, it flashes when you press a button. To scroll the various PIP display modes. To swap the main picture with the PIP picture. Inactive. To change programmes within the PIP function. To change position of PIP on screen. Inactive. Inactive. (red button) To access the sleep timer. (green button) Inactive. (yellow button) To access status information. (blue button) Inactive. (purple button) To access teletext. The coloured buttons can also be used for operating Teletext. To select menu options. To set functions, change values, enable and disable functions (checkbox) in menus, and use the zoom function. To confirm a selection. To access the OVERVIEW menu. To exit the menu structure. In PIP mode: to disable the PIP function. To control the volume. To switch the sound off and back on again. Inactive. To change channels. To select a channel by its number. In the case of channel numbers with two digits: - press the two digits quickly, or - press 0 to display “--”, then enter the channel number. Enter numeric values in menus. To select an appliance connected to an AV socket. Inactive. 42pb120S4-en 2/07/04 11:32 Page 7 Remote control Using the remote control for other equipment The remote control supplied with your television can be used to control other appliances using the programmable buttons VCR, DVD, SAT, AMP and AUX. For each button you can control the following appliances: VCR: video recorder DVD: DVD player SAT: satellite receiver, cable network AMP: hi-fi system, Home Cinema amplifier AUX: any appliance. For instance, if you have two video recorders, you can program the VCR button to control one video recorder, and program the AUX button to control the other one. Note: The TV button is not programmable. MENU OK EXIT 0-9 PR+/AV REW PLAY FWD STOP PAUSE REC +/- Video recorder Press the VCR button On/Standby To display the main menu Vertical scrolling in menus Horizontal scrolling in menus To confirm an action To close a menu To directly access channels or enter numeric values To change channels To select AV input Rewind Play Fast forward Stop Pause Record DVD player Press the DVD button On/Standby To display the main menu Vertical scrolling in menus Horizontal scrolling in menus To confirm an action To close a menu To enter numeric values or select options in menus To change chapters Satellite receiver Press the SAT button On/Standby To display the main menu Vertical scrolling in menus Horizontal scrolling in menus To confirm an action To close a menu To directly access channels or enter numeric values To change channels Hi-fi system Press the AMP button On/Standby To select a radio station using its number To change stations Rewind Play Fast forward Stop Pause To switch the sound off and back on again To set the volume level EN 7 42pb120S4-en 2/07/04 11:32 Page 8 Remote control Programming the remote control EN 8 Automatic code search Manual programming This method can be used to automatically find the most appropriate code for your appliance. 1. Switch on the appliance you wish to use the remote control with. 2. Press the relevant button for this appliance on the remote control, and while holding this button down, press the button until the light or the appliance buttons of the remote control come on. Release both buttons. 3. Point the remote control at the appliance and press PLAY.Wait until the light stops flashing. If the appliance has not gone into standby mode, press the PLAY button again to continue the search for the next set of codes. Repeat this operation until the appliance goes into standby mode.There are around 20 sets of codes. 4. When the appliance goes into standby mode, switch it on again without using the remote control. Press the REV button as many times as is required to return the appliance to standby mode. 5. Press the STOP button and hold it down until the light or the appliance buttons of the remote control go off. This method involves carrying out a manual search for the codes to be used for controlling your other appliance. 1. Switch on the appliance you wish to use the remote control with. 2. Press the relevant button for this appliance on the remote control, and while holding this button down, enter one of the codes relevant to your make of appliance (see the list of codes at the end of this manual). If the light or the appliance buttons of the remote control flash you have entered the wrong code or it is not possible to program the remote control. 3. Point the remote control at the appliance and press the relevant button (VCR, DVD, etc). Press the standby button. If the appliance does not go into standby mode, try another code. Depending on the year of manufacture and the type of appliance, some functions may not be available. Certain codes may cover more functions than others.Test the functions you can control and, if appropriate, try other codes. Note here the code(s) which work best. Note:You can cancel the programming operation at any time by pressing the EXIT button. VCR AUX DVD AMP SAT When you change the remote control’s batteries, remember to reprogram it. 42pb120S4-en 2/07/04 11:32 Page 9 Switching on Follow the instructions on this page to switch on the TV set and the remote control. 1. Install two LR06 or AA batteries in the remote control. Precautions on using batteries: - Only use the battery types specified. - Make sure you use the correct polarity. - Do not mix new and used batteries. - Do not use rechargeable batteries. - Do not expose batteries to excessive heat, throw them on the fire, recharge them or try to open them, as this could cause them to leak or explode. - Remove the batteries from the remote control if you are not using it for a long period of time (several weeks). 100 ~ 240 V 50/60 Hz Mains socket in continental Europe 13 A 2. Connect the TV set to a mains socket. The set should only be connected to an AC supply. It must not be connected to a DC supply. If the plug is detached from the cord, do not, under any circumstances, connect it to a mains socket, as there is a risk of electric shock. Equipment for the UK is supplied with a mains cable fitted with a moulded plug.This plug contains safety components and must not be replaced by one sold by general retailers. It is fitted with a fuse that protects your television. If your set has stopped working, the fuse may have blown. If it has, replace it with an identical ASTA or BSI certified (BS1362) 13-amp fuse. 3. Connect the outside aerial or cable network to the antenna connector (labelled ANT) on the rear panel of the TV set. The aerial socket can be used for connecting an external aerial or other equipment fitted with a modulator (video recorder, satellite receiver, etc.). We recommend that you do not connect other equipment (video recorder, satellite receiver, etc.) to your TV set to begin with, so as not to complicate the set-up procedure with this additional equipment. Connect them when you have finished setting up the channels. 4. Switch the TV set on by putting the main power switch located at the back on the ON position, then pressing the power button on the front panel. The first time you switch on the TV set, the language selection menu appears. Please respect the environment and the relevant regulations. Before you dispose of batteries or accumulators, ask your dealer whether they require special recycling and if he is able to take them back. EN 9 42pb120S4-en 2/07/04 11:32 Page 10 Channel set-up Initial set-up The initial set-up involves setting all the parameters required to be able to search and store all the channels you can receive in your area. Make sure that the TV set is switched on and follow steps 1 to 4.When you first switch the TV set on, the language selection menu appears. If this does not happen, refer to the Manual installation section to find out how to carry out an automatic search. English Français Deutsch Italiano Español - ok EN 10 1. Choose which language you want the menus to appear in using the buttons. Press OK to confirm. COUNTRY Return U.K. Eire France Germany Italy Spain Belgium Switzerland Austria Other Select your country and press OK. AUTO INSTALLATION Return Start ... To start auto installation, press OK. 2. A list of countries appears. Select the relevant country using the buttons. If your country is not listed, select Other. Press OK to confirm. Note: This is the country you are in, or the country whose channels you want to receive if you live near its borders. 3. The AUTO INSTALLATION menu appears.The Start line is selected. Press OK to launch the auto installation. Once the auto installation has started, additional information displays (standard currently scanned, frequency, and number of channels found). The automatic set-up process can take several minutes. Channels are arranged in a pre-set order, depending on the country selected. If you press the EXIT button before the end of the process, the channels already found are stored. 42pb120S4-en 2/07/04 11:32 Page 11 Channel set-up ORGANIZER Return Select PR Swap with PR: Change name Delete PR Select programme with PR-/+ or </> or 0 to 9 keys. 02 -BBC2 05 4. At the end of the auto installation process, the ORGANIZER menu appears to allow you to modify the order of channels, to name or rename channels, or delete channels stored twice or with poor reception quality. Use a TV programme magazine and the channel logos to identify the various channels. Note: The ORGANIZER menu is also accessible from the INSTALLATION menu. If you do not want to reorganise the channels, press EXIT to close the menu. When the ORGANIZER menu opens, the current channel’s number is displayed on the Select PR line. - Organising channels: on the Select PR line, display the number of the channel you want to move using the buttons or the numeric buttons.The channel is displayed on TV. Select the Swap with PR: option, enter the number you want to assign to this channel and press OK to confirm. A message appears indicating that the channels are swapped. - Changing a channel name: on the Select PR line, display the number of the channel whose name is to change using the buttons or the numeric buttons. Select the Change name option. Select the character to be changed using the buttons. Scroll through the alphabet using the buttons.When you have changed one character, move the cursor to the next one using the buttons and repeat the procedure. The maximum length for a channel name is 6 characters. Press OK to confirm the name. - Deleting a channel: on the Select PR line, display the number of the channel to be deleted using the buttons or the numeric buttons. Select Delete PR, and press OK to confirm. A message appears indicating that the channel has been deleted. Press EXIT to close the menu. Select Return to return to the INSTALLATION menu. To launch a new auto installation after the initial set-up (after moving house, for instance), display the OVERVIEW menu and select Installation. In the INSTALLATION menu, select Auto installation. The country selection screen appears, allowing you to launch an automatic installation.This process deletes all channels previously stored. EN 11 42pb120S4-en 2/07/04 11:32 Page 12 Channel set-up Manual installation INSTALLATION Return Manual installation Auto installation Organizer MANUAL INSTALLATION EN 12 Return Standard Frequency Name Fine-tuning Store on PR: Decoder Text EURO 150.75 MHz BBC2 02 1 You may want to to carry out a manual installation in case some channels have not been stored during the initial set-up. Setting up channels manually requires every setting to be entered, one at a time.To carry out a manual installation, display the OVERVIEW menu using the MENU button and select the Installation option. Press OK to confirm. In the INSTALLATION menu, select Manual installation and press OK to confirm. The information displayed pertains to the current channel.The Standard line is highlighted. To search for channels, do the following: 1. On the Standard line, select the standard for your country. The following standards are available: FR for France and Luxemburg, UK for United Kingdom and Eire, DK for Eastern Europe and the Middle East, and EURO for Western Europe. 2. Select the Frequency line, enter a frequency or use the buttons to start a search.The available frequencies depend on the selected standard. 3. Once a channel is found, if it is recognised, its name is automatically detected and displayed on the Name line. Note: This line is only informative and cannot be selected. 4. You can tune the channel manually using the Fine-tuning function. 5. If the channel is encoded and you want to connect a decoder to an AV socket, select the Decoder line and check the box using the buttons. 6. Select the Text line, and using the and buttons, select the character set to be used for Teletext: 1:Western Europe 2: Eastern Europe 3: Russian, Bulgarian 4: Greek 5: Arabic 6: Ukrainian 7: Byelorussian Note: The Teletext character set is stored per channel. You can now store the settings for this channel.To do so, select the Store on PR: line, enter the number you want to assign to the channel (e.g. 02 for BBC2), press OK to confirm. Press EXIT to close the menu. Note: The INSTALLATION menu is only available in video mode (TV channels or AV programmes). 42pb120S4-en 2/07/04 11:32 Page 13 General operation Switching the set on and off To switch the TV set on, put the main power switch located at the rear on the ON position, then press the power button located on the front panel.When the set is on, the light on the front is green. Standby mode: press the power button on the front panel.When the TV set is in standby mode, the light on the front is orange. Volume Volume control: use the buttons on the front panel or the remote control to increase and decrease the volume. Sound mute: press the button on the remote control to temporarily mute the sound. +/- button. To restore it, press the button again or use the Displaying status information In TV mode, press the yellow INFO button on the remote control to display the number and name of the channel you are watching, the zoom format, the type of sound, and the remaining time if the sleep timer is on. In PIP mode, the PIP display mode is displayed with the number and name of the channel or the AV programme number and the type of signal transmitted. The number and name of the channel are displayed whenever you turn on the set or change channels. Accessing TV channels Using the numeric buttons: - For channels 1 to 9, press the corresponding button. - For two-digit channels, first press the 0 button, then the channel number (e.g. type 012 for channel 12), or enter the two digits quickly. Using the PR+/- buttons: scan through the programmes. AV programmes are not accessible. Accessing AV programmes Press the AV button to display the last selected AV programme and scan through the other AV programmes. EN 13 42pb120S4-en 2/07/04 11:32 Page 14 Adjusting the picture Display the OVERVIEW menu using the MENU button. Select Picture and press OK to confirm.The PICTURE menu appears. The contents of this menu depends on the signal. In TV mode: PICTURE menu in TV mode PICTURE EN 14 Return Brightness Contrast Colour Sharpness Tint Tone Auto format Noise reduction Cold Low Adjust the Brightness, Contrast, Colour and Sharpness settings as required. The Tint option is only available when a NTSC signal is detected. It is used for adjusting the picture’s tint. To adjust the colour temperature, select the Tone option and select a setting using the buttons. Check the box for the Auto format option so that the appropriate format is automatically applied to the picture. Note: if you are watching an AV programme through AV3 or Component Y/CB/CR, this function is not available. Use the Noise reduction function to improve the quality of the picture in the case of poor reception. Use the buttons to select one of the options. In PC mode: PICTURE menu in PC mode PICTURE Return Brightness Contrast Tone V-Size V-Position H-Size H-Position Phase Neutral Adjust the Brightness and Contrast settings as required. To adjust the colour temperature, select the Tone option and select a setting using the buttons. Use the V-Size option to change the vertical size of the picture. Using the buttons, move the cursor to the right to enlarge the picture, or to the left to reduce it. Use the V-position to move the picture vertically. Using the buttons, move the cursor to the right to shift the picture up, or to the left to shift it down. Use the H-Size option to change the horizontal size of the picture. Using the buttons, move the cursor to the right to enlarge the picture, or to the left to reduce it. Use the H-position to move the picture horizontally. Using the buttons, move the cursor to the right to shift the picture to the right, or to the left to shift it to the left. The Phase option allows you to finetune the set in order to perfectly synchronize it with the video signal source. Press the EXIT button to close the menu. Select Return to return to the OVERVIEW menu. 42pb120S4-en 2/07/04 11:32 Page 15 Adjusting the sound SOUND Return Sound type Bass Treble Balance Intern. speaker Audio output Stereo Fixed Display the OVERVIEW menu using the MENU button. Select Sound and press OK to confirm.The SOUND menu appears, which offers the following settings: The Sound type option allows to select the relevant sound type. Use the buttons to make a selection. The available options depend on the programme you are watching. Broadcast Options Mono Mono, Automatic Stereo Mono, Stereo Bilingual Sound 1, Sound 2 NICAM bilingual Sound 1, Sound 2, Sound 3 AV1, AV2, or AV3 Stereo , Sound 1, Sound 2 Adjust the Bass and Treble levels as required. Use the Balance option to balance the sound between the left and right speakers. The internal speakers are activated by default.To deactivate, uncheck the box on the Intern. speaker line using the OK button. The Audio output option allows you to set the audio output of external speakers.When Fixed is selected, the Bass,Treble and Balance functions, and the volume controls are deactivated for the external speakers. The audio output is set to Fixed by default. Use the buttons to change the setting. Press EXIT to close the menu. EN 15 42pb120S4-en 2/07/04 11:32 Page 16 Picture in picture (PIP) EN 16 The PIP area on the remote control is used for the PIP functions.These functions allow to view two programmes (one TV channel and one AV programme, or two AV programmes) at the same time in various ways.Press the PIP button to scroll the various display modes: PIP: a TV channel or AV programme is displayed in a frame in a corner of the screen. PAP: the screen is divided vertically in two and the second programme is displayed on the right side. Sound comes from the main programme, on the left. PAP (4/3): the images are displayed in 4:3 format. Black bars are added on the upper and lower parts of the screen. PAP (16/9): the images are displayed in 16:9 format. Black bars are added on the upper and lower parts of the screen. Off: the function is deactivated. Note: The PIP function is only available in TV mode and with devices connected to the SCART, S-video, and Component 1H Y/Cb/Cr sockets. Use the PIP+/PIP- buttons to change the PIP programme. Use the PR+/- buttons to change the main programme. Use the SWAP/ button to swap the main programme and the PIP programme. button to change the position of the PIP on the Use the ZOOM/ screen (upper right, upper left, bottom left or bottom right). Note: This function is only available if you selected the PIP mode. Press the EXIT button to deactivate the PIP function. 42pb120S4-en 2/07/04 11:32 Page 17 Other functions Sleep timer This function allows you to set an automatic shut-off time, from 0 to 4 hours, with 15-minute steps. 3 : 4 5 - : - - Press the red button on the remote control to activate the sleep timer function. A symbol appears on screen in front of the sleep time. If no timer has been set, then -:-- is displayed. Use the buttons to decrease/increase the duration. Once the timer is set, pressing the red button displays the remaining time before shut-off.You can use the buttons to change the setting. When the timer count down reaches 0, the TV goes automatically into standby and the timer resets to -:--. Zoom The following formats are available using the buttons, in TV mode: 4/3: picture in centred 4:3 format. zoom: picture in centred letterbox 16:9 format. zoom : picture in 16:9 format with subtitles. Cinerama: picture in widescreen 4:3 format. 16/9: picture in widescreen 16:9 format. In PC mode, only 4/3 and 16/9 formats are available. Customizing your TV set PREFERENCES Return Eco mode Menu language Menu brightness AV1 input AV2 input English Video S-Video You can set preferences for some features such as the language or appearance of the menus. Display the OVERVIEW menu using the MENU button. Select the Preferences option and press OK to confirm. The corresponding menu appears with the following options: Eco mode: when this function is enabled, In video mode: the set goes automatically into standby mode after 10 minutes without video. In PC mode: the PC power management function will be activated. Check the box using the OK button to enable the functions. This function is activated by default. Menu language: select the language you want the menus to be displayed in.The menu is immediately updated according to your selection. Menu brightness: select a setting using the buttons. AV1 input: use the buttons to select the type of video signal transmitted by the equipment connected to the AV1 socket. The Video option is selected by default. Note: Select RGB if no picture is displayed when you connect equipment such as a games console. AV2 input: use the buttons to select the type of video signal transmitted by the equipment connected to the AV2 socket. The Video option is selected by default. Press EXIT to close the menu. Select Return to return to the OVERVIEW menu. EN 17 42pb120S4-en 2/07/04 11:32 Page 18 Using the teletext The Teletext service is available in many countries under a variety of names (TOP Text, Fastext, FLOF test,Videotext). It is provided as a free service by some television broadcasters.This service provides a real wealth of information, available at any time, on weather, sports results, news, games, etc.The information is presented in pages or organised in topics specified in colour on the screen and you can access this information by simply pressing the buttons of the same colour on the remote control. EN 18 To access the Teletext, press the (purple) TEXT button on the remote control.Teletext opens on the last page selected, or on the index page (100) if you have changed channels or put the set into standby. To display another page, use the PR+/- buttons to access the next and previous pages, or enter its number using the numeric buttons.The page/subpage number appears: - in green when the page has not been found yet; - in white when the page has been found. A teletext page contains a header line with page and subpage number, and broadcaster information (date and time, channel number, etc.). The navigation bar at the bottom of the screen displays coloured blocks with page numbers giving direct access to the corresponding pages by simply pressing the relevant buttons on the remote control. Press the MENU button to access the navigation bar, which offers the following functions: STOP: freezes the current page, preventing update and subpage display.To select this function, press the red button on the remote control.To cancel, press the red button again. ??? (REVEAL): to reveal a hidden answer (for example, in games), select ??? using the green button on the remote control.To cancel, press the green button again. ZOOM: press the yellow button once to zoom in on the top part of the screen, twice to zoom in on the bottom part of the screen, and three times to return to normal display. PAT: press the blue button on the remote control to display Teletext in the right half of the screen, press again to return to normal display. 42pb120S4-en 2/07/04 11:32 Page 19 Using the teletext Teletext offers some other useful functions: Newsflash When a newsflash is detected, PAT is replaced by N. Press the blue button to display the newsflash. In the case of an update,Teletext is automatically enabled and displays the new information. To display the header and the navigation bar again, press any button or the volume adjustment buttons) on the (except EXIT, the button remote control. This function is cancelled when you change channels or put the set into standby. To return to TV mode, press EXIT. Subtitles Some channels provide subtitles for some of their programmes through Teletext.The numbers of the relevant pages are specified on the Teletext index page. To display the subtitles, enter the number of the relevant page. Once it is found, the subtitles appear in the TV picture.The header and the navigation bar disappear after a couple of seconds.To display them again, or the volume press any button (except EXIT, the button adjustment buttons) on the remote control. To return to TV mode, press EXIT. Alarm page In some countries (Spain, Benelux, etc.), you can set a time to display certain Teletext pages (alarm pages). To do this, display the relevant alarm page and press the buttons to enter subpage mode. Enter the time instead of the subpage number (e.g. 1705 for 17:05) and press EXIT.The page will disappear and will appear again at the set time, as long as you do not change channels or switch off the set beforehand. Fastext If Fastext is available, direct access to previous and subsequent pages is replaced with coloured bars (red, green, yellow and blue) which provide links to the topics you can access by pressing the corresponding buttons on the remote control. Press the MENU button to access these direct links, press it again to display the navigation bar. Temporary change of the character set You can temporarily change the character set.To do so, display the navigation bar using the MENU button, then press the OK button to display the number of the current character set in place of ???. Scroll the list of character sets using the green button. Press the OK button to display the ??? function again. The character set will reset to the one selected in the MANUAL INSTALLATION menu: - when the set is turned off or put into standby, - when you change channels. In Teletext mode, volume controls remain available, but the relevant symbols do not display. EN 19 42pb120S4-en 2/07/04 11:32 Page 20 Connecting other equipment Connecting a DVD player AV1 AV2 Using SCART (AV) socket input 1. Connect the SCART socket on the DVD player to a SCART socket (AV1 or AV2) on the rear panel of the set. Using component video input 1. Connect the green (Y), red (PR/CR), and blue (PB/CB) cinch sockets on the DVD player to the corresponding cinch sockets on the rear panel of the set. 2. Connect the red (R) and white (L) audio cinch sockets on the DVD player to the R and L audio-in cinch sockets located next to the PR/CR cinch socket, on the rear panel. EN 20 Using S-video input 1. Connect the S-video socket on the DVD player to the S-VIDEO socket on the rear panel of the set. 2. Connect the red (R) and white (L) audio cinch sockets on the DVD player to the R and L audio-in cinch sockets located next to the SVIDEO socket on the rear panel of the set. Connecting a videorecorder Using SCART (AV) socket input AV1 AV2 This connection gives the best picture and sound quality. 1. Connect the SCART socket on the videorecorder to a SCART socket (AV1 or AV2) on the rear panel of the set. 2. Connect the videorecorder to the antenna wall socket or cable box. Using S-video input 1. Connect the S-video socket on the videorecorder to the .S-VIDEO socket on the rear panel of the set. 2. Connect the red (R) and white (L) audio cinch socket on the videorecorder to the R and L audio-in cinch sockets located next to the S-VIDEO socket. 3. Connect the videorecorder to the antenna wall socket or cable box. Using TV input 1. Connect the antenna out socket on the videorecorder to the corresponding socket (ANT) on the rear panel of the set. 2. Connect the videorecorder to the antenna wall socket or cable box. 42pb120S4-en 2/07/04 11:32 Page 21 Connecting other equipment Connecting external amplified speakers Connect the red (R) and white (L) audio out sockets located to the right of the connector panel of the set respectively to the right and left amplified speakers. Connecting an amplifier Connect the red (R) and white (L) audio out sockets located to the right of the connector panel to the amplifier’s L and R inputs. Note: The AUDIO OUT cinch sockets can be set to either Fixed or Variable audio output levels. Please refer to page 15 for additional explanation on this feature. Connecting a PC Using RGB input 1. Connect the 15-pin RGB connector on the PC to the RGB IN connector located at the rear of the set. 2. Connect the audio sockets on the PC to the R and L cinch audio in DVI/RGB sockets on the rear panel of the set. Using DVI input 1. If your PC is equipped with DVI (Digital Visual Interface), connect its DVI connector to the DVI IN connector located on the rear panel of the set. 2. Connect the audio sockets on the PC to the R and L cinch audio in DVI/RGB sockets on the rear panel of the set. Notes: - If your PC only has a 3.5 mm jack, you will need to use a jack-to-cinch converter cable for the audio connection. - The RGB OUT connector on the TV set allows you to connect another RGB monitor. It will display the same signal as the RGB IN signal source. - The physical display resolution is a maximum of 640x480 dots when aspect ratio is set to “4x3”, and 852x480 dots when set to “16x9”. If the PC’s display resolution exceeds these maximum values, the TV set will have to artificially eliminate dots in order to fit within the physical dot capability of the display; therefore, it is possible that the TV set may not be able to show details with adequate clarity. EN 21 42pb120S4-en 2/07/04 11:32 Page 22 Signal frequency information In PC mode, you can press the yellow INFO button to access the display mode of the TV set. M. xx appears on screen. Please refer to the table below to get detailed information about the various display modes. EN 22 Mode Horizontal 1 31.469 2 37.861 3 37.500 4 43.269 5 35.156 6 37.879 7 48.077 8 46.875 9 53.674 10 48.364 11 56.476 12 60.023 13 68.677 14 63.981 15* 79.976 16* 91.146 18 31.469 19 31.469 20* 45.000 21* 33.750 22 31.469 23 31.413 24 35.000 25 49.725 26 68.681 Vertical 59.940 72.809 75.000 85.008 56.250 60.317 72.188 75.000 85.061 60.004 70.069 75.029 84.997 60.020 75.025 85.024 70.087 50.030 60.000 60.000 70.087 59.835 66.667 74.550 75.062 Format Refresh rate 640 x 480 (VGA) 60 640 x 480 (VGA) 72 640 x 480 (VGA) 75 640 x 480 (VGA) 85 800 x 600 (SVGA) 56 800 x 600 (SVGA) 60 800 x 600 (SVGA) 72 800 x 600 (SVGA) 75 800 x 600 (SVGA) 85 1024 x 768 (XGA) 60 1024 x 768 (XGA) 70 1024 x 768 (XGA) 75 1024 x 768 (XGA) 85 1280 x 1024 (SXGA) 60 1280 x 1024 (SXGA) 75 1280 x 1024 (SXGA) 85 720 x 400 (DOS) 70 640 x 480 (VGA) 50 1280 x 720p (HDTV) 60 1920 x 1080i (HDTV) 60 640 x 350 (VGA) 70 852 x 480 (WVGA) 60 640 x 480 (Apple) 67 832 x 624 (Apple) 75 1152 x 870 (Apple) 75 Notes: - Modes 15, 16, 20, and 21 are not available with DVI input. - Modes 24, 25, and 26 are for use with Apple Macintosh computers. 42pb120S4-en 2/07/04 11:32 Page 23 Troubleshooting The following table lists possible problems and methods for remedy. Please refer to this table prior to contacting a service representative. Symptom No picture is displayed. Possible cause 1.The power cord is disconnected. 2.The main power switch on the rear panel is on the OFF position. 3.The selected input has no connection. 4.The TV set is in standby mode in RGB mode. Remedy 1. Plug in the power cord. 2. Put the main power switch on the ON position. 3. Connect the selected device to the TV set. 4. Press any button on the TV set. Poor picture or poor sound. 1. Electrical appliances, cars, motorcycles 1. Move the TV set to another location or fluorescent lights may be nearby. to reduce interference. Color is abnormal. 1.The signal cable is not connected properly. 1. Make sure that the signal cable is attached firmly to the rear panel of the TV set. Picture is distorted. 1.The signal cable is not connected properly. 2.The input signal is not supported by the TV set. 1. Make sure that the signal cable is attached firmly. 2. Check that the video signal source is supported by the TV set. Image doesn’t fill up the full size of the screen. 1. If under RGB mode, the H-Size and V-Size settings are incorrectly set. 1. Use the H-Size and V-Size options in the PICTURE menu to adjust the size of the picture. Sound with no picture. 1.The signal cable is not connected properly. 1. Make sure that both video and sound inputs are correctly connected. Picture with no sound. 1.The signal cable is not connected properly. 2.Volume is turned all the way down. 3.The sound is muted. Some picture elements do not light up. 1. Some pixels of the plasma display may 1.This TV set was manufactured using not turn on. an extremely high level of technology; however, sometimes some pixels may not display.This is not a malfuction. 1.A still picture was displayed for an 1. Do not allow a still image to be extended period of time (examples of displayed for an extended period of still pictures include logos, video time as this can cause a permanent games, computer images, and images after-image to remain on the screen. displayed in 4:3 format). 1. Make sure that both video and sound inputs are correctly connected. 2. Use the volume adjustment buttons to adjust sound. 3. Switch MUTE off using the button on the remote control. The remote control buttons do not 1.The remote control batteries are flat, 1. Change the batteries. Please note work. or incorrectly installed. that you must then reprogram the remote control. 2.The selected mode (VCR, DVD, etc.) does not correspond to the appliance 2. Select the relevant mode. you want to use the remote control with. After-images can be seen on the screen after the set has been powered off. EN 23 42pb120S4-en 2/07/04 11:32 Page 24 Specifications Display panel Screen size Aspect ratio Resolution 42 inches 16:9 wide 852 x 480 Power source EN 24 Input voltage Power consumption Standby & power save 100 ~ 240 V ac , 50 / 60 Hz 240 W (average) 4W Dimensions (W x H x D) Net weight 1200 x 648 x 22 33 kg 42pb120S4-en 2/07/04 11:32 Page 25 Wall mount installation (optional) Package contents An optional wall mount (ACC 913) is available. Contact your local retailer for more information. Left module Right module Horizontal supports EN 25 C D A Screws for assembling wall mount (8) E B Screws for installing onto wooden wall (8) F Screws for installing onto cement wall (8) G 42pb120S4-en 2/07/04 11:32 Page 26 Wall mount installation (optional) Installation Step 1. Attach the horizontal supports (C and D) to the left and right modules (A and B) using the appropriate screws (E). EN 26 Step 2. Install the wall mount bracket onto the wall. Note: This package includes two different sets of screws - one for mounting on a cement wall and one for a wooden wall. Please consult with a qualified installer to make sure that this wall mount and TV set can be installed. You can change the mounting direction and inclination angle (0, 5, 10, 15 degrees) by adjusting the screw position on the wall mount. 42pb120S4-en 2/07/04 11:32 Page 27 Wall mount installation (optional) Step 3. Remove the table-top stand, and install the TV set onto the wall mount bracket. EN 27 Note: This wall mount is an optional accessory, please contact your retailer for more information. This type of equipment is to be installed by qualified installers, please contact with authorized dealer for installation. Please make sure that the wall can support the wall mount and TV set.