1
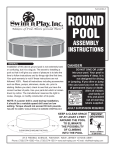
ASSEMBLY INSTRUCTIONS
SIDE DECKS
READ THROUGH AND UNDERSTAND ALL THE STEPS TO THIS INSTALLATION BEFORE
ATTEMPTING TO INSTALL EITHER YOUR POOL OR YOUR DECK.
IF YOUR POOL IS ALREADY INSTALLED IT MAY BE NECESSARY TO LOWER THE WATER
LEVEL IN YOUR POOL DOWN TO 2’ TO ENABLE YOU TO PROPERLY INSTALL THIS DECK.
313 REGINA AVENUE
RAHWAY, NEW JERSEY 07065-4891
Phone: (732) 574-1500
Fax: (732) 574-1551
www.swimnplay.com
E-mail: [email protected]
DANGER
DO NOT DIVE OR JUMP into your pool. Your pool is approximately 4' deep.
It is not designed for diving or jumping. If you dive or jump into your pool
you run the risk of permanent injury or death. Alert all visitors and family
of this and point out all warning labels supplied.
ADULT SUPERVISION REQUIRED
Part # 420865-10
the pool with a minimum height of 48”.
A barrier is necessary to provide protection
against potential drowning and near drowning
and is not a substitute for constant supervision of
children.
A barrier is a fence, wall, or a combination
thereof which completely surrounds the swimming pool and obstructs access to the swimming
pool. Barriers must comply with local and national
building codes and the US Consumer Product
Safety Commission.
These are minimum fencing and barrier requirements. Check your local building codes for
other requirements they may request. Optional
fencing kits are available, Please contact your local dealer.
If pool covers are used for safety barriers
they should comply with ASTM F 1346 “Standard Performance Specification for Safety
Covers and Labeling Requirements for All Covers
for Swimming Pools, Spas and Hot Tubs.”
GENERAL
Take time to follow the instructions and do
things right the first time. Read all instructions
prior to starting. Before you start, check to see
that you have the correct number of parts. Use
your parts list which is broken down by carton.
The manufacturer reserves the right to revise,
change or modify construction of their product.
CONTRACT INSTALLATIONS
The manufacturer is in no way affiliated with
any professional installer. Therefore the manufacturer can assume no responsibility, for errors in
installation by the home owner or said professional installer. If you have your deck installed by
others, please supervise to be sure they comply
with the proper installation techniques shown.
Their past experience or short cuts may not
cover the latest improvements in our decks. Do
not allow any short cuts of any nature.
LOCAL CODES
GETTING STARTED
Local building code may require obtaining a
building permit and may have regulations on set
backs, barriers, devices and other conditions that
must be followed. Any after market or home built
deck should be built to the local building code
requirements, including load capacity and fencing
requirements.
Local electrical code may require obtaining
a building permit and may have regulations on
setbacks, devices and other conditions that must
be followed.
All electrical outlet connections should be a
minimum of 5 feet from the outside perimeter of
the wall of the pool. From 5-10 feet there should
be either a fixed connection (outlet box) or twistlock connection with a GFCI. Connect power
cords to a 3-wire grounding-type outlet only.
Severe electrical shock could result if you install your pump or filter on a deck. They could fall
into the water, causing severe shock or electrocution. Do not install on a deck or other surface at,
above or slightly below the top SEAT of the pool.
Unpack and identify all the parts to your
deck using the enclosed packing list.
TO ASSEMBLE THE DECK YOU WILL NEED:
1.
2.
3.
4.
DRILL WITH A 7/64", 5/32", 3/16" AND 5/16" BIT
7/16" WRENCH
#3 POINT PHILLIPS SCREW DRIVER
MEASURING TAPE AND MARKING PENCIL
ATTENTION
DECKS ARE MADE FOR
52 INCH DEEP POOLS
IF YOUR POOL IS 48" DEEP
YOU WILL HAVE TO DIG A TRENCH
OR CUT THE BOTTOM OF THE POSTS
(4 INCHES) IN ORDER TO LEVEL THE HEIGHT OF
THE DECK WITH THE HEIGHT OF YOUR POOL.
BARRIER REQUIREMENTS
THE BASE OF THE DECK MUST BE LEVEL
WITH THE TOP LEDGE OF YOUR POOL
If the distance from the top of the assembled
pool is less than 48” vertically from the surrounding grade, a fence or barrier is needed to surround
2
ASSEMBLY DRAWINGS
Use the drawings below for reference while assembling your deck.
During assemly please note that the ledges on the pool are to be removed where the deck meets the
pool. The extension on the front of the deck will replace your pool legde. Please refer to Step 9.
Deck
Ledge
1½ x 5
LEFT
Deck
Ledge
4x5
4x5
4x5
Deck
Ledge
1½ x 5
LEFT
Deck
Ledge
1½ x 5
RIGHT
1½ x 5
LEFT
4x5
4x5
4x5
4x5
Deck
Ledge
Deck
Ledge
4x5
Deck
Ledge
1½ x 5
LEFT
1½ x 5
RIGHT
Deck
Ledge
4x5
4x5
Deck
Ledge
Deck
Ledge
1½ x 5
LEFT
1½ x 5
RIGHT
1½ x 5
RIGHT
Deck
Ledge
Deck
Ledge
4x5
4x5
4x5
4x5
4x5
1½ x 5
RIGHT
4x5
3
1½ x 5
LEFT
4x5
1½ x 5
RIGHT
1
LEVEL GROUND
SIZE
12 x 18
12 x 24
15 x 24
15 x 30
18 x 33
18 x 45
2
A
Clear out and level the ground in the location where
your deck is to be installed.
Use the following chart for the area size:
A
8 ft.
12 ft.
12 ft.
16 ft.
16 ft.
28 ft.
B
DECK
B
6 ft.
6 ft.
6 ft.
6 ft.
6 ft.
6 ft.
POOL
ASSEMBLE FENCE POST BRACKETS ON DECK SIDE
If your pool is filled with water it will be necessary for you to lower the water level
to 2’ deep in order to assemble the Fence Post Brackets to the pool.
Before assembling your pool, take the Verticals or Buttress Posts, for the straight side of the
pool where the deck is to be assembled and attach two Fence Post Brackets to each using
the 1/4 x 20 x 3/4” screws, washers and hex nuts provided as shown at the bottom.
If the vertical or Buttress post do not have pre-drilled holes,
simply measure down the required distance from the top and
place the bracket on the post or vertical as shown.
Use a distance of 2-3/8” for the Buttress post and
FENCE POST
a distance of 3” for the Vertical.
BRACKETS
Then using the Post Bracket as a template drill through (2 Pieces)
the Vertical or Buttress post using a 5/16” drill bit.
3”
HEX
NUT
WASHER
1/4" TRUSS
HEAD SCREW
These Locations on the
30 x 15 Pool
VERTICAL
2-3/8”
FENCE POST
BRACKETS
(2 Pieces)
HEX
NUT
WASHER
1/4" TRUSS
HEAD SCREW
4
BUTTRESS POST
3
POSITION YOUR FIRST DECK SECTION
Starting at the first or last (left or right) vertical of the straight side of the pool, place the
Ledge section of a 4’x5’ patio over the two top plates as shown Close Up #1.
Attach two long posts to the back side of the deck using the 2” screws and hex nuts as
shown in Close Up #3.
Only hand tighten the screws at this time.
If your deck has only one 4’x5’ patio as on the 18x12 Side deck,
proceed to step 5 now.
HEX
NUTS
2” SCREWS
LONG POST
CLOSE-UP #3
CLOSE-UP #1
Start Here
or Here
5
4
POSITION THE REMAINING 4’X5’ PATIOS
Take the next 4’x5’ patio and position it next to the previous patio. Place the ledge
section of the patio over the top plates.
Attach one long post to the back side corner using the 2” screws and hex nuts as shown.
Fasten the deck sections together using the 1” Truss Head screws, Washers, and hex nuts as shown.
Only hand tighten the screws at this time.
Repeat this process for all 4’x5’ Patios.
HEX
NUTS
2” SCREWS
LONG POST
CLOSE-UP #3
WASHERS
HEX NUTS
1” SCREW
6
5
POSITION THE 18”X 5’ LEFT AND RIGHT PATIOS
Attach the left and right 18”x5’ patios to your deck using the Truss Head screws,
Washers, and hex nuts as shown. If any holes do not match up, drill your own holes,
assuring that your deck surfaces line up.
Using the ASSEMBLED DECK DRAWING
as a reference, attach the two corner post brackets
to the back corner of the deck using the ½” screws
and nuts as shown in Close Up 2a.
WASHERS
HEX NUTS
Attach the long posts to the corner post brackets
using the 2” screws and hex nuts as shown
in Close Up 2b.
1” SCREW
Attach two long posts to the corner of the deck closest to the pool
using the 2” screws and hex nuts as shown in Close Up 3.
ASSEMBLED DECK DRAWING
CLOSE UP #2b
Close Up 3
Close Up 3
Close Up
2a & 2b
2” SCREWS
HEX
NUTS
Close Up
2a & 2b
LONG
POST
CORNER
POST
BRACKET
CLOSE UP #2a
HEX
NUTS
2” SCREWS
HEX
NUTS
1/2”
SCREWS
LONG POST
CLOSE-UP #3
7
HEX
NUTS
CORNER POST
BRACKET
6
ATTACH THE LADDER POST
Attach the remaining Long Square Post to either the left or right side of your deck
depending on where your ladder will be installed for easiest access to the pool.
Assemble as illustrated at right.
HEX
NUTS
2” SCREWS
ATTACH LADDER POST TO
EITHER SIDE OF THE DECK
7a
LONG POST
BOTTOM SUPPORT CHANNELS
Position the Bottom Support Channels (long “L” shaped pieces) at the bottoms of the
Posts according to the illustration below for your size deck. (The illustrations are as
viewing the deck from above with the Ladder to be installed on the right side.)
18x12
DECK
24x15 & 24x12
DECK
Close Up # 12
Close Up # 12
55¾”
55¾”
Close Up # 11
Close Up # 7
Close Up # 8
Close Up # 10
55¾”
68¾”
Close Up # 12
55¾”
Close Up # 7
Close Up # 8
Close Up # 10
67¾”
Close Up
# 11
Close Up # 10
87”
Close Up # 10
30x15 & 33x18
DECK
Close Up # 12
55¾”
55¾”
Close Up # 11
Close Up # 7
Close Up # 8
Close Up # 10
67¾”
50½”
67¾”
Close Up # 10
45x18 DECK
Close Up # 12
55¾”
Close Up # 11
Close Up # 11
Close Up # 8
Close Up # 10
Close Up # 12
55¾”
Close Up # 7
67¾”
50½”
49½”
49½”
8
49½”
67¾”
Close Up # 10
7b
ATTACH BOTTOM SUPPORT CHANNELS
ANGLE SUPPORT BAR
Use the Deck reference drawings on the previous page and the detailed Close Up
drawings below.
Having positioned all of the Bottom Support Channels in their proper locations as illustrated on the
previous page, attach them to the bottom of the Posts using 1/2” Sheet Metal Screws.
Attach the Angle Support Bars as shown.
Where One Angle Support Bar attaches to the Post use the ½” Sheet Metal Screws.
Where Two Angle Support Bars attach to the Post use the 1” Sheet Metal Screw.
Where the Angle Support Bars attach to the Bottom Support Channels use ½” Truss Head Screws
and Hex Nuts.
CLOSE UP #10
BOTTOM
OF POST
Note carefully in the Close-Ups the position of the slots
in the Angle Support Bars.
Again, only hand tighten screws at this time.
1/2” Sheet
Metal Screw
CLOSE UP #11
ANGLE
SUPPORT
BAR
ANGLE
SUPPORT
BAR
BOTTOM
SUPPORT
CHANNEL
BOTTOM
OF POST
1” SHEET METAL
SCREW
BOTTOM
SUPPORT
CHANNEL
CLOSE UP #12
Bend the ends of the Special Bottom Support Channels
and assemble as illustrated on Close-ups 7 & 8.
1/2” Sheet
Metal Screw
SPECIAL BOTTOM SUPPORT CHANNEL
ANGLE
SUPPORT
BAR
BOTTOM
OF DECK
POST
CLOSE UP #7
BOTTOM
SUPPORT
CHANNEL
1/4” x 20
HEX NUT
1/4” x 20 x 1/2”
TRUSS HEAD SCREW
1” SHEET
METAL SCREW
1/2” SHEET
METAL SCREW
Where the deck ladder
goes attach one end of
the Special Bottom Support
Channel to the middle post
and attach the other end to the
back Support channel. Drill hole
through both Support Channels
and attach with nut and bolt.
9
CLOSE UP #8
On the other side attach
both ends of the Special
Bottom Support Channel
to the Support channels.
Drill hole through both
Support Channels and
attach with nut and bolt.
8
ANGLE SUPPORT BARS TO DECK
Where the Posts fasten to the deck, attach Angle Support Bars.
The illustrations below indicate which of the Close-up illustrations at the bottom of this page show the
proper assembly procedure for each location.
Where One Angle Support Bars attach to the Post use the ½” Sheet Metal Screws.
Where Two Angle Support Bars attach to the Post use the 1” Sheet Metal Screw.
Where the Angle Support Bars attach to the deck use the ½” Truss Head Screws and Hex Nuts.
18x12
DECK
24x15 & 24x12
DECK
Close Up # 12
Close Up # 12
Close Up
# 11
Close Up # 11
Close Up # 10
Close Up # 10
Close Up # 10
Close Up # 12
Close Up # 10
45x18 DECK
Close Up # 12
Close Up # 11
Close Up # 11
Close Up # 12
Close Up # 10
Close Up # 10
CLOSE UP #10
DECK
30x15 & 33x18
DECK
Close Up # 12
LARGE
ANGLE
SUPPORT
BAR
Close Up # 11
Close Up # 10
Close Up # 10
DECK
CLOSE UP #11
SMALL
ANGLE
SUPPORT
BAR
DECK
1/2” TRUSS
HEAD SCREW
CLOSE UP #12
ANGLE
SUPPORT
BAR
ANGLE
SUPPORT
BAR
10
1” SHEET METAL
SCREW
9
3” SPECIAL POSTS / CHECK YOUR WORK AND TIGHTEN
Attach the 3” special post to the fence post brackets installed underneath your deck
using the 2” screws and nuts.
Make sure that your deck is level front to back. Also make sure that all your posts are straight up and
down. Tighten all screws, nuts and bolts securely.
Attach the deck to bracket adapter
to the 3” special post using
the 2” screws and nuts.
Make sure the deck to bracket
adapter is touching the
framework of your deck
for support.
DECK TO
BRACKET
ADAPTER
3” SPECIAL POST
UNDERSIDE OF WALK DECK
HEX NUT
Drill a hole in the framework
of your deck, and attach the
deck to bracket adapter
to your deck using the
½” screws and nuts as shown.
POOL
VERTICAL
1/2” TRUSS
HEAD SCREWS
LEVEL
LEVEL
DECK
3” SPECIAL
POST
ASSEMBLY
POOL
VERTICAL
10
POST
DECK LEDGES
Place the two
deck ledges over the
vertical top plates.
Secure the Deck ledges
to your assembled deck
using the 1” Round Head
Screw, washers and nuts
provided.
If any holes do not
match up, drill your
own holes,
assuring that your
deck surfaces line up.
VIEW FROM
ABOVE
11
Secure the two deck ledges and the ledge
section of each 4’x5’ patio to the top plates.
Drill a ¼” hole in the deck ledges and secure to
the top plates using the sheet metal screws that
were provided with your pool for the ledges.
Attach the top covers
that came with your
pool over the connection
where the deck ledges
meet your standard
pool ledges.
It may be required
to cut or trim your
top cover for a proper fit.
GENERAL ASSEMBLY ILLUSTRATION
Use the General Assembly Illustration below for reference as you assemble the Fensurround.
STANDARD POST
FENCE BRAKET
INSERTED
THROUGH POST
END POST
OR
CORNER POST
12
11
7¾”
7-1/8”
Before assembling your pool, drill the
required holes in the Verticals and
Buttress post.
Simply place the bracket 7¾” from the
top of the Vertical or 7-1/8” from the
top of theButtress post. Then, using the
Post Bracket as a template, drill through
the Vertical using a 5/16” drill bit.
If your pool is filled with water it will be
necessary for you to lower the water
level to 2’ deep in order to safely drill
these holes and attach the Fence Post
Brackets.
12
Take the Verticals and attach two Fence Post Brackets to
each Vertical using the 1/4 x 20 x 3/4” Screws and Washers
and Hex Nuts provided as shown.
You may now assemble your pool.
FENCE POST
BRACKETS
(2 Pieces)
HEX
NUT
WASHER
1/4" TRUSS
HEAD SCREW
13
VERTICAL
Assemble the Square Fence Post to the Post Bracket using the
¼” x 20 x 2” Screws and Hex Nuts as shown at right. If your pool is
equipped with Full-Contoured Covers like those below, you must first
assemble the covers to the pool before attaching the Posts.
13
14
Use the illustrations below for reference during attaching the sections of Fence to the
Fence Posts as described on the following pages.
14
15
Attach the Universal Fence Brackets to the top of
the End or Corner Posts simply by inserting the
oval end into the slot in the Post and pressing
down as shown.
END POST
OR
CORNER POST
Next, press one Post Cap to the top of each Post.
STANDARD POST
FENCE BRAKET
INSERTED
THROUGH POST
Attach the Straight Fence Brackets to the top of the Standard
Posts simply by inserting the shorter end through the slots in
the Post until it stops.
Next, press one Post Cap to the top of each Post.
16
Using the illustration for your size deck on the previous page, assemble
the Fence Postions. Note carefully the location for the different sizes.
Attach the Fence portions to the Fence Brackets using the ½” Sheet
Metal Screws as illustrated below. Slip a protective Rubber Screw
Ruber Cap
Cap on the exposed end of each screw.
1/2" Sheet
Metal Screw
1/2” SHEET
METAL
SCREW
VIEWED FROM OUTSIDE OF POOL
15
17
Using the Latch, Latch Bar and Hinges as templates, drill the holes
in the locations as illustrated at the bottom.
SELF CLOSING
HINGE
LATCH BAR
Drill a 5/32 hole for the Latch Bar
and Self Closing Hinges.
Drill a 7/64 hole for the Latch.
Mount the Hinges and the Gate using 1/2”
long Self-Tapping Screws so that the Gate
swings on to the deck in the direction of
the rear fence.
Mount the Latch Bar to the Gate using
the #10x1/2” Self-Tapping Screw.
LATCH
GATE
POST
Mount the Latch to the Gate Post using
#6x3/8 long Self-Tapping Screws
GATE
(Note: the Latch mounts approximately
21/8” from the top of the Gate).
Test the Gate to insure that it is perfectly aligned
and closes and completely latches by itself.
VIEW FROM INSIDE THE DECK
It is very important to periodically test and maintain the Gates proper functioning.
WARNING: Make sure that your pool is not accessible when not in use!!!
18
WARNING LABELS
With your deck you are provided with 5 additional Warning Labels. One Large Label
(#490090) is to be permanently affixed to the top of the pool’s Top Ledge at the entry
point of the pool. The two long, thin labels (#490091) are to be affixed on the inside of
the pool’s Top Ledge opposite to and facing the entry point of the pool. The two Square
Labels (#490021) are to be affixed on the outside edge of the deck by the outside ladder.
To affix these labels, simply clean the area where the label is to be applied and peel off
the backing and press the label firmly into place. Should you need any additional Labels
for any reason, simply order them by part number from your local dealer or direct from the
manufacturer.
#490091
WARNING
LEDGE
PLACEMENT
#490090
#490021
ENTRY POINT
Consumer Awareness Booklets:
The following books are available through the APSP:
“The Sensible Way To Enjoy Your Pool”...published by the NSPI, October 1983 (revised September 1986),
“Children Aren’t Waterproof”...published by the NSPI,
“Pool & Spa Emergency Procedures For Infants And Children”...published by the NSPI.
Contact: APSP •
2111 Eisenhower Avenue, Alexandria, Virginia 22314 • (703) 838-0083
16