1
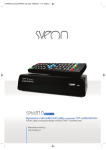
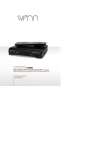
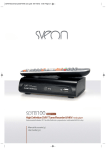
DVB-T Tuner-Recorder & multimedia player with
removable HD system
Sintonizador TDT grabador y reproductor multimedia con sistema de disco duro extraíble
Manual de usuario (2)
User Guide (25)
SDT10100 - Manual de usuario
SDT10100 Manual de usuario
Índice
1. Bienvenido. Pag. 3
2. Instrucciones de seguridad. Pag. 3
3. Características. Pag. 4
4. Contenido del pack. Pag. 4
5. Hardware. Pag. 4
6. Conexiones. Pag. 5
7. Mando a distancia. Pag. 8
8. Primer uso de la unidad. Pag. 9
8.1 Búsqueda automática. Pag. 9
8.2 Búsqueda manual. Pag. 9
9. Menú principal. Pag. 10
9.1 Instalación. Pag. 11
9.2 Configuración de TV. Pag. 11
9.3 Contraseña. Pag. 12
9.4 Calendario de grabaciones y grabación directa. Pag. 12
9.5 Grabación en segundo plano. Pag. 14
10. Actualizar sistema-. Pag. 14
11. Configuración predeterminada. Pag. 15
12. Lista de TV. Pag. 15
12.1 Guía de TV (EPG). Pag. 17
12.2 Radio. Pag. 17
13. Multimedia. Pag. 17
13.1 Imágenes. Pag. 18
13.2 Música. Pag. 18
13.3 Vídeos. Pag. 19
13.4 Opciones PVR. Pag. 19
14. Otros. Pag. 20
15. Ver canales TV. Pag. 20
15.1 Información. Pag. 20
15.2 Cambiar canal. Pag. 20
15.3 Volumen. Pag. 20
15.4 Lista de canales. Pag. 21
15.5 Audio. Pag. 21
15.6 Pausa. Pag. 21
15.7 Favoritos. Pag. 21
15.8 Teletexto. Pag. 21
15.9 EPG. Pag. 22
15.10 Función Sleep. Pag. 22
16. Multi screen. Pag. 23
17. Mensajes SDT10100. Pag. 23
18. Solución de problemas. Pag. 23
19. Especificaciones Técnicas. Pag. 24
20. Advertencia: reciclaje de baterías. Pag. 24
www.sveon.com
Español
2
SDT10100 - Manual de usuario
1. Bienvenido
Gracias por elegir el sintonizador/grabador con función de reproductor multimedia SDT10100 de Sveon. Esta unidad incluye una ranura frontal para introducir discos duros externos compatibles (gama Sveon SStorage) y disfrutar
de una capacidad ilimitada para almacenar y reproducir archivos multimedia así como para grabar contenidos
desde el sintonizador.
SDT10100 incluye una caja de aluminio compatible con el sistema extraíble que cuenta además con conexión
USB para el PC. Instale un disco SATA de 2.5” en la carcasa proporcionada, almacene sus archivos multimedia
del PC al disco gracias a su conexión USB e inserte el disco extraíble en la ranura para disfrutar durante horas
de contenidos. Las cajas compatibles pueden adquirirse por separado (gama SStorage de Sveon).
A través de este manual le mostraremos cómo conectar y utilizar adecuadamente este receptor para obtener el
máximo rendimiento.
2. Instrucciones de seguridad
Para garantizar tu seguridad y la de los demás lea detenidamente estas instrucciones antes de utilizar este producto.
Este producto incorpora doble aislamiento entre la alimentación y los elementos accesibles al usuario.
Seguridad
• Coloque los cables donde no se puedan pisar, pinchar o cortar.
• No exponga el aparato a la lluvia.
• No conecte la unidad en lugares húmedos como en el baño, piscina.
• No coloques objetos con agua (floreros, un vaso de agua) en la parte superior del dispositivo.
SDT10100
• No coloque fuentes de llama, como velas, cerca de la SDT10100.
• No desmonte el producto.
• No permita que los niños introduzcan nada por los orificios de ventilación ni por el sistema de
ranura extraible (STG50).
Ventilación
• No tape la unidad ni la coloque en lugares no ventilados.
• No coloque la unidad sobre superficies irregulares como cama, sofa
• No exponga la unidad al frío o luz solar
• Dejar 10cm como mínimo entre el receptor y otros aparatos.
• No coloque ningún objeto encima del receptor.
Mantenimiento
• El SDT10100 no necesita mantenimiento.
• Desconecte el receptor antes de limpiarlo.
• No utilice líquidos o aresoles.
• Límpielo con una bayeta suave y húmeda (no mojada).
• Nunca deseche las pilas tirándolas como residuos domésticos (consulte el apartado “Advertencia:
reciclaje de pilas gastadas” de este manual).
www.sveon.com
Español
3
SDT10100 - Manual de usuario
3. Características
• TDT grabador con HDMI y puerto USB 2.0
• Menú de control OSD de fácil uso
• Guía de programación semanal electrónica (EPG)*
• Búsqueda automática y manual de canales
• Sistema de disco extraíble SVEON (solo con unidades compatibles: Gama SStorage de Sveon)
• 2 conexiones de euroconector (TV, VCR). Cable no incluido.
• Control parental
• Teletexto y función de subtítulos*.
• Puerto USB Host frontal.
• Permite grabar a un dispositivo conectado a través del puerto USB Host o a la unidad extraíble.
• Permite grabar un canal mientras ve otro de la misma frecuencia.
• Grabación directa solo pulsando un botón.
• Timeshift (pausa de programación en vivo) de 8 horas.
• Reproduce música, fotos y videos desde USB o unidad extraíble.
• Soporta discos de hasta 2TB por USB.
• Compatible con subtítulos externos (srt, sub, smi).
• Salida de audio digital coaxial S/PDIF.
• Función Sleep.
• Reproduce música, fotos y videos.
• Archivos soportados: MPEG-4, XVID, AVI, DAT, VOB, MPEG2, OGG, WMA , MP3, JPG, BMP, GIF.
• Software Actualizable por USB.
* Las funciones EPG, Teletexto o subtítulos están sujetas a la disponibilidad del canal.
4. Contenido del pack
- Sintonizador/Grabador TDT y reproductor multimedia SDT10100
- Caja de aluminio externa (gama SStorage de Sveon) compatible con SDT10100 y puerto USB para PC
- Cable USB
- Funda para unidad extraíble
- Cable HDMI
- Guía Rápida de uso
- Manual de usuario
- Tarjeta de garantía
5. Hardware
Panel frontal
1
2
3
4
5
6
1. Puerto USB Host
2. Canal anterior
3. Pantalla
4. Encendido/Apagado (Standby)
5. Canal siguiente
6. Ranura para sistema extraíble
www.sveon.com
Español
4
SDT10100 - Manual de usuario
Panel trasero
1
2
3
4 5
6
7
1. Conexión de audio coaxial
2. Conexión de antena doméstica
3. Conexión de antena a TV
4. Conexión euroconector TV
5. Conexión HDMI
6. Conexión euroconector VCR
7. Conexión de corriente
Unidad extraíble
Conector USB
Conexión exclusiva
para SDT10100
LED encendido
6. Conexiones
Conexión a través de Euroconector
1. Conecte la unidad a la pantalla de TV a través de la conexión de Euroconector (cable no incluído).
Nota: La unidad SDT10100 incluye dos conexiones de Euroconector: para conectar la TV o para conectar un
vídeo u otro dispositivo externo (VCR). Asegúrese de conectar la TV y la unidad a través del Euroconector indicado
como “TV”.
2. Conecte la unidad a la toma de corriente, la unidad se encenderá automáticamente.
3. Seleccione la entrada de Euroconector en su TV y espere mientras se realiza la carga del sistema.
CONEXIÓN DE AUDIO
Si quiere disfrutar de sonido multicanal utilice la salida Coaxial (cable no incluído) para conectar el dispositivo a
un sistema de altavoces 5.1.
Importante: Para reproducir archivos de audio AC3 es necesario conectar un sistema de altavoces a la unidad a
través de la salida Coaxial.
www.sveon.com
Español
5
SDT10100 - Manual de usuario
Conexión HDMI
1. Conecte la unidad a su TV a través de la
salida HDMI utilizando el cable incluido en
el pack.
2. Conecte la unidad a la toma de corriente,
ésta se encenderá automáticamente.
3. Seleccione la entrada HDMI en su TV:
CONEXIÓN DE AUDIO
La salida HDMI incluye señal de audio y
vídeo a través del mismo cable. Debido a
esto, basta realizar la conexión HDMI entre
el dispositivo y su TV para disfrutar de
ambas señales.
Importante: Para reproducir archivos de audio AC3 es necesario conectar un sistema de altavoces a la unidad a
través de la salida Coaxial.
Sistema de disco extraíble
La unidad SDT10100 incluye un novedoso sistema de reproducción de archivos multimedia a través de su ranura
frontal especialmente diseñada para insertar discos duros externos de 2.5” de la gama SStorage de Sveon.
De este modo es posible almacenar vídeos, música e imágenes en diferentes unidades externas compatibles e
introducir las unidades en la ranura frontal; intercambiando las unidades conseguirá capacidad de almacenamiento
ilimitada y una organización máxima de sus contenidos multimedia.
SDT10100 incluye una caja de aluminio para disco duro de 2.5” compatible con el sistema extraíble de la unidad
(disco duro no incluido). Siga los pasos que se muestran a continuación para instalar el disco duro en la carcasa
y reproducir archivos a través de la ranura del dispositivo.
INSTALACIÓN DE UN DISCO DURO SATA DE 2.5” EN LA CARCASA DE ALUMINIO
Paso 1
Paso 2
Paso 3
Paso 1: Introduzca el disco duro tal y como se muestra en la imagen. La unidad incluye cuatro piezas de espuma
para colocarlas en el interior de la parte superior de la caja y ofrecer una sujección extra para el disco duro.
Paso 2: Presione el disco hasta que quede situado en la caja de aluminio.
Paso 3: Coloque la parte superior de la caja y presione hasta que haga clic.
Nota: La caja se cierra mediante presión y no requiere del uso de tornillos. Disco duro no incluido.
www.sveon.com
Español
6
SDT10100 - Manual de usuario
REPRODUCCIÓN DE ARCHIVOS DESDE LA RANURA FRONTAL
1. Asegúrese de haber instalado un disco
duro SATA en la caja de aluminio incluida
con la unidad (disco duro no incluido). Si
no ha instalado aun un disco duro, por
favor consulte el apartado anterior.
2. Inserte la caja de aluminio en la ranura
frontal de la unidad SDT10100.
3. Espere durante la carga de archivos y
acceda al menú principal para reproducir
los archivos multimedia almacenados en la
unidad. Para aumentar su librería de archivos adquiera diferentes carcasas de aluminio compatibles de la gama SStorage de
Sveon.
Reproducción de archivos desde puerto USB Host
SDT10100 cuenta con un puerto USB Host frontal con función de reproducción directa de archivos. Conecte un
dispositivo USB a través del puerto USB Host para reproducir vídeos, imágenes y música directamente en su
pantalla de TV sin necesidad de volcar los datos.
Siga los siguientes pasos:
1. Conecte un dispositivo de almacenamiento USB (stick de memoria o disco duro externo) al puerto USB Host
de la unidad.
2. Encienda el dispositivo de almacenamiento y espere durante la lectura de contenidos.
3. Acceda al menú principal de la unidad para reproducir los archivos almacenados en la unidad extraíble.
Conexión de Antena
Para poder sintonizar canales de TDT es necesario realizar las conexiones de antena. Son necesarios dos cables
de antena para completar la conexión correctamente:
1. Conexión de antena doméstica al dispositivo SDT10100
Conecte un extremo del cable de antena a la toma de antena doméstica y el otro extremo al conector “RF IN” del
panel trasero de la unidad.
2. Conexión de antena entre el dispositivo SDT10100 y la TV
Conecte un extremo del cable de antena a la salida de antena de la unidad (“RF Loop Through”) y el otro extremo
a la TV.
www.sveon.com
Español
7
SDT10100 - Manual de usuario
7. Mando a distancia
1. POWER : Pulse para encender/apagar (modo Standby)
la unidad
2. FAV: Pulse para acceder a la lista de favoritos
1
3. RECALL: Pulse para volver al canal anterior visto
2
4. NUMERIC: Teclado numérico, seleccionan canales
3
5. PAGE DOWN: Retrocede página en el apartado multimedia
6. SLEEP: Pulse para activar el apagado automático
7. MENU: Pulse para acceder al menú principal
4
8. VOL +: Pulse para aumentar el volumen
9. VOL -: Pulse para disminuir el volumen
10. Botón rojo: Accede al menú multimedia o acciones en
5
teletexto
6
11. Botón verde: Acceder a Calendario grabaciones
7
12. SUB-T: Cambia entre los subtítulos disponibles incluidos
en el canal
13. AUDIO: Cambia entre los idiomas disponibles incluidos
en el canal
14. PLAY: Pulse play en TV para ver el mosaico de canales
y en Modo Reproducción para pausar y reanudar.
8
15. PAUSE: Pulse para pausar fotograma a fotograma
9
16. FB: Reproducción rápida hacia atrás a velocidad configurable 2, 4, 8, 16, 32 ,1.
10
17. FF: Reproducción rápida a velocidad configurable 2, 4,
11
8, 13, 32, 1.
12
18. MUTE: Activa/desactiva el sonido.
13
19. TTX: Muestra el teletexto si el canal dispone de el.
14
20. PVR: Accede a las grabaciones realizadas
15
21. PAGE UP: Avanza página en el apartado multimedia
16
17
22. EXIT: Vuelve al menú anterior
23. LEFT/RIGHT: Cursores izquierda/derecha, se usa para
desplazarse por las pantallas del menú o cambiar el volumen
en modo de reproducción normal
24. OK: Confirma una selección en un menú
25. UP/DOWN: Se utiliza para desplazarse por las pantallas
del menú o cambiar los canales
26. CHANNEL +: Se utiliza para cambiar de canal +1
27. CHANNEL -: Se utiliza para cambiar de canal -1
28. INFO: Muestra la información acerca del canal actual o información adicional del canal
29. Botón azul: Cada vez que se presiona cambia de resolución (480i, 480p, 576i, 576p)
30. Botón amarillo: Acceso al menú “Otros”.
31. EPG: Muestra la programación electrónica de los canales
32. TV/RADIO: Cambia entre los canales de TV y Radio
33. REC: Pulse para iniciar una grabación manualmente
34. STOP: Para una reproducción
35. NEXT: Pulse para pasar a la siguiente pista
36. PREV: Pulse para retroceder de pista
18
19
20
21
22
23
24
25
26
27
28
29
30
31
32
33
34
35
36
Importante. Las opciones de Subtítulos, Teletexto o Audio están sujetas a la disponibilidad del canal.
www.sveon.com
Español
8
SDT10100 - Manual de usuario
6.1 Instalación de las baterías
Encontrará las baterías para el mando a distancia en el embalaje del producto. Siga las siguientes indicaciones
para instalarlas de forma adecuada:
• Retire la tapa, coloque las pilas AAA en el sentido correcto +/- y cierre la tapa
• La siguiente imagen le indica la forma correcta de intsalar las pilas.
• Para utilizar el mando a distancia, apunte hacia el panel frontal del receptor
• El mando a distancia tiene un alcance de 5 metros desde el receptor y un ángulo de hasta 60 grados.
8. Primer uso de la unidad
Al conectar por primera vez el dispositivo aparecerá la siguiente pantalla de configuración:
• Ajuste de antena: Seleccione si el SDT10100 alimenta
la antena (5v) o no.
Nota: El valor por defecto es “desactivado”. Seleccione
“Activado” solo si está conectada a una antena activa
que amplifica la señal RF recibida.
• Configuración de país: Seleccione el país de localización. Cambiar la configuración regional cambiará automáticamente la zona horaria y los valores por defecto
de frecuencias.
• Idioma OSD: Seleccione el idioma en que se muestran
los textos del OSD (en pantalla).
• Idioma de audio: Seleccione el idioma de audio predeterminado.
• Idioma de subtítulos: Seleccione el idioma de subtítulos predeterminado.
• LCN: Activa o Desactiva el sistema LCN (Local Channel Number)
Nota: LCN es un número que identifica de forma exclusiva un canal, se usa en algunos paieses europeos
como Reino Unido y Francia.
• USO DE GMT: Permite activar/desactivar la actualización automática de la zona horaria. En modo Activado
se actualizara con la señal TDT.
Nota: Algunos países están cubiertos por más de un horario. ESPAÑA usa GMT+ (excepto Canarias que usa
GMT)
• Zona horaria: Permite modificar la hora con respecto
al GMT
• Fijar fecha: Si desactivamos el uso de GMT podremos
ajustar la fecha manualmente
• Fijar hora: Si desactivamos el uso de GMT podremos ajustar la hora manualmente
Una vez configuradas las opciones pulse el Botón Rojo para realizar una búsqueda automática de canales o
pulse el Botón Verde para realizar la búsqueda de canales de forma manual.
www.sveon.com
Español
9
SDT10100 - Manual de usuario
8.1 Búsqueda automática
Para realizar la búsqueda de canales TDT de forma automática, por favor pulse el botón rojo de su mando a distancia. El proceso de búsqueda puede tardar algunos minutos, por favor espere hasta que haya finalizado.
La función de “Búsqueda Automática” borra la base de datos de canales actual y hace una búsqueda de canales
en las frecuencias del país seleccinado en la configuración inicial.
Una vez terminado el proceso de búsqueda, la lista de canales se guarda automáticamente y aparece en pantalla
el primer canal de la lista.
8.2 Búsqueda manual
Para realizar la búsqueda de canales de forma manual (por frecuencias) por favor pulse el botón verde de su
mando a distancia. Tenga en cuenta que para realizar este tipo de búsqueda debe conocer la frecuencia y ancho
de banda del canal que desee visualizar, ya que no busca los canales de forma automática. Cuando se explora
una banda de frecuencias, los canales de esta banda almacenados se borrarán para guardar la búsqueda más
reciente.
9. Menú Principal
Una vez finalizada la búsqueda de canales, pulse el botón “Menú” y aparecerán las siguientes opciones:
• Instalación
• Configuración de TV
• Contraseña
• Calendario de Grabaciones
• Actualizar sistema
• Configuración predeterminada
www.sveon.com
Español
10
SDT10100 - Manual de usuario
9.1 Instalación
La pantalla “Instalación” le permite configurar los valores generales del dispositivo. Esta pantalla es la primera
que aparece al conectar la unidad. Para conocer más detalles por favor consulte el apartado 8 de este manual.
9.2 Configuración de TV
El apartado de “Configuración TV” muestra las siguientes opciones:
• Formato TV
- 4:3 LB (LetterBox): Para una TV convencional con formato 4:3.
- 4:3 PS (PanScan): para una TV convencional con formato 4:3 (corta los bordes izquierdo y derecho
para ajustar la imagen a una TV normal con formato 4:3).
- 16:9 LB (PB): Para TV con formato panorámico 16:9
Nota. Una imagen 16:9 aparece con bandas negras si se reproduce en una pantalla 4:3, pero ocupa completamente el área visible en televisiones panorámicas.
• Modo TV
- Selecciona la resolución de salida para su TV o VCR (480i, 480p, 576i, 576p)
Nota: Si desea grabar usando la salida VCR, seleccione resoluciones 480i/576i
• Transparencia OSD
- Ajusta la transparencia de los menús en pantalla. El nivel “1” es el más transparente.
• Tiempo de presencia de la banda de información
- Ajusta el tiempo que permanece en pantalla la barra de información cuando se presiona el botón
“INFO”. Si el valor establecido es “Siempre” la barra de información permanente en pantalla hasta
que presione el botón “EXIT”.
• Salida de Vídeo
- Establece el modo de salida RGB cuando se usa un Euroconector de 15 pines ó CVBS en caso
de usar cable componentes.
Nota: La mejor calidad de imagen se consigue a través de RGB, ya que las señales se aplican
directamente a la etapa de salida del televisor, y por tanto no sufren ningún deterioro. CVBS es
video compuesto, por lo que debe ser procesado, separado en componentes y por fin amplificado,
esto provoca que la señal no sea tan pura como en RGB.
• Mejora de Video: La mejora de video costa de dos elementos
- Tono de piel
- Extensión blanco/negro
www.sveon.com
Español
11
SDT10100 - Manual de usuario
9.3 Contraseña
Establece si el menú, los canales marcados como bloqueados y los programas que superan cierto nivel de censura
están protegidos por contraseña o no.
Nota: La contraseña por defecto es 0000
• Bloqueo de menú Configuración: Active/Desactive el menú de Configuración solicitando la contraseña.
• Bloqueo de canales: Si activa esta opción, cada vez que cambie a un canal bloqueado le solicitará que introduzca la contraseña para poder visualizarlo.
• Bloqueo Censura: Establece la edad a partir de la cual es necesaria una contraseña para ver el canal.
• Sin bloqueo: No se requiere contraseña sea cual sea la clasificación.
• Bloqueo total: Siempre se requiere contraseña.
• 02-18: Se requiere contraseña si la clasificación supera los valores seleccionados.
Nota: La información de clasificación del programa es emitida por la cadena sintonizada y su funcionamiento depende del canal.
• Cambiar contraseña: Pulsa <izquierda/derecha> para activar el cambio de contraseña y las teclas <0-9> para
introducir la contraseña antigua y dos veces la nueva (para evitar errores). En caso de introducirla correctamente
aparecerá un mensaje que le informa que el cambio de contraseña se ha realizado con éxito.
9.4 Calendario de grabaciones y grabación directa
SDT10100 permite añadir tareas de grabaciones manualmente, grabar a través de la Guía de TV/Radio o pulsando directamente el botón de grabación (REC).
• Establecer grabaciones manualmente
Para añadir una grabación manualmente pulse el botón
amarillo del mando a distancia y a continuación el botón
rojo en uno de los 10 eventos disponibles. Aparecerá
una ventana con el tipo de grabación “TV/RADIO”, el
canal, fecha de inicio de grabación, hora de inicio/fin y
la frecuencia con la que quiere realizar esta grabación.
Cuando llega la fecha y hora de una grabación el
SDT10100 cambia automáticamente al canal programado. Si desea modificar un evento sitúese en el evento
y pulse el botón rojo.
Nota: Para asegurar una correcta programación realice
grabaciones con intervalos mínimos de 3min entre
eventos.
- Para borrar un evento sitúese sobre el evento que
desea borrar y pulse el botón verde. Seleccione “OK”
para confirmar o “Salir” para cancelar.
Nota: Puede eliminar eventos de grabación siempre que
no estén en funcionamiento. Para eliminar un evento en
curso, pulse “Stop” y a continuación ya podrá eliminarlo.
www.sveon.com
Español
12
SDT10100 - Manual de usuario
• Establecer grabaciones con el EPG (Guía Electrónica de Programas)
Para establecer grabaciones desde la Guía Electrónica pulse el botón “EPG” del mando a distancia, seleccione
el canal y programa que desea grabar usando el botón “Right”(cursor derecho) y presionando el botón rojo sobre
el programa deseado. Automáticamente aparecerá la ventana con la información detallada del evento a grabar.
• Realizar grabaciones directamente pulsando el botón REC
La unidad SDT10100 cuenta con la función Timeshift ó pausa de la programación en vivo, que permite pausar un
programa y reanudar la emisión por donde lo dejó sin perder ni un segundo de contenidos..
Cuando la opción Timeshift está activa, el programa guarda la grabación como un archivo de grabación temporal.
Gracias a esto, puede acceder a los minutos perdidos de la programación y seguir viendo su programa favorito
justo donde lo dejó
El SDT10100 permite grabar con sólo pulsar un botón “REC” con un tiempo determinado o hasta 8 horas. Antes
de realizar grabaciones directamente, configure las opciones pulsando el botón “MENU” “APARTADO MULTIMEDIA“ “PREF. GRABACION” como muestra la siguiente imagen.
• Capacidad Timeshift: Capacidad detectada para Timeshift
• Timeshift: Activa/Desactiva la función Timeshift.
- Pause: Timeshift activo
- Auto: Timeshift activo continuamente
- Desactivado: Apagado
www.sveon.com
Español
13
SDT10100 - Manual de usuario
• Grabación pulsando un botón: Activa o desactiva la opción grabar directamente pulsando REC. Si la opción
esta desactivada, al pulsar el botón “REC” habrá que introducir el tiempo durante el que queramos grabar. Este
tiempo se puede especificar en el campo “Tiempo de
Grabación”. Si la opción esta activada, grabará directamente el tiempo especificado en la opción “Tiempo de
grabación”.
• Tiempo de grabación: Tiempo máximo permitido de
grabación (desde 15 min hasta 8 horas).
Nota: La capacidad de la función Timeshift dependerá
de la capacidad del dispositivo que se use para la grabación y no podrá ser modificado por el usuario.
9.5 Grabación en segundo plano
La unidad SDT10100 permite establecer un calendario de grabaciones que se ejecutará aunque la unidad esté
en modo Standby (modo ahorro de energía). Una vez añadido un evento, pulse el botón “Power” de su mando a
distancia y la unidad entrará en modo de ahorro de energía (mostrando la hora en la pantalla frontal). Un minuto
antes del inicio del evento, se encenderá automáticamente y mostrará el canal seleccionado para la grabación.
Para grabar un canal y ver otro* pulse el botón “OK” del
mando a distancia durante una grabación, y mostrará
los canales disponible para ver y el que actualmente se
está grabando.
Nota: La opción de ver un canal mientras se graba otro
está limitado a canales que se encuentranen la misma
frecuencia.
10. Actualizar sistema
La unidad SDT10100 permite la actualización de software para introducir avances y mejoras de funcionamiento.
Para actualizar el firmware de la unidad:
- Copie el archivo “SDT10100_XX.ssu” de actualización en una memoria USB
- Conecte la memoria USB a la unidad a través del puerto USB Host del panel frontal del dispositivo.
- Seleccione la opción “Actualización del sistema” en el menú principal de Configuración. Seleccione el archivo
en la unidad USB.
Importante. Por favor asegúrese de que durante la actualización del sistema no se desconecta el dispositivo USB
o se apaga la corriente ya que podría causar daños irreversibles a la unidad y quedaría anulada la garantía del
producto.
Recomendamos que descargue las actualizaciones para sus productos Sveon sólo a través de la web oficial de
la marca: ww.sveon.com. Si tiene alguna duda póngase en contacto con el servicio de asistencia de SVEON.
www.sveon.com
Español
14
SDT10100 - Manual de usuario
11. Configuración predeterminada
Restaura la configuración del SDT10100 a sus valores de fábrica. Todas las opciones modificadas por el usuario
se restaurarán a los valores por defecto y la base de datos de canales se borrará.
12. Lista de TV
La unidad SDT10100 dispone de varias opciones para organizar los canales:
• Favoritos: El usuario puede desplazarse rápidamente por
la lista de favoritos pulsando “CHANNEL +/-“. Hay 8 grupos
configurables por el usuario: Noticias, Deportes, Película, Música, Compras, Viajes, Hombre, Mujer.
Para seleccionar su lista de favoritos colóquese sobre el canal
deseado, seleccione el icono “Favoritos” (iluminado) y pulse
del 1 al 8 para incluir o eliminar el canal de una de las categorías de favoritos.
• Bloqueo: Pulse “OK” para activar o desactivar el canal seleccionado. Si esta activada la opción en “CONFIGURACION”
“CONTRASEÑA” “bloqueo de canales”, le pedirá la contraseña para ver el canal.
• Editar: Puede editar el nombre del canal. La longitud máxima es de 18 caracteres.
Pulse los botones izquierda/derecha para seleccionar la opción “Editar” y los botones arriba/abajo para seleccionar
el canal; pulse “OK” para mostrar información del canal y pulse “OK” de nuevo para editar el nombre del canal.
Para guardar los cambios pulse “OK” y a continuación pulse el botón rojo para salir a la lista de canales.
www.sveon.com
Español
15
SDT10100 - Manual de usuario
• Mover: Pulse esta opción para mover los canales en la lista.
Para ordenar los canales sitúese sobre el canal y pulse “OK” para seleccionarlo; pulse los botones arriba/abajo
para moverlo a la posición deseada y pulse de nuevo “OK” para situarlo.
Nota: Esta función no moverá correctamente los canales cuando este activada la opción LCN en el “Menú”> “Configuración”> “Instalación”.
• Ordenar: Ordena los canales por orden alfabético A<>Z/ De Pago / Por grupos de frecuencias.
Pulse el botón rojo / verde / amarillo para seleccionar el orden de los canales.
• Invisible: Activa/desactiva la opción pulsado “OK”. Los canales que tengan este atributo no serán accesibles
desde la lista de canales. Para poder ver el canal invisible pulse “OK” y con la lista de canales en pantalla pulse
el botón azul y los botones derecha/izquierda para elegir el grupo invisible.
• Eliminar: Elimina permanentemente el canal seleccionado de la base de datos. Para recuperarlo es necesario
volver hacer una búsqueda de canales (manual o automática).
Para eliminar un canal seleccione el icono “Eliminar” y pulse “OK” sobre el canal a eliminar; para guardar los cambios pulse el botón amarillo.
www.sveon.com
Español
16
SDT10100 - Manual de usuario
• Búsqueda: Busca canales que coincidan total o parcialmente con la palabra introducida.
12.1 Guía de TV (EPG)
Seleccione la opción “EPG” para visualizar la guía de
programas de los canales sintonizados, su programación y realizar grabaciones.
1. Pulse el botón EPG para acceder a la Guía.
2. Utilice los botones arriba/abajo para seleccionar el
canal
3. Utilice los botones izquierda/derecha para cambiar la
fecha o el programa seleccionado.
4. Pulse “OK” para ver detalles del programa o “Exit”
para volver.
5. Pulse el botón rojo para añadir eventos al calendario
de grabaciones
Nota: La visualización de la Guía Electrónica de Canales está sujeta a la disponibilidad del canal. Si el canal
no dispone de EPG, el sistema no podrá mostrar esta
información.
12.2 Radio
La lista de emisoras y funciones de EPG para la señal de Radio Digital siguen los mismos parámetros que para
los canales de TV.
13. Multimedia
Antes de utilizar el menú “Multimedia” asegúrese de conectar una unidad external al dispositivo: a través de la
ranura para el disco extraíble o a través del puerto USB
Host. Si no hay ningún dispositivo conectado, aparecerá
el mensaje “Dispositivo desconectado”.
Al conectar una unidad externa, aparece en pantalla el
mensaje “Detectando dispositivo, por favor espere”; espere durante la carga de archivos y a continuación
podrá acceder al menú “Multimedia” ya sea presionando
el botón “Menú” del mando a distancia y seleccionando
la opción “Multimedia” con los botones izquierda/derecha como pulsando el botón rojo durante el modo TV.
www.sveon.com
Español
17
SDT10100 - Manual de usuario
13.1 Imágenes
La unidad soporta archivos de imagen en formato JPEG/BMP/GIF. En el caso de que haya archivos de imágen
en el directorio principal de la unidad se mostrarán en modo miniaturas; si no es así, aparecerá el mensaje “Pulsar
para elegir su carpeta de fotos” para seleccionar el origen de las imágenes. Pulse “Exit” para volver al modo de
miniaturas.
La resolución de la foto seleccionada se muestra en la parte inferior izquierda en modo miniatura y en la parte
derecha cuando se visualiza en modo de carpetas. Para desplazarse por carpetas y ficheros, use las teclas
<Arriba/Abajo/Izquierda/Derecha> y pulse “OK” para visualizar la foto seleccionada.
Puede activar la función Zoom presionando el botón rojo del mando a distancia; las opciones disponibles son:
25-50-100-150-200%. Si el Zoom es mayor del 100%, pulse los botones de dirección para desplazarse por la
imagen aumentada. Si el Zoom es menor de 100% podrá girar la imagen pulsando <Izquierda/Derecha>.
Para ver las fotos en modo presentación de diapositivas pulse el botón “OK” del mando a distancia en la foto seleccionada y pulse de nuevo “OK” para comenzar en modo presentación.
- Para pausar/reanudar pulse el botón rojo.
- Para seleccionar música de fondo durante la presentación pulse el botón verde.
- Para seleccionar el modo repetición pulse el botón amarillo.
- Para ajusta el intervalo de tiempo entre fotos pulse el botón azul.
13.2 Música
La unidad soporta los formatos de música más conocidos: MP3/WMA/OGG. Cuando la unidad está reproduciendo
archivos de música, se muestra en pantalla la barra de progreso con la indicación del tiempo transcurrido, tiempo
restante y visualizador del espectro de frecuencias.
Para desplazarse por carpetas y ficheros, use las teclas
<Arriba/Abajo/Izquierda/Derecha> y pulse “OK” para reproducir el archivo seleccionado.
- Para pausar/reanudar pulse el botón rojo
- Para detener pulse el botón verde
- Para seleccionar el modo repetición pulse el botón
amarillo
- Para avanzar x2 pulse el botón azul
- Para ajusta el volumen pulse <izquierda/ derecha/
Mute>
www.sveon.com
Español
18
SDT10100 - Manual de usuario
13.3 Vídeos
La unidad SPM10100 reproduce archivos con el formato MPEG-4, XVID, AVI, DAT, VOB, MPEG2. Para reproducir
archivos de videos pulse el botón “Menú” del mando a distancia, seleccione las opciones “Multimedia” y “Videos.
También puede acceder directamente pulsando el botón rojo del mando a distancia durante el modo TV.
Para desplazarse por carpetas y ficheros use las teclas <Arriba/Abajo/Izquierda/Derecha>. Seleccione el archivo
de vídeo que desee reproducir y a continuación y pulse “OK” para reproducirlo.
- Para pausar/reanudar pulse el botón rojo.
- Para avanzar paso a paso pulse el botón verde.
- Para avanzar rapidamente x2/x4/x8x/x16/x32, o volver a modo normal pulse el botón amarillo.
13.4 Opciones PVR
En el menú “Opciones PVR” puede ver los programas grabados y configurar las opciones de grabación.
Nota: El sistema de archivos del dispositivo de almacenamiento debe ser FAT o FAT32
- Lista de Grabaciones: Reproduce pulsando “OK” o
borra los programas grabados pulsando el botón rojo
del mando a distancia.
- Dispositivo de grabación: Selecciona el dispositivo
de almacenamiento y la partición donde se guardarán
las grabaciones.
También ofrece la posibilidad de formatear la partición
pulsando el botón rojo o formatear el dispositivo pulsando el botón verde. Use esta opción con precaución
puesto que borrará todos los datos del disco.
- Preferencias de grabación: Permite seleccionar
entre las opciones de Timeshift, grabación pulsando un
botón y tiempo de grabación.
• Capacidad Timeshift: Capacidad detectada para Timeshift
• Timeshift: Activa/Desactiva la función Timeshift.
- Pause: Timeshift activo
- Auto: Timeshift activo continuamente
- Desactivado: Apagado
www.sveon.com
Español
19
SDT10100 - Manual de usuario
• Grabación pulsando un botón: Activa o desactiva la opción de grabar directamente pulsando el botón REC del
mando a distancia. Si la opción esta desactivada, al pulsar el botón “REC” el sistema preguntará el tiempo durante
el cual queremos grabar. Este tiempo se puede especificar en el campo “Tiempo de Grabación”. Si la opción esta
activada grabará directamente el tiempo especificado en la opción “Tiempo de grabación”.
• Tiempo de grabación: Tiempo máximo permitido de grabación (desde 15 minutos hasta 8 horas).
14. Otros
La unidad SDT10100 dispone de varias aplicaciones disponibles. Pulse el botón “MENU” <izquierda/derecha> y
seleccione la opción “OTROS”.
Gomoku: juego
Calendario: Muestra el año, mes y día
Calculadora: Realiza calculos sencillos
15. Ver canales TV
Este apartado le muestra las opciones disponibles una vez realizada la búsqueda de canales. Si aun no ha realizado la búsqueda, por favor lea detenidamente la sección 8 del presente manual.
15.1 Información
Pulse el botón “INFO” del mando a distancia una vez para visualizar la barra de información. Ésta información
muestra el número y nombre de canal, fecha y hora actual, programa actual y próximo programa y los iconos: Información, Favoritos, Codificado y Bloqueado.
Pulse el botón “INFO” por segunda vez para visualizar información detallada del programa actual.
Pulse el botón “INFO” por tercera vez para mostrar información del canal, como la frecuencia e intensidad/calidad
de señal.
15.2 Cambiar canal
Para cambiar de canal pulse las teclas <CHANNEL+/-> o pulse directamente el número del canal con el teclado
numérico del mando a distancia. Si introduce un número de canal que no existe, la unidad ignorará el cambio.
15.3 Volumen
Para ajusta el volumen pulse los botones “VOLUME +/-“ del mando a distancia; para silenciar el volumen en general pulse el botón “MUTE ”. Si ajusta el volumen mientras el sonido esta desactivado (MUTE) se activará el sonido.
www.sveon.com
Español
20
SDT10100 - Manual de usuario
15.4 Lista de canales
Para mostrar la lista de canales pulse el botón “OK” del
mando a distancia y seleccione el canal con los cursores <Arriba/Abajo/Izquierda/Derecha>.
15.5 Audio
Algunos Programas de televisión contienen varios idiomas disponibles: para cambiar de idioma pulse el botón
“AUDIO” y seleccione el canal de audio con los cursores <izquierda/derecha>. También podrá seleccionar el modo
de sonido entre diferentes opciones: sólo canal izquierdo, sólo canal Derecho y Estéreo.
Nota: La posibilidad de seleccionar entre varios idiomas está sujeta a la disponibilidad del canal.
15.6 Pausa
Esta opción permite pausar la imagen y el sonido. Al presionar cualquier tecla se reanudará la reproducción.
Si la opción Timeshift esta activada, al pulsar de nuevo el botón de pausa se retomará el programa sin perder ni
un segundo de contenidos.
Para cancelar la opciónTimeshift pulse la tecla “Stop” dos veces y el programa se reanudará a tiempo real.
15.7 Favoritos
Por favor consulte el apartado 11 del manual de usuario para conocer más sobre la opción “Favoritos” de la unidad.
15.8 Teletexto
Pulse el botón “TTX” del mando a distancia para acceder a la información de Teletexto proporcionada por el canal
seleccionado y a continuación seleccione “Spa”. La disponibilidad, información y estilo de la función Teletexto dependerá del canal.
www.sveon.com
Español
21
SDT10100 - Manual de usuario
Algunas cadenas ofrecen, a través del Teletexto, subtítulos adaptados para sordos. Pulse el botón “TTX” del
mando a distancia y utilice los botones de dirección <Izquierda/Derecha> para seleccionar la opción de “Subtítulos
TTX” y “Spa” para mostrar los subtítulos sobre la imagen.
Nota: Las funciones de Teletexto y Subtítulos estarán disponibles sólo en aquellos canales de TV que ofrezcan
estos servicios y que cuenten con una calidad óptima de recepción de señal.
15.9 EPG
Para obtener más información sobre la Guía Electrónica de Programas consulte la sección 12.1 del presente manual de usuario.
15.10 Función Sleep
La unidad cuenta con función “Sleep” que le permitirá apagar la unidad de forma automática.
Para activar la función de auto-apatado pulse el botón “0” del mando a distancia y utilice las teclas de dirección
<Izquierda/Derecha> para seleccionar el tiempo en minutos que deben transcurrir para el apagado automático
de la unidad.
www.sveon.com
Español
22
SDT10100 - Manual de usuario
16. Multi screen
La opción Multi-Screen permite mostrar a la vez hasta
9 canales diferentes en pantalla; sólo el canal seleccionado se mostrará en tiempo real, los demás mostrarán
una instantánea.
Para mostrar la pantalla Multi-Screen pulse el botón
“PLAY ” del mando a distancia en cualquier canal de TV.
Pulse los botones de dirección <Izquierda/Derecha
/Arriba/Abajo> para desplazarse por los canales y pulse
“OK” para seleccionarlo. Para salir del modo Multi
Screen pulse el botón “EXIT”.
17. Mensaje SDT10100
SDT10100 muestra diferentes mensajes de estado como los que se muestran a continuación:
- No hay señal: La unidad no recibe correctamente la señal (el cable de antena puede estar desconectado).
- Sin servicio: El canal sintonizado no esta emitiendo ningún programa.
- Servicio Codificado: El canal esta codificado (normalmente son canales de pago).
- Canal bloqueado: El canal está bloqueado (ver apartado 9.3).
18. Solución de problemas
Por favor lea detenidamente los posibles problemas de uso que pueden surgir, sus posibles causas y soluciones:
- Luz Standby apagada:
Causa posible: El equipo está desenchufado.
Solución: Comprobar las conexiones
- Señal no encontrada
Causa posible 1: La antena está desconectada. Solución: Comprobar conexiones
Causa posible 2: La antena está dañada. Solución: Comprobar antena
Causa posible 3: Fuera de cobertura TDT. Solución: Consultar al instalador de la antena
- Sin imagen o sonido:
Causa posible 1: Salida de vídeo incorrecta. Solución: Pulse el botón azul (cambio resolución)
Causa posible 2: Sintonizado un canal de radio. Solución: Pulse el botón amarillo (TV/Radio)
Causa posible 3: Película con sonido AC3. Solución: Conecte un sistema de sonido a la salida
coaxial
- Imagen pixelada o saltos de imagen:
Causa posible: La antena está mal orientada o falta de señal.
Solución: Comprobar la antena
- Mensaje de canal codificado:
Causa posible: Es un canal codificado
Solución: Cambiar de canal
- Contraseña olvidada: Solución: Resintonizar canales para eliminar bloqueo
- El mando a distancia no funciona:
Causa posible 1: Receptor apagado. Solución: Desconectar y encender el receptor
Causa posible 2: Panel frontal obstruído. Solución: Despejar el frontal
Causa posible 3: Baterías del mando mal colocadas. Solución: Comprobar su instalación.
Causa posible 4: Baterías del mando agotadas. Solución: Sustituir baterías.
www.sveon.com
Español
23
SDT10100 - Manual de usuario
19. Especificaciones Técnicas
Sintonizador:
- Conector de entrada RF x1 (D-Type, IEC 169-2, conector hembra)
- Conector de salida RF x1 (D-Type, IEC 169-2, conector macho -Loop-)
- Rango de frecuencia: 174 Mhz~230 Mhz (VHF) - 470Mhz~862Mhz (UHF)
- Nivel de señal: -10~-70 dbm
Flujo de señal: MPEG-2 ISO/IEC 13818-1
Nivel de perfil: MPEG-2 (perfil principal)
Tasa de transferencia: Max. 15 Mbits/s
Formatos de vídeo: 4:3, 16:9
Decodificación:
- Vídeo: MPEG2
- Audio: MPEG2
Salida de vídeo:
- Sistema de TV: NTSC, PAL
- Resolución: RGB/CVBS: 720x576i, 720x480i. HDMI: 480i, 480p, 576i, 576p
Conectores:
- Entrada RF: IEC 169-2 conector hembra
- RF Loop: IEC 169-2 conector macho
- Euroconector TV: Vídeo compuesto (CVBS), RGB, L/R
- Euroconector VCR: Vídeo compuesto (CVBS), L/R
- Coaxial: RCA, S/PDIF salida de audio digital
- USB 2.0: Reproducción multimedia y grabación TDT
- Sistema de ranura extraíble: HDMI/USB 2.0. Reproducción multimedia y grabación TDT
- HDMI: High Definition Multimedia Interface (Alta definición)
Formatos multimedia:
- Vídeo: MPEG-2, MPEG-4, XVID
- Audio: MP3, WMA, OGG
- Imágenes: JPEG, GIF, BMP
20. Advertencia: Reciclaje de baterías
Este símbolo en el producto o sus baterías significa que ni este producto ni sus baterías deben desecharse junto con el resto de la basura doméstica.
En este caso, es su responsabilidad llevarlo a un punto de recogida adecuado para
el reciclaje de baterías y equipos eléctricos y electrónicos. la recogida selectiva y el
reciclaje ayudarán a conservar los recursos naturales y a evitar posibles consecuencias negativas para la salud del hombre y el medioambiente debidas a la posible
presencia de sustancias peligrosas en baterías y equipos eléctricos y electrónicos
desechados de forma inadecuada.
Para obtener más información acerca de dónde desechar baterías y equipos eléctricos o electrónicos, póngase
en contacto con la oficina local de su ciudad/municipio.
:
www.sveon.com
Español
24
SDT10100 - User Guide
SDT10100 User Guide
Index
1. Welcome. Page 26
2. Safety Instructions. Page. 26
3. Features. Page 26
4. Content. Page 27
5. Hardware. Page 27
6. Connections. Page 28
7. Remote control. Page 31
8. First time usage. Page 32
8.1 Auto Channel Scan. Page 33
8.2 Manual Channel Scan. Page 33
9. Main Menu. Page 33
9.1 Installation Menu. Page 34
9.2 TV Setup Menu. Page 34
9.3 Password. Page 35
9.4 Schedule Recording and Direct Recording. Page 35
9.5 Channel Recording. Page 37
10. System upgrading. Page 37
11. Restore default values. Page 38
12. TV channel list. Page 38
12.1 Electronic Program Guide (EPG). Page 40
12.2 Radio stations. Page 40
13. Multimedia. Page 40
13.1 Picture files. Page 41
13.2 Music files. Page 41
13.3 Video files. Page 42
13.4 PVR options. Page 42
14. Others. Page 43
15. Watch TV channels. Page 43
15.1 Information. Page 43
15.2 Change channel. Page 43
15.3 Volume. Page 43
15.4 Channels list. Page 44
15.5 Audio. Page 44
15.6 Pause. Page 44
15.7 Favourites list. Page 44
15.8 Teletext. Page 44
15.9 EPG. Page 45
15.10 Sleep function. Page 45
16. Multi screen. Page 46
17. SDT10100 status. Page 46
18. Trouble-shooting. Page 46
19. Technical specifications. Page 47
20. Warning: disposal of waste batteries. Page 47
www.sveon.com
English
25
SDT1
SDT10100 - User Guide
1. Welcome
Thanks for choosing the DVB-T Tuner and recorder with multimedia player functions SDT10100 from Sveon. This
device includes a frontal slot to insert compliant external hard disk devices (SStorage series from Sveon) and save
and share files with unlimited capacity.
SDT10100 includes an aluminum HD case compliant with the removable hard disk system with USB connection
(it can be connected to the computer). Install a 2.5” SATA hard disk in the aluminum case, save your multimedia
files from your computer to the disk through and USB available port and insert the external HD case in the slot of
the SDT10100 to play files directly on your TV or record DVB-T programs in the inner hard disk. External HD cases
can be purchased separately (SStorage series from Sveon).
Through this user guide we will show you how to connect and use properly the device to get the best performance.
2. Safety Instructions
Please read carefully this information before operation and use the device:
This product includes double insulation between the power connection and the rest of elements which are exposed
to the user.
Safety
• Protect the power cord from being walked on or pinched.
• Do not exposed the device to the rain.
• Do not use the device near water or liquids (such as bath).
• Do not place objects with water (such as a glass of water) on top of the device.
SDT10100
• Do not place the unit near or on top of any heat readiating.
• Do not cover or touch any of the components inside the unit.
• Do not insert objects through the removable slot system or inside the air flow system.
Ventilation
• Do not block the device ventilation holes.
• Do not place the unit on an unstable object.
• Never expose the unit to direct sunlight.
• Leave at least 10 cm between the device and another devices or the wall.
• Never stack other electronic equipment on top of the device.
Cleaning
• SDT10100 doesn´t need maintenance.
• Before cleaning the device, disconnect it from the wall socket.
• Keep liquids away from the device
• Use a cloth lightly dampened with water (no solvents) to clean the exterior.
• Do not dispose batteries as normal rubbish. Be environmentally friendly, dispose the batteries fo
llowing the Government´s regulation. Read carefully the section number 20 of the user guide for fur
ther information.
3. Features
• DVB-T Tuner/Recorder with HDMI output and USB Host port
• Easy-to-use OSD menu.
• Electronic Program Guide information (EPG) *
• Auto channel scan and manual channel scan options.
www.sveon.com
English
26
10100 - User Guide
• Exclusive removable hard disk system from Sveon (only compliant with external hard disk cases from Sveon
SSTorage series)
• Two scart connections (TV and VCR). Cable is not provided.
• Paternity control.
• Teletext and subtitles options*.
• One USB Host port located in the front panel of the device.
• Allows you to record and save the recordings in an external device connected through its slot system or through
its USB Host port.
• Allows you to record a TV channel and watch a different TV channel (this function is only available in channels
wich belong to the same frequency)
• One-button direct recording.
• Time Shifting function (up to 8 hours).
• Music, pictures and video files playback from its slot system or through its USB Host port.
• Maximum capacity supported: up to 2TB (through USB)
• Subtitle supported formats: srt, sub, smi.
• S/PDIF digital Coaxial audio output
• Sleep function.
• Music, pictures and video files playback.
• File supported formats: MPEG-4, XVID, AVI, DAT, VOB, MPEG2, OGG, WMA , MP3, JPG, BMP, GIF.
• Upgradeable software through USB.
* EPG, Teletext and subtitle functions are subject to channel availability.
4. Content
- DVB-T Tuner/Recorder and multimedia player SDT10100
- External aluminum case (SStorage series from Sveon) compliant with SDT10100 and PC
- USB Cable
- HD case sleeve
- HDMI Cable
- Quick Installation Guide
- User Guide
- Guarantee Card
5. Hardware
Front Panel
1
2
3
4
5
6
1. USB Host port
2. Previous channel
3. Screen
4. Power on/off (Standby)
5. Next channel
6. Slot for removable hard disk system
www.sveon.com
English
27
ea
r
Pa
ne
l
1
1.
2. Co
3. Ro axi
4. TV of a al a
5. Sc an nte udi
6. HD art ten nn o co
7. Sc MI TV na c a co nn
a
e
c
P
ow rt V Con onn onn nne ctio
Ex
er CR ne ec ec ctio n
te
co c ctio tio tion n
n
ne onn n n
cti ec
on tio
n
2
3
4
rn
5
al
d
ev
ic
e
6
Co
C
n
e
o
cto
n
e
rU
pa xión
SB
ra e
S xc
D
T1 lusi
01 va
00
tC
o
ne nn
ct ec
T th tio
1
0 ed n
v 100 evic
i
c
e
d e
e (VC evic to y
de R e o
n vic ). in ur
p
ut e to Mak clud TV
in
e e sc
yo the su s tw ree
u p re
o n
O
r
N
TV owe to sc thr
an r ou con art c oug
ul
n
h
d
t
wa tlet; ect onn Sc
m icha
ul
it
it th ec ar
n
t
d
n
i
c
ur turn e de tors t co
ha el
LE
ing s
v : o nn
nn au
D
th on ice t ne ect
el dio
en
A
e a
s
C
c
sy uto o th to c ion
pe sig
en
3
ste m e
o (c
au
ak na
did
e
d
l
m at co nn ab
o
r
i
o
s us
l ica rr ec le i
e
o
t
file
y
a
ste e t
din lly. ct s to t s no
s
ca he t
m he
us
g
.
p
Co
rt
pr
ing
c T ro
o
V
a
o
c
x
a
nn an vide
es
ia
sp
ec d d)
la
s.
ea
to an .
ud
k
r,
o
i
e
o
t
i
rs
d
ou
en her
ys
tp
tifi on
te
ut
ed e
m
(
wi to
co
co
th co
nn
ax
“T nn
ia
ec
l
V e
t
”
wo ct a
rd n
s.
6
Co
n
ec
t
io
ns
ed
En
t
hr
o
ug
h
gl
ish
ca
b
le
is
Co
no
ax
ia
ti
la
nc
lu
ud
io
ou
de
d)
to
tp
ut
to
SDT10100 - User Guide
HDMI Connection
1. Connect the device to your TV through
HDMI output using the provided cable.
2. Connect the device to the power outlet
and it turns on automatically.
3. Select HDMI output in your TV.
w
pla
Sc
1. ar
N Co t
ex ote: nn
2 ter SD
.
3. Co nal T
Se nn de
lec ect vi
A
U
t
Sc the
If DI
ar
co you O C
t in
nn w O
e a N
c
Im
t t nt t NE
he o C
th por
e
de en TIO
de tan
v jo
t
i
v
c
ice : Yo
e ym
to
u
.
ca
a
m
n
m
co
n.
eo
ww
.sv
yA
on
ly
AUDIO CONNECTION
HDMI output includes audio and video signal through the same cable. Because of
this, you only have to connect the HDMI
cable between the device and your computer to enjoy high quality of audio and video
signal.
Important: You can only play AC3 audio files using a speaker system connected through Coaxial audio output to
the device.
Removable hard disk system
SDT10100 includes an exclusive multimedia files playback system through its slot located in the front panel of the
device specially developed to insert a compliant hard disk unit (SStorage series from Sveon). This way you will be
able to storage file, music and video files using different external devices and insert the different disks in the slot
of the device to play its files; by changing the external devices you will get an unlimited storage capacity.
The SDT10100 device includes an external aluminum case for 2.5” SATA hard disk, which is compatible with the
removable hard disk system (hard disk is not included). Follow these steps to install properly the hard isk inside
the aluminum case and play files through the slot of the device.
HOW TO INSTALL A 2.5” SATA HARD DISK IN THE PROVIDED ALUMINUM CASE
Step 1
Step 2
Step 3
Step 1: Install the hard disk as shown in the picture. The device includes four pieces of foam to be placed in the
top of the case to offer a better protection to the hard disk.
Step 2: Push the disk until it is located inside the hard disk case.
Step 3: Put the top part of the case and press until it is fixed.
Note: The aluminum case doesn´t need screws to be closed. Hard disk is not included.
www.sveon.com
English
29
6.
SDT10100 - User Guide
PLAYBACK OF MULTIMEDIA FILES THROUGH THE FRONTAL SLOT
1. Make sure you have installed a 2.5”
SATA hard disk in the provided aluminum
case (hard disk is not included). If you have
not installed a hard disk inside, please read
carefully the previous page.
2. Insert the aluminum case inside the slot
located in the frontal panel of the unit.
3. Wait during the files loading process. Go
to the Main Menu to play the multimedia
files saved in the device. Add more files to
your multimedia library by purchasing more
compatible aluminum hard disk cases from
Sveon SStorage series.
Files playback through USB Host port
SDT10100 includes an USB Host port in the front panel of the device with direct playing function. Connect an USB
external devices through the USB Host port to play video, picture and music files directly from the device to your
TV without the needing to copy the files in advance.
Follow these steps:
1. Connect and external USB device through the USB Host port (memory stick or external hard disk).
2. Turn the device on and wait during the files loading process.
3. Go to the Main Menu to play the files saved in the external storage device.
Antenna Connection
To receive DVB-T signal you need to connect the device to the roof antenna. Please note you have to complete
the antenna connection as indicated in this section (you need two antenna cables):
1. Antenna connection between Roof Antenna and SDT10100 device
Connect one end of the antenna cable to the roof antenna connector and the other end to the “RF IN” connector
located in the rear panel of the device.
2. Antenna connection between SDT10100 device and TV
Connect one end of the second antenna cable to the antenna output located in the rear panel of the device (“RF
Loop Through”) and the other end to the TV.
www.sveon.com
English
30
SDT10100 - User Guide
7. Remote control
1. POWER : Press to turn on/off (Standby mode) the device.
2. FAV: Press to access to My Favourite list.
1
18
3. RECALL: Press to go the previous watched channel.
4. NUMERIC: Numeric buttons.
2
19
5. PAGE DOWN: Press to go to the previous page in
3
20
multimedia menu.
6. SLEEP: Press to enable auto-power off option.
7. MENU: Press to go to the Main Menu.
4
8. VOL +: Press to increase the volume.
9. VOL -: Press to decrease the volume.
10. Red button: Press to access to multimedia menu.
Teletext button.
5
21
6
11. Green button: Press to access to schedule recording
tab.
7
22
12. SUB-T: Press to change between the available subtitles
included in the selected TV channel.
23
13. AUDIO: Press to change between the available langua24
ges included in the TV channel.
25
14. PLAY: Press in TV mode to display the channels in
thumbnail mode. Press in Playback mode to pause and re8
26
sume the playback.
27
9
15. PAUSE: Press to pause.
28
16. FB: Fast backward. Different speeds: 2, 4, 8, 16, 32 ,1.
10
29
17. FF: Fast forward. Different speeds: 2, 4, 8, 13, 32, 1.
11
30
18. MUTE: Enables/Disables audio signal.
12
31
19. TTX: Press to display the Teletext information (if it is avai13
32
lable).
14
33
20. PVR: Press to access to the recordings.
15
34
21. PAGE UP: Press to go to the next page in Multimedia
16
35
17
36
menu.
22. EXIT: Press to go to the previous menu.
23. LEFT/RIGHT: Right/Left arrows. Press to move the highlight to the left or to the right, navigate between menu screens or change the volumen in a playback.
24. OK: Press to confirm a selection.
25. UP/DOWN: Press to navigate between menu screens or
to change between channels.
26. CHANNEL +: Press to go to the next channel.
27. CHANNEL -: Press to go to the previous channel.
28. INFO: Press to display information of the current channel or additional information about the current channel.
29. Blue button: Press several times to change between the available resolutions (480i, 480p, 576i, 576p)
30. Yellow button: Press to access to “Others” menu.
31. EPG: Press to display the Electronic Program Guide information.
32. TV/RADIO: Press to change between TV channels and Radio stations.
33. REC: Press to start a manual recording.
34. STOP: Press to stop a playback.
35. NEXT: Press to go to the next track.
36. PREV: Press to go to the previous track.
Important. Subtitle, Teletext or audio outputs are subject to the channel availability.
www.sveon.com
English
31
SDT10100 - User Guide
6.1 Batteries installation
The product includes the batteries you need for remote control usage. Please follow these indications to install
them properly inside the remote control:
• Take the cover out, put the AAA batteries inside (please check the correct position +/-) and close the cover
• This picture shows the correct way to install the batteries:
• Point with the remote to the front panel of the device.
• The remote control signal power is 5 meters from the receptor and it covers an angle up to 60 degrees.
8. First time usage
First time you connect the device to your TV, the following window will appear:
• Antenna setting: Select if the device feeds the antenna
(5V) or not.
Note: The default value is “Disabled”. Select “Enabled”
if the device is connected to an active antenna which
amplifies the RF received signal.
• Select country: Select the country where you are going
to use the device. When you change the country, the
time zone is changed and the default frequency information also changes.
• OSD Language: Select the language used to display
the text of the OSD menu.
• Audio language: Select the default audio language.
• Subtitles language: Select the default subtitles language.
• LCN: Enables or disables the LCN system (Local
Channel Number).
Note: LCN is a number which identifies a channel; this
system is used in some European countries as United
Kingdom or France.
• GMT USAGE: This option enables or disables the time
zone upgrading. When it is in Enable mode, this information is updated based on DVB-T signal
Note: There are some countries which are covered by
more than one GMT time area. Spain uses GMT+ (except Canarias Islands, which uses GMT).
• Time Zone: This option allows you to modify the time
zone based on GMT.
• Set Date: If the GMT usage is disabled, you can set
the date in a manual mode.
• Set Time: If the GMT usage is disabled, you can set
the time in a manual mode.
Once you have set all these options, press red button to start an auto channel scan or press the green button to
scan the available channels in a manual mode.
www.sveon.com
English
32
SDT10100 - User Guide
8.1 Auto Channel Scan
To start the auto channels scan, please press the red button of the remote control. The process may take several
minutes, please wait until it finishes.
“Auto channel scan” option deletes the current channels list and do a channels searching based in the frequencies
of the selected country in the main setting menu.
Once the process is finished, the found DVB-T channels are automatically saved and the first available channel
of the list is displayed in the TV screen.
8.2 Manual Channel Scan
Enter the frequency of the channels you want to watch to search the channels in a manual way. Press the green
button of the remote control; please note you have to know the frequency and the bandwidth of the channels you
want to find. When you search the available channels by frequencies, the current channels of this frequency are
deleted to save the newest searching.
9. Main Menu
Once the channel scan finishes, press “Menu” button and the following options appear:
• Installation
• TV Setup
• Password
• Schedule recording
• System upgrading
• Restore default values
www.sveon.com
English
33
SDT10100 - User Guide
9.1 Installation
The Installation menu allows you to setup the general values of the device. It is the first window which appears
when the device is connected. Please read carefully the section 8 of this user guide for further information.
9.2 TV Setup
The “TV Setup” section offers the following options:
• TV Format
- 4:3 LB (LetterBox): For a 4:3 TV format screen
- 4:3 PS (PanScan): For a 4:3 TV format screen (the left and right sides of the picture are lost to
adjust it to a 4:3 TV format)
- 16:9 LB (PB): Wide format
Note. A wide picture (16:9 format) includes black bands if it is displayed in a 4:3 format screen; if it is displayed in
a wide TV, the picture covers the whole surface of the TV screen.
• TV Mode
Select the TV or VCR output resolution: (480i, 480p, 576i, 576p)
Note: If you want to record using VCR output, you have to select the resolutions 480i/576i
• OSD Transparency
This menu allows you to adjust the opacity of the screen menus. The level “1” is the most trans
parent one.
• Information display time
Select to adjust the time of the information display when the “Info” button is pressed. If the selected
value is “Always”, the information tab appears until you press “Exit” button.
• Video output
This option stablishes the RGB output mode when you use a Scart connector with 15 pins or CVBS
when you use a component cable.
Note: To get the best picture quality we recommend you to use RGB output because this signal is
applied directly to the TV output without distortions. CVBS is a composite video signal and it has to be proceeded,
separated in componentes and then amplified; the composite signal is not as pure as RGB.
• Video quality:
Video improvements are:
- Skin tone
- Black and white extensions
www.sveon.com
English
34
SDT10100 - User Guide
9.3 Password
This menu allows you to set a password to the menu, locked TV channels and censored TV programs.
Note: The default password is 0000.
• Locking of Setup menu: Enables/Disables Setup menu with a password.
• Locking of channels: If this option is enabled, each time you select a locked channel a password will be required
to watch it.
• Locking censored: This option stablishes the age at which a password is needed to watch a TV channel.
• Without lock: A password is not needed to watch the channel.
• Total lock: A password is always required to watch a TV channel.
• 02-18: A password is needed if the age clasification of the channel is higher than the selected values.
Note: The information about the program´s clasification is provided by the TV channel.
• Change the password: Press the arrow buttons <left/right> to change the password and use the numeric buttons
<0-9> to enter the old password and the new password (two times to confirm). When you enter the correct password a message appears to confirm that the password has been successfully changed.
9.4 Schedule recording and direct recording
SDT10100 allows you to create recording tasks manually, record through Electronic Program Guide (TV or Radio)
or by pressing directly the “Rec” button of the remote control.
• Set recording tasks manually
If you want to set a recording task manually press the
yellow button of the remote control and then press the
red button to select between all the available options (10
options)
A window will appear with the type of recording,
“TV/Radio”, the TV channel info, the start time, the finish
time and the frecuency with wich you want to record.
When the time and date of the recording arrives, the device changes the TV channel and starts the recording
task. If you want to modify a recording task, select it and
press the red button of the remote control.
Note: To make sure the recording task is going to be
started successfully, set recording tasks with at least
three minutes between them.
If you wanto to delete a recording task, select it and
press the green button of the remote control. Then select
“OK” to confirm or “Exit” to cancel.
Note: You can delete recording tasks if they are not running. If you want to delete a recording task which is running, you have to Stop it before deleting it.
www.sveon.com
English
35
SDT10100 - User Guide
• Recording tasks based on EPG (Electronic Program Guide)
If you want to stablish a recording based on EPG information, press “EPG” button of the remote control, select
the channel and the program you want to record by pressing “Right” button and then pressing red button over the
selected program. A window with detailed information about the recording task will be displayed.
• Direct recording by pressing “REC” button
SDT10100 device includes Timeshift function to pause a live TV program and resume it minutes later without lost
anything.
When the Timeshift option is enabled, the program saves the recording as a temporarily file. Thanks to this function
you can access to the lost moments and resume your favourite program in the point you left it.
SDT10100 allows you to record a TV program just by pressing the “Rec” button of the remote contro during an interval of time or up to 8 hours. Before starting a recording, please setup the different recording options: press
“Menu” button, select “Multimedia” and “Recording preferences” as shown in the following picture:
• Timeshift capacity: Interval time for Timeshift option
• Timeshift: Enables/Disables Timeshift option:
- Pause: Timeshift enabled
- Auto: Timeshift always enabled
- Off: Timeshift disabled
www.sveon.com
English
36
SDT10100 - User Guide
• Recording by pressing a button: Enables or disables
the recording option by pressing the “Rec” button of the
remote control. If this option is disabled, when you press
“Rec” button you need to enter the interval time of the
recording; this information has to be be entered in the
“Recording Time” field. If this option is enabled, when
you press “Rec” button the recording lenght will be the
same than the “Recording Time” value automatically.
• Recording Time: Choose the recording lenght
(between 15 minutes and 8 hours).
Note: The Timeshift function lenght depends on the capacity of the connected device where is saved the temporarily file. It can not be changed by user.
9.5 Channel recording
SDT10100 allows you to set a schedule recording which starts automatically although the device is in Standby
mode. Once you set the schedule recording, press “Power” button of the remote control and the device enters in
Standby mode (the screen of the device displays a clock). One minute before starting the recording the device is
turned on automatically and displays the selected channel.
If you want to record a channel and watch another one,
press “Ok” button of the remote control during a recording and the available channels will be displayed (the
channel which is being recorded also appears).
Note: This option (to record a TV program and watch a
different one simultaneously) is only available in the
channels which are in the same frequency.
10. System upgrading
You can upgrade the SDT10100 system to enjoy improvements and new options.
Follow these steps to upgrade the device firmware:
- Copy the update file “SDT10100_XX.ssu” in an USB device.
- Connect the USB device to the USB Host port located in the front panel of the device.
- Select the option “System upgrading” in the Setup main menu. Select the update file saved inside the USB device.
Important. Please make sure during the firmware upgrade the USB device is not disconnected or the unit is not
powered off. It may cause serious damages to the device and it would void the product guarantee.
We strongly recommend to download the upgrade files only from our official website: www.sveon.com. If you have
any doubt please contact with our Technical Support service.
www.sveon.com
English
37
SDT10100 - User Guide
11. Restore default values
This option restores the default values of the device. All the modified options and values will be erased and the
channel list will disappear.
12. TV channel list
There are different options to sort the channel list:
• Favourites: User can move through the favourite list by
pressing the buttons “Channel +/-” of the remote control. There
are eight groups to sort the channels: News, Sprots, Film,
Music, Shopping, Travel, Male, Female.
If you want to add a channel to the favourite list, select the
channel, select the “Favourites” icon (it is lighted) and press a
numeric button (from 1 to 8) to include it or press “Delete” to
delete it from the favourite group it belongs to.
• Lock: Press “OK” button to enable or disable the selected
channel. If this option is enabled in “Setup” > “Password” >
“Channels lock”, a password will be required to watch this
channel.
• Edit: You can edit the channel name (the maximum lenght
of the new name is 18 characters).
Press the arrow buttons left and right to select “Edit” option and arrow buttons up and down to select the channel
you want to rename; press “OK” to display the channel information and press it again to rename. Press for third
time the “Ok” button to confirm and then press red button to go to the channel list.
www.sveon.com
English
38
SDT10100 - User Guide
• Move: Select this option to move the channels in the list.
If you want to sort the channels, select the channel and press “OK” button to select it; then press the arrow buttons
up and down to move it to the wished position and press again “Ok” button to confirm.
Note: This function will not move the channels when the “LCN” option is enabled in the main Menu > Setup > Installation.
• Sort: This option allows you to sort the channels: from A to Z, pay per view channels and frequency. Press the
red/green/yellow buttons to select the channels position.
• Invisible: Press “Ok” button to enable or disable this option. The invisible TV channels are not available in the
channel list. If you want to watch an "invisible" TV channel, press “Ok” button to display the channel list, press
blue button of the remote control and then use the arrow buttons right and left to select the invisible channel group.
• Delete: Use this option to delete the selected channel from the channel list. If you want to restore this TV channel
you have to start again the channel scan (in a manual or auto mode).
If you want to delete a TV channel, select it and select “Delete” option. Then press “Ok” button and press yellow
button to confirm.
www.sveon.com
English
39
SDT10100 - User Guide
• Search: Use this option to search a TV channel by the channel name.
12.1 Electronic Program Guide (EPG)
Select “EPG” option to display the Electronic Program
Guide information or program recordings.
1. Press “EPG” button to access to the Guide information.
2. Press the arrow buttons up and down to select the
channel.
3. Use the arrow buttons left and right to change the date
or the selected program.
4. Press “OK” button to display the program information
or press “Exit” to go to the previous window.
5. Press the red button of the remote control to add new
recording tasks in the schedule.
Note: EPG information is subject to the channel availability. This information is not available if the TV channel
doesn´t include EPG option.
12.2 Radio
The radio station list and EPG functios for digital radio signal have the same parameters than the TV channels.
Please read carefully the sections of this user guide for further information.
13. Multimedia
Before using “Multimedia” option please make sure to
connect an external storage device through the slot
system or using the USB Host por of the device. If there
is no external device connected to the SDT10100, a
message will appear indicating that there isn´t any external device connected.
When an external storage device is connected,an onscreen message appears which indicates that the system
is detecting the device and loading its content. Wait during some minutes and then go to “Multimedia” menu by
pressing “Menu” button of the remote control and selecting “Multimedia” option or by pressing the red button
(during TV mode).
www.sveon.com
English
40
SDT10100 - User Guide
13.1 Pictures
SDT10100 supports JPEG; BMP and GIF picture formats. When there are picture files in the external device root,
they are displayed in thumbnail mode. If there aren´t, a message will appear to select the folder where are saved
the picture files. Press “Exit” to go to the thumbnail mode.
The resolution of the selected picture file is displayed in the left-bottom corner when the picture is shown in thumbnail mode; when the picture is shown in folder mode, the resolution is shown in the right. To navigate between folders and files, use the arrow buttons up, down, left and right and press “Ok” to watch the selected picture.
Enable “Zoom” option by pressing the red button of the remote control; the available Zoom options are: 25-50100-150-200%. If the Zoom of the picture is more than the 100% of its size, you can press the arrow buttons to
move the enlarged picture. If the Zoom option is less than the 100% of the picture size, you can rotate the picture
by pressing the arrow buttons left and right.
You can watch the picture files in Slide Show mode by pressing the “Ok” button of the remote control in the selected
picture to start this mode:
- Press red button to pause/resume the Slide Show mode.
- Press green button to select background music during Slide Show mode.
- Press yellow button to enable repeat function during Slide Show mode.
- Press blue button to adjust the interval time between pictures in Slide Show mode.
13.2 Music
SDT10100 supports the most common audio formats: MP3/WMA/OGG. During music playback, the time bar is
displayed onscreen with the elapsed and remaining time information. Also appears the frequency spectrum.
Use the arrow buttons to navigate between folderse and
files. Press “Ok” button to play the selected file.
- Press red button to pause or resume the playback.
- Press green button to stop the playback.
- Press yellow button to select the repeat mode.
- Press blue button for fast forward (speed x2)
- Press the arrow buttons left and right to adjust the
volume or press “Mute” to disable the audio signal.
www.sveon.com
English
41
SDT10100 - User Guide
13.3 Video
SDT10100 supports the following video file formats: MPEG-4, XVID, AVI, DAT, VOB, MPEG2. To play video files
press “Menu” button of the remote control, select “Multimedia” and then “Video” option. You can also access directly
by pressing the red button of the remote control during TV mode.
Use the arrow buttons up, down, right and left to navigate between folders and files. Select the video file you want
to play and press “Ok”.
- Press red button to pause/resume the playback.
- Press the green button to go forward step by step
- Press yellow button for fast forward option (available speeds: x2/x4/x8x/x16/x32) or to resume the normal playback speed.
13.4 PVR options
The “PVR Options” menu allows you to watch the recording programs and also to setup the recording options.
Note: The file system of the storage device must be FAT or FAT32.
- Recording List: Plays a recording by pressing “OK”
button or delete the recording by pressing the red button
of the remote control.
- Recording Device: Selects the storage device and the
partition where are going to be saved the recordings.
This option also allows you to format the hard disk partition by pressing the red button of the remote control or
to format the device by pressing the green button. Please note this options erase all the information saved in
the external storage device.
- Recording preferences: Allows you to select between
the Timeshift options, one-button recording options and
Recording Time.
• Timeshift capacity: Available interval time for Timeshift option.
• Timeshift: Enables/Disables Timeshift function.
- Pause: Timeshift enabled
- Auto: Timeshift always enabled
- Off: Timeshift disabled
www.sveon.com
English
42
SDT10100 - User Guide
• One-button recording: Enables or disables the recording option by pressing “Rec” button of the remote control.
If this option is disabled, when you press “Rec” button, the system will ask the interval time for the recording. This
time can be stablished in the “Recording Time” field. If the option is enabled, the recording lenght will be the same
than stablished in "Recording Time" field.
• Recording time: Maximum interval time for recording option (from 15 minutes up to 8 hours).
14. Others
SDT10100 includes different applications. Press “Menu” button and use the arrow buttons left and right to select
“Others” menu:
Gomoku: game
Calendar: Displays the date: day,month and year
Calculator: Allows you to do easy operations
15. Watch TV channels
This section shows you the available options once the channel scan is done. If you have still not searched the
channels, please read carefully the section 8 of this user guide.
15.1 Information
Press “Info” button of the remote control once to display the information bar. This bar shows the channel´s number
and name, date and current time, current program and the following icons: Info, Favourites, Codified and Locked.
Press “Info” button twice to display the detailed info about the current program.
Press “Info” button for third time to display the channel information (frequency, signal intensity and quality)
15.2 Change channel
Use the buttons “Channel +/-” or press directly the channel number using the numeric pad of the remote control
to change the channel. If you enter a channel number wich doesn´t exist, the device will not change the channel.
15.3 Volume
If you want to adjust the volume, press the button “Volume +/-” of the remote control; press “Mute” button to disable
the audio signal. If you adjust the volume level during Mute option, the audio will be enabled.
www.sveon.com
English
43
SDT10100 - User Guide
15.4 Channel list
Press “Ok” button to display the channel list. Select the
channel you want to watch by pressing the arrow buttons.
15.5 Audio
There are some TV programs which contain different available languages. Press “Audio” button of the remote
control and use the arrow buttons right and left to switch between the different audio languages available.
You can also select the sound mode between different options: only left channel, only right channel or Stereo.
Note: The posibility of switch between different audio language is subject to the channel availability.
15.6 Pause
This option allows you to pause the audio and video signal. Press any key to resume the playback.
If “Timeshift" function is enabled, when you press again the pause button, the program resumes in the point you
left it. To cancel “Timeshift” option press “Stop” button two times and the program will resume in live time.
15.7 Favourites
Please read carefully the section number 11 of this user guide for further information about “Favourites” options.
15.8 Teletext
Press “TTX” button of the remote control to access to the program´s Teletext information; then select “Spa”. The
Teletext information is subject to channel availability.
www.sveon.com
English
44
SDT10100 - User Guide
Some TV channels offer subtitles adapted to deaf through Teletext function. Press “TTX” button of the remote control and use the arrow buttons left and right to select “TTX subtitles” and “Spa” to display the subtitles on the TV
picture.
Note: Teletext and Subtitle functions are subject to the channel availability. It depends also on the signal coverage.
15.9 EPG
For further information about EPG function please read the section 12.1 of this user guide.
15.10 Sleep function
SDT10100 device includes “Sleep” function which will allow you to turn the device off automatically. To enable this
function press the button “0” of the remote control and use the arrow buttons left and right to select the remaining
time to turn the device off.
www.sveon.com
English
45
SDT10100 - User Guide
16. Multi screen
The Multi-Screen option allows you to display up to 9
different channels simultaneously; only the current channel is shown in live, the rest of channels only display a
thumbnail.
To enable this option press “Play” buttonof the remote
control in a TV channel.
Press arrow buttons left, right, up and down to navigate
through the channels. Press “Ok” to select a channel.
To exit this mode press “Exit” button.
17. SDT10100 status
SDT10100 displays different status messages:
- No signal: The device doesn´t receive DVB-T signal (the antenna cable may be disconnected).
- Without service: The channel has not signal.
- Codified signal: The channel is codified (in pay per view TV channels).
- Locked channel: The channel is locked (for further info please go to 9.3 section in this user guide).
18. Trouble-shooting
Please read carefully the following information about the usage of the device:
- The Standby LED is off:
Cause: The device is disconnected
Solution: Please check if the device is properly connected
- There is no signal:
Cause 1: Antenna is diconnected. Solution: Please check the device connections
Cause 2: Antenna is damaged. Solution: Please check the antenna
Cause 3: There is not DVB-T coverage. Solution: Check with the antenna installator.
- Wighout audio or video signal:
Cause 1: Wrong video output selected. Solution: Press blue button to change output resolution.
Cause 2: A radio station is selected. Solution: Press yellow button to switch between TV and Radio
signal
Cause 3: Movie with AC3 audio format. Solution: Connect a speaker system to your device through
coaxial connection.
- Low quality picture:
Cause: Antena is bad placed or there isn´t enough signal coverage.
Solution: Check the antenna installation
- Codified channel:
Cause: This is a codified channel
Solution: Change the channel
- Forgotten password: Solution: Start again the channel scan.
- The remote control doesn´t work properly:
Cause 1: The receptor is turned off. Solution: Disconect and turn the receptor on.
Cause 2: Frontal panel is covered. Solution: Avoid obstructions the front panel of the device.
Cause 3: The batteries of the remote control are not properly installed. Solution: Check the batteries
installation.
Cause 4: The batteries are ran out. Solution: Change the batteries.
www.sveon.com
English
46
SDT10100 - User Guide
19. Technical Specifications
DVB-T TV Tuner:
- Input RF connector x1(D-Type, IEC 169-2, female connector)
- Output RF connector x1 (D-Type, IEC 169-2, male connector -Loop-)
- Frequency range: 174 Mhz~230 Mhz (VHF) - 470Mhz~862Mhz (UHF)
- Signal level: -10~-70 dbm
Signal stream: MPEG-2 ISO/IEC 13818-1
Profile level: MPEG-2 (main profile)
Transfer rate: Max. 15 Mbits/s
Video formats: 4:3, 16:9
Decodification:
- Video: MPEG2
- Audio: MPEG2
Video outputs:
- TV System: NTSC, PAL
- Resolution: RGB/CVBS: 720x576i, 720x480i. HDMI: 480i, 480p, 576i, 576p
Connectors:
- RF Input: IEC 169-2 female connector
- RF Loop: IEC 169-2 male connector
- TV Scart: Composite video (CVBS), RGB, L/R
- VCR Scart: Composite video (CVBS), L/R
- Coaxial: RCA, S/PDIF digital audio output
- USB 2.0: Multimedia playback and DVB-T recording
- Removable hard disk system: HDMI/USB 2.0. Multimedia playback and DVB-T recording.
- HDMI: High Definition Multimedia Interface.
Multimedia files format:
- Video: MPEG-2, MPEG-4, XVID
- Audio: MP3, WMA, OGG
- Pictures: JPEG, GIF, BMP
20. Warning: Disposal of waste batteries
This symbol on the product or its batteries or its packaging means that this product
and any batteries it contains must not be disposed of with your household waste.
Instead, it is your responsability to hand this over to an applicable collection point
for the recycling of batteries and electrical and electronic equipment. This separate
collection and recycling will help to conserve natural resources and prevent potential
negative consequences for human health and the environment due to the possible
presence of hazardous substances in batteries and electrical and electronic equipment, which could be caused by inappropriate disposal.
For more information about where to drop off your batteries and electronic waste, please contact your local city/municipality office, your household waste disposal service or the shopw where you purchased the product.
www.sveon.com
English
47