1
VGN-CS Series Hard Disk Drive
Replacement Instructions
IMPORTANT!
PLEASE READ BEFORE YOU START
These easy instructions are intended to guide you through the replacement process. If you need
additional help, please call 1-866-651-7669 for technical support from 9:00 am to 11:00 pm EST.
9 To avoid electric shock please make sure product is turned off and AC Adaptor is disconnected
from the power source. Remove jewelry before you begin work to avoid scratching the surface of
your notebook computer.*
9 Place your notebook computer on a clean, stable and covered surface to avoid damage to the
computer's case.*
9 Follow the ESD (Electrostatic Discharge) damage prevention instructions:
o Hold parts by the edges, away from exposed circuitry when possible.
o Do not walk around excessively as this promotes static build-up.
9 The appearance of the electronic components shown in the illustrations may be different from the
components shipped. This slight difference does not affect the accuracy of these instructions.
* Sony is not responsible for any loss of data associated with your computer or any damage caused by incorrect
handling of the computer under these procedures. The terms of your Sony Limited Warranty continue to apply.
1.
3.
2.
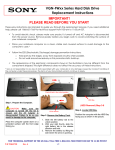
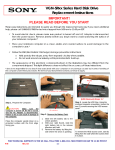
Step 1. Prepare the Computer.
Step 2. Remove the Battery Pack.
(Look for the screw hole with 2 dots)
CAUTION: Make sure the
computer is turned off, the lid is
closed, and the AC Adapter is
disconnected. Failure to do so
can result in damage to the
computer.
Locate the release tab as shown in
the picture.
1. Slide the left battery tab to
the Unlock position.
2. With your finger slide the
right battery tab in the
release direction and hold.
3. Hook your finger under the
battery pack and lift.
(HDD Removal) Steps 3-7)
Step 3. Rotate the computer with
the Hard Disk Drive (HDD) Bay
facing you as shown in the picture.
Using the enclosed magnetic
screwdriver, remove the two (2)
screws securing the hard drive
access cover.
Place the computer upside down on
a protected surface with the front
edge facing you.
FOR TECHNICAL SUPPORT IN THE US CALL TOLL FREE 1-866-651-7669 FROM 9:00 AM TO 11:00 PM EST
P/N 994659900
Rev. A
1/2
VGN-CS Series Hard Disk Drive
Replacement Instructions
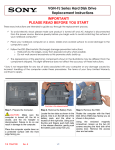
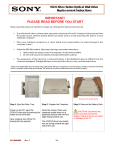
Step 4. To remove the hard drive
access cover slide the cover as
shown above .
Step 5. Using the enclosed
magnetic screwdriver, remove the
one (1) screw securing the hard
drive assembly.
(HDD must be disconnected)
Step 6. Locate the black plastic tab
on the hard drive assembly and
gently pull the original hard drive in
the direction shown above.
Step 7. Once the hard drive
assembly is disconnected from the
connector carefully lift the hard drive
assembly to remove from hard drive
bay.
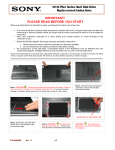
(HDD Reinstallation) Steps 8-11)
Step 8. Initiate hard drive reinstallation by sliding the hard drive
assembly back into the hard drive
bay.
Step 9. Once hard drive is properly
sitting its bay, carefully re-connect
the hard drive to the connector by
sliding the hard drive in the
direction shown above.
Step 12. Reinstall the Battery
Pack. Reconnect the AC Adapter.
(Power on your computer and
continue with the recovery process by
following the instructions described on
the back of the recovery disk’s case.)
Step 10. Reinstall the one screw
previously removed.
Step 11. Reinstall the hard drive
cover by sliding the cover in the
direction shown above and tighten
the two (2) screws previously
removed.
Step 13. Return the old HDD to
Sony following the included
shipping instructions.
FOR TECHNICAL SUPPORT IN THE US CALL TOLL FREE 1-866-651-7669 FROM 9:00 AM TO 11:00 PM EST
P/N 994659900
Rev. A
2/2