1
Precautions
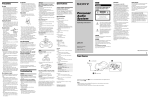
On safety
• As the laser beam used in the CD player
section is harmful to the eyes, do not
attempt to disassemble the casing. Refer
servicing to qualified personnel only.
• Should any solid object or liquid fall into
the player, unplug the player, and have it
checked by qualified personnel before
operating it any further.
• Discs with non-standard shapes (e.g.,
heart, square, star) cannot be played on
this player. Attempting to do so may
damage the player. Do not use such discs.
On operation
• If the player is brought directly from a
cold to a warm location, or is placed in a
very damp room, moisture may condense
on the lenses inside the CD player section.
Should this occur, the player will not
operate properly. In this case, remove the
CD and wait about an hour for the
moisture to evaporate.
Notes on CDs
• Before playing, clean the CD with a
cleaning cloth. Wipe the CD from the
center out.
On power sources
• For AC operation,
use the supplied
AC power
Polarity of
adaptor; do not
the plug
use any other type.
• The player is not disconnected from the
AC power source (mains) as long as it is
connected to the wall outlet, even if the
player itself has been turned off.
• Unplug the player from the wall outlet
when it is not to be used for an extended
period of time.
• For battery operation, use six size C (R14)
batteries.
• When the batteries are not to be used,
remove them to avoid damage that can be
caused by battery leakage or corrosion.
• The nameplate indicating operating
voltage, etc. is located at the bottom.
On placement
• Do not leave the player in a location near
heat sources, or in a place subject to direct
sunlight, excessive dust or mechanical
shock.
• Do not place the player on an inclined or
unstable place.
• Do not place anything within 10 mm of
the side of the cabinet. The ventilation
holes must be unobstructed for the player
to operate properly and prolong the life of
its components.
• If the player is left in a car parked in the
sun, be sure to choose a location in the car
where the player will not be subjected to
the direct rays of the sun.
• Since a strong magnet is used for the
speakers, keep personal credit cards using
magnetic coding or spring-wound watches
away from the player to prevent possible
damage from the magnet.
Do not immerse in water
This product is not meant to be immersed in
water or come in continuous contact with
water.
• Before opening or shutting the CD
compartment or battery compartment lid,
be sure to wipe off water, dust or sand on
the outside of the player.
• Water in the headphones jack/DC IN jack
may cause rusting. Cover the jacks with
the attached rubber cap when the jacks are
not used.
• If the player is splashed with salt water,
wipe clean with a damp cloth, then dry
with a soft dry cloth. Do not wash under
running water; do not use soap or
detergent; do not dry with an electric hair
dryer.
• The supplied AC power adaptor is not
water resistant. To prevent shock hazard,
avoid using the player near water during
AC operation.
The CD does not play or “no dISC” is
displayed even when a CD is in place.
• Place the CD with the label surface up.
• Clean the CD.
• Take out the CD and leave the CD
compartment open for about an hour to dry
moisture condensation.
• The CD-R/CD-RW was not finalized. Finalize
the CD-R/CD-RW with the recording device.
• There is a problem with the quality of the CDR/CD-RW, recording device or application
software.
• The CD-R/CD-RW is blank.
• Replace all the batteries with new ones if they
are weak.
The sound drops out.
Cleaning the cabinet
• Clean the cabinet, panel and controls with
a soft cloth slightly moistened with a mild
detergent solution. Do not use any type of
abrasive pad, scouring powder, or solvent,
such as alcohol or benzine.
CD Player
• Do not use solvents such as benzine,
thinner, commercially available cleaners
or anti-static spray intended for vinyl LPs.
• Do not expose the CD to direct sunlight or
heat sources such as hot air ducts, nor
leave it in a car parked in direct sunlight as
there can be a considerable rise in
temperature inside the car.
• Do not stick paper or sticker on the CD,
nor scratch the surface of the CD.
• After playing, store the CD in its case.
If there is a scratch, dirt or fingerprints on the
CD, it may cause tracking error.
About CD-Rs/CD-RWs
This player can play CD-Rs/CD-RWs
recorded in the CD-DA format*, but
playback capability may vary depending on
the quality of the disc and the condition of
the recording device.
* CD-DA is the abbreviation for Compact
Disc Digital Audio. It is a recording
standard used for Audio CDs.
Music discs encoded with copyright
protection technologies
This product is designed to play back discs
that conform to the Compact Disc (CD)
standard. Recently, various music discs
encoded with copyright protection
technologies are marketed by some record
companies. Please be aware that among
those discs, there are some that do not
conform to the CD standard and may not be
playable by this product.
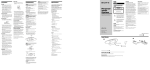
• Reduce the volume.
• Clean the CD, or replace it if the CD is badly
damaged.
• Place the player in a location free from
vibration.
• Clean the lens with a commercially available
blower.
Lens
• The sound may drop out or noise may be
heard when using poor quality CD-Rs/CDRWs or if there is a problem with the
recording device or application software.
You cannot open/close the lid of the
CD compartment.
• Place the player on a level surface and open/
close the lid.
Radio
Reception is poor.
• Reorient the antenna to improve FM
reception.
• Reorient the player itself to improve AM
reception.
If you have any questions or problems
concerning your player, please consult your
nearest Sony dealer.
Information
English
Specifications
For customers in the USA
WARNING
AUDIO POWER SPECIFICATIONS
POWER OUTPUT AND TOTAL
HARMONIC DISTORTION
With 3.2-ohm loads, both channels driven
from 100 - 10 000 Hz; rated 1.7 W per
channel-minimum RMS power, with no
more than 10 % total harmonic distortion
in AC operation.
Other specifications
CD player section
System
Compact disc digital audio system
Laser diode properties
Material: GaAlAs
Wave length: 780 nm
Emission duration: Continuous
Laser output: Less than 44.6 µW
(This output is the value measured at a distance
of about 200 mm from the objective lens surface
on the optical pick-up block with 7 mm
aperture.)
Spindle speed
200 r/min (rpm) to 500 r/min (rpm)
(CLV)
Number of channels
2
Frequency response
20 - 20 000 Hz +0/–1 dB
Wow and flutter
Below measurable limit
To prevent fire or shock hazard, do
not expose the player to rain or
moisture.
Personal
Audio
System
This symbol is intended to alert the
user to the presence of uninsulated
“dangerous voltage” within the
product's enclosure that may be of
sufficient magnitude to constitute a
risk of electric shock to persons.
Operating Instructions
This symbol is intended to alert the
user to the presence of important
operating and maintenance
(servicing) instructions in the
literature accompanying the
appliance.
CAUTION
The use of optical instruments with this product
will increase eye hazard.
WARNING
Radio section
Frequency range
FM: 87.5 - 108 MHz
AM: 530 - 1 710 kHz
Antennas
FM: Telescopic antenna
AM: Built-in ferrite bar antenna
ZS-X10
Printed on 100% recycled paper using
VOC (Volatile Organic Compound)free vegetable oil based ink.
2-581-447-11 (1)
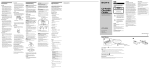
Power Sources
2 to a wall outlet
B
Sony R14P: approx. 2 h
Sony alkaline LR14: approx. 6 h
General
The power does not come on.
• Connect the AC power adaptor to a wall outlet
securely.
• Make sure the batteries are inserted correctly.
• Replace all the batteries with new ones if they
are weak.
The power is not on, and "bAttErY"
and “Error” are displayed alternately.
• Make sure the batteries are inserted correctly.
• Replace all the batteries with new ones if they
are weak.
There is no audio.
• Adjust the volume.
• Unplug the headphones when listening
through speakers.
Noise is heard.
• Someone is using a portable telephone or
other equipment that emits radio waves near
the player. tMove the portable telephone,
etc., away from the player.
• Replace all the batteries with new ones if they
are weak.
• Move the player away from the TV.
The picture of your TV becomes
unstable.
• If you are listening to an FM program near the
TV with an indoor antenna, move the player
away from the TV.
After trying the above remedies, if you still have
problems, unplug the AC adaptor and remove all
the batteries. After all the indications in the
display disappear, plug the power cord and
insert the batteries again. If the problem persists,
please consult your nearest Sony dealer.
Sony R14P: approx. 12 h
Sony alkaline LR14: approx. 40 h
Dimensions
Approx. 511 × 154 × 244 mm (w/h/d)
(20 1⁄8 × 6 1⁄8 × 9 5⁄8 inches) (incl. projecting parts)
Mass
Approx. 3.4 kg (7 lb. 5 oz) (incl. batteries)
Supplied accessory
AC power adaptor (1)
Design and specifications are subject to change
without notice.
Optional accessories
Sony MDR headphone series
Please register this product on line at
http://www.sony.com/productregistration.
Proper registration will enable us to send you
periodic mailings about new product,
services and other important announcements.
Registering your product will also allow us to
contact you in the unlikely event that the
product needs adjustment or modification.
Thank you.
©2005 Sony Corporation
Printed in China
CD playback
The audio is weak or has poor quality.
For customers in the USA
To prevent fire or shock hazard, do not place
objects filled with liquids, such as vases, on the
appliance.
Radio play
Troubleshooting
The model number is located at the bottom and
the serial number is located in the battery
compartment.
Record the serial number in the space provided
below. Refer to them whenever you call upon
your Sony dealer regarding this product.
Model No. ZS-X10
Serial No.
Do not install the appliance in a confined space,
such as a bookcase or built-in cabinet.
General
Speaker
Full range: 8 cm (3 1⁄4 inches) dia., 3.2 Ω, cone
type (2)
Passive radiator: 8 cm (3 1⁄4 inches) dia. (2)
Outputs
Headphones jack (stereo minijack)
For 16 - 64 Ω impedance headphones
Power output
2.3 W + 2.3 W (at 3.2 Ω, 10% harmonic
distortion)
Power requirements
DC IN 9V jack accepts:
Supplied AC power adaptor for use with 120V
AC, 60 Hz
9 V DC, 6 size C (R14) batteries
Battery life
This equipment has been tested and found to
comply with the limits for a Class B digital
device, pursuant to Part 15 of the FCC Rules.
These limits are designed to provide reasonable
protection against harmful interference in a
residential installation. This equipment
generates, uses and can radiate radio frequency
energy and, if not installed and used in
accordance with the instructions, may cause
harmful interference to radio communications.
However, there is no guarantee that interference
will not occur in a particular installation. If this
equipment does cause harmful interference to
radio or television reception, which can be
determined by turning the equipment off and on,
the user is encouraged to try to correct the
interference by one or more of the following
measures:
— Reorient or relocate the receiving antenna.
— Increase the separation between the
equipment and receiver.
— Connect the equipment into an outlet on a
circuit different from that to which the
receiver is connected.
— Consult the dealer or an experienced radio/
TV technician for help.
This device complies with part 15 of the FCC
rules. Operation is subject to the following two
conditions: (1) This device may not cause
harmful interference, and (2) this device must
accept any interference received, including
interference that may cause undesired operation.
You are cautioned that any changes or
modifications not expressly approved in this
manual could void your authority to operate this
equipment.
Owner's Record
A
1 to DC IN 9V
Connect the AC power adaptor A or insert six size C (R14) batteries (not supplied) into the
battery compartment B.
Notes
• Replace the batteries when the OPR/BATT indicator dims or when the player stops operating.
Replace all the batteries with new ones.
• To use the player on batteries, disconnect the AC power adaptor from the player.
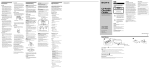
Playing a CD
Location of controls
1
2
3
4
Loading a CD
Listening to the radio
Press POWER to turn on the player.
Load a CD in the CD compartment.
With the labeled side up
Press u.
The player plays all the tracks once.
go to the next track
find the beginning of the current
track/go back to the previous track
remove the CD
locate a point while listening
to the sound
locate a point while observing
the display
When inserting a CD, place the player horizontally.
If the player is not level, you cannot open or close the CD compartment lid.
POWER
Display
RADIO
BAND
AUTO PRESET
PUSHZ
OPEN/CLOSE
OPR/BATT
DC IN 9V
i
MODE
Press POWER to turn on the player.
3
Push the 4-way control key toward TUNE + or TUNE – and hold it until the
frequency digits begin to change in the display.
Press PUSH ZOPEN/CLOSE to close the CD compartment.
To
stop playback
pause playback
Note
1
2
Do this
Press x.
Press u.
Press the button again to resume play after pause.
Push the 4-way control key toward >.
Push the 4-way control key toward ..
The player automatically scans the radio frequencies and stops when it finds a
clear station.
If you can't tune in a station, push the 4-way control key toward TUNE + or
TUNE – repeatedly to change the frequency step by step.
Tip
Press PUSH ZOPEN/CLOSE.
Push the 4-way control key toward > (forward) or .
(backward) while playing until you find the point.
Push the 4-way control key toward > (forward) or .
(backward) in pause until you find the point.
About ESP (Electronic Shock Protection) function
When a CD is playing, the ESP function is always activated. The ESP function prevents the
sound from skipping by using a buffer memory that stores music data for about 10 seconds.
Notes
If the FM broadcast is noisy, press MODE until "Mono" appears in the display and the radio will play in
monaural.
Presetting radio stations
You can store radio stations into the player’s memory. You can preset up to 30 radio stations, 20
for FM and 10 for AM in any order.
1
2
3
Press POWER to turn on the player.
4
Press DSPL•ENTER•MEMORY.
The stations are stored in memory from the lower frequencies to the higher ones.
• Playing may stop when the player gets a strong shock even with the ESP function.
• You may hear a noise or sound skip:
– when you listen to a dirty or scratched CD.
– when you listen to an audio test CD.
– when the player receives continuous shock.
Using the display
To check the total track number and playing time
DSPL
ENTER
MEMORY
VOL +*, –
MEGA BASS
Press DSPL•ENTER•MEMORY in stop mode (see fig. C).
u*
To check the remaining time
x
*The button has a tactile dot.
Display
C
Total track number
Total playing time
D
Programed track
Press DSPL•ENTER•MEMORY repeatedly while playing a CD. The display changes as
follows:
t the current track number and playing time
r
the current track number and the remaining time on the current track*
r
the number of tracks left and remaining time on the CD
Playing order
* For a track whose number is more than 20, the remaining time appears as “- -:- -” in the display.
Selecting the play mode
To turn on/off the power
Press POWER.
To adjust the volume
Press MODE until “REP 1” “REP ALL” “SHUF” “SHUF REP” “PROGRAM”
“PROGRAM REP” appears in the display. Then proceed as follows:
Press VOL +, –.
To listen through headphones
To
repeat a single track
Select
“REP 1”
repeat all tracks
shuffle play
repeat tracks
in random order
program play
“REP ALL”
“SHUF”
“SHUF REP”
Connect the headphones to the i (headphones) jack.
Adjusting the sound emphasis
To reinforce the bass sound
Press MEGA BASS.
“MEGA BASS” appears in the display.
To return to normal sound, press the button again.
repeat programed tracks
Press RADIO•BAND•AUTO PRESET until the band you want appears in the
display.
Each time you press the button, the indication changes as follows:
“FM” t “AM”.
Then do this
Push the 4-way control key toward > or .
to select the track you want to repeat then press
u.
Press u.
Press u.
Press u.
“PROGRAM” Push the 4-way control key toward > or .
then press DSPL•ENTER•MEMORY for the
tracks you want to program in the order you want
up to 20 tracks (see fig. D). Then press u.
“PROGRAM Push the 4-way control key toward > or .
then press DSPL•ENTER•MEMORY for the
REP”
tracks you want to program in the order you want
up to 20 tracks. Then Press u.
To cancel selected play mode
Press MODE until the selected mode disappears from the display.
To check the programed track and playing order in the display
To check the order of tracks before play, press DSPL•ENTER•MEMORY.
Every time you press the button, the track number appears in the programed order.
To change the current program
Press x once if the CD is stopped and twice if the CD is playing. The current program will be
erased. Then create a new program following the programing procedure.
Tip
You can play the same program again, since the program is saved until you open the CD compartment.
Press RADIO•BAND•AUTO PRESET to select the band.
Hold down RADIO•BAND•AUTO PRESET for 2 seconds until “AUTO”
flashes in the display.
If a station cannot be preset automatically
You need to preset a station with a weak signal manually.
1 Press POWER.
2 Press RADIO•BAND•AUTO PRESET to select the band.
3 Tune in a station you want.
4 Hold down DSPL•ENTER•MEMORY for 2 seconds until the preset number flashes in the
display.
5 Push the 4-way control key toward PRESET . or PRESET > repeatedly until the
preset number you want for the station on flashes in the display.
6 Press DSPL•ENTER•MEMORY.
The new station replaces the old one.
Tip
The preset radio stations remain in memory even if you unplug the AC power adaptor or remove the
batteries.
Playing preset radio stations
1
2
3
Press POWER to turn on the player.
Press RADIO•BAND•AUTO PRESET repeatedly to select the band.
Push the 4-way control key toward PRESET . or PRESET > to tune in
the stored station.