1
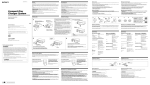
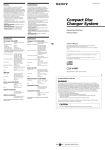
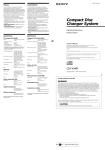
3-867-765-11 (1) Specifications Spécifications CD changer (CDX-530RF) Changeur de CD (CDX-530RF) System Système Compact disc digital audio system Système audionumérique à disque compact Fréquence de transmission 88,3 MHz/88,5 MHz/ 88,7 MHz/88,9 MHz/ 89,1 MHz/89,3 MHz/ 89,5 MHz/89,7 MHz/ 89,9 MHz/(réglable) Bornes d’entrée/sortie Télécommande filaire (8 broches) Sortie du signal RF (FM) Entrée d’alimentation (3 broches) Consommation de courant 800 mA (lecture) 800 mA (charge/éjection de disque) Température de fonctionnement –10°C à + 55°C (14°F à 131°F) Dimensions Env. 262 × 90 × 181,5 mm (10 3/8 × 3 5/8 × 7 1/4 po.) (l/h/p) Poids Env. 2,1 kg (4 liv. 10 on.) Laser Diode Properties Material GaAlAs Wavelength 780 nm Emission Duration Continuous Laser output power Less than 44.6 µW* * This output is the value measured at a distance of 200 mm from the objective lens surface on the Optical Pick-up Block. Transmitting frequency Input/output terminals Current drain Operating temperature Dimensions Mass 88.3 MHz/88.5 MHz/ 88.7 MHz/88.9 MHz/ 89.1 MHz/89.3 MHz/ 89.5 MHz/89.7 MHz/ 89.9 MHz/(switchable) Wired remote control (8 pin) RF signal (FM) output Power input (3 pin) 800 mA (at playback) 800 mA (at disc loading/ ejecting) –10°C to +55°C (14°F to 131°F) Approx. 262 × 90 × 181.5 mm (10 3/8 × 3 5/8 × 7 1/4 in.) (w/h/d) Approx. 2.1 kg (4 lb. 10 oz.) Dimensions Mass Entrée/sortie Dimensions Antenna input terminal Antenna output cord CD Changer input cord 40 × 40 × 27 mm (1 5/8 × 1 5/8 × 1 1/8 in.) (w/h/d) 140 g (5 oz.) Poids Mass Battery Mode d’emploi Borne d’entrée d’antenne Câble de sortie d’antenne Câble d’entrée du changeur CD 40 × 40 × 27 mm (1 5/8 × 1 5/8 × 1 1/8 po.) (l/h/p) 140 g (5 on.) Télécommande à fil (RM-X87)/ télécommande sans fil (RM-X89) Dimensions Wired remote (RM-X87) /Wireless remote (RM-X89) Dimensions Operating Instructions Boîte de relais Relay box Input/output Compact Disc Changer System Wired remote: Approx. 122 × 36.5 × 15.5 mm (4 3/8 × 1 7/16 × 5/8 in.) (w/h/d) Wireless remote: Approx. 40 × 6.5 × 86 mm (1 5/8 × 9/32 × 3 1/2 in.) (w/h/d) Wired remote: Approx. 255 g (9 oz.) Wireless remote: Approx. 20 g (1 oz.) Wireless remote: Lithium battery (CR2025) Poids Pile Owner’s Record The model and serial numbers are located at the rear of the CD changer. Record the serial number in the space provided below. Refer to these numbers whenever you call upon your Sony dealer regarding this product. Télécommande à fil: Env. 122 × 36,5 × 15,5 mm (4 3/8 × 1 7/16 × 5/8 po.) (l/h/p) Télécommande sans fil: Env. 40 × 6,5 × 86 mm (1 5/8 × 9/32 × 3 1/2 po.) (l/h/p) Télécommande à fil: Env. 255 g (9 on.) Télécommande sans fil: Env. 20 g (1 on.) Télécommande sans fil: Pile au lithium (CR2025) Model No. CDX-530RF Serial No. For installation and connections, see the supplied installation/connections manual. En ce qui concerne l’installation et les connexions, consulter le manuel d’installation/ connexions fourni. Accessoires fournis Chargeur de disques (1) Pièces de montage et de raccordement (1 jeu) Accessoires en option Supplied accessories Adaptateur pour CD de 8 cm CSA-8 Chargeur de disques XA-250 Disc magazine (1) Parts for installation and connections (1 set) CDX-530RF Conception et spécifications modifiables sans préavis. Optional accessories Sony Corporation 2000 Printed in Thailand CD single adaptor CSA-8 Disc magazine XA-250 Design and specifications are subject to change without notice. For the customers in the USA WARNING Installing the battery Installation de la pile Replace the battery with a Sony CR2025 or Duracell DL-2025 lithium battery. Use of another battery may present a risk of fire or explosion. Remplacez la pile par une pile au lithium CR2025 Sony ou DL-2025 Duracell. L’utilisation d’une autre pile comporte un risque d’incendie ou d’explosion. + side up Côté + vers le haut c The use of optical instruments with this product will increase eye hazard. Autonomie de la pile au lithium When the battery becomes weak, you will not be able to operate the unit with the wireless remote. Battery life is approx. six months depending on the conditions of use. Lorsque les piles s’épuisent, il ne vous sera plus possible de commander l’appareil à l’aide de la télécommande sans fil. L’autonomie de la pile est d’environ six mois suivant les conditions d’utilisation. Battery may explode if mistreated. Do not recharge, disassemble or dispose of in fire. Notes on the lithium battery • Keep the lithium battery out of the reach of children. Should the battery be swallowed, immediately consult a doctor. • Wipe the battery with a dry cloth to assure a good contact. • Be sure to observe the correct polarity when installing the battery. • Do not hold the battery with metallic tweezers, otherwise a short-circuit may occur. You are cautioned that any changes or modifications not expressly approved in this manual could void your authority to operate this equipment. CAUTION Lithium battery life WARNING This equipment has been tested and found to comply with the limits for a Class B digital device, pursuant to Part 15 of the FCC Rules. These limits are designed to provide reasonable protection against harmful interference in a residential installation. This equipment generates, uses, and can radiate radio frequency energy and, if not installed and used in accordance with the instructions, may cause harmful interference to radio communications. However, there is no guarantee that interference will not occur in a particular installation. If this equipment does cause harmful interference to radio or television reception, which can be determined by turning the equipment off and on, the user is encouraged to try to correct the interference by one or more of the following measures: — Reorient or relocate the receiving antenna. — Increase the separation between the equipment and receiver. — Connect the equipment into an outlet on a circuit different from that to which the receiver is connected. — Consult the dealer or an experienced radio/TV technician for help. ATTENTION Utilisée de façon incorrecte, la pile peut exploser. Ne pas la recharger, la démonter ni la jeter au feu. Remarques sur la pile au lithium • Gardez les piles au lithium hors de la portée des enfants. En cas d’ingestion, consultez immédiatement un médecin. • Essuyez la pile à l’aide d’un chiffon sec de façon à assurer un bon contact. • Respectez la polarité de la pile lorsque vous l’installez. • Ne saisissez pas la pile à l’aide d’une pince métallique, sinon vous risquez de provoquer un court-circuit. Features Caractéristiques The CDX-530RF is a compact disc changer system comprised of the wired and wireless remote commanders, the relay box, and the CD changer. The CD changer modulates the audio signal into the RF (Radio Frequency) signal so that it can be received by the existing FM tuner of your car audio. Therefore you will be able to enjoy CD play with your car audio even if it has no input terminals for a compact disc player. • Compact and space saving CD changer for vertical, horizontal, suspended, or inclined installation in your car. • Supplied wired remote enables you to control the CD changer installed in the trunk room of your car. • Repeat play function for playing a track or a disc repeatedly. • Shuffle play function for playing tracks of one disc or of all discs in random order. • CD TEXT function* for displaying the CD TEXT information on the display of the supplied wired remote. • Supplied wireless remote (RM-X89) which can be operated almost like the wired remote (RM-X87). Le CDX-530RF est un système de changeur de disques compacts comprenant des télécommandes avec et sans fil, une boîte de relais et un changeur CD. Le changeur CD module le signal audio en signal RF (fréquence radio) de sorte qu’il peut être capté par le syntoniseur FM existant de votre autoradio. Ainsi, vous pouvez écouter des disques compacts en voiture même si votre autoradio n’est pas équipé de bornes d’entrée pour lecteur de CD. • Changeur de CD compact et peu encombrant pouvant être installé verticalement, horizontalement, en suspension ou en oblique dans votre voiture. • La télécommande filaire fournie vous permet de commander le changeur CD installé dans le coffre de votre voiture. • Lecture répétée pour écouter plusieurs fois une plage ou un disque. • Lecture aléatoire pour écouter les plages d’un disque ou de tous les disques dans un ordre quelconque. • La fonction* CD TEXT permettant d’afficher les informations CD TEXT sur l’écran d’affichage de la télécommande filaire fournie. • La télécommande sans fil fournie (RM-X89) s’utilise pratiquement de la même façon que la télécommande filaire (RM-X87). * Only available when playing back a CD TEXT disc * Uniquement disponible lors de la lecture d’un disque CD TEXT Inserting a disc Insertion d’un disque Use the supplied disc magazine or the disc magazine XA-250. The disc magazine XA-10B can not be used with this unit. If you use any other disc magazine, it may cause a malfunction. 1 Labeled surface up Face imprimée vers le haut c Notes • To listen to an 8 cm (3 in.) CD, use the optional Sony CD adaptor CSA-8. Be sure to always use the specified adaptor, as failing to do so may cause a malfunction of the unit. If you use any other adaptor, the unit may not operate properly. When using the Sony CD adaptor, make sure that the three catches on the adaptor are firmly latched onto the 8 cm (3 in.) CD. • Do not insert the Sony CD adaptor CSA-8 in the disc magazine without a disc, malfunction may result. Utilisez le magasin à disques fourni ou un magasin à disques XA-250. Vous ne pouvez pas utiliser de magasin à disques XA-10B avec cet appareil. L’utilisation d’un autre type de magasin à disques risque de provoquer un dysfonctionnement. 10 discs, one in each tray 10 disques, un par plateau Tab Onglet 2 3 x Release, and slide open. Relâchez et coulissez pour ouvrir. Remarques • Pour écouter un CD de 8 cm (3 po.) CD, utilisez l’adaptateur CD Sony en option CSA-8. Veillez à toujours utiliser l’adaptateur spécifié, faute de quoi vous risquez de provoquer un dysfonctionnement de l’appareil. Si vous utilisez un autre adaptateur, l’appareil risque de ne pas fonctionner correctement. Lorsque vous employez l’adaptateur CD Sony, assurez-vous que les trois encoches de l’adaptateur soient fermement engagées sur le CD de 8 cm (3 po.). • N’introduisez pas l’adaptateur CD Sony CSA-8 dans le chargeur sans disque, car il pourrait en résulter un dysfonctionnement. To remove Retrait Disc magazine Chargeur de disques 4 Use the unit with the door closed Otherwise, foreign matter may enter the unit and contaminate the lenses inside the CD changer. Utiliser cet appareil avec la trappe fermée Sinon, des corps étrangers pénètreront dans l’appareil et encrasseront les lentilles à l’intérieur du changeur CD. If the disc magazine does not lock properly Take out the disc magazine, press Z, and re-insert it. Si vous ne pouvez pas fermer le chargeur de disques Retirez le chargeur, appuyez sur Z et réintroduisez-le. Notes on the disc magazine Remarques sur le chargeur de disques • Do not leave the disc magazine in locations with high temperature and high humidity, such as on a car dashboard or in the rear window where the disc magazine will be subject to direct sunlight. • Do not place more than one disc at a time onto a tray, otherwise the CD changer and the discs may be damaged. • Do not drop the disc magazine or subject it to a violent shock. • N’abandonnez pas le chargeur de disques dans des endroits affichant des températures et une humidité élevées, tels que sur le tableau de bord d’une voiture ou sur la plage arrière où le chargeur de disques sera soumis aux rayons directs du soleil. • Ne placez pas plus d’un disque à la fois sur le plateau, sinon le changeur de CD et les disques risquent d’être endommagés. • Ne pas laisser tomber le chargeur de disques ni le cogner. When the tray comes out Normally, the trays will not come out of the disc magazine. However, if they are pulled out of the disc magazine, it is easy to re-insert them. With the cut-away portion of the tray facing you, insert the right corner of the tray in the slot, then push in the left corner until it clicks. Note Do not insert the tray upside down or in the wrong direction. Si un plateau s’enlève En principe, les plateaux ne s’enlèvent pas du magasin. S’ils s’enlèvent du magasin, il est cependant facile de les y réintroduire. L’encoche du plateau étant face à vous, introduisez l’angle droit du plateau dans la fente et poussez ensuite sur l’angle gauche jusqu’à ce qu’il s’encliquette. Remarque N’introduisez pas le plateau à l’envers ni dans le mauvais sens. Notes on compact discs Remarques sur les disques compacts A dirty or defective disc may cause sound drop-outs during CD playback. To enjoy optimum sound, handle the disc as follows. • Handle the disc by its edge, and do not touch the unlabled surface. (fig. A) • Do not stick paper or tape on the disc. (fig. B) • Do not expose the discs to direct sunlight or heat sources such as hot air-ducts. Do not leave the discs in a car parked in direct sunlight where there can be a considerable rise in temperature inside the car. (fig. C) • Before playing, clean the discs with an optional cleaning cloth. Wipe each disc in the direction of the arrows. (fig. D) Do not use solvents such as benzine, thinner, commercially available cleaner, or antistatic spray intended for analog discs. Un disque souillé ou défectueux peut provoquer des coupures de son pendant la lecture d’un CD. Pour obtenir un son optimal, manipulez les disques comme suit. • Saisissez les disques par les bords et n’en touchez jamais la surface. (fig. A) • Ne collez pas de papier ni de bande adhésive sur le disque. (fig. B) • N’exposez pas les disques au rayonnement direct du soleil ni à des sources de chaleur comme des conduits d’air chaud. Ne laissez pas les disques dans une voiture parquée en plein soleil où la température intérieure de l’habitable risque d’augmenter considérablement. (fig. C) • Avant la lecture, essuyer les disques avec un chiffon de nettoyage optionnel. Essuyer chaque disque dans le sens des flèches. (fig. D) Ne pas utiliser de solvants tels que de la benzine, du diluant, des produits de nettoyage vendus dans le commerce ou des vaporisateurs anti-statiques destinés aux disques analogiques. Notes on discs Remarques sur les disques If you use the discs explained below, the sticky residue can cause the CD to stop spinning and may cause malfunction or ruin your discs. Do not use second-hand or rental CDs that have a sticky residue on the surface (for example, from peeledoff stickers or from ink, or glue leaking from under the stickers). • There are paste residue. Ink is sticky. (fig. E) Do not use rental CDs with old labels that are beginning to peel off. • Stickers that are beginning to peel away, leaving a sticky residue. (fig. F) Do not use your CDs with labels or stickers attached. • Labels are attached. (fig. G) Si vous utilisez les disques expliqués ci-dessous, le résidu collant peut provoquer l’arrêt du disque et entraîner un dysfonctionnement ou abîmer vos disques. N’utilisez pas de disques de seconde main ou de location qui présentent des résidus collants sur leur surface (par exemple d’étiquettes décollées ou d’encre, ou encore de colle débordant sous l’étiquette). • Il s’agit de résidus de colle. L’encre est collante. (fig. E) N’utilisez pas de CD de location avec de vieilles étiquettes qui commencent à se décoller. • Les étiquettes qui commencent à se décoller laissent des résidus collants. (fig. F) N’utilisez pas vos CD avec des étiquettes ou des autocollants fixés. • Les étiquettes sont fixées. (fig. G) Operation Fonctionnement Precautions Précautions • This unit cannot be used with a car audio without FM tuner. • If your car was parked in direct sunlight resulting in a considerable rise in temperature inside the car, allow the unit to cool off before operating it. • If no power is being supplied to the unit, check the connections first. If everything is in order, check the fuse. • Avoid installing the CD changer, wireless remote, and wired remote in places: — subject to temperature exceeding 55°C (131°F). — subject to direct sunlight. — near heat sources (such as heaters). — exposed to rain or moisture. — exposed to excessive dust or dirt. — subject to excessive vibration. • Cet appareil ne peut être utilisé avec un autoradio sans syntoniseur FM. • Si votre voiture est parquée en plein soleil, provoquant ainsi une augmentation considérable de la température dans l’habitacle, laissez l’appareil refroidir avant de l’utiliser. • Si l’appareil n’est pas alimenté, vérifiez d’abord les connexions. Si tout est en ordre, contrôlez le fusible. • Evitez d’installer le changeur de CD, la télécommande sans fil et la télécommande à fil dans un endroit : — où la température peut dépasser 55°C (131°F), — en plein soleil, — près d’une source de chaleur (comme un chauffage), — exposé à la pluie ou à l’humidité, — poussiéreux ou sale, — exposé à des vibrations fortes. Resetting the unit Réinitialisation de l’appareil Before operating the unit for the first time or after replacing the car battery, you must reset the unit. Press the reset button with a pointed object, such as a ball-point pen, etc. Avant la première mise en service de cet appareil ou après avoir remplacé la batterie de la voiture, vous devez réinitialiser l’appareil. Appuyez sur la touche de réinitialisation à l’aide d’un objet pointu comme un stylo à bille, etc. Reset button Touche de réinitialisation Listening to a CD Labelling a CD — Disc Memo 1 2 Turn on the FM tuner of your car audio. (CD changer with custom file function) Tune in the selected transmitting frequency* with the FM tuner of your car audio. * The frequency of the unit is set to 88.3 MHz at the factory. You can change the frequency. (See “Changing the transmitting frequency” below. ) You can label each disc with a personalized label. Use the wireless remote to enter and erase the characters. 3 4 Press u. CD playback starts. 1 2 Adjust the volume with the volume control on your car audio. All the tracks play from the beginning. Stopping CD play Press (OFF). Notes • When CD playback stops, you may hear some noise from the speakers. To prevent this from happening, turn the volume down before stopping CD playback. • If you turn off the ignition switch of your car without stopping CD playback, it will automatically resume CD playback from where it was stopped when you turn on the ignition switch again. Press (DSPL/- EDIT) for two seconds until the first character flashes. Input the characters. or to select the desired 1 Press NAME characters. (A t B t C t ... Z t 0 t 1 t 2 t ... 9 t + t – t * t / t \ t > t < t . t _ t ...) to display the available characters. If Press NAME you press NAME , the characters will appear in reverse order. If you wish to put a blank space after a character, select “_” (under-bar). An alternative method to erase a title You can erase a title by selecting eight “_”s (underbar). Be sure to stop CD playback before you start listening to the radio or a tape. Note Be sure to stop CD playback, otherwise there may be some interference with radio reception. 2 Press (ENTER/- DELETE) after locating the desired character. The next character flashes. Playing tracks in random order 3 Repeat steps 1 and 2 to enter the entire title. Up to eight characters can be entered per disc. You can select: • SHUF 1 to play the tracks on the current disc in random order. • SHUF 2 to play all the discs in random order. Press (SHUF/REP) repeatedly until the desired setting appears (SHUF1 or SHUF2). After five seconds, the shuffle play starts. Each time you press (SHUF/REP), the display changes as follows: 3 Using on the wireless remote Press (SHUF) repeatedly until the desired setting appears. Playing tracks repeatedly — Repeat Play You can select: • REP 1 to repeat the track. • REP 2 to repeat the disc. Press (SHUF/REP) repeatedly until the desired setting appears (REP1 or REP2). After five seconds, the repeat play starts. Each time you press (SHUF/REP), the display changes as follows: B SHUF 1* B SHUF 2* B REP 1 B REP 2 Cancel (REP off) b * These indications do not appear when in operation with the wireless remote. To go back to the normal playback mode, press (SHUF/REP) repeatedly until “REP” or “SHUF” disappears. Using on the wireless remote To return to the normal CD playback mode, press (DSPL/- EDIT) for two seconds. Displaying the disc memo Press (DSPL-SCRL) during CD playback. Each time you press (DSPL-SCRL) during CD playback, the display changes as follows: B Elapsed playback time B SHUF 1 B SHUF 2 B REP 1* B REP 2* Cancel (SHUF off) b * These indications do not appear in operation with the wireless remote. To go back to the normal playback mode, press (SHUF/REP) repeatedly until the “SHUF” or “REP” disappears. 1 2 3 4 Allumez le syntoniseur FM de votre autoradio. Accordez la fréquence de transmission* sélectionnée au moyen du syntoniseur FM de votre autoradio. * La fréquence de l’appareil est réglée par défaut sur 88,3 MHz. Vous pouvez modifier la fréquence. (Voir “Changement de la fréquence de transmission”, cidessous.) Appuyez sur u. La lecture du CD démarre. Ajustez le volume avec la commande de volume de votre autoradio. Toutes les plages sont reproduites à partir du début. Pour arrêter la lecture d’un CD Listening to the radio or a tape — Shuffle Play Lecture d’un CD B Disc name Track name b Using on the wireless remote Press (DSPL/- EDIT) to change the display. Notes • If a disc has not been assigned a personalized label, “********” or “NO NAME” will appear on the display. • The CD TEXT information appears only when a CD TEXT disc is played back. • If you use personalized labels, they will always take priority over the original CD TEXT information when such information is displayed. • “**WAIT**“ appears in the display while the unit is reading the data. • The system shows the CD TEXT information with alphabetic characters, numbers, and symbols. (The lowercase characters contained in the CD TEXT disc are automatically converted to uppercase.) Appuyez sur(OFF). Remarques • Lorsque vous arrêtez la lecture d’un CD, il se peut que vous entendiez des parasites dans les haut-parleurs. Pour éviter ce phénomène, baissez le volume avant d’arrêter la lecture du CD. • Si vous coupez le contact de votre voiture sans avoir arrêté la lecture du CD, il reprendra automatiquement la lecture du CD à l’endroit où vous l’avez arrêté lorsque vous rétablirez le contact. Ecouter la radio ou une cassette Arrêtez la lecture du CD avant d’écouter la radio ou une cassette. Remarque Si vous n’arrêtez pas la lecture du CD, des interférences risquent de se produire avec la réception radio. Lecture des plages dans un ordre quelconque — Lecture aléatoire Vous pouvez sélectionner: • SHUF 1 pour lire les plages du disque en cours dans un ordre aléatoire. • SHUF 2 pour lire tous les disques dans un ordre aléatoire. Appuyez plusieurs fois sur(SHUF/REP) jusqu’à ce que le réglage souhaité apparaisse (SHUF1 ou SHUF2). La lecture aléatoire commence dans les cinq secondes qui suivent. A chaque pression sur (SHUF/REP), l’affichage change de la façon suivante: B SHUF 1 B SHUF 2 B REP 1* B REP 2* Annulation (SHUF hors service) b * Ces indications n’apparaissent pas lors de l’utilisation de la télécommande sans fil. Pour revenir au mode de lecture normale, appuyez plusieurs fois sur (SHUF/REP) jusqu’à ce que “SHUF” ou “REP” disparaisse. Utilisation de la télécommande sans fil Appuyez plusieurs fois sur (SHUF) jusqu’à ce que le réglage désiré apparaisse. Erasing the disc memo 1 2 3 4 5 6 Press (REP) repeatedly until the desired setting appears. Play the CD and press (DSPL/- EDIT) for two seconds. Press (ENTER/- DELETE) for two seconds until DISC NAME indication flashes. Press NAME wish to erase. or to select the title that you Press (ENTER/- DELETE) to make DISC NAME indication and the disc name flash. Press (ENTER/- DELETE) again. The title is erased. Repeat steps 2 through 4 if necessary. Press (DSPL/- EDIT) for two seconds. The unit returns to the normal CD playback mode. Changing the transmitting frequency Because this unit processes CD playback sound through an FM tuner, there may be interference noise during CD playback. In such a case, change the frequency of the modulated RF signal transmitted from the unit. The initial setting is 88.3 MHz. 1 Press (SHUF/REP) for two seconds until frequency appears. Répétition de plages — Lecture répétée Vous pouvez sélectionner: • REP 1 pour répéter une plage. • REP 2 pour répéter tout un disque. Appuyez plusieurs fois sur (SHUF/REP) jusqu’à ce que le réglage souhaité apparaisse (REP1 ou REP2). La lecture répétée commence dans les cinq secondes qui suivent. A chaque pression sur (SHUF/REP), l’affichage change de la façon suivante: B SHUF 1* B SHUF 2* B REP 1 B REP 2 Annulation (REP hors service) b * Ces indications n’apparaissent pas lors de l’utilisation de la télécommande sans fil. Pour revenir au mode de lecture normale, appuyez plusieurs fois sur (SHUF/REP) jusqu’à ce que “REP” ou “SHUF” disparaisse. Utilisation de la télécommande sans fil Appuyez plusieurs fois sur (REP) jusqu’à ce que le réglage désiré apparaisse. 2 Press or frequency. Each time you press change as follows: 2 repeatedly to select the or ou , the frequency Initial setting : 88.3 MHz t 89.9 MHz t 89.7 MHz t 89.5 MHz t 89.3 MHz t 89.1 MHz t 88.9 MHz t 88.7 MHz t 88.5 MHz t : 88.3 MHz t 88.5 MHz t 88.7 MHz t 88.9 MHz t 89.1 MHz t 89.3 MHz t 89.5 MHz t 89.7 MHz t 89.9 MHz t 3 Appuyez plusieurs fois sur Press (SHUF/REP) for two seconds. Using on the wireless remote 1 2 Press (SHUF) for two seconds until frequency appears. Press or repeatedly to select the frequency. 3 Press (SHUF) for two seconds. Notes • When you change the transmitting frequency on the unit, be sure to tune your FM tuner to the newly selected one. • Press u on the wired remote before changing the frequency if the power to the unit is turned off. Changing the output level You can select the output level from the unit. Normally the unit is used at the initial output level; change the level if necessary. Location and function of controls Nomenclature Wired remote (RM-X87) Télécommande à fil (RM-X87) Wireless remote (RM-X89) Télécommande sans fil (RM-X89) 1 Commande AMS (détecteur automatique de musique/recherche manuelle) En fonction du côté de la commande sur lequel vous appuyez, vous pouvez sélectionner les fonctions suivantes. 2 Indication REP (répétition de la lecture) 3 Indication SHUF (lecture aléatoire) 4 Indication DISC NAME (numéro du disque/nom du disque) Le numéro de disque indiqué correspond au numéro de disque dans le chargeur de disques. 5 Indication TRACK NAME (numéro de plage/ nom de plage) 6 Indication MIN (minute) 7 Indication SEC (seconde) 8 Touches DISC En fonction du côté de la touche sur lequel vous appuyez, vous pouvez sélectionner les fonctions suivantes. 9 Touche u (lecture/pause) 1 AMS (Automatic Music Sensor/manual search) control Depending on which side of the control you push down, you can select from the following functions. 2 REP (repeat play) indication 3 SHUF (shuffle play) indication 4 DISC NAME (disc number/disc name) indication The indicated disc number matches the disc number in the disc magazine. 5 TRACK NAME (track number/track name) indication 6 MIN (minute) indication 7 SEC (second) indication 8 DISC buttons Depending on which side of the button you press, you can select from the following functions. 9 u (play/pause) button If pressed during CD playback, the CD will pause. If pressed again, CD playback will continue. AMS function To locate the beginning of a track, push down > to locate the beginning of the next track. . to locate the beginning of the track currently played. If you push down the control repeatedly, the beginnings of all following or previous tracks will be located until the end of the disc is reached. Manual search function To quickly locate a desired point of a track, push down and hold M to fast-forward. m to fast-reverse. The elapsed playing time of the track will be shown in the display window during manual search. Disc select function To select a desired disc, press momentarily to select the next disc. to select the previous disc. Troubleshooting guide Guide de dépannage The following checklist will assist in the correction of most problems which you may encounter with your unit. Before going through the checklist below, refer to the connection and operating procedures. La liste de contrôle suivante vous assistera dans la correction de la plupart des problèmes que vous pourriez rencontrer avec votre appareil. Avant de passer en revue la liste de vérification ci-dessous, reportez-vous aux procédures de connexion et d’utilisation. General Problem The unit does not function. Problèmes généraux Cause/Solution • The built-in micro computer has malfunctioned. t Press the reset button the CD changer. • The connecting cords are not connected properly. The sound skips. • The CD changer is installed in an unstable location. t Re-install it in a stable location. • The CD is dirty or defective. t Clean or replace it. The disc magazine is not locked in the CD changer. Take out the disc magazine, press Z, and re-insert the disc magazine until it is locked securely. Error displays Problème L’appareil ne fonctionne pas. Le son saute. Le chargeur de disques est mal encastré. Cause/solution • Le micro-ordinateur intégré est défaillant. t Appuyez sur la touche de réinitialisation du changeur de CD. • Les cordons de raccordement sont mal branchés. • Le changeur de CD est installé dans un endroit instable. t Réinstallez-le dans un endroit stable. • Le CD est souillé ou défectueux. t Nettoyez ou remplacez-le. Retirez le chargeur, appuyez sur Z et réintroduisez le chargeur jusqu’à ce qu’il s’encliquette correctement en position. Affichages d’erreur The following indications will flash for about five seconds. Les indications suivantes clignotent pendant environ cinq secondes. Display Affichage Cause Solution Cause Solution The disc magazine is not inserted in the CD changer. Insert the disc magazine with CDs into the CD changer. Le chargeur de disques n’est pas introduit Introduisez le chargeur de disques avec des dans le changeur CD. disques dans le changeur CD. No CD is inserted in the CD changer. Take out the disc magazine and insert CDs. Aucun CD n’est introduit dans le changeur Sortez le chargeur CD et introduisez les CD. CD. The CD is dirty. Clean the CD. Le disque est sale. Nettoyez le CD. The CD is inserted upside down. Insert the CD correctly. Le disque est placé à l’envers. Introduisez le CD dans le bon sens. The CD changer cannot be operated because of some problem. Press the reset button of the CD changer. Le changeur de CD ne fonctionne pas en raison d’un problème. Appuyez sur la touche de réinitialisation du changeur de CD. One or more CDs from the CD changer will not play because of some problem. Insert another CD. Un ou plusieurs disques du changeur CD ne sont pas lus en raison d’un problème. Introduisez un autre disque. If the solutions mentioned above do not improve the situation, consult your nearest Sony dealer. Si les solutions mentionnées ci-dessus ne peuvent pas résoudre le problème, consultez le revendeur Sony le plus proche.