1
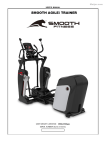
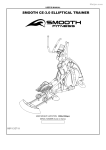
USER’S MANUAL SMOOTH CE7.4 ELLIPTICAL TRAINER USER WEIGHT LIMITATION: 350lbs(160kgs). SERIAL NUMBER (found on frame): 2 SMOOTH CE7.4 ELLIPTICAL TRAINER PREASSEMBLY For future service or related questions: Please staple your receipt and/or write in the name and phone number of the retail store where you purchased your Smooth Fitness Elliptical Trainer. Name: ______________________________ Phone Number: ___________________ Receipt: ______________________ Open the boxes: You are now ready to open the boxes of your new equipment. Make sure to inventory all of the parts that are included in the boxes. Check the Parts List for a full count of the number of parts included for this product to be assembled properly. If you are missing any parts or have any assembly questions call your local dealer or contact us directly at 888-800-1167. Gather your tools: Before starting the assembly of your unit, make sure that you have gathered all the necessary tools you may require to assemble the unit properly. Having all of the necessary equipment at hand will save time and make the assembly quick and hassle-free. Clear your work area: Make sure that you have cleared away a large enough space to properly assemble the unit. Make sure the space is free from anything that may cause injury during assembly. After the unit is fully assembled, make sure there is a comfortable amount of free area around the unit for unobstructed operation. Invite a friend: Some of the assembly steps may require heavy lifting. It is recommended that you obtain the assistance of another person when assembling this product. User Weight Limitation: Please note that there is a weight limitation for this product. If you weigh more than 350lbs. it is not recommended that you use this product. Serious injury may occur if the user’s weight exceeds the limit shown here. This product is not intended to support users whose weight exceeds this limit. www.smoothfitness.com SUPPLIED COMPONENTS This list identifies the major components you will use to assemble this product. No. Description Qty. 654 Pedal Arm Front Pivot Cover 4 656 Console Back Cover 1 657 Water Bottle 1 659 Chest Belt 1 G Power cord 1 A1 Computer 1 A2 Front Handlebar Assembly 1 A3 Upright Assembly 1 A4 Main Frame Assembly 1 654 656 657 659 G A1 A2 A3 A4 3 4 SMOOTH CE7.4 ELLIPTICAL TRAINER SUPPLIED HARDWARE This list identifies the hardware you will use to assemble the product. To help distinguish between the various types of screws and bolts, use the scale below to measure them and compare them to the sizes listed. No. Description Qty. 701 M6x35mm Allen Head Bolt 2 702 M8x40mm Allen Head Bolt 2 703 20x91--M14x25mm Bolt 2 704 M14 Nut 2 705 8x14x2mm Spring Washer 2 706 20.7x29.1x0.3mm Washer 2 A Screwdriver – L 1 B 5mm Allen Wrench 1 C 8mm Allen Key 1 D 19 x 35 Spanner 1 E Slotted Screwdriver 1 F 4mm Allen Wrench 1 701 702 703 704 705 706 A B C D E F MILLIMETERS www.smoothfitness.com COMPLETE PARTS LIST Item No. Description Qty. Part No. 100 101 Console Support Tube 1 CE7.4 – 101 102 103 Main Frame Pedal Arm – Left 1 1 CE7.4 – 102 CE7.4 – 103 104 105 Pedal Arm – Right Action Handlebar – Left 1 1 CE7.4 – 104 CE7.4 – 105 106 Action Handlebar – Right 1 CE7.4 – 106 107 109 Upright Chain Cover Support Tube 1 1 CE7.4 – 107 CE7.4 – 109 110 111 Tension Wheel Bracket Pedal Support Base 1 2 CE7.4 – 110 CE7.4 – 111 Magnet Bracket Motor Bracket 1 1 CE7.4 – 112 CE7.4 – 113 201 202 203 204 Flywheel Axle Flywheel Aluminum Disk Flywheel Axle Support 1 1 1 1 CE7.4 –201 CE7.4 –202 CE7.4 –203 CE7.4 –204 205 Flywheel Fan Pieces 4 CE7.4 –205 206 207 Bearing 6000 M10 C Clip 3 2 CE7.4 –206 CE7.4 – 207 208 209 211 212 M8 x 15mm Allen Head Cap Bolt 8 x 14 x T2.0 Spring Washer M5 x 12mm Bolt Magnetic Sensor 4 4 8 1 CE7.4 – 208 CE7.4 – 209 CE7.4 – 211 CE7.4 –212 213 M4 x 15mm Screw 2 CE7.4 – 213 214 215 M4 Nylon Nut 10x18x0.3mm Washer 2 2 CE7.4 – 214 CE7.4 – 215 216 217 4x8mm Screw – Cone Point 4x10mm Screw – Flat Point 4 2 CE7.4 – 216 CE7.4 – 217 218 219 220 M5 Nut M5x10mm Allen Head Bolt 3x12mm Screw – Flat Point 4 4 4 CE7.4 – 218 CE7.4 – 219 CE7.4 – 220 231 232 233 235 Console Housing - Upper Console Insert Speaker Cover Console Housing – Bottom 1 1 1 1 CE7.4 – 231 CE7.4 – 232 CE7.4 – 233 CE7.4 – 235 239 241 242 3x10mm Screw – Flat Point 4x12mm Screw – Flat Point M6 Nylon Nut 11 10 1 CE7.4 – 239 CE7.4 – 241 CE7.4 – 242 245 247 248 iPod Dock Cap Tray Tray Cap – Left 1 1 1 CE7.4 – 245 CE7.4 – 247 CE7.4 – 248 112 113 200 5 6 SMOOTH CE7.4 ELLIPTICAL TRAINER COMPLETE PARTS LIST Item No. Description Qty. Part No. 249 Tray Cap – Right 1 CE7.4 – 249 251 252 Crank Disk Support Cover Crank Disk Axle 2 1 CE7.4 – 251 CE7.4 – 252 253 25x35xT2.0 Washer 1 CE7.4 – 253 254 255 Crank Disk Oval Cap Crank Disk Cover 2 2 CE7.4 – 254 CE7.4 – 255 256 Crank Disk 1 CE7.4 – 256 257 Left Crank 1 CE7.4 – 257 258 Right Crank 1 CE7.4 – 258 259 Crank Axle Bushing 1 CE7.4 – 259 261 Pedal Arm Support Axle 19x80.4mm 1 CE7.4 – 261 262 264 Pedal Arm Support Axle 19x104.4mm 3/4” Nut 1 2 CE7.4 – 262 CE7.4 – 264 266 M8x15mm Allen Head Bolt 4 CE7.4 – 266 267 268 M6x12mm Allen Head Cap Bolt M8x20mm Bolt 2 2 CE7.4 – 267 CE7.4 – 268 269 8x14xT2.0 Spring Washer 6 CE7.4 – 269 270 M6x12mm Screw 1 CE7.4 – 270 271 10x16x1.5mm Washer 3 CE7.4 – 271 272 6x10x1mm Spring Washer 2 CE7.4 – 272 273 Fan Bracket – Top 1 CE7.4 – 273 274 Fan Bracket – Bottom 1 CE7.4 – 274 275 Adjustable Vane 1 CE7.4 – 275 276 277 iPod Dock Bracket Cover – Top iPod Dock Bracket Cover – Bottom 1 1 CE7.4 – 276 CE7.4 – 277 278 6x14.5-M5x6.5mm Bolt 2 CE7.4 – 278 279 6x8x8mm Washer 2 CE7.4 – 279 285 Bearing Sleeve 1 CE7.4 – 285 286 M8x30mm Allen Head CAP Bolt 2 CE7.4 – 286 287 M10x25mm Allen Head CAP Bolt 2 CE7.4 – 287 288 289 Bushing 25X32X6mm 19x25x6mm Washer 2 1 CE7.4 – 288 CE7.4 – 289 301 302 Action Handlebar Foam Grip Hand Pulse Sensor 2 2 CE7.4 – 301 CE7.4 – 302 303 Action Handlebar End Cap 2 CE7.4 – 303 304 Bearing 6004 4 CE7.4 – 304 305 Action Handlebar Cover 2 CE7.4 – 305 306 Action Handlebar Front Cover 4 CE7.4 – 306 307 4x12mm Plastic Screw 8 CE7.4 – 307 308 4x12mm Screw – Cone Point 8 CE7.4 – 308 309 Action Handlebar Side Cap 2 CE7.4 – 309 310 Hand Pulse Sensor Back Cover 2 CE7.4 – 310 300 www.smoothfitness.com COMPLETE PARTS LIST Item No. 311 371 372 400 401 402 403 404 405 406 407 430 451 452 453 454 500 502 503 504 505 506 507 508 509 510 511 512 513 516 518 519 520 521 523 524 525 526 527 528 529 532 533 Description Qty. Part No. 3x10mm Screw – Cone Point Wheel Wheel Nylon Bushing 4 2 4 CE7.4 – 311 CE7.4 – 371 CE7.4 – 372 Pedal Fixing Base M8 x 90mm Allen Head Bolt Bushing 12x62mm Bearing 608zz M8 Nylon Nut Pedal Buffer Set M8x20mm Screw Fix Bolt Speed Sensor Speed Sensor Base M3x8mm Screw 4x12mm Screw – Flat Point 2 4 4 8 4 2 4 1 1 1 4 2 CE7.4 – 401 CE7.4 – 402 CE7.4 – 403 CE7.4 – 404 CE7.4 – 405 CE7.4 – 406 CE7.4 – 407 CE7.4 – 430 CE7.4 – 451 CE7.4 – 452 CE7.4 – 453 CE7.4 – 454 Fixed Handlebar Foam Grip Fixed Handlebar Side Foam Grip Bearing 2203 Bearing 6005 Bearing 6300 Bearing 6804 Flywheel Axle Fixing Plate M5x8mm Allen Head Bolt 3/8” Wire Clip M6x12mm Allen Head Bolt M8x15mm Allen Head Bolt M8x20mm Allen Head Bolt M6x12mm Allen Head Cap Bolt Tension Wheel Axle M4x45mm Allen Head Cap Bolt 1/4” Wire Clip M10x50mm Allen Head Bolt M8x16mm Allen Head Cap Bolt 4x12mm Plastic Screw – Flat Point 4x19mm Screw M8x16mm Bolt 4x12mm Screw – Flat Point M8x20mm Screw M10 Nylon Nut M8 Nylon Nut 20x6xT1.5mm Washer 2 2 2 2 4 4 1 5 3 8 8 3 2 2 1 2 2 2 2 10 8 35 2 4 3 2 CE7.4 – 502 CE7.4 – 503 CE7.4 – 504 CE7.4 – 505 CE7.4 – 506 CE7.4 – 507 CE7.4 – 508 CE7.4 – 509 CE7.4 – 510 CE7.4 – 511 CE7.4 – 512 CE7.4 – 513 CE7.4 – 516 CE7.4 – 518 CE7.4 – 519 CE7.4 – 520 CE7.4 – 521 CE7.4 – 523 CE7.4 – 524 CE7.4 – 525 CE7.4 – 526 CE7.4 – 527 CE7.4 – 528 CE7.4 – 529 CE7.4 – 532 CE7.4 – 533 7 8 SMOOTH CE7.4 ELLIPTICAL TRAINER COMPLETE PARTS LIST Item No. Description Qty. Part No. 534 535 8x27x2mm Washer 8x14xT2.0mm Spring Washer 2 2 CE7.4 – 534 CE7.4 – 535 536 M42 C Clip 2 CE7.4 – 536 537 538 540 541 18x10x5.1mm Washer M5x12mm Screw 10x18x3mm Washer 10x94 – M12x22mm Bolt 4 8 2 1 CE7.4 – 537 CE7.4 – 538 CE7.4 – 540 CE7.4 – 541 542 543 544 Compression Spring M12 Nylon Nut Magnet 1 1 2 CE7.4 – 542 CE7.4 – 543 CE7.4 – 544 M6x40mm Bolt 1 CE7.4 – 545 601 602 Rear Cover – Left Front Cover – Left 1 1 CE7.4 – 601 CE7.4 – 602 603 Rear Cover – Right 1 CE7.4 – 603 604 605 Front Cover – Right Top Cover 1 1 CE7.4 – 604 CE7.4 – 605 606 607 Pedal Pedal Cover 2 4 CE7.4 – 606 CE7.4 – 607 608 609 611 Pedal Soft Cushion Wheel Cover Oval Tube Cap 2 2 2 CE7.4 – 608 CE7.4 – 609 CE7.4 – 611 612 613 Power Switch Plate Cover Tube Cap 1 2 CE7.4 – 612 CE7.4 – 613 615 616 Rear Pedal Cover Action Handle Bar Shaft Bushing 2 2 CE7.4 – 615 CE7.4 – 616 617 618 619 Front Handlebar End Cap Front Frame Cover – Left Front Frame Cover – Right 2 1 1 CE7.4 – 617 CE7.4 – 618 CE7.4 – 619 621 622 623 Level Adjuster Rubber Cap Rubber Cushion – Front 2 2 2 CE7.4 – 621 CE7.4 – 622 CE7.4 – 623 624 625 626 636 Rubber Cushion – Rear Belt Rubber Wire Holder Plastic Fixing Insert 2 1 1 7 CE7.4 – 624 CE7.4 – 625 CE7.4 – 626 CE7.4 – 636 637 638 654 Rear Stabilizer Cap Rear Stabilizer Mat Pedal Arm Front Pivot Cover 2 2 4 CE7.4 – 637 CE7.4 – 638 CE7.4 – 654 655 656 Pin Nut Console Back Cover 2 1 CE7.4 – 655 CE7.4 – 656 657 659 Water Bottle Chest Belt 1 1 CE7.4 – 657 CE7.4 – 659 545 600 www.smoothfitness.com COMPLETE PARTS LIST Item No. Description Qty. Part No. 700 701 M6x35mm Allen Head Bolt 2 CE7.4 – 701 702 M8x40mm Allen Head Bolt 2 CE7.4 – 702 703 20x91--M14x25mm Bolt 2 CE7.4 – 703 704 M14 Nut 2 CE7.4 – 704 705 8x14x2mm Spring Washer 2 CE7.4 – 705 706 20.7x29.1x0.3mm Washer 2 CE7.4 – 706 813 Hand Pulse Sensor Wire – Upper 2 CE7.4 – 813 814 Hand Pulse Sensor Wire – Middle 2 CE7.4 – 814 815 Computer PC Board 1 CE7.4 – 815 818 2.6x6mm Screw 2 CE7.4 – 818 822 Hand Pulse Sensor Wire – Lower 1 CE7.4 – 822 823 Motor Assembly 1 CE7.4 – 823 824 Motor 1 CE7.4 – 824 825 Control Board 1 CE7.4 – 825 826 Limit Position PC Board 1 CE7.4 – 826 827 Limit Position PC Board Wire 1 CE7.4 – 827 828 DC Power Wire 1 CE7.4 – 828 829 8pin Computer Wire – Top 1 CE7.4 – 829 830 8pin Computer Wire – Upper 1 CE7.4 – 830 831 8pin Computer Wire – Middle 1 CE7.4 – 831 832 8pin Computer Wire – Lower 1 CE7.4 – 832 833 Speaker 2 CE7.4 – 833 834 Fan 1 CE7.4 – 834 835 iPod Dock 1 CE7.4 – 835 836 Hand Pulse Sensor Wire – Top 300mm 2 CE7.4 – 836 837 Receiver Wire 1 CE7.4 – 837 838 Volume Control Wire 1 CE7.4 – 838 839 Receiver 1 CE7.4 – 839 840 6Pin iPod dock Connection Wire 1 CE7.4 – 840 800 9 10 SMOOTH CE7.4 ELLIPTICAL TRAINER PARTS DIAGRAM MOST OF THE PARTS SHOWN HERE HAVE BEEN PRE-ASSEMBLED. 218 834 246 273 274 217 275 219 235 241 502 617 502 701 231 232 239 233 833 613 239 613 241 276 216 245 101 503 220 239 835 278 279 277 279 278 248 247 249 www.smoothfitness.com 11 PARTS DIAGRAM A MAJORITY OF THE PARTS SHOWN HERE HAVE BEEN PREASSEMBLED AT THE FACTORY. 303 301 310 311 311 303 311 302 307 301 311 306 302 309 535 534 310 304 306 307 307 523 308 304 306 306 535 616 308 305 616 308 105 308 304 608 513 107 511 511 606 654 704 305 624 606 623 512 532 106 512 608 111 513 623 111 406 624 407 403 404 512 402 532 654 703 507 407 405 404 527 607 401 507 703 654 704 654 406 403 636 507 404 407 404 527 615 516 533 536 504 402 405 607 401 607 103 526 527 607 636 526 527 526 104 504 536 533 516 615 534 523 309 12 SMOOTH CE7.4 ELLIPTICAL TRAINER PARTS DIAGRAM MOST OF THE PARTS SHOWN HERE HAVE BEEN PRE-ASSEMBLED. 433 521 372 529 432 431 529 372 371 372 611 609 371 609 519 537 102 506 271 529 622 509 110 621 518 621 611 544 541 545 242 543 513 261 109 255 528 542 823 527 264 263 267 272 112 540 532 538 265 268 263 251 285 267 265 272 254 266 269 251 257 256 259 505 625 252 505 269 266 538 253 264 258 255 262 254 521 www.smoothfitness.com 13 PARTS DIAGRAM MOST OF THE PARTS SHOWN HERE HAVE BEEN PRE-ASSEMBLED. 626 527 618 636 619 527 271 215 213 212 202 214 203 209 208 454451 453 527 270 207 206 204 525 527 452 510 525 510 601 527 602 209 208 201 527 206 524 205 211 207 508 603 520 605 525 527 527 604 527 524 527 637 637 638 205 211 215 509 525 638 527 612 527 14 SMOOTH CE7.4 ELLIPTICAL TRAINER PARTS DIAGRAM MOST OF THE PARTS SHOWN HERE HAVE BEEN PRE-ASSEMBLED. 232 834 838 815 841 836 835 829 829 837 836 839 833 822 830 831 813 814 840 822 813 827 831 826 832 832 825 451 828 823 828 832 827 www.smoothfitness.com 15 ASSEMBLY STEP 1: Attach the Upright Assembly NOTE: BE SURE THAT THE WIRES DO NOT TIGHTEN THE UPRIGHT FIXING BOLT YET WHEN ASSEMBLING THE UPRIGHT TO THE MAIN FRAME. (A) Connect the 8pin Computer Wire – Middle (831) and 8pin Computer Wire – Lower (832) (B) Slide the Upright(107) into the Main Frame(102) 107 832 107 831 102 102 16 SMOOTH CE7.4 ELLIPTICAL TRAINER ASSEMBLY STEP 2: Assemble the Pedal Arm – Right (A) Slide the 20x91--M14x25mm Bolt (703) with 20.7x29.1x0.3mm Wave Washer (706) through the Pedal Arm – Right(104) and Action Handlebar – Right (106) then secure using one M14 Nut (704). 106 E D 704 104 706 703 C 703 X1 704 X1 706 X1 www.smoothfitness.com ASSEMBLY STEP 3: Assemble the Pedal Arm – Left (A) Slide the 20x91--M14x25mm Bolt (703) with 20.7x29.1x0.3mm Wave Washer (706) through the Pedal Arm – Left (103) and Action Handlebar – Left (105) then secure using one M14 Nut (704). 703 X1 704 X1 706 X1 105 E C 703706 103 704 D 17 18 SMOOTH CE7.4 ELLIPTICAL TRAINER ASSEMBLY STEP 4: Assemble the Pedal Arm Front Pivot Cover (A) Attach the Pedal Arm Pivot Cover (654) into the ends of the Action Handlebar – Right (106) and Pedal Arm – Right (104). 654 (B) Repeat the above process for the Left side 105 103 106 104 654 654 X4 www.smoothfitness.com ASSEMBLY STEP 5: Assemble the Console Support Tube (A) Connect the 8pin Computer Wire – Upper (830) to the 8pin Computer Wire – Middle (831) and connect the Handle Pulse Sensor Wire – Upper (813) to the Handle Pulse Sensor Wire – Lowe (814) (B) Attach the Console Support Tube to the Upright (107) and secure using two M8x40mm Allen Head Bolts (702) with 8x14x2mm Spring Washer (705). 702 X2 705 X2 830 813 702 831 814 101 813 705 830 831 814 107 19 20 SMOOTH CE7.4 ELLIPTICAL TRAINER ASSEMBLY STEP 6: Assemble the Computer (A) Attach the Computer to the Console Support Tube (101), and secure using the M6x35mm Allen Head Bolt (701). 235 701 101 701 X2 www.smoothfitness.com ASSEMBLY STEP 7: Assemble Console Back Cover (A) Attach the Console Back Cover to Console Housing – Bottom (235). 235 246 21 22 SMOOTH CE7.4 ELLIPTICAL TRAINER ASSEMBLY STEP 9: Secure the Upright (A) Tighten the Upright Fixing Bolt using the 8mm Allen Key (C) C www.smoothfitness.com 23 LEVEL ADJUSTMENT LEVEL ADJUSTMENT: To adjust the levelers follow these instructions: You will need someone to help you with this procedure, as you will need to tip elliptical trainer while adjusting the levellers Tip the elliptical trainer to the left/right. You will then see the LEVEL ADJUSTERS. These will need to be screwed either in or out to level the elliptical trainer. Repeat for the other side. It may help to use a bubble level when adjusting the level on your elliptical trainer. LEVEL ADJUSTMENT 24 SMOOTH CE7.4 ELLIPTICAL TRAINER TRANSPORT INSTRUCTION TRANSPORT INSTRUCTIONS: To transport your elliptical trainer simply lift the back end and roll it away to the desired location, as shown. www.smoothfitness.com COMPUTER OPERATION A B K 95% 90% 85% C TARGET HEART RATE 80% 75% 70% J 65% 60% 55% D 50% I E F H G MODE BUTTON A B DTAT DISPLAY-1 LEVEL DISPLAY C D PROFILE FAN CONTROL E F STOP/ENTER INTENSITY UP/DOWN G H START VOLUME CONTROL I J TARGET HEART RATE DTAT DISPLAY-2 K 25 26 SMOOTH CE7.4 ELLIPTICAL TRAINER COMPUTER OPERATION DISPLAY FUNCTIONS: There are 4 display areas to show all the necessary information prior to and during the workout. LEVEL DISPLAY: Shows from 1 to 16 resistance levels. 8 x 16 DOT MATRIX PROFILE DISPLAY: Shows all operating instructions prior to the workout and shows all program profiles during the workout. TARGET HEART RATE DISPLAY: Shows the user TARGET HEART RATE% to monitor the body reaction and workout achievement. A minimum of 50% of the user’s target heart rate must be detected before the LED bar will illuminate. MODE 1 DISPLAY: Displays and allows user to set age prior to using all programs. Displays and allows user to set the METS for the METS (Rx) program. Displays and allows user to set workout time prior to using all programs. Displays TIME, RPM and PULSE during the workout. Press the MODE button to switch between the different information to be displayed, or switch to SCAN to view all information. MODE 2 DISPLAY: Displays and allows the user to set weight prior to using all programs. Displays the DISTANCE, SPEED, CALORIES and WATTS during the workout. Press the MODE button to switch between the different information to be displayed or switch to SCAN to view all information. COMPUTER OPERATION: POWER ON: Plug in the ADAOTOR, all the LED windows will light up and begin scanning. The Dot Matrix will display and begin showing “U1”. The other LED windows will show the factory settings as follows: LEVEL window display: “0” MODE-1 window display (default AGE): ”35”. MODE-2 window display (default WEIGHT): “150” lb. During the workout, press the STOP button twice to return to POWER ON status. SLEEP MODE: The computer will automatically enter SLEEP MODE if left idle for 3 minutes without any input in POWER ON status. When the computer is in SLEEP MODE, press any button or pedal and the machine will return to POWER ON status. PAUSE/STOP: During the workout, press the STOP button or stop pedaling for 30 seconds to enter PAUSE status. The Dot Matrix display will show “PAUSE”. All the figures on the console will be frozen. Press the START button or start pedaling to resume the program and all the displays will continue the performance until the program finishes. If you leave the pedal stopped for over 3 minutes or press the STOP button twice, all the data will return to 0 and the computer will return to POWER ON status. FAN: First Press: Second Press: Third Press: Fourth Press: STOP ENGLISH/METRIC CONVERSION: The console display can show ENGLISH and METRIC information. The factory should have the proper setting on this for the different markets. In case it needs to be converted between METRIC and ENGLISH readout, please follow the procedure below: 1. From the POWER SWITCH status, press both the MOLD and START button at the same time and hold for 3 seconds. The computer will sound one short beep and the Dot Matrix will display a scrolling “KM” or “ML”. KM is displayed for METRIC and ML for ENGLISH. 2. Press the START button to switch between METRIC/ENGLISH. Then press the STOP button to confirm the change and return to the POWER ON status. www.smoothfitness.com 27 COMPUTER OPERATION SOUND on/off: From the POWER ON status press and hold MOLD and STOP/ENTER buttons for 3 seconds to get to the display control mode. The MODE-1 will be displaying “1”. Press INTENSITY UP once so that “2” is displaying then press the START button. To toggle between sound “on” or “off” use the INTENSITY UP or DOWN button then press STOP/ENTER to confirm and press STOP/ENTER button to return to POWER ON status. QUICK START: When the console is in POWER ON status, press the START button to activate the QUICK START program. The Dot Matrix will display “QUICK START” then display the resistance level graphic. Press the INTENSITY UP/DOWN button to change the resistance level. The TIME, CALORIES and DISTANCE will count up from 0. PROGRAM OPERATING INSTRUCTION: At POWER ON status, press STOP/ENTER button to enter preset PROGRAM MODE and to set user parameters. SET UP USER CODE: At first, the PROFILE will show a blinking U1, and will also display only factory default setting values for user WEIGHT, and AGE. Press the INTENSITY UP/DOWN buttons to choose the User ID from U1 to U9 and press the STOP/ENTER buttons to assign the user ID shown. AGE set up – After the User ID set up procedure, the computer will display the default “35” or previous setting and begin blinking. Press the INTENSITY UP/DOWN button to adjust the user age information then press STOP/ENTER to confirm. WEIGHT set up – After the User AGE confirmation procedure, the computer will display the default “150(lbs)/68(kgs) or previous setting and begin blinking. Press the INTENSITY UP/DOWN button to adjust the user weight information then press STOP/ENTER to confirm. PROGRAM MODE After setting the user WEIGHT, the computer will display a blinking P1, indicating that the user is now select from P1~C5. Press the INTENSITY UP/DOWN buttons to select the programs and press the STOP/ENTER button to set up the program. After enter this program, Press START button to start the target time program. Time counts down to 0, Distance and Calories count up. Press INTENSITY UP/DOWN to adjust the resistance. PROGRAM 1 – TARGET TIME After enter this program, the TIME display shows the factory default setting “30:00”. Press UP/DOWN button to adjust the target time and press STOP/ENTER to confirm. Press START button to start the target time program. Time counts down to 0, Distance and Calories count up. Press INTENSITY UP/DOWN to adjust the resistance. PROGRAM 2 – TARGET DISTANCE After enter this program, the DISTANCE display shows factory default setting 5.0mph or 5.0km/h. Press UP/DOWN button to adjust the target distance and press STOP/ENTER to confirm. Press START button to start the target distance program. Distance counts down to 0, Time and Calories count up. Press INTENSITY UP/DOWN to adjust the resistance. PROGRAM 3 – TARGET CALORIES After enter this program, the CALORIES display shows factory default setting “50”. Press UP/DOWN button to adjust the target calories and press STOPE/ENTER to confirm. Press START button to start the target calories program. Calories counts down to 0, Time and Distance count up. Press INTENSITY UP/DOWN to adjust the resistance. 28 SMOOTH CE7.4 ELLIPTICAL TRAINER COMPUTER OPERATION PROGRAM 4 – METS The MET program allows you to set the workout load from 1.0 MET up to 16.0 METS. The following formula and the comparison chart shows you how different METS relate to different sport activities: One MET: Resting metabolic rate at 3.5ml O2/kg/min. One Kilocalorie (kcal): 200ml of Oxygen (O2) used. Energy Expenditure in KCals/minute: 1. KCals/min = 0.0175 kcals/kg/min x METS x WtKg 2. Where WtKg = weight in kilograms (1.0 Kilograms = 2.2 LB) 1.0 - 3.0 METS: Light Activity (50 to 200 KCals per hour). Fishing, Standing or Housework. 3.0 - 4.0 METS: Moderate Activity (200 to 350 KCals per hour). Bicycling in pace 5.5 mph or Canoeing at 2.5 mph – 3 METS Row boat at 2.5 mph – 4 METS Golf Walking – 4 METS Swimming at 0.25 mph – 4 METS 4.0 and above METS: Strenuous Activity (Over 350 KCals per hour). Badminton – 5 METS Bicycling in pace 11 mph – 6 METS Squash or Handball – 8 METS Bicycling in pace 16.6 mph – 9 METS Moderate Run at 6 mph – 10 METS Fast Run at 10 mph – 16 METS After enter this program, the TIME display shows the factory default setting “30:00”. Press INTENSITY UP/DOWN button to adjust the target time and press STOP/ENTER to confirm. METS display shows factory default setting “1.00”. Press INTENSITY UP/DOWN button to adjust the target time and press STOP/ENTER to confirm. Press START button to start the METS program. Time counts down to 0, Distance and Calories count up. Press INTENSITY UP/DOWN to adjust the METS. PROGRAM 5 – FAT BURNING The FAT BURNING program provides a consistent level of work during your exercise session. Exercising at this consistent level is more effective in the fat burning process. After enter this program, the TIME display shows factory default setting “32:00”. Press INTENSITY UP/DOWN button to adjust the target time and press STOP/ENTER to confirm. Press START button to start the FAT BURNING program. Time counts down to 0, Distance and Calories count up. Dot Matrix display shows the pre-set INTENSITY profile. Press INTENSITY UP/DOWN to adjust the resistance. P6: INTERVAL PROGRAM The INTERVAL program helps to build the strength of your cardiovascular system. By alternating the workload from high to low, your heart gets an effective workout. After enter this program, the TIME display shows “L1”. This indicates the intensity level for the intervals. Use the INTENSITY UP/DOWN buttons to change the intensity then press STOP/ENTER button to enter to confirm. TIME display shows factory default setting “32:00”. Press INTENSITY UP/DOWN button to adjust the target time and press STOP/ENTER to confirm. Press START button to start the INTERVAL INTENSITY program. Time counts down to 0, Distance and Calories count up. Dot Matrix display shows the pre-set INTENSITY profile. Press INTENSITY UP/DOWN to adjust the resistance. www.smoothfitness.com 29 COMPUTER OPERATION Press START button to start the INTERVAL program. Time counts down to 0, Distance and Calories count up. Dot Matrix display shows the pre-set INTENSITY profile. Press INTENSITY UP/DOWN to adjust the resistance. TIME /zone INTENSITY /level LEVEL L1 L2 L3 L4 L5 L6 L7 L8 st nd 1 2 Seg. Seg. L1 L2 L3 L4 L5 L6 L7 L8 L9 L10 L11 L12 L13 L14 L15 L16 rd 3 Seg. L9 L10 L11 L12 L13 L14 L15 L16 th 4 Seg. L1 L2 L3 L4 L5 L6 L7 L8 5th 6th 7th 8th 9th 10th Seg. Seg. Seg. Seg. Seg. Seg. L1 L2 L3 L4 L5 L6 L7 L8 L9 L10 L11 L12 L13 L14 L15 L16 L9 L10 L11 L12 L13 L14 L15 L16 L1 L2 L3 L4 L5 L6 L7 L8 L1 L2 L3 L4 L5 L6 L7 L8 L9 L10 L11 L12 L13 L14 L15 L16 11th Seg. L9 L10 L11 L12 L13 L14 L15 L16 12th Seg. 13th Seg. L1 L2 L3 L4 L5 L6 L7 L8 L1 L2 L3 L4 L5 L6 L7 L8 14th Seg. L9 L10 L11 L12 L13 L14 L15 L16 15th Seg. L9 L10 L11 L12 L13 L14 L15 L16 16th Seg. L1 L2 L3 L4 L5 L6 L7 L8 P7 –STRENGTH PROGRAM: The STRENGTH program gradually increases the workload over time. This will strengthen not only your heart, but also the major muscle groups, which are doing the work. After enter this program, the time display shows “L1”. This indicates the intensity level for the intervals. Use the INTENSITY UP/DOWN buttons to change the intensity then press STOP/ENTER button to confirm. TIME display shows factory default setting “32:00”. Press INTENSITY UP/DOWN button to adjust the target time and press STOP/ENTER to confirm. Press START button to start the STRENGTH program. Time counts down to 0, Distance and Calories count up. Dot Matrix display shows the pre-set INTENSITY profile. Press INTENSITY UP/DOWN to adjust the resistance. TIME /zone INTENSITY /level LEVEL L1 L2 L3 L4 L5 L6 L7 L8 1st 2nd Seg. Seg. L1 L2 L3 L4 L5 L6 L7 L8 L1 L2 L3 L4 L5 L6 L7 L8 3rd Seg. L3 L4 L5 L6 L7 L8 L9 L10 4th Seg. L3 L4 L5 L6 L7 L8 L9 L10 5th 6th 7th 8th 9th 10th Seg. Seg. Seg. Seg. Seg. Seg. L4 L4 L5 L5 L6 L6 L5 L5 L6 L6 L7 L7 L6 L6 L7 L7 L8 L8 L7 L7 L8 L8 L9 L9 L8 L8 L9 L9 L10 L10 L9 L9 L10 L10 L11 L11 L10 L10 L11 L11 L12 L12 L11 L11 L12 L12 L13 L13 11th Seg. L7 L8 L9 L10 L11 L12 L13 L14 12th Seg. L7 L8 L9 L10 L11 L12 L13 L14 13th Seg. L9 L10 L11 L12 L13 L14 L15 L16 14th Seg. L9 L10 L11 L12 L13 L14 L15 L16 15th Seg. L1 L10 L11 L12 L13 L14 L15 L16 16th Seg. L1 L2 L3 L4 L5 L6 L7 L8 30 SMOOTH CE7.4 ELLIPTICAL TRAINER COMPUTER OPERATION P8 –FITNESS LEVEL TEST: The FITNESS LEVEL TEST is based on YMCA Protocol Standards which are provided as a tool to evaluate your fitness level. During exercise, the muscles convert oxygen into the fuel needed for the muscles to do the required work. The harder you workout, the more oxygen the muscles need. The oxygen is delivered to the muscles by the cardiovascular or blood system. The harder you workout, the faster your heart beats to maintain the oxygen supply to the muscles. As your fitness level improves, your muscles become more efficient and therefore do not require as much oxygen as before. This means your heart does not have to beat as fast as before to do the same amount of work. A heart rate monitoring device must be used for this test. The equipment provides a standard handgrip pulse on the moving handle bar to sense the user’s heart beat during the workout. Pulse detection can be confirmed by observing the top LED light on the TARGET HEART RATE display as well as the PULSE display on the MODE-1 window. If your heart rate exceeds 95% of your maximum target rate the test will terminate. The Target Heart Rate calculation is as follows: (220 – user age) x % A 35 year old user needs to reach a minimum of 50% of their TARGET HEART RATE. Which means: (220 - 35) x 50% = 93 bpm (Beats per minute) After enter this program, The MODE-1 window will show the test timer “12:00” which is the standard test time. This can not be changed by the user. Press the START button to begin the test. If the test has been completed successfully, the Dot Matrix display will show the score. P 9 – HEART RATE CONTROL PROGRAM The TARGET HEART RATE CONTROL program is designed to keep the user training at their chosen heart rate level to achieve the proper workout result. A heart rate monitoring device must be used for this program. The equipment provides a standard contact handgrip on the moving handle bar to sense the user heart beat during the workout. The user must hold the contact handgrips on the moving handle bar constantly in order to monitor the user heart rate during the workout. A wireless chest belt transmitter is highly recommended for this program. www.smoothfitness.com 31 COMPUTER OPERATION IMPORTANT: The console software will calculate the user’s SAFE MAXIMUM HEART RATE based on the formula: (220pbmAGE). User’s are encouraged to consult with a doctor or personal Training consultant to more accurately estimate their SAFE MAXIMUM HEART RATE in order to workout safely. PULSE display shows the calculated TARGET HEART RATE based on the user age setting from the above step. The TARGET HEART RATE = 85% MAXIMUM SAFE HEART RATE. Press INTENSITY UP/DOWN button to adjust the target heart rate then press the STOP/ENTER bottom to confirm. After adjust the TARGET HEART RATE, the TIME display shows factory default setting “32:00”. Press INTENSITY UP/DOWN button to adjust the target time and press STOP/ENTER to confirm. Press the START button to start the 3 minute WARM UP. The purpose of warm up program is to bring the user’s heart rate to 65% of the MAXIMUM SAFE HEART RATE. Time counts down from “3.00” to “0:00”. Intensity Level Profile displays “WARM UP” 3 times. During the WARM UP, if the actual heart rate is less than 65% of the user’s MAXIMUM SAFE HEART RATE, the intensity level will be increased by 1 level every 30 seconds. If the actual heart rate reaches 65% MAXIMUM SAFE HEART RATE twice within the warm up, the HEART RATE CONTROL program will start after finished 3minute WARM UP. nd If user’s actual hear rate fails to reach 65% of MAXIMUM SAFE HEART RATE during the warm up, the user will be placed into a 2 rd or 3 (if necessary) 3 minute warm up program. If user’s actual heart rate fails to reach 65% of the MAXIMUM SAFE HEART RATE rd after the 3 3 warm up program, the INTENSITY LEVEL PROFILE dot matrix will display “FAIL” then return to POWER ON status in 10 seconds. Once the user successfully enters the HEART RATE CONTROL program, the computer will actively adjust the intensity level to keep the users at the TARGET HEART RATE. If the user is consistently below the TARGET HEART RATE, the INTENSITY LEVEL will increase 1 level every 30 seconds. If the user reaches and exceeds the TARGET HEART RATE, the INTENSITY LEVEL will decrease 1 level every 30 seconds. The program will continue until the time runs out. If the user’s heart rate continues to exceed the TARGET HEART RATE for 3 minutes, or the time counts down to “0:00”, the heart rate control program will stop and start the 1 minute COOL DOWN function. Time counts down from “1:00” and INTENSITY LEVEL at level 1 . Now you have completed the personal data input. Press START to begin the workout and start pedaling. Press STOP twice to return to POWER ON status. C1~C5 CUSTOMER COURSE The program can allow store the settings for repeated workouts. After enter this program and press STOP/ENTER button, the user comes into the INTENSITY LEVEL, and TIME setting mode. In the display the first minute is flashing, use the INTENSITY UP/DOWN button to adjust the INTENSITY LEVEL. Then press the STOP/ENTER button to reserve the setting and continue to next minute setting of the program, etc. The maximum workout time of each user program is 60 minutes. After setting up above item, press the SATER button to confirm, and then press START button to activate status. 32 SMOOTH CE7.4 ELLIPTICAL TRAINER COMPUTER OPERATION USING THE CHEST BELT HEART RATE MONITOR: For proper operation, the chest belt should be worn with the monitor strapped across the front of your body just above the chest line as shown in the drawing on the right. The monitor needs a little body heat and moisture in order to work properly. To ensure correct operation you may want to wet the two rubber pickups under the belt prior to exercising. www.smoothfitness.com 33 IMPORTANT STEPS Warning: Before using this product, please consult your personal physician for a complete physical examination. Frequent and strenuous exercise should be approved by your doctor first. If any discomfort should result from your use of this product, stop exercising and consult your doctor. Proper usage of this product is essential. Please read your manual carefully before exercising. Please keep all children away from the equipment during use and when equipment is unattended. Always wear appropriate clothing, including athletic shoes, when exercising. Do not wear loose clothing that could become caught during exercising. Make sure that all bolts and nuts are tightened when equipment is in use. Periodic maintenance is required on all exercise equipment to keep it in good condition. Before beginning: How you begin your exercise program depends on your physical condition. If you have been inactive for several years, or are severely overweight, you must start slowly and increase your time gradually, a few minutes per week. Initially you may be able to exercise only for a few minutes in your target zone. However, your aerobic fitness will improve over the next six to eight weeks. Don’t be discouraged if it takes longer. It’s important to work at your own pace. Ultimately, you’ll be able to exercise continuously for 30 minutes. And the better your aerobic fitness, the harder you will have to work to stay in your target zone. But remember these essentials: • Contact your physician before starting a workout or training program. Have your doctor review your training and diet programs to advise you of a workout routine you should adopt. • Begin your training program slowly with realistic goals that have been set by you and your doctor. • Supplement your program with some type of aerobic exercise such as walking, jogging, swimming, dancing and/or bicycling. Monitor your pulse frequently. If you do not have an electronic heart rate monitor, have your physician show you the proper way to manually check your pulse by using your wrist or neck. Establish your target heart rate based on your age and condition. • Drink plenty of fluids during the course of your routine. You must replace the water content lost from excessive exercising to avoid dehydration. Avoid drinking large amounts of cold liquids. Fluids should be at room temperature when consumed. 34 SMOOTH CE7.4 ELLIPTICAL TRAINER TARGET HEART RATE Finding your pulse: To make sure your heart is beating in its target zone, you’ll need to know how to monitor your heart rate. The easiest way is to feel the pulse in the carotid artery on either side of your neck, between the windpipe and the large neck muscles. Count the number of beats in ten seconds, and then multiply that number by six. This gives you the number of beats per minute. How fast should your heart beat during aerobic exercise? Fast enough to reach and stay in its “target zone,” a range of beats per minute that is largely determined by your age and physical condition. To determine your target zone, consult the chart we have provided. FIND YOUR TARGET HEART RATE HEART RATE in beats per minute 200 180 160 140 120 100 80 20 25 30 35 40 45 50 55 60 65 70 AGE IN YEARS ADVANCED: Sports, athletic conditioning or interval training FITNESS: Optimal training, aerobic or cardiovascular HEALTH: Beginner, low intensity with long duration produces fat burning Aerobic exercise: Is any sustained activity that sends oxygen to your muscles via your heart and lungs. It will improve the fitness of your lungs and heart: your body’s most important muscle. Aerobic fitness is promoted by any activity that uses your large muscle groups - arms, legs or buttocks, for example. Your heart beats quickly and you breathe deeply. An aerobic exercise should be part of your entire exercise routine. www.smoothfitness.com 35 MUSCLE CHART Targeted muscle groups: The exercise routine that is performed on this product will develop primarily lower body muscle groups. These muscle groups are shown in gray color on the chart below. MUSCLE GROUPS A Shoulder muscles B Pectoral muscles C Bicep muscle D Abdominal muscles E Forearm muscles F Quadricep muscles Calf muscles G Trapezius muscles H Tricep muscles I Back muscles J Gluteal muscles K Hamstring muscles L 36 SMOOTH CE7.4 ELLIPTICAL TRAINER STRETCHING ROUTINE Warm up and cool down: A successful exercise program consists of a warm-up, aerobic exercise, and a cool-down. Do the entire program at least two and preferably three times a week, resting for a day between workouts. After several months, you can increase your workouts to four or five times per week. Warming up is an important part of your workout, and should begin every session. It prepares your body for more strenuous exercise by heating up and stretching out your muscles, increasing your circulation and pulse rate, and delivering more oxygen to your muscles. At the end of your workout, repeat these exercises to reduce sore muscle problems. We suggest the warm-up and cool-down exercises on the following pages: Toe Touch: Slowly bend forward from your waist, letting your back and shoulders relax as you stretch toward your toes. Reach down as far as you can and hold for 15 counts. Shoulder Lift: Lift your right shoulder up toward your ear for one count. Then lift your left shoulder up for one count as you lower your right shoulder. Inner Thigh Stretch: Sit with the soles of your feet together with your knees pointing outward. Pull your feet as close into your groin as possible. Gently push your knees towards the floor. Hold for 15 counts. Hamstring Stretch: Sit with your right leg extended. Rest the sole of your left foot against your right inner thigh. Stretch toward your toe as far as possible. Hold for 15 counts. Relax and then repeat with left leg extended. Side Stretch: Open your arms to the side and continue lifting them until they are over your head. Reach your right arm as far upward toward the ceiling as you can for one count. Feel the stretch up your right side. Repeat this action with your left arm. Calf-Achilles Stretch: Lean against a wall with your left leg in front of the right and your arms forward. Keep your right leg straight and the left foot on the floor; then bend the left leg and lean forward by moving your hips toward the wall. Hold, and then repeat on the other side for 15 counts. Head Roll: Rotate your head to the right for one count, feeling the stretch up the left side of your neck. Next, rotate your head back for one count, stretching your chin to the ceiling and letting your mouth open. Rotate your head to the left for one count, and finally, drop your head to your chest for one count. SmooththFitness 780 5 Ave King of Prussia, PA 19406 Toll Free Customer Service: 1.888.800.1167 Website: www.smoothfitness.com Copyright 2005 Greenmaster Industrial Corp. All rights reserved.