1
Universal Garage Door
Remote Control
Model GS1
2. RECEIVER INSTALLATION (CONT)
1. INTRODUCTION
®
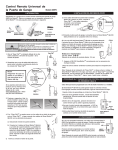
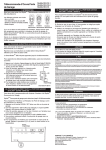
Congratulations on your purchase of GS1, the package includes Skylink
garage door receiver -Smart ButtonTM GB-318, and Skylink® garage door
transmitter - remote control G6T3. In this package, you will find the following:
Garage Door
Receiver
Smart ButtonTM
GB-318
Double Sided Tape
Crimper
Garage Door
Transmitter
G6T3
(Battery inside)
Double Sided Tape
Mounting
Bracket
Visor Clip
Connect the receiver - Smart ButtonTM GB-318 to your current garage
door opener system, you can use the transmitter - remote G6T3 to
open or close the garage door.
2. RECEIVER INSTALLATION
WARNING
Unplug the power cord of your garage door opener before installation to ensure
power is not connected.
DO NOT let children use the gargae door Transmitter without adult supervision.
Children can injure themselves or others by the garage door.
DO NOT use remote to control the door without safety beams.
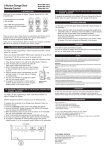
1. Open up the “Easy ClipTM” and place it underneath
the existing 2 wires of the wall button / wall
console.
Easy ClipTM
2. Ensure a pair of the wall button ribbon wires
are placed properly inside the channels of the
“Easy ClipTM”.
Wall Button
Ribbon Wires
NOTE:
Ensure the ribbon wires
are not twisted but laid
flat inside the clip.
If your wall button ribbon wires
are not the same kind as shown
in the diagram, please refer
below (4) or visit our website
www.skylinkhome.com or
contact us for more information.
If the Smart ButtonTM GB-318’s red LED does not flash after the
Smart ButtonTM GB-318 has been connected to the wall button’s
wires for 2 minutes, your garage door opener is probably too
old. However, the Smart ButtonTM GB-318 will still work if you
plug in an adapter (purchased separately). Please
contact Skylink® to purchase the adapter.
Rating of the transformer:
12V DC, 100mA
Diameter of DC plug : 3.5mm
7. Secure the SmartButtonTM GB-318 properly with the mounting accessories.
Note: Do not cut the antenna! Straighten up the antenna to improve
signal reception.
Note: After installation of the “Easy Clip TM ”, if you want to re-install the
Smart Button TM GB-318 to another place, please open the “Easy Clip TM ” by
gently unlocking the two buckles with a screw driver, and remove it from
the wires. Do not re-use the “Easy Clip TM ”, refer to Step 4 to re-install it.
3. PROGRAM TRANSMITTER G6T3 TO RECEIVER GB-318
You need to do the programming in order to add the transmitter to a receiver.
Smart ButtonTM GB-318 can learn up to 10 remote controls.
To add remote controls, follow the instructions below:
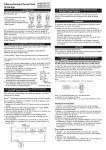
1. Press the learn button on the side of the Smart ButtonTM GB-318.
2. Once the learn button is pressed, the LED will
flash quickly. Release the learn button.
3. Within 30 seconds, press any one of the 3 buttons on
the transmitter that you want to program to the receiver.
4. Once the remote control is programmed, the LED
will flash slowly, in the same way as it flashes
LED
in standby mode.
5. You may now operate the garage door opener
Learn
with this new remote control.
Button
6. To program this transmitter to control another
TM
receiver, repeat process (1) to (4) to program
Smart Button
GB-318
another button on the remote control.
Press / lock
4. OPERATION
Ribbon Wires
3. Press and lock the clip by
snapping it together. The
included Crimper helps you
lock the “Easy ClipTM”. Close
the cover and press down
to lock the cover using this
Crimper until you hear a “click”.
4. If the “Easy ClipTM” cannot clip with the wires from your wall button, cut
off the “Easy ClipTM” then connect two wires from the Smart ButtonTM
GB-318 to the wall button.
a) Disconnect the existing wall button from the wall.
b) Connect the 2 wires from the Smart ButtonTM
GB-318 to your existing wall button. Polarity does
not matter, so simply pick one wire from the Smart
ButtonTM GB-318 and connect it to one of the
screw terminals on your wall button. Connect
the 2nd wire to the other screw terminal.
c) Reconnect the wall button back.
5. If the wall button wires are hidden inside the
wall, please connect the “Easy ClipTM” to
the exposed wires attached to the
terminals of the garage door
opener.
If the red LED flashes slowly, the Smart ButtonTM GB-318
is in standby mode. When a valid remote control signal is
received, it will open / close the garage door.
LED
Press the programmed button on the remote control
or Smart ButtonTM GB-318, it will open / close the
garage door.
OPEN /
CLOSE
Button
5. ERASE TRANSMITTERS
To erase unwanted remote control(s)from the memory of Smart ButtonTM
GB-318, first erase all remote controls, then learn the one(s) you would
like to keep, follow the steps below:
1. Press and hold the learn button for approximate 10 seconds.
2. The LED will flash rapidly after 10 seconds to indicate all the programmed remote controls have been erased. You may now release
the learn button.
3. You have erased all the remote controls programmed to the Smart
ButtonTM GB-318.
6. TROUBLE SHOOTING
Q: What can I do if the door opener does not react after I press the button on
the transmitter ?
A: - Ensure when the button on the transmitter is pressed, the red LED on the
transmitter comes on. Otherwise, check if the battery is inserted properly.
- Make sure the correct button on the transmitter is pressed.
- Ensure the wires that were previously connected to the wall mounted
door control are not loose.
- Ensure the transmitter has been programmed to the receiver. Refer
to section 2 for how to program a transmitter to the receiver.
7. TRANSMITTER MOUNTING METHOD
6. Power up the garage door opener, the red LED on the Smart ButtonTM
GB-318 should keep flashing slowly within 2 minutes.
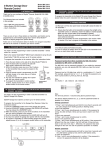
This three-button remote control G6T3 can be mounted on the windshield or
visor of your car with mounting accessories. First use the double sided tape
to attach the mounting bracket on the windshield or use the visor clip to clip
the mounting bracket on the visor, then you can put the remote control on the
bracket. The remote control can also be attached to your key ring as a key fob.
7. TRANSMITTER MOUNTING METHOD (CONT)
9. OPTIONAL ACCESSORIES AND OPERATIONS
You can add up to 10 additional
transmitters to control the GB-318.
Skylink® offers different
lighting control / automation
transmitters, Visor Transmitters,
Keychain Transmitters and Keypad
Transmitters to work with your receiver.
Mounted on the windshield
Peal off the double
sided tape cover.
Stick the
double sided tape on
the back of the bracket.
Program additional remote controls
Mounted on the visor
Smart ButtonTM GB-318 can learn up to 10 remote controls.
To learn additional remote controls, follow the instructions below:
Attach visor clip
to bracket.
8. TRANSMITTER PASSWORD PROTECTION
Password protection
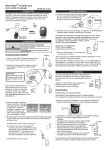
The G6T3 can be password protected. If you enable the password protection, you can only operate G6T3 after you input the correct password.
1. Press the learn button on the side of the GB-318.
2. Once the learn button is pressed, the LED will
flash quickly. Release the learn button.
3. Within 30 seconds, press the button on the remote
control you would like to program.
4. Once the remote control is programmed, the LED
will flash slowly, in the same way as it flashes
in standby mode.
5. You may now operate the garage door opener
with this remote control.
[
] = Button 2 [
] = Button 3
10. BATTERY
3 Volt lithium battery (CR 2032) (included).
It is time to change the battery when the red LED on the transmitter does
not turn on when either button is pressed.
11. WARNING
Button [ 1 , 2, 3 ]
Note:
The time-out period is 1 second during above password input.
The factory default password is 2, 2, 2, which is disabled out of factory.
Learn Button
For more information, please visit our website at www.skylinkhome.com
or contact us.
Password can be 2-8 digits long, which is a combination of 1, 2 and 3.
For example, password can be 1, 2, 1, 2. To input this password, you
have to press [
], then [
], then [
], then [
].
Note:
[ ] = Button 1
LED
DO NOT let children use the garage door transmitter without adult supervision.
Otherwise, Children and others may be injured by the garage door.
12. FCC
Change password
1. Press 1 and 3 simultaneously and hold for more than 6 seconds until
the LED changes from flashing quickly to flashing slowly.
2. Input old password.
3. Press 1 and 3 simultaneously to confirm. If the password is wrong,
the LED will flash 3 times and you have to start it over from step1.
4. Input new password.
5. Press 1 and 3 simultaneously to confirm.
6. Input new password again.
7. Press 1 and 3 simultaneously to RE-confirm. If the password is
different from the one of step 4, the LED will flash 3 times and you
have to start over from step 1. Otherwise, the password has been
changed to the new one and the password protection is enabled.
Disable password
1. Press 1 and 3 simultaneously and hold for more than 2 seconds until
the LED flashes quickly but not until the LED flashes slowly.
2. Input old password.
3. Press 1 and 3 simultaneously to confirm. If the password is correct,
the password protection will be disabled.
Enable password
1. Press 1 and 3 simultaneously and hold for more than 2 seconds until
the LED flashes quickly but not until the LED flashes slowly.
2. Input old password.
3. Press 1 and 3 simultaneously to confirm. If the password is correct,
the password protection will be enabled.
You can toggle the two states - password protection enabled or disabled.
Note:
The time-out period is 10 seconds during any of the above setting
operations. After 10 seconds, the LED will flash 3 times and the remote
will exit from setting.
If you forget your password and want to reset G6T3, follow the
steps below:
1. Press 1 and 2 simultaneously and hold for more than 10 seconds until
the LED flashes.
2. After you release 1 and 2, the LED will be turned off and G6T3 will be
reset. The password will be reset to factory default.
After the reset, password protection is removed but the remote can not
control any receiver until you reprogram it to receivers you want to control.
This device complies with Part 15 of the FCC Rules. Operation is subject to the following two conditions:
(1) This device may not cause harmful interference, and (2) This device must accept any interference
received, including interference that may cause undesired operation.
WARNING:
Changes or modifications to this unit not expressly approved by the party responsible for compliance could
void the user’s authority to operate the equipment.
NOTE:
This equipment has been tested and found to comply with the limits for a Class B digital device, pursuant
to Part 15 of the FCC Rules. These limits are designed to provide reasonable protection against harmful
interference in a residential installation. This equipment generates, uses and can radiate radio frequency
energy and, if not installed and used in accordance with the instructions, may cause harmful interference
to radio communications.
However, there is no guarantee that interference will not occur in a particular installation. If this equipment does
cause harmful interference to radio or television reception, which can be determined by turning the equipment
off and on, the user is encouraged to try to correct the interference by one or more of the following measures:
- Reorient or relocate the receiving antenna.
- Increase the separation between the equipment and receiver.
- Connect the equipment into an outlet on a circuit different from that to which the receiver is connected.
- Consult the dealer or an experienced radio/TV technician for help.
13. WARRANTY
If, within one year from date of purchase, this product should become defective
(except battery), due to faulty workmanship or materials, it will be repaired or
replaced, without charge. Proof of purchase and a Return Authorization are required.
14. CUSTOMER SERVICE
If you would like to
- find out the up-to-date specifications
- know more about features and applications
- download documents, i.e. user’s instructions
- order Skylink products
or if you have difficulty getting products to work, please:
1. visit our FAQ section at www.skylinkhome.com, or
2. email us at [email protected], or
3. call our toll free at 1-800-304-1187 from Monday to Friday, 9 am to 5 pm EST.
Fax (800) 286-1320
CUSTOMER SERVICE
17 Sheard Avenue, Brampton, Ontario, Canada L6Y 1J3
Email:[email protected]
http://www.skylinkhome.com
P/N. 101Z865-002
Patent Pending
® are registered trademarks of their respective corporations
©2010 SKYLINK GROUP