Transcript
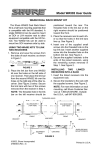
Model WA503 Instruction Sheet
WA503 SINGLE RACK, FRONT–MOUNT ANTENNA CONVERSION KIT
Bracket Installation
1. Remove the screws from each side
of the receiver. See Figure 1.
ÁÁ
Á
ÁÁÁÁÁ
ÁÁÁ
Á
Á Á
Á
Á
Á Á Á
ÁÁÁÁ
ÁÁ
ÁÁ
ÁÁÁÁÁ
ÁÁ
ÁÁÁÁ
ÁÁÁ
RECEIVER
(TOP VIEW)
FRONT
FIGURE 1
2. Secure the brackets (not supplied
with the WA503 kit) to the sides of
the receiver with the screws removed in Step 1. See Figure 2.
ÁÁ
ÁÁ
ÁÁÁ
ÁÁÁÁ
Á ÁÁÁ
ÁÁ
ÁÁÁ
ÁÁÁ
Á
ÁÁÁÁÁ
ÁÁÁÁÁÁÁÁ
ÁÁ
ÁÁÁÁÁÁÁÁ
Á
RECEIVER
(TOP VIEW)
FRONT
BRACKET
BRACKET
FIGURE 2
Á
Á
ÁÁ
ÁÁÁ
ÁÁÁÁ
Á
Á
Á
Á Á Á
ÁÁ
ÁÁÁÁ
Á ÁÁ
ÁÁÁÁ
Á
ÁÁÁÁÁ
ÁÁÁÁ
ÁÁÁ
RECEIVER
(TOP VIEW)
FRONT
FIGURE 3
©2006, Shure Incorporated
27B8445 (Rev. 3)
ÁÁ ÁÁ
ÁÁÁÁÁÁÁ
ÁÁ
ÁÁÁÁÁ
ÁÁ
ÁÁ
ÁÁÁÁÁÁÁ
Á ÁÁ
ÁÁÁÁÁÁÁ
ÁÁÁ
ÁÁÁ
ÁÁÁ
ÁÁ
ÁÁ
Á
ÁÁÁÁ
ÁÁ
ANTENNA
CABLE
ANTENNA
CABLE
RECEIVER
(TOP VIEW)
FRONT
FIGURE 4
3. Screw the antennas into the bulkhead adaptors protruding through
the front panel. See Figure 5.
ÁÁ Á
ÁÁ
Á
ÁÁÁÁÁÁÁ
ÁÁ
ÁÁÁÁÁ
ÁÁ
ÁÁ
ÁÁ
ÁÁÁ Á ÁÁÁ
ÁÁ
ÁÁ
ÁÁÁÁÁÁ
ÁÁ
ÁÁÁ
ÁÁ
ÁÁÁÁ
ÁÁÁ
ÁÁ
Á
ÁÁÁÁ
ÁÁ
ÁÁ
Á
Á
ÁÁ
Á
Á
RECEIVER
(TOP VIEW)
FRONT
NOTE: There are four holes in each
bracket. Use the rear holes if the receiver is to be recessed; use the front
holes to mount it flush to the rack.
WA503 Adapter & Cable Installation
1. Insert the WA503 adapters through
the holes in each bracket, and secure them from each side, using the
attaching hardware. See Figure 3.
WA503
ADAPTER
2. Connect the supplied antenna cables
to the receiver antenna inputs and
WA503 adapters. See Figure 4.
WA503
ADAPTER
ANTENNA
ANTENNA
FIGURE 5
4. Insert the receiver into the equipment rack and secure the brackets
to the rack with the supplied screws.
See Figure 6.
ÁÁÁ
ÁÁÁÁ
EQUIPMENT RACK
FIGURE 6
NOTE: For more information, call
Shure Customer Service at
1–847–600–2000.
Printed U.S.A.