1
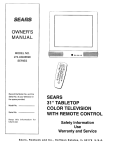
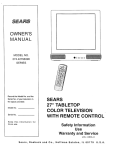
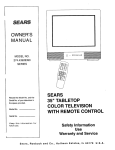
OWNER'S
MANUAL
MODEL NO.
274.4345869A
SERIES
Record the Model No. and the
SEARS
27" TABLETOP
COLOR TELEVISION
Serial No. of your television in
the space provided.
Model No.
Serial No.
Keep this
future use.
WITH REMOTE
information
CONTROL
for
Safety Information
Use
Warranty and Service
Sears,
Roebuck
and
Co.,
Hoffman
Estates,
IL
60179
U.S.A.
To reduce
TO QUALIFIED
or shock hazard,
SERVICE PERSONNEL.
Caution:
introduire
To reduce the risk of electric
Pour _viter
shock,
insert.
les chocs _lectriques,
la lame la plus large de la fiche dans la
borne correspondante
au fond.
de la prise et pousser jusq_
Refer to the identification/rating
label on the back of this
product
voltage.
for the proper
modifications
do not
important
This
symbolinstructions
indicates
accompanying
the product.
match wide blade of plug to wide slot, fully
Attention:
the risk of fire
expose this TV to rain
or moisture.
This symbol indicates
"dangerous voltage" inside
the product that presents a
risk of electric shock or
personal injury.
FCC Regulations
WARNING
[O REDUCE IHL RISK OI- LLECI RIC SHOCK, DO
NOT REMOVE COVER (OR BACK). NO USER
SERVICEABLE PARTS INSIDE. REFER SERVICING
operating
state that unauthorized
to this equipment
to operate
it.
CAUTION:
If fixed (non-moving)
changes or
may void the user's authority
images are left on the screen
for long periods, they may be permanently
screen. Such images include
network
and video games. Extended
viewing
imprinted
on the
Iogos, phone numbers,
of channels
displaying
these images should be avoided.
This reminder is provided
of the National Electrical
Electrical
to call your attention
to Article 820-40
Code (Section 54 of the Canadian
Code, Part 1) which
provides
guidelines
for proper
grounding
and, in particular, specifies that the cable ground
shall be connected to the grounding
system of the building as
close to the point
of cable entry as practical.
NOTE TO CABLE TV
INSTALLER
Safety
First
Information
Things
....................................................
First
i
.......................................................
2
Unpacking the TV and accessories
Connecting
your TV
Plugging in your TV
Putting batteries in the remote
Turning on the TV
Using
the
Menu
System
The menu rule: point
...........................................
3
and select
What is point and select?
Interactive
Setup
......................................................
Menu
System
3
Begin setup
Tour
of the
.....................................
4-6
TV main menu
The audio
menu
The picture quality
The screen menu
The channel
menu
menu
The time menu
The Channel
Marker
Tour of the
.................................................
7
TV ............................................................
8
Remote
9
Front Panel
Tour
of the
Remote
...................................................
buttons
Advanced
Features
On-screen
program
.................................................
10
details
Closed Captioning
Troubleshooting
.................................................
TV will not turn on or controls don't work
Problems with
11-12
remote
Turns on or off while playing
Schedule does not turn off the TV at the set time
Blank screen or black box appears
No sound, picture
No picture,
okay
no sound, but power
Sound okay, picture
Care
Repair
and
Cleaning
Services
on the screen
light
is on
poor
..................................................
........................................................
12
13
STEP1
Unpackthe
IMPORTANT
IV and remote
control.
INFORMATION:
A matching stand
vision. This stand
the stand so that
tipped over. This
available by mail
OPTIONAL
STAND
has been designed to be used with this teleis provided with hardware to secure the TV to
it cannot be easily pushed off, pulled off, or
stand is available from your dealer, and is not
order.
Caution: If you choose not to use the stand recommended
for
your TV, take precautions that the stand or other furniture the TV
is placed on is properly located and of adequate size and strength
to prevent the TV from accidentally being pushed off, pulled off,
or tipped over. This could cause damage to the TV and/or
personal injury.
AN I LI,JNi_,,UABLL, UABLL BUX UH VUH
STE P 2:
Connect your TV. This is a basic connection
from an antenna, cable
box, or VCR to your TV. Connect the cable from your cable system
or off-air antenna to the cable-in jack on the back of the TV, as shown.
STEP 3:
Plug in the TV. Plug the end of the power cord into the wall outlet,
matching the wide blade of the plug with the wide slot in the outlet.
Be sure to insert the plug completely.
STEP 4
Put batteries
in the remote.
•
Remove the battery compartment
the remote.
cover from the back of
•
Insert two AAA batteries as shown, matching the + and - ends
of each battery in the compartment.
°
Replace the cover.
STEP 5
Turn on the TV.
•
Press TV on the remote.
Read the next section, Using the Menu System, which is a brief
overview of the basic rules for getting around in the menus using
the remote or TV's front control panel.
2
TV
I
THLMENU
RULE: POINT
AND
SELECT
You only need to know one rule to use the on-sc_eu_l _heJlus a_d
control panels: point and select.
WHAT
IS POINT
The point
1.
2.
AND
SELECT?
and select method
has two steps.
Point to a menu item using the MOVE arrows
(The CHAN/VOL buttons on the remote.)
Select
a menu item by pressing
on the remote.
VOL
CHAN
VOL
MENU.
Selecting an item tells the TV's menu system to go ahead and
make the change or go to a place you have indicated. (You can
also select an item by pressing the corresponding
number
button on the remote.)
CHAN
MENU
Once you know how to point and select your way through the
menus, you can apply this rule in the menu control panels, which
do the real work in the menu system.
The setup fuuL,ne w,_lk_ yuu Lhrough the steps needed to configure
the TV. These steps allow you to select a menu language, complete
the auto channel search, which puts available cable TV or antenna
signals into the TV's memory, label the channels and set the
parental controls. After you select a menu language, you can skip
any of the remaining steps and return to them later.
BEGIN
SETUP
1.
Press MENU to bring up the Main menu.
2.
Point to Setup and press MENU. The first Setup screen
comes up, asking you to select a language.
3.
Point to your preferred language by pressing the up and
down arrows until the language is highlighted in green.
4.
Press MENU to select the language.
5.
A screen appears asking if you would like the TV to search
for all channels.
6.
Complete the Setup routine
return to them later.
Setu
Setu
or skip any of the steps and
3
TV
MAIN
MENU
The Main menu is your gateway to _;ontrolling the 1V. it lets
you adjust the TV's audio, picture quality, screen, time
functions and channel settings.
To select any other
Press MENU to bring up the TV's Main menu.
2.
Point to any menu item by pressing the up and down
arrows until the item is highlighted
in green.
3.
Press MENU to select the item and a new menu comes
To exit any menu screen,
press CLEAR.
TH E AUDIO
menu
point to Exit and press MENU,
I
up.
or
lets you adjust the way the TV sounds.
II
MENU
MENU
Mute Turns off the TV's sound.
Press MENU to toggle
Mute feature between ON and OFF.
I
MAIN
menu item:
1.
The Audio
IV
I
I
II
XS Stereo - An innovative
sound effect
I
Illl
method
IIII
II
II
II
III
Audio
the
I
for providing
stereo
The sound delivered by your television is XS Stereo. This patented
process suppresses
noise, restores the dynamic range and
electronically
expands the stereo signal to create a more spacious
sound effect.
I
I
Stereo
Press MENU to toggle
and OFF.
On Sound is reproduced
being broadcast.
Off Sound
THE
is reproduced
PICTURE
The Picture Quality
TV's picture.
I
I
I
the Stereo feature
between
in stereo or mono, whichever
ON
is
in mono.
QUALITY
menu contains
MENU
the controls
that adjust the
There are five slider controls for adjusting the way the picture
looks. Use the left and right arrow buttons to adjust the controls.
Contrast
Adjusts
the difference
between
light and dark areas
of the picture.
Color
Adjusts
Tint Adjusts
Black
the balance
Level Adjusts
Sharpness
4
the richness
Adjusts
of the color.
between
the brightness
the crispness
the red and green levels.
of the picture.
of edges in the picture.
Picture
Qualit
Auto Color Displays the curru,L _etting (ON or OFF). This feature
automatically
corrects the color of the picture. Select Off if you
prefer to adjust the picture with the Picture Controls.
Use the
MENU button to toggle between the choices.
Reset
Picture
Controls
Resets the picture
controls
to their
original settings and automatically
corrects the color of the picture.
Select Off if you prefer to adjust the picture with the Picture
Controls.
Use the MENU button to toggle between the choices.
Reset
Picture
original
Controls
Resets the picture
controls
to their
settings.
THE SCREEN MENU
The Screen
menu contains
Closed-Caption
the controls
mode, Closed-Caption
that let you adjust the
Screen
display and menu language.
Closed-Caption
Display Displays a choice list that lets you
choose the way closed captioning information
is shown on the
screen. Use the MENU button to toggle between the choices.
Off
No captioning
On Captioning
information
information
displayed.
shown
always,
when available.
On When Sound is Muted Displays captioning
information,
when available, whenever you press the MUTE button. The
captioning
information
is not displayed when the sound is
not muted.
Closed-Caption
Mode
Displays
a choice list that lets you choose
which captioning
mode is used for displaying
captioning
information.
Use the MENU button to toggle between the choices:
CCl and CC2.
Menu Language
Lets you select the language of your choice:
English, French or Spanish. Use the MENU button to toggle
between the choices.
THE CHANNEL
The Channel
your
menu contains
channels,
and setting
Signal
current
MENU
including
parental
all the commands
custom-building
used to control
your channel
list
controls.
Type Displays
antenna type.
a choice list that lets you select the
Antenna
Choose this if you are currently
antenna for UHF/VHF TV signals.
using an off-air
Cable TV Choose this if you are currently
box for TV signals.
using cable or a cable
Auto
Channel
Channel
Search
Displays
a control
panel that lets you tell
the TV to search automatically
for all the channels available through
the antenna input. When the TV finds an active channel, it places it
in the channel list; inactive channels (weak stations or channels
with no signal at all) will be removed from the channel list.
5
Lists and Labels Displays a control panel that lets you custombuild your channel scan list, choose a four-character
label for each
channel, and decide whether each channel is "parent-approved."
Use the up, down, left and right arrows to enter settings and create
labels. Press MENU to exit.
Chan # Use the up and down arrows to scroll up and down
through the channel scan list. You can enter the channel
directly using the number buttons.
Chan Labels Use the up and down arrows
character label for each channel.
Lists
and
number
to enter a four-
Scan List Only the channels included in the Scan list are
available when you scan up and down using the CHAN buttons.
Use the up and down arrows to indicate whether the channel
number indicated is included (YES) or is not included (NO) in
the channel scan list.
Parent Approved
Use the up and down arrows to choose
whether the channel indicated should be shown when the
Parental Control feature is turned on. Select YES to indicate that
the channel can be shown at any time, regardless of whether
Parental Control is turned on. Select NO to indicate that the
front panel cannot tune to that channel when Parental Control is
turned on. Important:
You must turn the Parental Control
feature ON in the Parental Control control panel,
Parental Control Displays
Parental Control feature,
a choice list that lets you adjust the
On The front panel CHAN buttons will tune only to channels
that you have marked as "Parent Approved"
in the Lists and
Labels control panel. Important:
When Parental Control is on,
the TV's front panel no longer provides access to the menus.
Parents may prefer to hide the remote and let children use the
front panel to change channels.
Off The TV shows
"Parent Approved"
TH E TIME
all channels,
or not.
whether
they are marked as
MENU
The Time menu contains the controls that let you set the time
and schedule the TV to turn off and on at specific times.
Time
Sleep Timer Displays a control panel that lets you select the
amount of time you want to give the TV before it shuts itself
off. Use the up and down arrows to increase or decrease the
sleep timer by 15 minute increments.
Press MENU to exit.
Timer
Schedule
Displays a control panel that lets you set up a schedule
for turning the TV on and off automatically.
Make sure to turn
the schedule
On in the control panel. Use the up and down
arrows and number buttons to change the settings. Use the left and
right arrows to move across the control panel, You must first set
the clock to use the scheduling feature.
Sot Time Displays a control panel that lets you enter the current
time. Use the up and down arrows and number buttons to set the
time. Press MENU to exit
6
Schedule
Set
Time
Labels
There a_u _uvural indicators that cortle up when you change
channels or press the DISPLAY button. This display is called the
Channel Marker. The Channel Marker shown below is just an
example
of what your screen may look like.
08:59
Displays the current time.
WRTV
Displays the label assigned to the current channel.
06 Displays the current channel.
Sleep
Displayed
when the Sleep Timer has been set.
CC Displayed when Closed Captioning
current channel.
Mute
Displayed
Schedule
is available
when you mute the audio.
Displayed when the TV is scheduled
01:30 Displayed
(SKIP) timer.
on the
to turn on.
to count down time left on the commercial
skip
7
FRON_[ PANkL
VOL < Decreases
used to point
the volur_lu. Whez_ in the menu system,
left to items and adjust
VOL < is
menu controls.
VOL > Increases the volume. When in the menu system,
used to point right to items and adjust menu controls.
VOL > is
CHAN ^ Scans up through the channel list. In the menu system,
points up to items and adjusts menu controls.
it
CHAN v Scans down through the current channel list. In the menu
system, it points down to items and adjusts menu controls.
MENU Brings up the Main menu. When in the menu system, it
selects highlighted
items. Also returns you to the previous menu.
If you turn Parental Control on, the front panel no longer
access to the menus. For more information,
see Parental
the Channel menu on the back side of these instructions.
POWER
Turns the TV on and off.
The front panel shown is a typical
the buttons may be different from
8
provides
Control in
button layout. The exact look of
those on the front of your TV.
I
ME.u
V
CHAN
/_
<
V0L
>
REMOTL
POWER
BUi
I UN_
Turns the TV ul, d_,d ott.
DISPLAY Brings
detailed program
MUTE
up channel informa[iol,.
I_ress lupeatedly
information,
if available.
Turns off the TV's sound.
PREV CH Returns
Press again to restore
you to the previous
1o suu
POWER
the sound.
channel.
PREV CH
MUTE
VOL - or VOL + Decreases
or increases
the TV's volume.
Also
used as left and right arrows.
©
©
VOL H_AN
CHAN ^ or CHAN v Scans up or down through the current
channel list. Press once to change the channel up or down; press
and hold to continue changing channels. Also used as up and
down arrows.
CLEAR
Removes
any menu or display
you to TV viewing.
Also cancels
from the screen and returns
VOL
CHAN
CLEAR
MENU
RESET
SKIP timer.
MENU Brings up the Main menu. When in the menu system,
selects highlighted
items or returns you to the previous menu.
RESET
Returns
all picture
quality
controls
to their original
settings.
(0-9) Number
Buttons Enters channel numbers and time settings
directly though the remote control. To enter a two-digit channel,
3b
press the two digits. To enter a three-digit
channel, press and hold
the first digit, then add the second two. Example: to tune to channel
123, press and hold 1, press 2, then press 3.
INPUT
(on some
input sources
models)
Press to toggle
through
the available
(CH3, CH4, etc.).
'535
SKIP Press once before changing channels and the TV will wait 30
seconds before returning you to the original channel. Press
repeatedly to add more time. Press CLEAR to cancel the SKIP timer
and remain on the current channel.
9
ON-SCREEN
PROGRAM
DETAILS
Program providers have the option of sending inforl]latio_l
th_uugh
the airwaves along their programs. If this information
is available,
the TV can display it up when you press DISPLAY on the remote. To
display
the on-screen
program
details:
1.
Press DISPLAY once to bring up the channel
marker.
2.
Press DISPLAY again to bring up the program title, the
program's
length, elapsed time and other program details such
as the story line and whether Closed-Captioning
is available.
3.
Press DISPLAY again to clear the screen.
Whether all (or any) of the program details are displayed depends
on whether the program provider has sent the information
along
with the program.
CLOSED CAPTIONING
Many programs are encoded with closed-captioning information, which
lets you display the audio portion of a program as text on the TV
screen. You can tell the TV to display closed captioning: a) never, b)
whenever it is available, or c) whenever the MUTE button is pressed.
The TV offers two closed-captioned
translation of the primary language
secondary language translation,
being broadcast in your area.
modes. Select CCl for full
in your area. Select CC2 for
simplified
English, or whatever
is
Closed captioning is not available on all channels at all times. Only
specific programs encoded with closed-captioning
information are
applicable. When a program is closed captioned, the letters CC are
displayed in the channel marker.
10
-[roubles sometimes
are caused by simple "faults" that you can
correct without the help of a service technician.
If you experience
any difficulty with your TV, check a few basic remedies before
calling your service technician.
TV WILL NOT TURN
ON OR CONTROLS
•
Check to make sure it is plugged
•
Check the wall receptacle (or extension
"live" by plugging in something
else.
•
Try unplugging
set for two minutes,
then turning it on again.
PROBLEMS
WITH
DON'T
WORK
in.
cord) to make sure it is
plugging
it back in, and
REMOTE
•
Maybe something
•
Maybe the remote is not aimed directly at the TV's remote sensor.
•
Maybe remote batteries are weak, dead or installed incorrectly.
Try replacing batteries correctly.
•
Remove batteries and hold down one or more buttons for
several seconds. Install the batteries and try remote.
TURNS
is between the remote and the remote
ON OR OFF WHILE
Schedule
function
sensor.
PLAYING
may have been activated.
Electronic protection
circuit may have been activated because of
a power surge. Wait 30 seconds and then turn on again. If this
happens frequently,
the voltage in your house may be
abnormally
high.
SCHEDULE
DOES NOTTURN
OFF THE TV ATTHE
SETTIME
•
Check schedule on/off function (it must be set to On).
•
Check to make sure clock is set to the correct time.
BLANK
SCREEN OR BLACK BOX APPEARS
ON THE SCREEN
•
Try another
•
Press RESET, in case the picture controls are set too low.
•
Captioning
may be turned on. Check the Closed-Caption
control panel in the Channel menu.
NO SOUND,
•
channel.
PICTURE
Display
OKAY
Maybe sound is muted.
restore sound.
Try pressing
volume
up button
to
11
NO PICTURE,
NO SOUND
BUT POWER
IS ON
•
Maybe cable/air
function
•
Maybe a vacant
channel
•
If watching VCR, make sure TV is tuned to channel 3 or 4- same
as CH3/4 switch on VCR. Also check to make sure TV/VCR
switch on VCR is in correct position.
SOUND
OKAY,
PICTURE
•
Check antenna
•
Try adjusting
is in wrong
LIGHT
position.
is tuned.
POOR
connections.
sharpness
function
to improve
weak signals,
You catJ clear_ thu _V as ruquired, using a soft cloth or the dusting
attachment for your vacuum cleaner. Be sure to occasionally
vacuum
the ventilation slots in the cabinet to help assure adequate ventilation.
To clean the TV screen, use a diluted soap and water mixture and a
soft cloth. Do not use furniture polish on the TV cabinet or screen.
While cleaning
do not spray liquid directly
on the screen, or
allow liquid to run down the screen and inside the TV. Also,
avoid placing drinks or vases with water on top of the TV.
This could increase the risk of fire, shock hazard, or damage
to the TV.
Caution:
If fixed (non-moving)
images are left on the screen for
long periods, they may be permanently
imprinted
on the screen.
Such images include network Iogos, phone numbers, and video
games. Extended viewing of channels displaying these images
should be avoided.
12
Forthe repairor replacementpartsyouneed
Call7 am - 7 pm, 7 daysa week
1-800-366-PART
(1-800-366-7278)
Forin-homemajorbrandrepairservice
Call24 hours a day,7 daysa week
1-800-4-REPAIR
(1-800-473-7247)
Forthe locationof a
SearsRepairServiceCenterin yourarea
Call24 hours a day,7 daysa week
1-800-488-1222
SEARS
mmmmmm
mmmmmm
For information on purchasinga Sears
Maintenance Agreement or to inquire
about an existing Agreement
call 9 am - 5 pm, Monday-Saturday
1-800-827-6655
SEARS
America's Repair Specialists
1'3
SEARS
27" TABLETOP
COLOR TELEVISION
WITH REMOTE CONTROL
OWNER'S
MANUAL
Your Sears Television has added value when you consider that
Sears has service units nationwide staffed with Sears trained
technicians-professional
home entertainment
technicians specifically
products,
having
trained on Sears
the parts,
tools
and
equipment to ensure that we meet our pledge to you -"We Service
What We Sell."
For repair service, call:
1-800-4-REPAIR
MODEL NO.
(1-800-473-7247)
274.4345869A
For replacement parts information and ordering, call:
1-800-FON-PART
SERIES
(1-800-366-7278)
WARRANTY
FULL90-DAYWARRANTYON COLORTELEVISION
Forthe first 90 daysfrom the dateof purchase,Searswill repairthis television,free
WHEN
ORDERING
REPAIR
PARTS,
ALWAYS
GIVE
FOLLOWING INFORMATION:
of charge,if defectivein materialor workmanship.
THE
LIMITEDWARRANTYONALLPARTSEXCEPTPICTURETUBE
After 90 daysfrom the date of purchaseand upto one year,Searswill furnish,free
of charge,a replacementfor anydefectivepart in this television.You payfor labor.
1. NAME OF ITEM
Sears Color Television
Receiver
LIMITEDWARRANTYON PICTURETUBE
After 90 daysfrom date of purchaseand up to two years,Searswill furnish,free of
charge,a replacementfor the picturetube,if defective.Youpayfor labor.
2. MODEL NUMBER
WARRANTY SERVICE IS AVAILABLE BY CONTACTING THE NEAREST
SEARSSERVICECENTER/DEPARTMENT
IN THE UNITEDSTATES.
3.
PART DESCRIPTION
This warrantygives you specific legal rights, and you may also have other rights
which varyfrom stateto state.
Sears, Roebuck and Co., Oept. 817WA, Hoffman Estates,
IL 60179
Printed in U.S.A. 9/96
1517396A