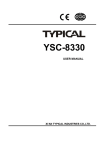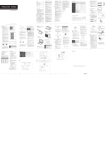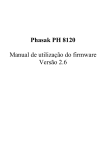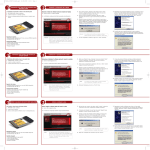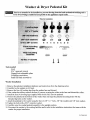
1
Washer
& Dryer Pedestal
Kit
This kit is intended to be installed by persons having electrical and mechanical
level of knowledge considered acceptable in the appliance repair trade.
training
and a
This kit contains:
........
:::_:_: I%:;¸ _,_
::3Rg
I_k
:Frant
0
washers
mounting
brackets
m
' 10_6
X 1"
screws
Tools needed:
Level
9/16" open end wrench
Channel-lock adjustable pliers
2# Phillips screwdriver
Small flat blade screwdriver
Washer Installation
1. Remove the pedestal, installation hardware and instructions from the shipping carton.
2. Carefully lay the washer on it's back.
3. Remove the four (4) leveling legs from the washer base and discard.
4. If the washer has rollers, remove the four (4) screws securing the rollers to the base and discard the rollers.
5. Install the four (4) leveling legs (supplied with the kit) fully into the pedestal.
6. Position the pedestal at the bottom of the washer base and align the pedestal mounting holes with the
threaded leg holes on the washer.
7. Attach the pedestal to the washer using the four (4) 3/8" X 1" bolts, 3/8" fiat washers and 3/8" lock washers.
8. Tighten the bolts with a 9/16" wrench or socket.
9. Carefully raise the washer/pedestal
assembly to the upright position.
10. Reconnect the washer to the existing facilities and/or refer to the installation instructions that came with the
washer for proper installation.
134176300 8/02
NOTE:
The washer/pedestal
nut on each leveling
at a minimum
assembly
MUST be on a solid floor and level for proper operation. Turn the lock
leg up towards the pedestal base and snug with a wrench. Keep the leg extension
to prevent
excessive
vibration.
Dryer Installation
1. Remove the pedestal, installation hardware and instructions from the shipping carton.
2. Carefully lay the dryer on it's back.
3. Using the small flat blade screwdriver, carefully remove the hole plugs located in the bottom of the dryer
front panel.
4. Remove the four (4) leveling legs from the dryer base and discard.
5. Install the four (4) leveling legs (supplied with the kit) fully into the pedestal.
6. Using four (4) 8-18 x 3/8" screws (supplied with the kit), attached the rear mounting brackets to the pedestal.
7. Using four (4) 8-18 x 3/8" screws (supplied
with the kit), attach the front mounting
brackets to the pedestal.
Bracket
8. Place the dryer on top of the pedestal.
down behind the front brackets.
Slide the back of the dryer into the rear brackets,
then drop the front
9. Insert the two (2) screws 10-16 x .75" (supplied with the kit) through the holes in the dryer front panel and
install into the front mounting brackets.
10. Reinstall the hole plugs removed in step 3.
11. Reconnect the dryer to the existing facilities and/or refer to the installation instructions that came with the
dryer for proper installation.
NOTE: The dryer/pedestal
assembly MUST be on a solid floor and level for proper operation. Turn the lock
nut on each leveling leg up towards the pedestal base and snug with a wrench. Keep the leg extension
at a minimum to prevent excessive vibration.
134176300 8/02