1
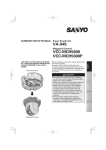
SUMMARY MANUAL
VCC-HD4600
VCC-HD4600P
Please read this instruction manual carefully in order to ensure correct installation.
In addition, be sure to read carefully the electronic manual (INSTRUCTION MANUAL)
contained in the supplied CD-ROM to ensure correct operation of the camera.
L5DH2_VCC-HD4600P_SM_GB.indd 1
日本語
Ё᭛ㅔԧ
Deutsch
Español
Français
THIS INSTALLATION SHOULD BE MADE BY A QUALIFIED
SERVICE PERSON AND SHOULD CONFORM TO ALL LOCAL
CODES.
English
Megapixel Camera
2009/10/20 20:05:17
Contents
Name and Function of Each Component ................................................................. 2
Basic Connections .................................................................................................... 6
Network Settings ...................................................................................................... 9
Specifications ......................................................................................................... 11
Copyright Notice ..................................................................................................... 13
■ Accessories
① Power supply connector
② CD-ROM
■ Check your operating environment.
To operate the camera via network operation, you must meet the following operating
requirements.
• PC
• Operating system
• CPU
• Memory
:
:
:
:
• Network interface
• Display card
• Graphics chip
:
:
:
• Web browser
:
IBM PC/AT compatible
Windows XP Professional/Windows Vista
Core2Duo E6700 2.66 GHz or higher
Windows XP: 1GB or more
Windows Vista: 2GB or more
10Base-T/100Base-TX (RJ-45 connector)
1920×1200 pixels or higher
ATI RADEON HD2600 series or higher
nVIDIA GeForce 8600 series or higher
nVIDIA Quadro FX550 series or higher
Internet Explorer Ver. 6.0 SP2 or higher,
or Internet Explorer Ver. 7.0
■ You can automatically set up the IP address of the camera.
This software application is useful when two or more cameras are connected to the
network.
Download “Auto IP Setup” software application from the supplied CD-ROM.
1
L5DH2_VCC-HD4600P_SM_GB.indd Sec1:1
2009/10/20 18:42:15
Name and Function of Each Component
■ Rear Face
❾
❶
❷
❽
❼
❸
❹
❺
❻
❶ Power Indicator (POWER)
This indicator lights up when the camera is powered on.
When the camera is on, this indicator blinks to indicate the following
camera statuses:
• Firmware update in progress
• Deactivation of media recording is in progress.
• Error occurring on SD memory card or external hard disk drive (faster
blink)
❷ 24 VAC/ 12 VDC Power Connector Terminal
Connect a 24 VAC or 12 VDC power supply to this terminal using the supplied
Power supply connector.
For details, refer to the “Basic Connections” ( Page 6) section.
❸ Control Terminals (7 push-lock pins)
For details, refer to the “
Control Terminal Connections” (
Page 7) section.
❹ External hard disk terminal (EX-HDD)
To record live video on a hard disk, put the hard disk in a dedicated hard disk case
(VA-HDC4000), sold separately) and then connect the case to the camera.
For details, refer to “Installing and formatting recording media” section on the
electronic manual.
❺ Audio Output Jack (AUDIO OUT, 3.5-mm mini jack)
Connect this jack via an audio cable to the audio input jack of an amplified speaker
system or the monitor.
❻ Audio Input Jack (AUDIO IN, 3.5-mm mini jack)
Use this jack to connect an external microphone to listen to the sound while
monitoring the live video, or simultaneously record the video and sound.
This jack supports 3.5-mm diameter monaural microphone plugs, or
monaural line-level input plugs (the left channel only for stereo plugs).
2
L5DH2_VCC-HD4600P_SM_GB.indd Sec1:2
2009/10/20 18:42:15
Name and Function of Each Component
❼ SD (SDHC) Card Slot
When recording live video onto an SD memory card, insert the card into the slot.
For details, refer to “Installing and formatting recording media” section on the
electronic manual.
❽ LAN Connector (RJ-45)
Use this socket to connect the camera to your PC to enable network operation.
For details, refer to the “Basic Connections” ( Page 6) section.
• Link access indicator (Green):
This indicator lights up approx. 3 seconds after power on, if a
connection has been established between the camera and the network.
After that, it will blink when data are being transmitted via the network.
• Speed indicator (Orange):
The camera automatically detects the local network transmission
speed (10BASE-T or 100BASE-TX).
This indicator lights up when 100BASE-TX data transmission is in
progress; it goes out when 10BASE-T data transmission is in progress.
❾ Monitor output terminal for video adjustment
Connect this terminal to a monitor, etc. A live video will be displayed on the monitor
once the camera is turned on. For details, refer to the “Basic Connections”
( Page 6) section.
While displaying live video, the current zoom magnification is displayed on the
screen.
<Zoom magnification display>
• Optical zoom area: ×1.0 to ×10.0
• Electronic zoom area: ×11 to ×160
Zoom magnification settings (ex. enabling/disabling
the magnification display, displaying position) can be
configured via network operation on the VIDEO &
x 10.0
AUDIO SETTINGS (TV OUT) screen.
HD video output terminal (HDMI)
The terminal outputs super-fine HD (High Definition) video signal. Use the terminal
to connect a high-definition monitor with HDMI interface.
For details, refer to the “Basic Connections” ( Page 6) section.
3
L5DH2_VCC-HD4600P_SM_GB.indd Sec1:3
2009/10/20 18:42:16
Name and Function of Each Component
■ Side Face
❶
❸
❷
❶ Operation Buttons
When using operation buttons on the camera, slide and open the side cover to
access the buttons.
Some operations can be performed via network operation.
Basic operations (focus adjustment, zoom, etc.)
Adjusting focus: Press the
button to set the focus to a near target; press
button to set the focus to a far target.
the
Live screen control panel
• Zoom: Press the button to zoom out of the image; press the button to
zoom into the image.
Live screen control panel
•
Menu screen operations
Press the SET button for 2 seconds or more to display the menu screen.
For details, refer to the “Using the Menu screen” on the electronic manual.
• Moving the cursor up or down: Press button to move the cursor upward, or
button to move the cursor downward.
press
• Selecting the setting value: Press or button to change the setting value.
• Set the selected value: Press the SET button.
Miscellaneous operations (ex. restarting the camera)
Never press the RESET button while recording is in progress. The
video may not be recorded properly.
• Restarting camera: Press the RESET button.
OPTION SETTINGS (CAMERA REBOOT)
• Restoring factory default settings: Press the
•
and
buttons
simultaneously.
OPTION SETTINGS (FACTORY DEFAULT)
and
Stopping recording/Removing the recording medium: Press the
SET buttons simultaneously.
⇨ The power indicator starts blinking and then stay lit when the camera is
ready for you to remove the recording media.
SD/HDD SETTINGS
4
L5DH2_VCC-HD4600P_SM_GB.indd Sec1:4
2009/10/20 18:42:16
Name and Function of Each Component
• Resuming recording/Recognizing the recording medium: Press the
•
and SET buttons simultaneously.
⇨ The power indicator starts blinking and then stay lit after the camera
recognizes the recording medium and is ready for recording.
SD/HDD SETTINGS
Resetting the login password (for default users only): Press the and
buttons simultaneously.
Not supported via network operation
❷ Power indicator
The indicator also works as an error indicator.
Power indicator: The indicator lights up when the camera is powered on.
Error indicator: The indicator blinks when an error occurs.
To activate the power or error indicator, via network operation on the
OPTION SETTINGS screen, change the setting for [POWER LED (FRONT)]
or [ERROR LED (FRONT)] respectively.
❸ Bracket
This bracket may be attached to either the top or bottom face of the camera
depending on the installation environment.
For bracket installation, be sure to use the longer screws supplied.
Install the camera securely to a durable location, taking into account
the total weight of the camera mount (commercially available) and the
camera.
5
L5DH2_VCC-HD4600P_SM_GB.indd Sec1:5
2009/10/20 18:42:17
Basic Connections
High-definition monitor
Target
Monitor
24 VAC
24 VAC
GND
~
~
PC
12 VDC
12 VDC
+
Power Connection
Attach the supplied power connecter into the power terminal.
Loosen the screws on the side face of the connecter, connect
the power cables to it, and tighten the screws.
Connection method depends on the power supply (24 VAC or
12 VDC).
Connection to 24 VAC power supply:
Although the power terminals have no polarity, the earth grounding wire must be
connected to the COM (GND) terminal.
Connection to 12 VDC power supply:
Note the polarity (+/–) of the power terminals when connecting the camera to a 12
VDC power supply.
Incorrect polarity may cause damage to the camera.
• To prevent a fire hazard use any UL listed wire rated VW-1. Be sure to
use an 18AWG or thicker wire power cable.
• If you must use a long power cable, determine the cable type by
ensuring that the voltage at the 24 VAC/12 VDC terminal is within the
operating range of the camera.
When the camera is powered on, the POWER indicator lights up and the live video
is displayed on the connected monitor.
6
L5DH2_VCC-HD4600P_SM_GB.indd Sec1:6
2009/10/20 18:42:17
Basic Connections
High-Definition Monitor Connection
Connect the HDMI cable to the HD video output terminal (HDMI).
You cannot output the video simultaneously from HD video output
terminal (HDMI) and from monitor output terminal (MONITOR OUT). When
both terminals are used, the HD video output terminal takes precedence.
Monitor connection for video adjustment
Connect the coaxial cable to the SD video output terminal (MONITOR OUT).
Network Connection
This camera is designed so that you can use all of its functions via network
operation.
By connecting the network (LAN) socket of the camera to your PC using a LAN
cable, you can configure and operate it from the Web browser installed on your PC.
• Use a LAN cable no longer than 100 m (109.4 yards) with the shield type
CAT5 or higher.
• The supported Web browser is Internet Explorer Ver.6.0 SP2 or higher, or
Internet Explorer Ver.7.0.
• Configure the network information using the camera's menu item
[NETWORK SET].
For details, refer to “Configuring the network settings of the camera”
section on the electronic manual.
• The same settings can be performed via network operation on the
NETWORK SETTINGS screen.
Control Terminal Connections
Alarm output terminals (ALARM OUT1/2)
Connect a buzzer, lamp, or other alarm device to one of the alarm output
terminals.
• After connecting an alarm device, configure the output conditions
for the corresponding alarm output terminal (ALARM OUT1 or 2) via
network operation on the ALARM SETTINGS screen.
• Alarm output terminal configuration is also possible via remote
operation.
Alarm input or Day/Night switching terminals (ALARM IN1/2)
These input terminals can be used for either of the following purposes:
• Alarm input
Connecting an external switch, infrared sensor, or other device to these
terminals enables the camera to detect alarm conditions such as the entry of
an intruder.
After connecting an alarm device, configure the input conditions for
the corresponding alarm input terminal (ALARM IN1 or 2) via network
operation on the ALARM SETTINGS screen.
7
L5DH2_VCC-HD4600P_SM_GB.indd Sec1:7
2009/10/20 18:42:18
Basic Connections
• Day/Night switching
Normally, switching the camera between the color and black-and-white video
modes is automatically accomplished by the Day/Night function.
Using one of these alarm input terminals as the Day/Night switching terminal,
however, enables the camera to be switched between the color and black-andwhite video modes when an external control signal is received.
• To use the alarm input terminals as Day/Night switching terminals,
follow the steps below.
• Under [DAY/NIGHT], set [DAY/NIGHT] to “COLOR” and select the
terminal you want to use in [EXT ALARM].
• On the ALARM SETTINGS screen, in [POLARITY], select the signal
polarity of the alarm input terminal.
Zoom/Focus adjustment terminal (ZOOM/FOCUS)
Zoom and focus adjustment operations can be performed remotely by external
voltage control.
■ Connection Diagram (Thicker than 24 AWG, 600 m / 656 yds. max.)
External
peripheral
device
(COM)
(ALARM OUT1)
(ALARM OUT2)
Alarm input signal
(ALARM IN 2)
(COM)
Alarm input signal
(ALARM IN 1)
(COM)
+6/12 V (focuses on
subjects close to the lens)
(FOCUS)
(COM)
–6/12 V (focuses on
subjects far from the lens)
+6/12 V (wide angle)
(ZOOM)
(COM)
–6/12 V (telephoto)
8
L5DH2_VCC-HD4600P_SM_GB.indd Sec1:8
2009/10/20 18:42:18
Network Settings
Preparing Your Computer for Network Operation
Check your operating environment. (
Page 1)
Connect the camera to the network to which your PC is also connected.
Configue the network information on your PC.
Configure information such as the IP address of your PC.
Install the “H.264 Plug-in” from the supplied CD-ROM onto your PC.
You are now ready to monitor the surveillance video in the H.264 format.
Start Internet Explorer.
The supported Web browser is Internet Explorer Ver.6.0 SP2 or higher, or Internet
Explorer Ver.7.0.
Access the camera from your Web browser.
From your Web browser (Internet Explorer), access the camera and log into the
system as an “admin” user (administrator).
In the address bar, type the IP address of the camera and press [Enter] key.
When you access the camera, the login screen appears.
If this is the first access to the camera, in the Address bar, enter the default IP
address as follows.
If you set [SSL] to “ON”, before the IP address, type “https://” (instead
of “http://”).
Attempts to access the camera using the default IP address will fail if
that address is already being used by another device in the network.
If so, change the IP address of the existing device before accessing
the camera.
9
L5DH2_VCC-HD4600P_SM_GB.indd Sec1:9
2009/10/20 18:42:19
Network Settings
Type your user name and password and click [OK].
The language selection screen appears.
If this is the first access to the camera, log in as an admin user
(administrator) using the following default authentication information.
• User name: admin
• Password: admin
Click the button corresponding to the language you want to use.
The live screen appears.
From the second login onwards, the live screen appears automatically by skipping
the language selection screen.
If this is the first access to the camera, configure the system clock on the CLOCK
SETTINGS screen.
10
L5DH2_VCC-HD4600P_SM_GB.indd Sec1:10
2009/10/20 18:42:19
Specifications
■ Camera
Image pickup device
1/2.5" CMOS sensor
Effective pixels
16:9 1920 (H) × 1080 (V), 4:3 2288 (H) × 1712 (V)
Lowest image illumination 50IRE: 2.0 lx (F1.8, in color mode with high gain)
50IRE: 0.1 lx (F1.8 in black-and-white mode with high gain)
Video S/N ratio
50 dB or higher (when AGC is “Off”)
Lens
Focal Length: 6.3 to 63 mm, F number: F1.8 - 2.5
Optical zoom 10x, electronic zoom 16x (up to 160x when used
in combination with the optical zoom)
Digital PTZ
Enables electronic pan, tilt, and zoom operations on clipped
subject areas in VGA size, Zoom magnification: 2× max
DNR (digital noise
ON/OFF
reduction)
Image inversion
Horizontal/Vertical/Horizontal and vertical/Off
Privacy mask
On/Off, max. 8 mask patterns
Motion sensor
On (Motion masking/motion detection area setting, or video
analytics)/Off, face detection
Sway compensation
ON/OFF
Language selection
English, French, German, Spanish, Japanese
For further details on the specifications of the camera, refer to the electronic manual.
■ I/O
Video output
LAN
EX-HDD Connector
SD Card Slot
Alarm input
Alarm output
Lens remote control
Audio input/output
HD Output: HDMI terminal (TYPE C)
Monitor output for video adjustment: BNC terminal (MONITOR
OUT)
10BASE-T/100BASE-TX (RJ-45 connector)
For connecting SANYO-specified external hard disk case
(VA-HDC4000)
1 (SDHC compliant, max. 32 GB supported)
2 (NO/NC), also serving as Day/Night switching function input
<control terminals>
2 (NO/NC switching, 16 V, 150 mA, open collector)
<control terminal>
Zoom, Focus, Common (Voltage control: ±(6 to 12 V))
<control terminal>
Audio input (3.5-mm Mini jack) <AUDIO IN>
Audio output (3.5-mm Mini jack) <AUDIO OUT>
■ Recording media
SD memory card/
External HDD
Normal recording, Alarm recording, Backup recording in event
of a network failure, Log information recording
For the recommended SD memory cards, visit our website.
http://www.sanyo-cctv.net/
11
L5DH2_VCC-HD4600P_SM_GB.indd Sec1:11
2009/10/20 18:42:19
Specifications
■ Network
Image/video compression
Video size (H.264)
Video size (JPEG)
Picture quality
Interface
Protocol
Audio
Simultaneous access
Security
H.264/JPEG
(16:9) 1920×1080, 1280×720, 640×360, 320×180
(4:3) 1600×1200, 1280×960, 1024×768, 640×480, 320×240
(16:9) 1920×1080, 1280×720, 1024×576, 640×360
(4:3) 2288×1712, 1600×1200, 1280×960, 1024×768, 800×600,
640×480, 320×240
QUALITY mode: BASIC, NORMAL, ENHANCED, FINE,
SUPER FINE
BITRATE mode: User-specified bit rate
10BASE-T/100BASE-TX
TCP/IP, UDP, HTTP, HTTPS, SMTP, NTP, DHCP, FTP, DDNS,
RTP, RTSP, RTCP
G.711 (Bidirectional)
20
BASIC authentication (ID/password), SSL, IP filtering
■ Others
Operating ambient
temperature/humidity
Power source
Power consumption
Weight
–10 to +50°C, 14 to 122°F
90% RH or less (no condensation)
• 12 to 15 VDC
• 24 VAC±10%, 50/60 Hz
• PoE
15 W (PoE: 12.3 W)
420 g/14.8 oz.
■ Dimensions
125 (4.90)
63 (2.47)
11
(0.44)
64 (2.53)
115 (4.52)
Unit: mm (inch)
1/4"-20UNC
Appearance and specifications are subject to change without prior notice or obligations.
12
L5DH2_VCC-HD4600P_SM_GB.indd Sec1:12
2009/10/20 18:42:19
Copyright Notice
The instruction manual and the software are copyrighted by SANYO Electric Co., Ltd.
No materials contained in the manual and the software may, wholly or partially, be
copied, modified, reproduced, or distributed in any format without the prior permission
of the copyright holder.
Microsoft, Windows, ActiveX and Internet Explorer are registered trademarks or
trademarks of Microsoft Corporation in the United States and other countries.
The official name for “Windows” used in this manual is Microsoft® Windows® Operating
System.
In this manual, note that the word “Windows” refers to both “Microsoft® Windows® XP
Operating System” and “Microsoft® Windows® Vista Operating System”.
Intel and Pentium are registered trademarks or trademarks of Intel Corporation and its
subsidiaries in the United States and other countries.
IBM and IBM PC/AT are trademarks of International Business Machines Corporation.
All other brands and product names in this manual are the registered trademarks or
trademarks of their respective owners.
SDHC Logo is a trademark.
■ Notes on data storage
• It is recommended that important data be copied to a separate medium.
• In the following situations, it is possible that recorded data may be lost (destroyed).
Our company bears absolutely no responsibility for damages or profits loss due to
the loss of data.
• The medium (SD card or external hard disk) is not used correctly.
• The medium is not installed on the device correctly.
• The medium is subjected to electrical or mechanical shock.
• The card is removed or the power is turned off while the card is being accessed.
• The medium has reached the end of its service life.
■ License for Software Contained in CD-ROM
• Please read carefully the terms and conditions contained in the license agreement
•
that appears on the screen during the software installation process. Provided that
you have agreed to all the terms and conditions therein, you may use the software
subject to the license agreement.
For information on the other products or services provided by third parties which
are introduced in the CD-ROM, please contact each supplier or manufacturer.
13
L5DH2_VCC-HD4600P_SM_GB.indd Sec1:13
2009/10/20 18:42:20
1AC6P1P4038-L5DH2/XE, US, JP (1009KR)
L5DH2_VCC-HD4600_SM_JP.indd Sec1:17
SANYO Electric Co., Ltd.
2009/10/20 19:04:36