1
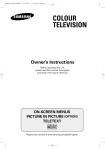
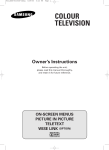
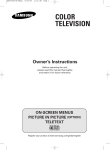
AA68-03554A-X5Eng 2/17/05 12:03 PM Page 1 COLOUR TELEVISION Owner’s Instructions Before operating the unit, please read this manual thoroughly, and retain it for future reference. ON-SCREEN MENUS PICTURE IN PICTURE (OPTION) TELETEXT Register your product at www.samsung.com/global/register AA68-03554A-X5Eng 2/17/05 12:03 PM Page 2 AA68-03554A-X5Eng 2/17/05 12:03 PM Page 3 Contents ◆ CONNECTING AND PREPARING YOUR TELEVISION ■ ■ ■ ■ ■ ■ ■ ■ ■ ■ View of Your Television (depending on the model) ....................................... Infrared Remote Control (depending on the model) ...................................... Inserting the Batteries in the Remote Control................................................ Connecting to an Aerial or Cable Television Network ................................... Switching Your Television On and Off........................................................... Placing Your Television in Standby Mode ..................................................... Becoming Familiar with the Remote Control ................................................. Plug & Play Feature....................................................................................... Viewing the Demonstration............................................................................ Choosing Your Language.............................................................................. 5 7 9 9 10 10 11 12 13 13 ◆ SETTING THE CHANNELS ■ ■ ■ ■ ■ ■ Storing Channels Automatically..................................................................... Sorting the Stored Channels ......................................................................... Storing Channels Manually............................................................................ Skipping Unwanted Channels ....................................................................... Assigning Names to Channels ...................................................................... Fine Tuning Channel Reception .................................................................... 14 15 16 18 19 20 ◆ USING YOUR TELEVISION ■ ■ ■ ■ ■ ■ ■ ■ ■ ■ ■ ■ ■ ■ ■ ■ ■ ■ ■ Using the LNA (Low Noise Amplifier) feature (depending on the model) ...... Changing the Picture Standard ..................................................................... Customizing the Picture Settings................................................................... Selecting the Picture Size (depending on the model).................................... Extra Picture Settings .................................................................................... Setting the Blue Screen................................................................................. Using the Tilt Control Feature........................................................................ Freezing the Current Picture ......................................................................... Changing the Sound Standard ...................................................................... Adjusting the Sound Settings ........................................................................ Extra Sound Settings (depending on the model)........................................... Selecting the Melody ..................................................................................... Selecting the Sound Mode (depending on the model) .................................. Setting and Displaying the Current Time....................................................... Setting the Sleep Timer ................................................................................. Switching the Television On and Off Automatically ....................................... Setting the Preferred Volume Level/Channel ................................................ Viewing an External Signal Source/Edit Name (depending on the model).... Viewing the Picture In Picture (PIP) (depending on the model) .................... 21 21 22 23 24 25 25 26 26 27 28 29 30 31 32 33 34 35 36 English - 3 AA68-03554A-X5Eng 2/17/05 12:03 PM Page 4 Contents (continued) ◆ USING THE TELETEXT FEATURE ■ ■ ■ ■ ■ Teletext Feature ............................................................................................ Displaying the Teletext Information ............................................................... Selecting a Page by Number......................................................................... Using FLOF to Select a Page........................................................................ Storing Teletext Pages .................................................................................. 38 38 39 40 40 ◆ ADDITIONAL INFORMATION ON CONNECTIONS ■ ■ ■ ■ ■ ■ Connecting to the External Input/Outputs...................................................... Connecting to the Audio Output .................................................................... Connecting to the RCA Input......................................................................... Connecting to the S-Video Input.................................................................... Connecting to the DVD Player ...................................................................... Viewing Pictures From External Sources ...................................................... 41 41 42 42 43 43 ◆ RECOMMENDATIONS FOR USE ■ ■ Automatic Degaussing to Remove Colour Patches....................................... Troubleshooting: Before Contacting Service Personnel................................ Symbols Press English - 4 ☛ Important ➢ Note 44 45 AA68-03554A-X5Eng 2/22/05 11:55 AM Page 5 View of Your Television (depending on the model) ➢ The actual configuration on your TV may be different, depending on your model. Control Panels Front of the TV 1 2 5 6 7 3 4 1) Input Source Selection 2) Menu Display 3) Volume Adjustment 4) Channel Selection ➢ ➢ 5) Power On/Off 6) Standby Indicator 7) Remote Control Sensor ◆ You can use the C/P. buttons to switch on the TV when it is in standby mode. ◆ The + and C/P. buttons have the same function as the …/†/œ/√ buttons on the remote control. ◆ If the remote control no longer works or you have misplaced it, you can use the controls on the panel of the TV. If you turn the TV off by pressing the POWER button on the front of the TV, you will not be able to turn the TV on using the POWER button on the remote control. (For more detailed information, refer to page 10.) English - 5 AA68-03554A-X5Eng 2/18/05 12:53 PM Page 6 View of Your Television (depending on the model) (continued) Connection Panels Rear of the TV Side of the TV S-Video Input Video Input Audio Input (L, R) SCART Audio/ Video Input/Output Audio Output Component Input 75Ω Coaxial Connector for Aerial/Cable Network ➢ English - 6 Available format for Component inputs; 480i, 480p, 576i, 576p, 1080i - 50Hz. AA68-03554A-X5Eng 2/17/05 12:03 PM Page 7 Infrared Remote Control (depending on the model) TELEVISION STAND-BY PICTURE SIZE SELECTION SOUND MODE SELECTION AUTOMATIC SWITCH-OFF DIRECT CHANNEL SELECTION ONE/TWO-DIGIT CHANNEL SELECTION VOLUME INCREASE TEMPORARY SOUND SWITCH-OFF VOLUME DECREASE SWITCH REPEATEDLY BETWEEN THE LAST TWO CHANNELS DISPLAYED NEXT CHANNEL EXTERNAL INPUT SELECTION PREVIOUS CHANNEL INFORMATION DISPLAY MENU DISPLAY EXIT FROM ANY DISPLAY MOVE TO THE REQUIRED MENU OPTION/ ADJUST AN OPTION VALUE RESPECTIVELY SOUND MENU DISPLAY TURBO SOUND CHANGE CONFIRMATION SOUND EFFECT SELECTION PICTURE EFFECT SELECTION STILL PICTURE DNIe DEMO ➢ The performance of the remote control may be affected by bright light. English - 7 AA68-03554A-X5Eng 2/17/05 12:03 PM Page 8 Infrared Remote Control (depending on the model) (continued) TELETEXT SIZE SELECTION TELETEXT SUB-PAGE TELETEXT DISPLAY/ MIX BOTH TELETEXT INFORMATION AND THE NORMAL BROADCAST TELETEXT STORE TELETEXT PAGE HOLD SUB PICTURE(PIP) NEXT CHANNEL TELETEXT NEXT PAGE TELETEXT MODE SELECTION (LIST/FLOF) TELETEXT PREVIOUS PAGE PIP ON/OFF PROGRAMME SELECTION BY NAME SUB PICTURE(PIP) LOCATION SELECTION TELETEXT REVEAL SETUP MENU DISPLAY(W.LINK) (depending on the model) EXIT FROM ANY DISPLAY RETURN TO PREVIOUS MENU(W.LINK) (depending on the model) SUB PICTURE(PIP) SIZE SELECTION SUB PICTURE(PIP) PREVIOUS CHANNEL FASTEXT TOPIC SELECTION SUB PICTURE(PIP) SOURCE SELECTION INTERCHANGE THE MAIN AND SUB PICTURE (PIP) W.LINK FUNCTION:(depending on the model) - ROTATE - ZOOM - REWIND - STOP - PLAY/PAUSE - FASR FORWARD - W.LINK: TOGGLES BETWEEN WISE LINK AND TV MODE. English - 8 AA68-03554A-X5Eng 2/17/05 12:03 PM Page 9 Inserting the Batteries in the Remote Control You must insert or replace the batteries in the remote control when you: ◆ Purchase the television ◆ Find that the remote control is no longer operating correctly 1 Remove the cover on the rear of the remote control by pressing the symbol ( ) downwards and then pulling firmly to remove it. 2 Insert two R03, UM4, “AAA” 1.5V or equivalent batteries taking care to respect the polarities: ◆ - on the battery against - on the remote control ◆ + on the battery against + on the remote control 3 Replace the cover by aligning it with the base of the remote control and pressing it back into place. Connecting to an Aerial or Cable Television Network To view television channels correctly, a signal must be received by the set from one of the following sources: ◆ An outdoor aerial ◆ A cable television network ◆ A satellite network l) 1 In the first three cases, connect the aerial or network input cable to the 75Ω coaxial socket on the rear of the television. 2 If you are using an indoor aerial, you may need to turn it when tuning your television until you obtain a picture that is both sharp and clear. For further details, refer to: ◆ “Storing Channels Automatically ” on page 14 ◆ “Storing Channels Manually” on page 16 Rear of the TV or Cable Television Network English - 9 AA68-03554A-X5Eng 2/17/05 12:03 PM Page 10 Switching Your Television On and Off The mains lead is attached to the rear of your television. 1 Plug the mains lead into an appropriate socket. ➢ 2 The main voltage is indicated on the rear of the television and the frequency is 50 or 60Hz. Press the “ Result: 3 ” button (On/Off) on the front of the television. The Standby indicator on the front of the television lights up. Press the POWER ( television on. Result: ) button on the remote control to switch the The programme that you were watching last is reselected automatically. you have not yet stored any channels, No clear picture ➢ Ifappears. Refer to “Storing Channels Automatically” on page 14 or “Storing Channels Manually” on page 16. 4 To switch your television off, press the “ ” button (On/Off) again. Placing Your Television in Standby Mode Your television can be placed in Standby mode, in order to reduce: ◆ Power consumption ◆ Wear of the cathode ray tube The Standby mode can be useful when you wish to interrupt viewing temporarily (during a meal, for example). 1 Press the POWER ( Result: 2 ) button on the remote control. The screen is turned off and the Standby indicator on the front of the television lights up in red. To switch the television back on, simply press the POWER ( button again. can also switch on by pressing the TV ( ➢ You numeric buttons. ☛ English - 10 ), P / ) , or Do not leave your television in Standby mode for long periods of time (when you are away on holiday, for example). Turn your television off by pressing the “ ” button (On/Off) on the front of the television. It is best to unplug the set from the mains and aerial. AA68-03554A-X5Eng 2/17/05 12:03 PM Page 11 Becoming Familiar with the Remote Control The remote control is used mainly to: ◆ Change channels and adjust the volume ◆ Set up the television using the on-screen menu system The following table presents the most frequently used buttons and their functions. Button Viewing Function Menu Function Used to display the next stored channel. - Used to display the previous stored channel. to -/-- PRE-CH Used to display the corresponding channels. Used to select a channel numbered ten or over. Press this button, and the “--” symbol is displayed. Enter the two-digit channel number. Press the PRE-CH button. The TV will switch to the last channel viewed. To quickly switch between two channels that are far apart, tune to one channel, then use the number button to select second channel. Then, use the PRE-CH button to quickly alternate between them. Used to increase the volume. - Used to decrease the volume. - MUTE Used to switch the sound off temporarily. To turn the sound back on, press this button again, or press the or button. MENU Used to display the on-screen menu system. Used to return to the previous menu or normal viewing. - Used to: ◆ Display a submenu containing selections for the current menu option ◆ Increase/decrease a menu option value - Used to confirm your choice. - Used to exit from the menu system and return to normal viewing directly. Used to switch the television on when it is in Standby mode. Used to exit from the menu system and return to normal viewing directly EXIT TV ➢ English - 11 AA68-03554A-00Eng 3/9/05 2:38 PM Page 12 Plug & Play Feature When the television is initially powered on, three basic customer settings proceed automatically and subsequently: setting the language, channel and clock. Plug & Play 1 TV Language English Deutsch Français Nederland Español Italiano Svenska Português ∂ÏÏËÓÈο âe‰tina Srpski Hrvatski Român™ Magyar Polski êÛÒÒÍËÈ Å˙΄‡ÒÍË Türkçe Norsk Dansk Suomi Move If the television is in Standby mode, press the POWER ( on the remote control. Result: 2 Skip ) button The message Plug & Play is displayed. It flickers for a little while and then Language menu is automatically displayed. Select the appropriate language by pressing the ▲ or ▼ button. Press the MENU ( ) button to enter the language. Result: ➢ The message Check antenna input. is displayed. If any language is not selected on the Language menu, the Language menu will disappear about 30 seconds later. Check antenna input. 3 œ √ Move Skip Make sure that the antenna is connected to the TV. Press the œ or √ button. Result: 4 Auto Store TV Country Search œ Belgium : -/+ √ The Auto Store menu is displayed with Country is selected. Select your country by pressing the œ or √ button. To search the channels, select Search by pressing the ▲ or ▼ button, and then press the œ or √ button. Press the MENU ( ) button to stop the search. Result: ➢ Move TV œ √ Adjust Skip 5 Clock -- : -Sleep Timer : Off On Timer -- : -- Off Off Timer -- : -- Off On Timer Volume : 10 On Timer Channel : P 1 Move œ √ Adjust Skip Enjoy your watching. 6 Refer to “Storing Channels Automatically” on page 14. Press the œ or √ button to move to the hour or minute. Set the hour or minute by pressing the ▲ or ▼ button. ➢ Time The Time menu is displayed with Clock is selected. Refer to “Setting and Displaying the Current Time” on page 31. When you have finished, press the MENU ( Result: 7 The message Enjoy your watching. is displayed, and then the channel which has been stored will be activated. If you want to reset this feature... 1 Press the MENU ( 2 Press the ▲ or ▼ button to select Setup, and then press the œ or √ button. Result: TV ) button. ) button. The Plug & Play is selected. Setup √ Plug & Play Language : English √ Time Blue Screen : Off Melody : 0n √ Demonstration Move œ √ Enter English - 12 Return 3 Press the œ or √ button again. Result: ➢ This feature starts with the message Plug & Play is displayed. When you wish to exit from the Plug & Play, press the EXIT ( ) button on the remote control. AA68-03554A-00Eng 3/9/05 2:38 PM Page 13 Viewing the Demonstration To become familiar with the various menus provided by your television, you can view the inbuilt demonstration. 1 Press the MENU ( Result: 2 ) button. The main menu is displayed. Press the ▲ or ▼ button to select Setup. Result: The options available in the Setup group are displayed. 3 Press the œ or √ button. 4 Press the ▲ or ▼ button to select Demonstration. 5 TV Press the œ or √ button. Result: ➢ Setup √ Plug & Play Language : English √ Time Blue Screen : Off Melody : 0n √ Demonstration Each of the menu options is displayed in turn. When you wish to exit from the demonstration, press the EXIT ( ) button on the remote control. Move œ √ Enter Return Choosing Your Language When you start using your television for the first time, you must select the language which will be used for displaying menus and indications. 1 Press the MENU ( Result: 2 ) button. The main menu is displayed. Move The options available in the Setup group are displayed. Press the œ or √ button. 4 Press the ▲ or ▼ button to select Language. 5 Press the œ or √ button. 6 Select the appropriate language by pressing the ▲ or ▼ button repeatedly. Setup √ Plug & Play œ English √ Language √ Time Blue Screen : Off Melody : 0n √ Demonstration Press the ▲ or ▼ button to select Setup. Result: 3 TV œ √ Enter TV Return Language English Deutsch Français Nederland Español Italiano Svenska Português ∂ÏÏËÓÈο âe‰tina Move Srpski Hrvatski Român™ Magyar Polski êÛÒÒÍËÈ Å˙΄‡ÒÍË Türkçe Norsk Dansk Suomi Return English - 13 AA68-03554A-00Eng 3/9/05 2:38 PM Page 14 Storing Channels Automatically TV Channel √ √ √ √ √ Auto Store Manual Store Add/Delete Sort Name † More You can scan for the frequency ranges available to you (and availability depends on your country). Automatically allocated programme numbers may not correspond to actual or desired programme numbers. However you can sort numbers manually and clear any channels you do not wish to watch. 1 Press the MENU ( Result: Move œ √ Enter œ Belgium : -/+ Press the ▲ or ▼ button to select Channel. Result: Auto Store Country Search 3 4 œ √ Adjust TV Press the œ or √ button. Move : Belgium œ -/+ œ √ Search Select your country by pressing the œ or √ button. The countries are displayed in the following order: Belgium - France - Germany - Italy - Nederlands - Spain Sweden - Switzerland - Unitde Kingdom - Others Eastren Europe 6 Press the ▲ or ▼ button to select Search. 7 Press the œ or √ button to start the search. Result: ➢ P 1 C-- ----106 MHz 8 7 % Sort From To Store œ P 1 ----: P-- ----: ? To stop the search before it has finished, press the MENU ( ) button. When searching and storing are complete, the Sort menu is displayed. ◆ To exit from the channel store function without sorting the channels, press the MENU ( ) button repeatedly until the menus disappear. √ 9 Move The horizontal bar is displayed, and then channels are stored in an order which reflects their positions in the frequency range. Finally, the search will end automatically. ◆ To sort the stored channels into the desired numerical order, go to Step 6 of the “Sorting the Stored Channels” procedure on page 15. Return TV The options available in the Auto Store group are displayed with Country is selected. 5 √ Return The Auto Store is selected. Press the œ or √ button again. Result: Return Auto Store Country Search The options available in the Channel group are displayed. √ Result: Move The main menu is displayed. Return 2 TV ) button. œ √ Adjust English - 14 Return When the channels have been stored, you can: ◆ ◆ ◆ ◆ ◆ Sort them in the order required (refer to page 15) Clear a channel (refer to page 18) Assign a name to the stored channels (refer to page 19) Fine tune channel reception if necessary (refer to page 20) Activate the Digital Noise Reduction feature (refer to page 24) AA68-03554A-00Eng 3/9/05 2:38 PM Page 15 Sorting the Stored Channels This operation allows you to change the programme numbers of stored channels. This operation may be necessary after using auto store. You can delete the channels you do not want to keep. 1 Press the MENU ( Result: 2 TV Auto Store Manual Store Add/Delete Sort Name † More ) button. The main menu is displayed. Press the ▲ or ▼ button to select Channel. Result: Press the œ or √ button. 4 Press the ▲ or ▼ button to select Sort. 5 Press the œ or √ button. Result: Move The options available in the Channel group are displayed. 3 Channel Sort TV From To Store Move Select the channel number that you wish to change by pressing the œ or √ button repeatedly. 7 Press the ▲ or ▼ button to select To. Select the new channel number which you wish to identify by pressing the œ or √ button repeatedly. 9 œ P 1 ----: P-- ----: ? √ From To Store Press the ▲ or ▼ button to select Store. Select OK to confirm the exchange of channel numbers by pressing the œ or √ button. The selected channel is exchanged with the one previously stored to the chosen number. For all the channels to move to the required channel numbers, repeat steps 6 to 8 after selecting the From by pressing the ▲ or ▼ button. œ √ Adjust Return Sort TV can also select the channel number directly by pressing ➢ You the numeric buttons (0~9). Result: Return The options available in the Sort group are displayed with From is selected. 6 8 œ √ Enter √ √ √ √ √ Move TV : P 1 ----œ P 3 ----: ? œ √ Adjust √ Return Sort From To Store Move : P 3 ----: P 1 ----œ OK œ √ Adjust English - 15 √ Return AA68-03554A-00Eng 3/9/05 2:38 PM Page 16 Storing Channels Manually TV You can store up to 100 television channels, including those received via cable networks. Channel √ √ √ √ √ Auto Store Manual Store Add/Delete Sort Name † More Move œ √ Enter When storing channels manually, you can choose: ◆ Whether or not to store each of the channels found ◆ The programme number of each stored channel which you wish to identify Return 1 Press the MENU ( Result: ) button. The main menu is displayed. Manual Store TV œ P 1----Programme Colour System : AUTO Sound System : BG Search : 0MHz Channel : C-Store : ? Move œ √ Adjust √ 2 Result: Return Press the œ or √ button. 4 Press the ▲ or ▼ button to select Manual Store. 5 Press the œ or √ button. Result: Programme : P 1----œ AUTO √ Colour System Sound System : BG Search : 0MHz Channel : C-Store : ? Move œ √ Adjust To assign a programme number to a channel, press the œ or √ button. 7 Press the ▲ or ▼ button to select Colour System. Indicate the broadcasting standard required by pressing the œ or √ button repeatedly. Return Manual Store Programme : P 1----Colour System : AUTO œ BG Sound System Search : 0MHz Channel : C-Store : ? Move œ √ Adjust English - 16 8 √ Return The options available in the Manual Store group are displayed with Programme is selected. 6 Result: TV The options available in the Channel group are displayed. 3 Manual Store TV Press the ▲ or ▼ button to select Channel. The colour standards are displayed in the following order: AUTO - PAL - SECAM - NT4.43 Press the ▲ or ▼ button to select Sound System. Select the sound standard required by pressing the œ or √ button repeatedly. Result: The sound standards are displayed in the following order: BG - DK - I - L AA68-03554A-00Eng 3/9/05 2:38 PM Page 17 Storing Channels Manually (continued) 9 If you know the number of the channel to be stored, see the following steps. ◆ Press the ▲ or ▼ button to select Channel. Programme : P 1----Colour System : AUTO Sound System : BG Search : 0MHz œ C 1 Channel Store : ? ◆ Press the √ button. ◆ Press the ▲ or ▼ button to select C (Air channel) or S (Cable channel). ◆ Press the √ button. ◆ Press the ▲ or ▼ button to select indicate the required number. You can also select the channel number directly by pressing the numeric buttons (0~9). ➢ Adjust The tuner scans the frequency range until the first channel or the channel that you selected is received on your screen. 11 To store the channel and associated programme number, select Store by pressing the ▲ or ▼ button. Press the œ or √ button to select OK. 12 Repeat Steps 9 to 11 for each channel to be stored. Move TV œ √ Search Return Manual Store Programme : P 1----Colour System : AUTO Sound System : BG Search : 46MHz Channel : C 1 œ OK √ Store Move ☛ Return Programme : P 1----Colour System : AUTO Sound System : BG œ 46MHz √ Search Channel : C 1 Store : ? If you do not know the channel numbers, select Search by pressing the ▲ or ▼ button. Press the œ or √ button to start the search. Result: œ √ Move √ Manual Store TV no sound or abnormal sound, re-select the sound standard ➢ Ifrequired. 10 Manual Store TV œ √ Adjust Channel mode ◆ P (Programme mode): When completing tuning, the broadcasting stations in your area have been assigned to position numbers from P00 to max P99. You can select a channel by entering the position number in this mode. ◆ C (Real channel mode): You can select a channel by entering the assigned number to each air broadcasting station in this mode. ◆ S (Cable channel mode): You can select a channel by entering the assigned number for each cable channel in this mode. English - 17 Return AA68-03554A-00Eng 3/9/05 2:38 PM Page 18 Skipping Unwanted Channels TV You can exclude the channels you chosen from the channels you scanned. When you scan through the stored channels, those you have chosen to skip are not displayed. Channel Auto Store Manual Store Add/Delete Sort Name † More œ √ Enter Move √ √ √ √ √ All of the channels that you do not specifically choose to skip are displayed during scanning. 1 Return Result: 2 Add/Delete TV P P P P 1 2 3 4 œ : : : Added Added Added Added œ √ Adjust Move Press the MENU ( Result: Add/Delete P P P P Move 1 2 3 4 œ : : : Deleted Added Added Added œ √ Adjust Press the œ or √ button. 4 Press the ▲ or ▼ button to select Add/Delete. 5 Press the œ or √ button. English - 18 The stored channels are displayed. 6 Press the ▲ or ▼ button to select the channel to add or erase. If necessary, select Added or Deleted by pressing the œ or √ button. 7 Repeat Step 6 for each channel to be added or erased. √ Return The options available in the Channel group are displayed. 3 Result: TV The main menu is displayed. Press the ▲ or ▼ button to select Channel. √ Return ) button. AA68-03554A-00Eng 3/9/05 2:38 PM Page 19 Assigning Names to Channels Channel names will be assigned automatically when channel information is broadcast. These names can be changed, allowing you to assign new names. 1 Press the MENU ( Result: 2 TV Auto Store Manual Store Add/Delete Sort Name † More ) button. The main menu is displayed. Press the ▲ or ▼ button to select Channel. Result: Press the œ or √ button. 4 Press the ▲ or ▼ button to select Name. 5 Press the œ or √ button. Result: œ √ Enter Move The options available in the Channel group are displayed. 3 Channel √ √ √ √ √ Return Name TV P P P P 1 2 3 4 œ : : : ----------------- √ The current channels are displayed. 6 If necessary, select the channel to be assigned to a new name by pressing the ▲ or ▼ button. 7 Press the œ or √ button. 8 Press the ▲ or ▼ button to select a letter (A~Z), a number (0~9) or a symbol (-, space). Move on the previous or next letter by pressing the œ or √ button. 9 Repeat Steps 6 to 8 for each channel to be assigned to a new name. œ √ Adjust Move TV Return Name P P P P 1 2 3 4 Adjust œ : : : A ------------- œ √ Move English - 19 √ Return AA68-03554A-00Eng 3/9/05 2:38 PM Page 20 Fine Tuning Channel Reception If the reception is clear, you do not have to fine tune the channel, as this is done automatically during the search and store operation. If the signal is weak or distorted, you may have to fine tune the channel manually. Channel TV … More √ : Off Fine Tune LNA 1 Press the MENU ( Result: Move œ √ Enter Return 2 1 Move The options available in the Channel group are displayed. 3 Press the œ or √ button. 4 Press the ▲ or ▼ button to select Fine Tune. 5 Press the œ or √ button. 6 To obtain a sharp and clear picture and good sound quality, press the œ or √ button. P 1 Reset œ √ Adjust The main menu is displayed. Press the ▲ or ▼ button to select Channel. Result: Fine Tune ) button. Save Return Result: 7 To store the fine tuning setting in the TV’s memory, press the ENTER ( ) button. Result: 8 Channel indicator turns into Red. To erase adjusted picture or sound, select Reset by pressing the ▲ or ▼ button. Press the ENTER ( ) button. Result: English - 20 The horizontal bar is displayed. Move the horizontal bar’s cursor left or right by pressing the œ or √ button. Channel indicator returns to its original colour. AA68-03554A-00Eng 3/9/05 2:38 PM Page 21 Using the LNA (Low Noise Amplifier) feature (depending on the model) This function is very useful in the situation that the TV is used in weak signal. LNA amplifies the TV signal in the weak signal area, but not noise. This feature is working only weak signal condition, and that is memorized on current channel, additional. TV Channel … More √ œ On √ Fine Tune LNA 1 Press the MENU ( Result: 2 ) button. The main menu is displayed. Press the ▲ or ▼ button to select Channel. Result: œ √ Adjust Return The options available in the Channel group are displayed. 3 Press the œ or √ button. 4 Press the ▲ or ▼ button to select LNA. 5 To activate this feature, select On by pressing the œ or √ button. ➢ Move Setting the LNA option to “On” may produce worse picture quality due to the current channel’s signal condition. Hence, apply LNA On/Off selectively according to the picture quality that is currently displayed. Changing the Picture Standard You can select the type of picture which best corresponds to your viewing requirements. 1 Press the MENU ( Result: 2 Mode Size Scan Mode Digital NR DNIe Demo † More ) button. The main menu is displayed. Press the ▲ or ▼ button to select Picture. Result: Picture TV Move œ √ Adjust Press the œ or √ button. Result: 4 The Mode is selected. Select the required picture mode by pressing the œ or √ button repeatedly. Result: ➢ Return The options available in the Picture group are displayed. TV 3 œ Dynamic √ : Auto Wide : Natural : On : Off The following picture mode are available: Dynamic - Standard - Movie - Custom Mode Mode Contrast Brightness Sharpness Colour † More Move œ Dynamic : 70 : 50 : 50 : 50 œ √ Adjust You can also set these options simply by pressing the P.MODE ( ; Picture Mode) button. English - 21 √ Return AA68-03554A-00Eng 3/9/05 2:38 PM Page 22 Customizing the Picture Settings Your television has several settings which allow you to control the picture quality. Picture TV Mode Size Scan Mode Digital NR DNIe Demo † More Move œ Dynamic √ : Auto Wide : Natural : On : Off 3 Mode Contrast Brightness Sharpness Colour † More Move œ Standard : 50 : 50 : 50 : 45 œ √ Adjust 4 Move : Standard œ 50 : 50 : 50 : 45 Result: √ 6 Return Contrast 7 50 Mode … More Colour Tone Reset Move œ Normal œ √ Adjust TV √ √ Return Mode … More Colour Tone Reset Move :Normal œ √ Adjust English - 22 √ Return The horizontal bar is displayed. Press the œ or √ button until you reach the optimal setting. Press the MENU ( ) button. The available options are displayed again. Press the ▲ or ▼ button to select Colour Tone. Select the required option by pressing the œ or √ button repeatdly. Result: 8 TV The following picture mode are available: Dynamic - Standard - Movie - Custom Press the ▲ or ▼ button to select the option (Contrast, Brightness, Sharpness, Colour, or Tint-NTSC only) to be adjusted. Press the œ or √ button. Result: œ √ Adjust The Mode is selected. Return Mode Mode Contrast Brightness Sharpness Colour † More The options available in the Picture group are displayed. Select the required picture mode by pressing the œ or √ button repeatedly. Result: 5 TV The main menu is displayed. Press the œ or √ button. Result: √ ) button. Press the ▲ or ▼ button to select Picture. Result: Return Mode Press the MENU ( Result: 2 œ √ Adjust TV 1 The following colour tones are available: Warm2 - Warm1 - Normal - Cool1 - Cool2 To return to the factory defaults, select Reset by pressing the ▲ or ▼ button. Press the œ or √ button. The reset function is set for each mode (Dynamic, Standard, Movie, or Custom). Result: ➢ The previously adjusted settings will be reset to the factory defaults. ◆ The television has an “automatic degaussing” system that is activated if magnetic interference is present. To degauss the television screen, switch power off by pressing the “ ” (On/Off) button on the front panel. (Refer to “Automatic Degaussing to Remove Colour Patches” on page 44.) AA68-03554A-00Eng 3/9/05 2:38 PM Page 23 Selecting the Picture Size (depending on the model) You can select the picture size which best corresponds to your viewing requirements simply by pressing the “P.SIZE ( )” button. Depending on the model, the following picture sizes are available: ◆ Auto Wide, 16:9, Panorama, Zoom1, Zoom2, 4:3 ➢ 1 Lifting is available in the Zoom1 or Zoom2 mode by pressing the ▲ or ▼ button. Press the MENU ( Result: 2 ) button. Picture TV Mode Size Scan Mode Digital NR DNIe Demo † More Move : Dynamic œ Auto Wide √ : Natural : On : Off œ √ Adjust The main menu is displayed. Press the ▲ or ▼ button to select Picture. Result: The options available in the Picture group are displayed. 3 Press the œ or √ button. 4 Press the ▲ or ▼ button to select Size. 5 Press the œ or √ button to select the picture size. English - 23 Return