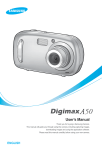
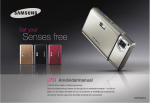
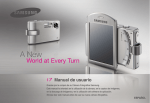
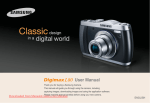
1
User Manual Thank you for buying a Samsung camera. This manual will guide you through using the camera, including capturing images, downloading images and using the application software. Please read this manual carefully before using your new camera. ENGLISH Instructions Getting to know your camera ƈ Use this camera in the following order. Set up the camera driver Take a picture Insert the USB cable Before connecting the camera to a PC, via the USB cable, you will need to set up the camera driver. Install the camera driver that is contained in Application software CD-ROM. (p.101) Take a picture. (p.17) Insert the supplied USB cable into the PC’s USB port and the camera’s USB connection terminal. (p.104) Check the camera’s power Check the camera’s power. If the power is turned off, press the camera button to turn it on. (p.14, 22) Check [Removable Disk] Open Windows EXPLORER and search for Removable Disk (SAMSUNG). (p.105) Thank you for buying a Samsung Digital Camera. ƃ Prior to using this camera, please read the user manual thoroughly. ƃ When you require After Sales service, please bring the camera and the cause of the camera malfunction (such as battery, Memory card etc.) to the A/S centre. ƃ Please check that the camera is operating properly prior to when you intend to use it (e.g. for a trip or an important event) to avoid disappointment. Samsung takes no responsibility for any loss or damage that may result from camera malfunction. ƃ Keep this manual in a safe place. ƃ If you use a card reader to copy the images on the memory card to your PC, the images could be damaged. When transferring the images taken with the camera to your PC, be sure to use the supplied USB cable to connect the camera to your PC. Please note that the manufacturer accepts no responsibility for loss or damage of images on the memory card due to the use of a card reader. Ҭ Microsoft, Windows and Windows logo are registered trademarks of Microsoft Corporation incorporated in the United States and/or other countries. Ҭ is a trademark of SRS Labs, Inc. WOW HD technology is incorporated under license from SRS Labs, Inc. Ҭ All brand and product names appearing in this manual are registered trademarks. Ҭ The contents and illustrations in this manual are subject to change without prior notice for upgrading the camera functions. HD ŝ1Ş Danger DANGER indicates an imminently hazardous situation which, if not avoided, will result in death or serious injury. ƈ Do not attempt to modify this camera in any way. To do so may result in fire, injury, electric shock or severe damage to you or your camera. Internal inspection, maintenance and repairs should only be carried out by your dealer or Samsung Camera Service centre. ƈ Please do not use this product in close proximity to flammable or explosive gases, as this could increase the risk of explosion. ƈ Should any form of liquid or a foreign object enter the camera, do not use it. Switch off the camera, and then disconnect the power source. You must contact your dealer or Samsung Camera Service centre. Do not continue to use the camera as this may cause a fire or electric shock. ƈ Do not insert or drop metallic or inflammable foreign objects into the camera through access points e.g. the memory card slot and battery chamber. This may cause a fire or electric shock. ƈ Do not operate this camera with wet hands. This could pose a risk of electric shock. ŝ2Ş Warning WARNING indicates a potentially hazardous situation which, if not avoided, could result in death or serious injury. ƈ Do not use the flash in close proximity to people or animals. Positioning the flash too close to your subject’s eyes may cause eyesight damage. ƈ For safety reasons keep this product and accessories out of reach of children or animals to prevent accidents e.g.: ҮSwallowing battery or small camera accessories. If an accident should occur, please consult a doctor immediately. ҮThere is the possibility of injury from the camera’s moving parts. ƈ Battery and camera may become hot during prolonged use and it may result in camera malfunction. Should this be the case, allow the camera to sit idle for a few minutes to allow it time to cool. ƈ Do not leave this camera in places subject to extremely high temperatures, such as a sealed vehicle, direct sunlight or other places with extremes of temperature. Exposure to extreme temperatures may adversely affect the camera’s internal components and could cause a fire. ƈ When in use, do not cover the camera or Charger. This may cause heat to build up and distort the camera body or cause a fire. Always use the camera and its accessories in a well-ventilated area. Caution CAUTION indicates a potentially hazardous situation which, if not avoided, may result in a minor or moderate injury. ƈ Leaking, overheating, or damaged battery could result in fire or injury. ҮUse battery with the correct specification for the camera. ҮDo not short circuit, heat or dispose of battery in fire. ҮDo not insert the battery with the polarities reversed. ƈ Remove the battery when not planning to use the camera for a long period of time. Otherwise the battery may leak corrosive electrolyte and permanently damage the camera’s components. ƈ Do not fire the flash while it is in contact with hands or objects. Do not touch the flash after using it continuously. It may cause burns. ƈ Do not move the camera while it is switched on, if you are using the AC Charger. After use, always switch off the camera before unplugging the cable from the wall socket. Then make sure that any connector cords or cables to other devices are disconnected before moving the camera. Failure to do so may damage the cords or cables and cause a fire or electric shock. ƈ Take care not to touch the lens or lens cover to avoid taking an unclear image and possibly causing camera malfunction. ƈ Avoid obstructing the lens or the flash when you capture an image. ƈ When using this camera in low temperatures, the following cases may be found. These are not camera malfunctions and usually recover at normal temperature. - It takes more time to turn on the LCD monitor and the colour may be differ from the subject. - When changing the composition, there may be an after image on the LCD monitor. ƈ Credit cards may be demagnetized if left near case. Avoid leaving magnetic strip cards near the case. Contents READY ƃSystem chart ōōōōōōōōō5 ƃIdentification of featuresōōōōō6 ƈSelf-timer lamp ōōōōōōōō8 ƈCamera Status Lamp ōōōōō8 ƃConnecting to a Power Sourceōō9 ƈHow to charge the rechargeable battery (SLB-0837) ōōōōōō10 ƃInserting the memory card ōōō11 ƃInstructions on how to use the memory card ōōōōōōōō12 ƃWhen Using the Camera for the First Time ō14 RECORDING ƃStarting the recording mode ōō15 ƈSelecting modes ōōōōōōō16 ƈHow to use the AUTO mode ōō17 ƈHow to use the PROGRAM mode ō17 ƈHow to use the MOVIE CLIP modeō17 ƈPausing while recording a movie clip (Successive Recording) ōōōō18 ƈHow to use the ASR (Advanced Shake Reduction) modeōōōō18 ƈWise Shot ōōōōōōōōō19 ƈHow to use the SCENE mode ō19 ƈFace recognition ōōōōōōō20 ƃThings to watch out for when taking pictures ōōōōōōōōōōō20 ƃFocus lockōōōōōōōōōō21 ƃUsing the camera buttons to set the camera ō22 ƈPOWER button ōōōōōōō22 ƈSHUTTER button ōōōōōō22 ƈFR (Face Recognition) / Lock button ō22 ƈZOOM W / T button ōōōōō23 ƈInfo / Up (Ɗ) button ōōōōō24 ƈMacro / Down (ƌ) button ōōō25 ƈFlash / Left (Ȝ) button ōōōō26 ƈSelf-timer / Right (Ȟ) button ōō28 ƈM (Mode) button ōōōōōōō29 ƈFn button ōōōōōōōōōō29 ƈE (Effect) button ōōōōōōō33 ƈE (Effect) button : Colour ōōō34 ƈE (Effect) button : Special Colour ō35 ƈE (Effect) button : Image editing ō36 ƈE (Effect) button : Funōōōōō37 ƈPreset focus frames ōōōōō37 ƈComposite shooting ōōōōō38 ƈPhoto Frame ōōōōōōōō40 ƈMENU / OK button ōōōōōō41 ƃUsing the LCD monitor to adjust the camera settings ōōōōōō41 ƈSharpness ōōōōōōōōō42 ƈContrast ōōōōōōōōōō42 ƈAuto Focus type ōōōōōōō42 ƈVoice Memo ōōōōōōōō43 ƈVoice Recording ōōōōōōō43 ƈRecording the movie clip without voice ō44 ƈSCENE mode ōōōōōōōō44 PLAY ƃStarting play mode ōōōōōō45 ŝ3Ş Contents ƈPlaying back a still image ōōō45 ƈPlaying back a movie clip ōōō45 ƈMovie clip capture functionōōō46 ƈOn camera movie trimming ōō46 ƈPlaying back a recorded voice ō47 ƈPlaying back a voice memo ōō47 ƃLCD monitor Indicator ōōōōō48 ƃUsing the camera buttons to adjust the camera ōōōōōōōōō48 ƈPlay mode button ōōōōōō48 ƈThumbnail / Enlargement button / Volume button ōōōōōōōō49 ƈInfo / Up (Ɗ) button ōōōōō50 ƈPlay & Pause / Down (ƌ) button ō51 ƈLeft (Ȝ) / Right (Ȟ) / Menu / OK button ōōōōōōōōōōō51 ƈDelete button ōōōōōōōō52 ƈPrinter button ōōōōōōōō52 ƈSpecial Effect (E button) : Resizeō52 ƈSpecial Effect (E button) : Rotating an image ōōōōōōōōōō53 ƈSpecial Effect (E button) : Colour ō54 ƈSpecial Effect (E button) : Special Colour ōōōōōōōōōōō54 ƈSpecial Effect (E button) : Image editing ōōōōōōōōōōō56 ƈSpecial Effect (E button) : FUN ō57 ƈCartoon ōōōōōōōōōō57 ƈPreset focus frames ōōōōō59 ƈComposite image ōōōōōō60 ƈPhoto Frame ōōōōōōōō61 ƈSticker ōōōōōōōōōōō62 ŝ4Ş ƈText Typing ōōōōōōōōō63 ƃText Typing ōōōōōōōōō64 ƃSetting up the play back function using the LCD monitorōōōōō65 ƃSlide Show ōōōōōōōōō66 ƃAlbum ōōōōōōōōōōō68 ƈView ōōōōōōōōōōōō68 ƈPassword setup ōōōōōōō69 ƃVoice memo ōōōōōōōōō70 ƃDeleting images ōōōōōōō70 ƃProtecting images ōōōōōō71 ƃDPOF ōōōōōōōōōōō71 ƃDPOF : STANDARD ōōōōō72 ƃDPOF : Index ōōōōōōōō72 ƃDPOF : Print size ōōōōōōō73 ƃCopy To Card ōōōōōōōō73 ƃPictBridge ōōōōōōōōōō74 ƃPictBridge : Picture Selection ōō75 ƃPictBridge : Print Setting ōōōō75 ƃPictBridge : Reset ōōōōōō76 ƃSound menuōōōōōōōōō76 ƃSound ōōōōōōōōōōō77 SETUP ƃSetup menu ōōōōōōōōō78 ƃSetup menu 1 ōōōōōōōō79 ƈFile name ōōōōōōōōōō79 ƈLANGUAGE ōōōōōōōō79 ƈSetting up the Date / Time / Date type ōōōōōōōōōōōō79 ƈImprinting the recording date ōō80 ƈLCD brightness ōōōōōōō80 ƈAuto Focus lamp ōōōōōōō80 ƈStart up image ōōōōōōōō80 ƃSetup menu 2 ōōōōōōōō81 ƈQuick view ōōōōōōōōō81 ƈAuto power off ōōōōōōōō81 ƈLCD saveōōōōōōōōōō81 ƈSelecting Video out typeōōōō82 ƈPassword setup ōōōōōōō83 ƈFormatting a memory ōōōōō83 ƈInitialisation ōōōōōōōōō83 MP3 / PMP / TEXT VIEWER Mode ƃMP3 / PMP / TEXT VIEWER Mode ō84 ƃStarting the MP3 / PMP / TEXT VIEWER modeōōōōōōōō85 ƃLCD monitor indicator for MP3 / PMP / TEXT VIEWER mode ōō87 ƃUsing the camera buttons to adjust the camera ōōōōōōōōō88 ƈVolume button ōōōōōōōō88 ƈPlay & Pause / Seeking button ō88 ƈDelete button ōōōōōōōō88 ƈHold / Equalizer button ōōōō89 ƈPlaylist button ōōōōōōōō89 ƃSetting up the playback function using the LCD monitorōōōōō90 ƈResume ōōōōōōōōōō91 ƈPlay mode ōōōōōōōōō91 ƈSkin of MP3 player ōōōōōō91 ƈPlaying back the slide show ōō92 ƈSetting slide show interval ōōō92 ƈDelete all ōōōōōōōōōō92 ƈFrame search ōōōōōōōō92 ƈDisplay setting ōōōōōōōō93 ƈSetting up the recording function in the MP3 modeōōōōōōō93 ƈAuto Scroll ōōōōōōōōō93 ƈMP3 BGM Setting ōōōōōō94 ƈLanguage setting ōōōōōō94 ƃImportant notes ōōōōōōō94 ƃWarning indicator ōōōōōōō96 ƃBefore contacting a service centre ō96 ƃSpecification ōōōōōōōōō98 SOFTWARE ƃSoftware Notes ōōōōōōō101 ƃAbout the softwareōōōōōō101 ƃSetting up the application softwareō102 ƃStarting PC mode ōōōōōō104 ƃRemovable Diskōōōōōōō105 ƃRemoving the removable disk ō106 ƃSetting up the USB Driver for MAC ō107 ƃUsing the USB Driver for MAC ō107 ƃRemoving the USB Driver for Windows 98SE ōōōōōōō107 ƃDigimax Converterōōōōōō108 ƃDigimax Master ōōōōōōō109 ƃFAQōōōōōōōōōōōō112 System chart Please check that you have the correct contents before using this product. The contents can vary depending on the sales region. To buy the optional equipment, contact your nearest Samsung dealer or Samsung service centre. < Included items > Computer Camera case User manual, Product warranty DPOF compatible printer (see p.71) Camera strap Software CD (see p.101~102) SD memory card / MMC (see p.12) AC adapter (SAC-45) / USB cable (SUC-C2) PictBridge compatible printer (see p.74) Earphones AV cable Rechargeable battery (SLB-0837) External monitor (see p.82) ŝ5Ş Identification of features Front & Top Power button Shutter button Speaker Face Recognition (FR) / Lock button Flash Self-timer / AF lamp Lens Microphone ŝ6Ş Identification of features Back Earphones jack Zoom W (Thumbnail) / Zoom T (Digital zoom) / Volume button Camera status lamp LCD monitor Camera strap 9 button touch pad (Smart button) ŝ7Ş Identification of features ƈ Self-timer lamp Side / Bottom Icon Status Blinking Blinking Battery chamber Memory card slot Blinking Description For the first 8 seconds, the lamp blinks at 1 second intervals. For the final 2 seconds, the lamp blinks quickly at 0.25second intervals. For the 2 seconds, the lamp blinks quickly at 0.25-second intervals before taking a picture. A picture will be taken after about 10 seconds and 2 seconds later a second picture will be taken. Battery chamber cover ƈ Camera Status Lamp Battery lock lever Status Power on After taking a picture When the USB cable is attached to a computer Transmitting Data with a PC When the USB cable is attached to a printer When the printer is printing Tripod socket ŝ8Ş USB / AV port When the AF activates Description The lamp turns on and off when the camera is ready to take a picture The lamp blinks while saving the image data and turns off when the camera is ready to take a picture The lamp is on (The lamp will be turned off after recognising the camera) The lamp is off (LCD monitor turns off) The lamp turns on The lamp blinks The lamp turns on (The camera focus on the subject) The lamp blinks (The camera doesn't focus on the subject) Connecting to a Power Source ƈ You should use the rechargeable battery (SLB-0837) supplied with the camera. Be sure to charge the battery before using the camera. Battery life / Number of images Conditions MP3 Approx. 210 MIN Using the fully charged battery Turning off the LCD monitor PMP Approx. 135 MIN Using the fully charged battery ƈ SLB-0837 rechargeable battery Specification Model Multi Media SLB-0837 Type Lithium Ion Capacity 860mAh Voltage 3.7V Charging time (When the camera is turned off) ſ These figures are measured under Samsung’s standard conditions and shooting conditions and may vary depending on the user’s methods. Approx. 150 MIN ƈ Number of images and battery life : Using the SLB-0837 Battery life / Number of images Still image Approx. 90 MIN / Approx. 180 shots Movie Approx. 80 MIN Conditions Using the fully charged battery, Auto mode, 7M image size, Fine image quality, Shot to shot interval: 30Sec. Changing the zoom position between Wide and Tele after every shot. Using the flash on every second shot. Using the camera for 5 minutes and then Powering it off for 1 minute. Using the fully charged battery 640x480 image size 30fps frame rate INFORMATION Important information about battery usage. ƃ When the camera is not used, turn off the camera power. ƃ Please remove the battery if the camera will not be used for long periods. Batteries can lose power over time and are prone to leaking if kept inside the camera. ƃ Low temperatures (below 0˚C) can affect the performance of the battery and you may experience reduced battery life. ƃ Batteries will usually recover at normal temperatures. ƃ During extended use of the camera, the camera body may become warm. This is perfectly normal. ƃ When you use earphones, do not remove the battery while the camera is turning on. It may generate a loud noise. ſ These figures are measured under Samsung’s standard conditions and shooting conditions and may vary depending on the user’s methods. ŝ9Ş Connecting to a Power Source ƈ You can charge the rechargeable battery (SLB-0837) by using the SAC-45 KIT which consists of the AC adapter (SAC-45) and the USB cable (SUC-C2). When the SAC-45 and SUC-C2 are combined, they can be used as an AC cable. ƃ Using an AC cable : Connect the AC adapter to the USB cable. It can be used as a power cable. ƃ Using a USB cable : Remove the AC adapter (SAC-45). You can download stored images to your PC (p.104) or supply the power to your camera through the USB cable. CAUTION Important information about USB cable usage. ƃ Use a USB cable (SUC-C2) with the correct specification. ƃ If the camera is connected to the PC through a USB hub : connect the camera directly to the PC. ƃ If the camera and other devices are connected to the PC at the same time : remove other device. ƃ If the USB cable is connected to a port located on the front of the PC : remove the cable and connect it to a port located on the back of the PC. ƃ If the USB port of the PC doesn't meet the Power output standard (5V, 500mA), the camera may not be charged. ƈ How to charge the rechargeable battery (SLB-0837) Charging LED ŝ10Ş Connecting to a Power Source CAUTION ƃ Before inserting any cables or AC adapter, check the directions and do not insert by force. It may cause breakage of cable or camera. ƃ If the charging LED of the AC Charger does not turn on or blink after inserting the rechargeable battery, please check whether the battery is inserted correctly. ƃ If you charge the battery with the camera power on, the battery can't charge fully. Turn the camera off while charging the battery. ƈ Insert the battery as shown - If the camera does not turn on after you have inserted battery, please check whether the battery is inserted with the correct polarity (+ / -). - When the battery chamber cover is opened, do not force the battery chamber cover. This may damage it. ƈ There are 4 indicators for battery condition that are displayed on the LCD monitor. Battery indicator ƈ Charging LED of the AC Adapter Charging LED Being Charged Red LED is on Charging is complete Green LED is on Charging error Red LED is off or blinking Being discharged (Using the AC adapter) Orange coloured LED is on ƃ If you insert the fully discharged battery to charge it, do not turn on the camera at the same time. The camera may not be turned on because of the low battery capacity. Charge the battery for more than 10 minutes before using the camera. ƃ Do not use the flash frequently or take a movie clip with the fully discharged battery charged for a short time. Even if the charger is inserted, the camera power may be turned off because the rechargeable battery is discharged again. Battery status Low battery capacity Low battery capacity Flat battery. The battery is (Prepare to recharge (Prepare to recharge Recharge or use fully charged or use spare battery) or use spare battery) spare battery. Inserting the memory card ƈ Insert the memory card as shown. - Turn off the camera’s power before inserting the memory card. - Have the front of the memory card facing toward the back of the camera (LCD monitor) and the card pins toward the front of the camera (Lens). - Do not insert the memory card the wrong way round. Doing so may damage the memory card slot. ŝ11Ş Instructions on how to use the memory card ƃ Be sure to format the memory card (see p.83) if you are using a newly purchased memory card for the first time, if it contains data that the camera cannot recognise, or if it contains images captured with a different camera. ƃ Turn off the camera power whenever the memory card is being inserted or removed. ƃ Repeated use of the memory card will eventually reduce the memory card’s performance. Should this be the case, you will need to purchase a new memory card. Wear and tear on the memory card is not covered by the Samsung warranty. ƃ The memory card is an electronic precision device. Do not bend, drop or subject the memory card to any heavy impact. ƃ Do not store the memory card in an environment with strong electronic or magnetic fields, e.g. near loud speakers or TV receivers. ƃ Please do not use or store in an environment where there are extremes in temperature. ƃ Do not allow the memory card to become dirty or to come into contact with any liquid. Should this happen, clean the memory card with a soft cloth. ƃ Please keep the memory card in its case when not in use. ƃ During and after periods of extended use, you may notice that the memory card is warm. This is perfectly normal. ƃ Do not use a memory card that is used in another digital camera. To use the memory card in this camera, format the memory card using this camera. ƃ Do not use a memory card formatted by another digital camera or memory card reader. ŝ12Ş ƃ If the memory card is subjected to any of the following, the recorded data may become corrupted : - When the memory card is used incorrectly. - If the power is switched off or the memory card is removed while recording, deleting (formatting) or reading. ƃ Samsung cannot be held responsible for lost data. ƃ It is advisable to copy important data onto other media as back-up e.g. floppy disks, hard disks, CD etc. ƃ If there is insufficient memory available : A [Memory Full!] message will appear and the camera will not operate. To optimise the amount of memory in the camera, replace the memory card or delete unnecessary images stored on the memory card. Instructions on how to use the memory card INFORMATION ƃ Don't remove the memory card when the camera status lamp is blinking as this may cause damage to data in the memory card. ƈ When using a 512MB MMC (Multi Media Card), the specified shooting capacity will be as follows. These figures are approximate as image capacities can be affected by variables such as subject matter and memory card type. Recorded image Super Fine size ƈ The camera can use SD Memory Cards and MMC (Multi Media Cards). Card pins Write protect switch Label [SD (Secure Digital) memory card] The SD memory card has a write protect switch that prevents image files from being deleted or formatted. By sliding the switch to the bottom of the SD memory card, the data will be protected. By sliding the switch to the top of the SD memory card, the data protection will be cancelled. Slide the switch to the top of the SD memory card before taking a picture. Still Image Print Wide Movie clip Fine Normal 137 263 380 189 359 511 293 540 750 930 1456 1793 154 295 425 176 338 485 256 481 680 856 1402 1780 30FPS 15FPS About 20' About 40' About 40' About 60' ſ The recording times can be changed by the zoom operation. The zoom button doesn’t use during the movie recording. ŝ13Ş When Using the Camera for the First Time ƈ When the camera is turned on for the first time, a menu will be displayed to set date, time and language in the LCD monitor. This menu will not be displayed again after setting up the date, time and language. Set up the date, time and language before using this camera. ƃ Turning on the camera To turn on the camera, press the Power button ( )ڹor Open the camera ( )ںas shown. ƃ Setting up the language 1. Select the [LANGUAGE] menu by pressing the Ɗƌ button and press the Ȟ button. 2. Select the desired sub menu by pressing the Ɗƌ button and press the OK button. ƃ You can select one of the following 22 languages. - English, Korean, French, German, Spanish, Italian, S.Chinese, T.Chinese, Japanese, Russian, Portuguese, Dutch, Danish, Swedish, Finnish, Thai, Bahasa (Malay / Indonesian), Arabic, Polish, Hungarian, Czech and Turkish. ƃ Even if the camera is restarted, the language setting will be maintained. ƃ Setting up the date, time and date type 1. Select the [Date&Time] menu by pressing Setup1 the Ɗƌ button and press the Ȟ button. LANGUAGE 2007/ 02/ 01 Date&Time 2. Select the desired sub menu by pressing 13:00 the ƊƌȜȞ button and press the OK button. yy/mm/dd Ȟ button : selects YEAR / MONTH / DAY / Back OK Set HOUR / MINUTE / DATE TYPE Ȝ button : Moves the cursor to the [Date&Time] main menu if the cursor is at the first item of the date and time setup. In all other instances, the cursor will be shifted to the left of its current position. Ɗƌ button : changes the value of each item. Setup1 LANGUAGE Date&Time Back ŝ14Ş INFORMATION ENGLISGH FRANÇAIS DEUTSCH ESPAÑOL ITALIANO OK Set Starting the recording mode ڹ ں10 00:00:00 : Optical / Digital Zoom bar / Digital Zoom rate (p.23) ۄ : Battery (p.11) : Number of available shots remaining (p.13) ۅ : Image size (p.29) ۆ : Image quality / ۇ : Continuous shot : Metering (p.31) ؆ : ISO (p.31) ؇ : White Balance ؈ : Exposure ؉ 2007/02/01 01:00 PM : Date/ Time (p.79) ؊ : Camera shake ؋ : Auto Focus Frame : Available recording time (Movie clip / Voice recording) (p.13) ڻ ڼ Frame rate (p.30) : Card inserted indicator (p.12) ڻ : Recording mode (p.16) ں ڹ ۅ ڽ ڽ : Colour Effect (p.34) ھ ھ : Face Recognition (p.20) ڿ ڿ : Flash (p.26) ۀ : Self-timer (p.28) ہ : Macro (p.25) ۂ : Contrast (p.42) : Mic. off (p.44) ۃ ۆ ، ۇ (p.32) ؋ ۀ ہ (p.30) ۄ ڼ ؊ compensation (p.33) ؆ ۂ ؇ ۃ ؈ ؉ warning (p.21) : Sharpness (p.42) (p.42) ، : Voice memo (p.43) ŝ15Ş Starting the recording mode Selecting modes ƈ Mode icons ƈ You can select the desired working mode using the M (Mode) button located on the back of the camera. Mode AUTO PROGRAM MOVIE ASR SHOOTING NIGHT PORTRAIT CHILDREN LANDSCAPE CLOSE-UP TEXT SUNSET Press the M button and a menu show aside will display. Select a desired mode by using the Smart button. SCENE MULTIMEDIA ŝ16Ş DAWN PMP BACK FIRE BEACH SELF LIGHT WORKS &SNOW SHOT MP3 FOOD TEXT VIEWER CAFE Starting the recording mode ƈ How to use the AUTO mode ( ) Please select this mode for quick and easy picture taking with minimal user interaction. 1. Insert the battery (p.11) taking note of the correct polarity (+ / -). 2. Insert the memory card (p.11). As this camera has a 10MB internal memory, it is not essential to insert the memory card. If the memory card is not inserted, an image [AUTO mode] will be stored in the internal memory. If the memory card is inserted, an image will be stored on the memory card. 3. Close the battery chamber cover. 4. Press the power button to turn on the camera. (If the date / time that is displayed on the LCD monitor is incorrect, reset the date / time before taking a picture.) 5. Select the Auto mode by pressing the Mode button (p.16, 29). 6. Point the camera towards the subject and compose the image. 7. Press the shutter button to capture an image. INFORMATION ƃ If the auto focus frame turns to red when you press the shutter button down half way, it means that the camera cannot focus on the subject. Should this be the case, the camera is unable to capture an image clearly. ƈ How to use the PROGRAM mode ( ) Selecting the program mode will configure the camera with optimal settings. You can still manually configure all functions except the aperture value and shutter speed. 1. Select the Program mode by pressing the Mode button. 2. Press the menu button to configure advanced functions such as image size, quality, effects, sharpness, metering and etc. (p.29~44) [PROGRAM mode] ƈ How to use the MOVIE CLIP mode ( ) A movie clip can be recorded for as long as the available recording time of the memory capacity allows. (Min. 2 sec - Max. 1 hour) 1. Select the MOVIE CLIP mode by pressing the mode button. (Available recording time will display on the LCD monitor) [MOVIE CLIP mode] 2. Point the camera towards the subject and compose the image by using the LCD monitor. Press the shutter button and movie clips are recorded for as long as the available recording time allows. Movie clips will still be recorded if the shutter button is released. If you wish to stop recording, press the shutter button again. * Image size and type are listed below. - Image size : 640x480, 320x240 (Selectable) - File type : *.avi (MPEG-4) ſ You can record the movie without voice. (p.44) ŝ17Ş Starting the recording mode ƈ Pausing while recording a movie clip (Successive Recording) This camera allows you to temporarily stop during unwanted scenes, while recording a movie clip. Using this function, you can record your favourite scenes into a movie clip without having to create multiple movie clips. ƈ How to use the ASR (Advanced Shake Reduction) mode ( ) This mode will reduce the effect of camera shake and help you get a wellexposed image in dim conditions. Press the ASR button. ƃ Things to watch out for using the ASR mode ƃ Using Successive Recording 1. Press the shutter button and movie clips are recorded for as long as the available recording time. Movie clips will still be recorded if the shutter button is released. 2. Press the Pause button to pause recording. Press the Pause button again to resume the recording. 3. If you wish to stop recording, press the shutter button again. ŝ18Ş REC 1. The digital zoom will not operate in the ASR mode. 2. If the lighting conditions are brighter than fluorescent lighting condition, the ASR doesn’t activate. 3. If the lighting condition is darker than in [ASR mode] fluorescent lighting condition, camera shake warning indicator ( ) will display. For best results only take pictures in situations where the camera shake warning indicator ( ) is not displayed. 4. If the subject is moving the final image captured may be blurred. 5. Avoid moving the camera while the [Capturing!] message is displayed to achieve a better result. 6. As the ASR uses the camera’s digital processor, images taken using the ASR may take a little longer for the camera to process. Starting the recording mode ƈ Wise Shot Two images are taken at a time. One is taken in the Fill-In Flash mode and the other is taken in the ASR mode. You can select and save only one of the images. ƃ How to use the Wise Shot 1. Select the ASR mode by pressing the mode button. 2. Press the Fn button. (p.30) 3. Select the ( ) menu. 4. Press the Shutter button to capture images - Two images are captured in succession. Wise Shot INFORMATION ƃ In the Wise shot mode, the shutter speed value shown on the LCD monitor may be different with the real shutter speed. ſ The scene modes are listed below. [Nightscene] ( [Portrait] [Children] ( ( [Landscape] [Close up] ( ( [Text] [Sunset] [Dawn] [Backlight] ( ( ( ( [Firework] ( [Beach&Snow] ( [Self Shot] ( [Food] [Café] ( ( ) : Use this for shooting still images at night or in other dark conditions. ) : To take a picture of a person. ) : To take a picture of fast moving objects, for example, children. ) : To take pictures of distant scenery. ) : Close-up shooting for small objects such as plants and insects. ) : Use this mode to shoot a document. ) : For taking pictures of sunsets. ) : Daybreak scenes. ) : For portraits without shadows caused by backlighting. ) : Firework scenes. ) : For ocean, lake, beach and snowscape scenes. ) : Use when the photographer would also like to be in the image. ) : For taking delicious looking food. ) : For taking pictures of cafe and restaurant. ƈ How to use the SCENE mode ( ) Use the menu to easily configure optimal settings for a variety of shooting situations. - Select the Scene mode by pressing the Mode button. - Press the Menu button to select a desired scene menu. (p.44) [SCENE mode] ŝ19Ş Starting the recording mode ƈ Face recognition This mode detects the face position of the subject automatically and then sets the focus and exposure. Select this mode for quick and easy pictures of people. Selectable modes : Auto, Program, ASR, Portrait, Children, Beach&Snow, Self shot, Cafe mode. 1. Press the FR (Face Recognition) button ( ) in the selectable modes. The FR icon will be displayed on the screen left top side. 2. The size and position of the auto focus frame is set on the face of the subject automatically. INFORMATION ƃ This function can detect up to 9 persons. ƃ When the camera recognises many people at the same time, it will focus on the nearest person. ƃ When Face detection begins, the Digital Zoom cannot operate. ƃ When Face detection begins, the Effect mode cannot operate. ƃ When the face is recognised, the focus frame will be white. And the face in focus will be highlighted in green when the Shutter button is pressed halfway down. Other faces (up to 8) in the picture will be shown in grey. (Total 9) ƃ Return to previous AF mode if face recognition was failure. ƃ In some conditions this function cannot work properly - When a person wears dark glasses or when some part of the face is hidden - When the person being taken does not look at the camera ƃ The maximum available Face Recognition range is 2.7m (Wide). ƃ The nearer the subject, the faster the camera can recognize the subject. Things to watch out for when taking pictures ƈ Pressing the shutter button down half way. Lightly press the shutter button to confirm focus and flash battery charge. Press the shutter button all way down to take the picture. 3. Press the shutter button halfway. The focus frame turns to green when the focus is activated. 4. Press the shutter button fully to take a picture. [Lightly press the shutter button] ŝ20Ş [Press the shutter button] Things to watch out for when taking pictures ƈ The available recording time may vary depending on shooting conditions and camera settings. ƈ When the Flash Off or Slow synchro mode is selected in a low lighting condition, the camera shake warning indicator ( ) may appear on the LCD monitor. In this case, use a tripod, support the camera on a solid surface or change to flash shot mode. ƈ Shooting against the light : Do not take pictures into the sun. Taking a picture against the sun may make the picture dark. To take a picture against the sun, please use the [Backlight] in the scene shooting mode (see page 19), fill-in flash (see page 26), spot metering (see page 31), or exposure compensation (see page 33). ƈ Under certain conditions the auto focus system may not perform as expected. - When photographing a subject that has little contrast. - If the subject is highly reflective or shiny. - If the subject is moving at high speed. - When there is strong reflected light, or when the background is very bright. - When the subject matter has only horizontal lines or the subject is very narrow (such as a stick or flagpole). - When the surroundings are dark. Focus lock ƈ To focus on a subject not positioned in the centre of the picture, use the focus lock function. ƃ Using the Focus Lock 1. Ensure the subject is in the centre of the autofocus frame. 2. Press the SHUTTER button halfway. When the green auto focus frame lights up, it means the camera is focused on the subject. Be careful not to press the SHUTTER button all the way down to avoid taking an unwanted picture. 3. With the SHUTTER button still pressed down only halfway, move the camera to recompose your picture as desired, and then press the SHUTTER button completely to take the picture. If you release your finger from the SHUTTER button, the focus lock function will be cancelled. [The image to be captured] [Press the SHUTTER button halfway and focus on the subject] [Recompose the picture and fully press the SHUTTER button] ŝ21Ş Using the camera buttons to set the camera ƈ The recording mode function can be set up by using the camera buttons. POWER button ƃ Used for turning the camera’s power on / off. ƃ If there is no operation during the specified time, the camera's power will be turned off automatically to save battery life. Refer to page 81 for more information about the auto power off function. SHUTTER button ƃ Used for taking an image or recording voice in the RECORDING mode. ƃ In MOVIE CLIP mode : Pressing the shutter button down fully starts the process for recording a movie clip. Press the shutter button once and the movie clip is recorded for as long as the available recording time in the memory allows. If you wish to stop recording, press the shutter button again. ƃ In STILL IMAGE mode : Pressing the shutter button down halfway activates the autofocus and checks the condition of the flash. Pressing the shutter button down fully takes and stores the image. If you select voice memo recording, the recording will start after the camera has finished storing the image data. ŝ22Ş FR (Face Recognition) / Lock button ƈ This button is for quick and easy pictures of people. ƈ In MP3 and PMP mode, this button will lock the camera buttons. ZOOM W / T button ƃ This camera has a 3X optical zoom and a 5X digital zoom function. Using both will offer a total zoom ratio of 15X. ƃ TELE Zoom Optical zoom TELE Digital zoom TELE ƃ WIDE Zoom Optical zoom WIDE : Pressing the ZOOM T button. This will zoom into the subject i.e. the subject will appear nearer. : When the maximum (3X) optical zoom is selected, pressing the ZOOM T button activates the digital zoom software. Releasing ZOOM T button stops the digital zooming at the required setting. Once the maximum digital zoom (5X) is achieved, pressing the ZOOM T button will have no effect. [TELE zoom] [Optical zoom 2X] Optical zoom Digital zoom [WIDE zoom] [TELE zoom] Pressing the ZOOM W button Pressing the ZOOM W button Digital zoom WIDE Pressing the ZOOM T button Pressing the ZOOM T button : Pressing the ZOOM W button. This will zoom out from the subject i.e. the subject will appear farther away. Pressing the ZOOM W button continuously will set the camera to its minimum zoom setting i.e. the subject appears at its farthest from the camera. [WIDE zoom] : When the digital zoom is in operation, pressing the ZOOM W button will reduce the digital zooming in steps. Releasing ZOOM W button stops digital zooming. Pressing the ZOOM W button will reduce the digital zoom and then it will continue to reduce the optical zoom until the minimum setting is reached. [Digital zoom 5X] Pressing the ZOOM W button Pressing the ZOOM W button [Digital zoom 5X] [TELE zoom] [WIDE zoom] ŝ23Ş ZOOM W / T button INFORMATION ƃ Images taken using the digital zoom may take a little longer for the camera to process. Allow time for this to take place. ƃ You may notice a decrease in image quality when using the digital zoom. ƃ To view a clearer digital zoom image, press the shutter button halfway at the maximum optical zoom position and press the zoom T button again. ƃ The digital zoom can't be activated in the [Nightscene], [Children], [Text], [Close up], [Fireworks], [Self Shot], [Food], [Café] scene modes, the Movie clip mode, the ASR (Wise shot) mode and the [High light], [Photo Frame], [Composite] effect. ƃ Take care not to touch the lens as this may cause a camera malfunction. ŝ24Ş Info ( Ɗ) button ) / Up (Ɗ ƈ While the menu is showing, the Up button operates as a direction button. In the recording modes or playback mode, pressing this button will display the image information. Info ( ) button Macro ( ƌ) button ) / Down (ƌ ƈ While the menu is showing, the DOWN button operates as a direction button. When the menu is not showing, you can use the MACRO / DOWN button to take macro pictures. The distance ranges are shown below. Press the Macro button until the desired macro mode indicator displays on the LCD monitor. ƈ Types of focus modes and focus ranges (W : Wide, T : Tele) Mode Focus Type Auto ( Super macro ( [Auto focus - No icon] ) Program ( Super macro ( ) Super macro ( Focus range - Macro ( ) Normal W : 80 ~ Infinity T : 80 ~ Infinity ) ) Normal W : 5 ~ 80 T : 40 ~ 80 W:1~5 (Wide only) Focus range Mode Focus Type ) Auto macro ( W : 5 ~ Infinity T : 40 ~ Infinity W:1~5 (Wide only) Focus range Mode Focus Type ) (Unit : cm) W : 80 ~ Infinity T : 80 ~ Infinity ASR mode ( ) Auto macro ( ) W : 5 ~ Infinity T : 40 ~ Infinity Normal W : 80 ~ Infinity T : 80 ~ Infinity INFORMATION [Auto macro ( )] [Super Macro ( )] [Macro ( )] ƃ When the macro mode is selected, be particularly careful to avoid camera shake. ƃ When you take a picture within 30cm (Wide zoom) or 40cm (Tele zoom) in the Macro mode, select the FLASH OFF mode. ƃ When you take a picture within the 5cm Super macro range, the auto-focus on the camera will take longer to set the correct focus distance. ŝ25Ş Macro ( ƌ) button ) / Down (ƌ ƈ Available focusing method, by recording mode (ƃ: Selectable, ū: Infinity focus range) Mode Auto macro ƃ Super macro Macro Normal ƃ ƃ ƃ ƃ ƃ ƃ ƃ Mode Auto macro ƃ ƃ SCENE Super macro Macro Ȝ) button ) / Left (Ȝ Flash ( Normal ƃ ƃ ƃ ū ƈ When the menu is displayed on the LCD monitor, pressing the LEFT button makes the cursor shift to the left tab. ƈ When the menu is not displayed on the LCD monitor, the LEFT button operates as the FLASH button. ƃ Selecting the flash mode 1. Press the Mode button to select a RECORDING mode with the exception of Movie clip mode. 2. Press the Flash button until the desired flash mode indicator displays on the LCD monitor. 3. A flash mode indicator will be displayed on the LCD monitor. Use the correct flash to suit the environment. [Selecting the Auto flash] ƃ ƃ ū ƃ Flash range ū ƃ ū ISO AUTO (Unit : m) Normal Macro Auto macro WIDE TELE WIDE TELE WIDE TELE 0.8 ~ 3.3 0.8 ~ 2.5 0.3 ~ 0.8 0.4 ~ 0.8 0.3 ~ 3.3 0.4 ~ 2.5 ƃ ƃ ſ When the Super Macro is selected, flash is fixed as the Flash Off mode. ƃ ƃ ŝ26Ş Flash ( Ȝ) button ) / Left (Ȝ INFORMATION ƃ If you press the shutter button after selecting the Auto, Fill-in, Slow synchro flash, the first flash fires to check the shooting condition (Flash range and Power ratio of flash). Do not move the camera until the second flash fires. ƃ Using the flash frequently will reduce the life of the battery. ƃ Under normal operating conditions the re-charging time for the flash is usually within 5 seconds. If the battery is weak, the charging time will be longer. ƃ In the ASR mode, [Landscape], [Close up], [Text], [Sunset], [Dawn], [Firework], [Self Shot], [Food], [Café] scene modes and the Movie clip mode, the flash function will not operate. ƃ The image quality is not guaranteed if the subject is too close or highly reflective. ƃ When taking an image in poorly lit conditions with the flash, there may be a white speck in the captured image. The speck is caused by the the flash light reflecting off atmospheric dust. ƃ Flash mode indicator Icon Flash mode Description Auto flash If the subject or background is dark, the camera flash will operate automatically. Auto & Red eye reduction If a subject or background is dark, the camera flash will work automatically and will reduce the red-eye effect by using the red-eye reduction function. Fill in flash The flash fires regardless of the available light. The intensity of the flash will be automatically controlled to suit the prevailing conditions. Slow synchro The flash operates with a slow shutter speed to obtain a balanced correct exposure. In poor lighting conditions the camera shake warning indicator ( ) will display on the LCD monitor. Flash off The flash does not fire. Select this mode when capturing images in a place or situation where flash photography is prohibited. When you capture an image in a poorly lit condition, the camera shake warning indicator ( ) will display on the LCD monitor. Red-eye reduction When a shot with "red eye" is detected, this mode will reduce the red-eye effect automatically. ŝ27Ş Flash ( Ȝ) button ) / Left (Ȝ Self-timer ( ƃ Available flash mode, by recording mode (ƃ: Selectable) ƃ ƃ ƃ ƃ ƃ ƃ ƃ ƃ ƃ ƃ ƃ Ȟ) button ) / Right (Ȟ ƈ When the menu is displayed on the LCD monitor, pressing the Right button makes the cursor shift to the right tab. The right button can also be used to move to a sub menu to select a different setting. When the menu is not displayed on the LCD monitor, the RIGHT button operates as the Self-timer. This function is used when the photographer would also like to be in the image. ƃ ƃ ƃ ƃ ƃ ƃ ƃ ƃ ƃ ƃ ƃ ƃ ƃ Selecting the self-timer 1. Press the SELF-TIMER button until the desired mode indicator displays on the LCD monitor. (p.8) 2. When you press the SHUTTER button, the picture will be taken after the specified time has elapsed. [Selecting the 2 SEC self-timer] ƃ ƃ ƃ ƃ ƃ ƃ ƃ ƃ ƃ ŝ28Ş INFORMATION ƃ In Movie Clip mode, only the 10SEC self-timer will work. ƃ When you select 2SEC self-timer with flash, the delay (2 seconds) can be extended according to the flash charging status. ƃ If you operate the Power button and Self-timer button during the self-timer operation, the self-timer function is cancelled. ƃ Use a tripod to prevent camera shake. M (Mode) button Fn button ƈ Image Size : You can select the image size appropriate for your application. ƈ You can select the desired working mode using the M (Mode) button located on the back of the camera Refer to page 16 for selecting camera modes. Image Size 3072x2304 2592x1944 2048x1536 1024x768 3072x2048 3072x1782 2560x1440 1280x720 640x480 320x240 Still Image Fn button Print ƈ You can select Image size, Quality, Metering, Drive modes, ISO, White Balance and Exposure Compensation. In Night scene mode, you can select the shutter speed and aperture value with this button. Wide Movie Clip Main menu Sub menu Available mode Image size Quality Drive mode Metering ISO White Balance Exposure Value LT SIZE SIZE [STILL IMAGE mode] [MOVIE CLIP mode] INFORMATION LT ƃ The higher the resolution, the lower the number of shots available because high resolution images require more memory. ſ In ASR mode, ISO is fixed to AUTO and EV is fixed to 0.0EV. ſ Depending on the recording mode, the selectable sub menus can be varied. ŝ29Ş Fn button ƈ Quality / Frame rate : You can select the compression ratio appropriate for your application of the captured images. The higher the compression ratio, the lower the picture quality. Mode STILL IMAGE mode MOVIE CLIP mode Icon Sub menu Super Fine Fine Normal 30FPS 15FPS File Format jpeg jpeg jpeg avi avi QUALITY FRAME RATE [STILL IMAGE mode] [MOVIE CLIP mode] INFORMATION ƃ This file format complies with the DCF (Design rule for Camera File system). ŝ30Ş ƈ Continuous shot : You can select continuous shot, and AEB (Auto Exposure Bracketing). - Single : Take one picture only - Continuous : Images will be taken continuously until the shutter button is released. The shooting capacity depends on the memory. DRIVE - AEB : Take three pictures in a series in different exposures: standard exposure (0.0EV), over exposure (+0.5EV) and short exposure (-0.5EV). Use the mode if it is hard to decide exposure of the object. - Wise shot : Two images are taken at a time. One is taken in the Fill-In Flash mode and the other is taken in the ASR mode. (p.19) ſ High resolution and picture quality increases file saving time, which increases stand-by time. ſ If the [Continuous] or [AEB] sub menu is selected, the flash will be off automatically. ſ If less than 3 pictures are available in the memory, the AEB shooting is not available. ſ It is best to use a tripod for the AEB shooting as the time to save each image file is longer and blurring caused by camera shake may occur. ſ The voice memo can't be added on the images taken with the [Continuous], [AEB] and [Wise Shot] menu. Fn button ƈ Metering : If you cannot obtain suitable exposure conditions, you can change the metering method to take brighter pictures. - Multi : Exposure will be calculated based on an average of the available light in the image area. However, the calculation will be biased towards the centre of the image area. This is suitable for general METERING use. - Spot : Only the rectangular area in the centre of the LCD monitor will be metered for light. This is suitable when the subject in the centre is exposed correctly, regardless of the back lighting. - Center : Exposure will be calculated based on an average of the available light in the image area. However, the calculation will be biased towards the centre of the image area. This is suitable for taking a picture of small object like a flower or insects. ƈ ISO : You can select the ISO sensitivity when taking pictures. The speed or specific light-sensitivity of a camera is rated by ISO numbers. - Auto : The camera's sensitivity is automatically changed by variables such as lighting value or subject brightness. - 80, 100, 200, 400, 800, 1000 ISO : The higher the ISO value, the higher the camera’s sensitivity to light and therefore the greater its capacity to take pictures in darker conditions. However, the noise level in the image will increase as the ISO value increases, making the image appear coarser. ſ If the subject is not the centre of the focus area, do not use the spot metering as this may result in an exposure error. In this circumstance, it is better to use exposure compensation. ŝ31Ş Fn button ƈ White balance : The white balance control allows you to adjust the colours to appear more natural. Auto WB : The camera automatically selects the appropriate white balance settings, depending on the prevailing lighting conditions. WHITE BALANCE Daylight : For taking images outside. Cloudy : For taking images under a cloudy and overcast sky. Fluorescent_H : For shooting under daylight fluorescent types of three-way fluorescent lighting. Fluorescent_L : Shooting under white fluorescent lighting. Tungsten : For shooting under tungsten (standard light bulb) lighting. Custom Set : Allows the user to set the white balance according to the shooting condition. Different lighting conditions may cause a colour cast on your images. ŝ32Ş ƃ Using the Custom White Balance White balance settings may vary slightly depending on the shooting environment. You can select the most appropriate white balance setting for a given shooting environment by setting up the custom white balance. 1. Select the CUSTOM ( ) menu of the White Balance. 2. Place a sheet of white paper in front of the camera so that the LCD monitor shows only white, and then press the SHUTTER button. ٌ 3. Your custom white balance value is stored. [White paper] - The custom white balance value will be applied, starting with the next picture you take. - The user configured white balance will be remain effective until it is overwritten. Fn button E (Effect) button ƈ Exposure compensation : This camera automatically adjusts the exposure according to the ambient lighting conditions. If you change the exposure value, the exposure indicator ( ) will be displayed on the bottom EXPOSURE VALUE of the LCD monitor. A negative exposure compensation value reduces the exposure. Note that a positive exposure compensation value increases the exposure and the LCD monitor will appear white or you may not get good pictures. ƃ Long Time shutter : This camera automatically adjusts the shutter speed and aperture values to the shooting environment. However, in NIGHT SCENE mode, you can set the shutter speed and aperture values to your preference. 1. Select the [Nightscene] scene mode. (p.19, 44) 2. Press the Fn button and Long Time shutter menu will be displayed. 3. Configure the Long Time shutter value with the ƊƌȜȞ button. 4. Press the Fn button again. The value you set will be saved and the mode will switch to NIGHT SCENE mode. WIDE : AUTO, F3.5 ~ F6.3 TELE : AUTO, F4.5 ~ F8.0 ƈ It is possible to add special effects to your images by using this button. ƈ Still image mode : You can select the colour, special colour, image editing and Fun menu. ƈ Movie clip mode : You can select the colour menu. ƈ Available Effects, by recording mode ƃ ƃ ƃ ƃ ƃ ƃ ƃ ƃ ƃ ƃ ƃ ƃ ƃ ƃ ƃ ƃ ƃ ƃ (ƃ: Selectable) ƃ ƃ ƃ ƃ ƃ ƃ ƃ ƃ ƃ ƃ ƃ ƃ ƃ ƃ ƃ ƃ ƃ ƃ ƃ ƃ ƃ ƃ ƃ ƃ ƃ ƃ ƃ ƃ ƃ ƃ ƃ ƃ LT INFORMATION Aperture Value AUTO, 1~16S Shutter Speed ƃ This button will not operate in ASR, Voice recording mode and some scene modes (Night, Text, Sunset, Dawn, Backlight, Fireworks, Beach&Snow). ƃ Even if the camera is turned off, the effect setting will be preserved. To cancel the special effect, select sub menu in the Colour menu and select the sub menu in the rest effect menus. ƃ The voice memo can't be added on the still image that has the FUN effect. ŝ33Ş E (Effect) button : Colour ƈ By using the cameraŖs digital processor, it is possible to add special effects to your images ƃ Press the E button in an available recording mode. (p.33) ƈ Custom colour : You can change the R (Red), G (Green) and B (Blue) values of the image. CUSTOM COLOR Move COLOR COLOR Move E Exit [Still image mode] - Ɗƌ button : Selects R, G, B - ȜȞ button : Changes the values Move E ŝ34Ş CUSTOM COLOR Exit [Movie clip mode] Select a desired sub menu by pressing the Ɗƌ button and press the OK button. : No effect is added to the image. : Captured images will be stored in black and white. : Captured images will be stored in a sepia tone (a gradient of yellowish brown colours). : Captured images will be stored in a red tone. : Captured images will be stored in a green tone. : Captured images will be stored in a blue tone. : Save the image in negative mode. : Captured image will be saved in set RGB tone. Press the shutter button to capture an image. OK Set Move OK Set E (Effect) button : Special Colour Colour mask ƈ With this menu, you can select a part you want to highlight. The rest of the image will be black and white. ƃ Press the E button in an available recording mode. (p.33) COLOR MASK E Back OK Set Press the OK button and the Mask mark will be displayed on the LCD monitor. SH Capture Fn Edit Press the Fn button. You can change the size and location of the mask. Move SH Capture T/W Size Zoom W / T button : Changing the Mask size Move Press the Shutter button and the mask added image is taken. [Final image] Pressing the Fn button. SH Capture Fn Edit SH Capture T/W Size ƊƌȜȞ button : Moving the mask [Mask added image] Move SH Capture T/W Size ŝ35Ş E (Effect) button : Image editing Saturation ƈ You can change the saturation of the image. ƃ Press the E button in an available recording mode. (p.33) Saturation IMAGE ADJUST Move E Exit Select Saturation menu ( ) and a bar for changing the saturation will be displayed. Move Change the saturation by pressing the ȜȞ button. OK Set Bar for changing the saturation Saturation Move OK Set + direction : High saturation (The colour will be deep) - direction : Low saturation (The colur will be tender) Press the Shutter button to take a picture. [Final Image] ŝ36Ş Press the OK button and the saturation of image will be changed. E (Effect) button : Fun Preset focus frames ƈ You can make the subject stand out from its surroundings. The subject will be sharp and in focus while making the rest out of focus. ƃ Moving and changing the focus frame You can change the focus frame after selecting a Range menu. ƃ Press the E button in an available recording mode. (p.33) Pressing the Fn button SH Capture High Light FUN Fn Edit SH Capture [Point the camera towards the subject and compose the image by using the LCD monitor.] Move Range E Exit Move [The range is activated : The colour of focus frame turns white.] OK Set Pressing the ƊƌȜȞ button Select a proper menu by pressing ȜȞ button and press the OK button. High Light High Light High Light High Light Pressing the Fn button Range OK Set [Range 1] Range OK Set Range [Range 2] OK Set Range [Range 3] OK Set SH Capture [Range 4] Move [After changing the range] Pressing the shutter button The preset focus frame will appear. Press the shutter button to capture an image. SH Capture Fn Edit [Final image] ŝ37Ş E (Effect) button : Fun ſ Selecting 2 composite shots Composite shooting ƈ You can combine 2 - 4 different shots in a still image. Pressing the shutter button ƃ Press the E button in an available recording mode. (p.33) SH Capture Fun FUN Composite SH Capture [Ready for taking] Fn Delete [First shot] Pressing the shutter button Move E Exit Composite OK Set Select a desired menu by pressing ȜȞ button and press the OK button. : 2 different shots are combined in a still image. : 3 different shots are combined in a still image. : 4 different shots are combined in a still image. : 2 different panorama shots are combined in a still image. Pressing the OK button OK Save [The final picture] Fn Delete [Second shot] After taking the last image, press the OK button to save the image. After selecting a desired menu, press the shutter button to take a picture. INFORMATION ƃ You can use the flash, self-timer, macro focus and the Zoom W / T button during the composite shooting. ƃ If you press the Play mode, Menu, E button or Mode button during the composite shots, each camera working mode is executed. The images captured before will be deleted. ŝ38Ş E (Effect) button : Fun 1. During the composite shots, press the Fn button. 2. A previous image will be deleted and new frame will display. If there is an image taken before, press the Fn button again and a previous image will be deleted again. ƃ Changing a part of composite shot after taking the last shot 1. After taking the last shot, a cursor to select a frame will display. Press the Ɗƌ ȜȞ button to select the frame. 2. Press the Fn button and an image will be deleted. Composite frame will be activated. 3. Press the Shutter button. You can take other images again by using the Ɗƌ ȜȞ button and Fn button. 4. Press the OK button again to save the captured image. Pressing the Fn button Pressing the Ɗ button ƃ Changing a part of composite shot before taking the last shot Before taking the last composite shot, you can change a part of composite shot. SH Capture Fn Delete [Before taking the 3rd shot] SH Capture Fn Delete [Moving backward to the 2nd shot] OK Save Fn Delete OK Save [After taking 4th shot] Fn Delete [Moving backward to the 2nd shot] 3. Press the shutter button to capture a new image. Pressing the Fn button Pressing the Shutter button SH Capture [Deleting 2nd shot] Pressing the OK button OK Save Fn Delete [Taking 2nd shot again] [Final Image] ŝ39Ş E (Effect) button : Fun Photo Frame ƈ You can add 8 types of frame-like borders to a still image you want to capture. ƈ Date & Time information will not be printed on the stored image taken with Photo Frame menu. ƃ Press the E button in an available recording mode. (p.33) Fun Photo Frame FUN The selected photo frame will display. Press the shutter button to take a picture. Move E Frame Exit OK Set Pressing the OK button SH Capture Move Pressing the Fn button SH Capture Fn Frame Select a desired sub menu by pressing the ȜȞ button and press the OK button. ŝ40Ş ſ When the Photo Frame image is displayed on the LCD monitor, some part of the image may not be visible but this will be corrected when displayed on the computer. Using the LCD monitor to adjust the camera settings MENU / OK button ƈ MENU button - When you press the MENU button, a menu related to each camera mode will be displayed on the LCD monitor. Pressing it again will return the LCD to the initial display. - A menu option can be displayed when the following are selected : MOVIE CLIP and STILL IMAGE mode. There is no menu available when the VOICE RECORDING mode is selected. Pressing the MENU button RECORDING Sharpness Contrast Auto Focus Voice Memo Voice Record Move [Menu off] ƈ You can use the menu on the LCD monitor to set up recording functions. ƈ The items indicated by Menu Sub menu Available mode Soft+ Soft Normal Vivid Vivid+ - High Normal Low - Auto Focus Center AF Multi AF Voice Memo Off On Sharpness Contrast are default settings. Normal Normal Center AF Off Page p.42 p.42 p.42 MENU Exit [Menu on] ƈ OK button - When the menu is displayed on the LCD monitor, this button is used for shifting the cursor to the sub menu or for confirming data. p.43 ~ 44 - Voice Record Voice Mute Off On Scene mode p.44 p.44 ſ Menus are subject to change without prior notice. ŝ41Ş Sharpness Auto Focus type ƈ You can adjust the sharpness of the picture you are about to take. You cannot check the sharpness effect on the LCD monitor before you take a picture, because this function is applied only when the captured image is stored on the memory. Icon Soft Normal Vivid Vivid+ Back Soft+ Soft Normal Vivid Vivid+ OK Set ƈ You can select your preferred Auto Focus type according to the shooting condition. - Center AF : The rectangular area in the center of the LCD monitor will be focused - Multi AF : This camera selects a AF point from the 5 AF points. Center AF Multi AF OK Set [PROGRAM mode] The edges of the image are softened. This effect is suitable for editing images on your PC. The edges of the image are sharp. This is suitable for printing. The edges of the image are emphasized. The edges will appear sharp, but noise may occur in the recorded image. [Center AF] Contrast : The difference between bright part of the image is high. - Normal : The difference between bright part of the image is normal. - Low : The difference between bright part of the image is low. [Multi AF] ſ When the camera focuses on the subject, the auto focus frame turns to green. When the camera doesn't focus on the subject, the auto focus frame turns to red. ƈ You can set the difference between bright part of the image and dark part of the image. - High ŝ42Ş RECORDING Sharpness Contrast Auto Focus Voice Memo Voice Record Back Description Menu Soft+ RECORDING Sharpness Contrast Auto Focus Voice Memo Voice Record RECORDING Sharpness Contrast Auto Focus Voice Memo Voice Record Back High Normal Low OK Set Voice Memo ƈ You can add your voice-over to a stored still image. (Min. 2 sec. - Max. 10 sec.) Voice Recording RECORDING Sharpness Contrast Auto Focus Voice Memo Voice Record Back ƈ A voice can be recorded for as long as the available recording time (Min. 2 sec. Max. 10 hour) allows. Off On OK Set - If the voice memo indicator is displayed on the LCD monitor, the setting is completed. - Press the shutter button and take a picture. The picture is stored on the memory card. - Voice memo will be recorded for ten seconds from the moment the picture is stored. In the middle of the sound recording, pressing the shutter button will stop the voice memo. Press the shutter button to record a voice. - Press the shutter button once and voice is recorded for as long as the available recording time (max:10 hour) allows. The recording time will be displayed on the LCD monitor. Voice will still be recorded if the shutter button is released. - If you wish to stop recording, press the shutter button again. - File type : *.wav RECORDING Sharpness Contrast Auto Focus Voice Memo Voice Record Move Normal Normal Center AF Off OK Set [Voice recording menu] SH REC MENU Exit [Voice recording mode] SH Stop ŝ43Ş Voice Recording Recording the movie clip without voice ƃ Pausing while recording a voice Using this function, you can record your favourite voice clips into a voice recording file without having to create multiple voice recording files. 1. Press the Pause button ( ) to pause recording. 2. Press the Pause button ( ) again to resume the recording. 3. If you wish to stop recording, press the shutter button again. ƈ You can record the movie without voice. SH Stop REC Select [Voice Mute] menu in the Movie clip mode. ( ) icon will display on the LCD monitor. Press the Shutter button and a movie will record for as long as the memory capacity allows without voice. RECORDING Voice Mute Back [Pausing the voice recording] Off On OK Set [Mic. Off menu] INFORMATION ƃ A distance of 40cm between you and the camera (microphone) is the best distance to record sound. ƃ If the camera power is turned off while the voice recording is paused, the voice recording is cancelled. [Movie clip mode] SCENE mode ƈ Use the menu to easily configure optimal settings for a variety of shooting situations. Press the Menu button and select a desired sub menu. ſ Refer to page 19 for more information. RECORDING Scene Mode Auto Focus Voice Memo Voice Record Back Nightscene Portrait Children Landscape Close up Text OK Set [Scene menu] ŝ44Ş Starting play mode ƈ Turn the camera on and select Play mode by pressing the play mode button ( ). The camera can now play back the images stored in the memory. ƈ If the memory card is inserted in the camera, all the camera functions apply only to the memory card. ƈ If the memory card is not inserted in the camera, all the camera functions apply only to the internal memory. ƃ Playing back a still image 1. Select the PLAY mode by pressing the play mode button ( ). 2. The last image stored on the memory is displayed on the LCD monitor. ƃ Playing back a movie clip 1. Select the recorded movie clip that you want to play back by using the ȜȞ button. 2. Press the play & pause button ( ) to play back a movie clip file. - To pause a movie clip file while playing it back, press the play & pause button again. - Pressing the play & pause button again will cause the movie clip file will restart. - To rewind the movie clip while it is playing, press the Ȝ button. To fast forward the movie clip, press the Ȟ button. - To stop playback of the movie clip, press the play & pause button, and then press the Ȝ or Ȟ button. Play Capture [Movie clip mode] 3. Select an image that you want to view by pressing the ȜȞ button. ſ Press and hold the Ȝ or Ȟ button to play back the images quickly. ŝ45Ş Starting play mode ƈ Movie clip capture function : capture still images from the movie clip. ƈ On camera movie trimming : You can extract desired frames of movie clip during the movie clip play back. ƃ How to capture the movie clip 1. Press the Play / Pause button while playing the movie clip. Then press the E button. 2. The paused movie clip is saved in a new file name. ƃ If the running time is under 10 seconds, the movie clip can’t be trimmed. 1. Press the Pause button at the point of the movie clip that you want to start extracting. 2. Press the T button. 3. Press the Play & Pause button and the extracted range will be displayed on the status bar. T Trim E Capture 4. Press the Play & Pause button once more at the point where you wish the extracted file to stop. 5. Press the T button and a confirmation window will display. 6. Select a desired sub menu by pressing the T Trim E Capture Ɗƌ button and press the OK button. [No] : The movie trimming will cancel. [Yes] : The extracted frames are saved as a Trimming? new file name. No ſ The captured movie clip file is the same size as the original movie clip (640x480, 320x240). ſ When you press the E button at the beginning of the movie clip, the first frame of the movie clip will be save as a still image. Trim Capture [Paused] [Press the E button] Yes OK Confirm INFORMATION ƃ When a voice is playing back, you can use the earphones. ƃ If you don't specify the ending point of the movie clip, the trimming confirmation window will display at the point of the last frame. ŝ46Ş Starting play mode ƃ Playing back a recorded voice 1. Select the recorded voice that you want to play back by using the ȜȞ button. 2. Press the play & pause button ( ) to play back a recorded voice file. - To pause a recorded voice file, while playing it Play back, press the play & pause button again. - To resume playback of the voice file, press the play & pause button - To rewind the voice file while it is playing, press the Ȝ button. To fast forward the voice file, press the Ȟ button. - To stop playback of the voice memo, press the Menu / OK button. - When a voice is playing back, you can use the earphones. ƃ Playing back a voice memo 1. Select a still image that has the voice memo. 2. Press the play & pause button ( ) to play back the voice memo. - To pause the voice memo, while playing it back, press the play & pause button ( ) again. - To resume playback of the voice memo, press the Ȟ button. - To stop playback of the voice memo, press the Menu / OK button. Pause MENU Stop Play ŝ47Ş LCD monitor Indicator Using the camera buttons to adjust the camera ƈ The LCD monitor displays shooting information about the displayed image. ڼ ڻ ں ƈ In Play mode, you can use the buttons on the camera to conveniently set up the Play mode functions. ڹ Play mode button ڽ ھ ISO AV TV FLASH SIZE DATE ڿ No. 1 2 3 4 5 6 7 8 9 10 11 12 13 ŝ48Ş Description Battery Folder name & File name Memory card indicator Playback mode Voice Memo Protect DPOF Recording date Image size Flash Shutter speed Aperture value ISO 174 F100 10/1 OFF 3072x2304 2007/02/01 ۅ ۄ ۃ ۂ ہ ۀ Icon Page p.11 p.79 p.12 p.45 p.43 p.71 p.71 p.29 p.26 p.33 p.33 p.31 100-0010 2007/02/01 3072x2304 ~ 256x192 On / Off 16 ~ 1/2000 F3.5 ~ F8.0 80 ~ 1000 ƈ If you have turned on the camera by pressing the POWER button, you can press the PLAY MODE button once to switch to Play mode and press it again to switch to Recording mode. ƈ In the PMP, MP3, Text viewer mode, pressing the playback mode button will display the play list of each mode. Thumbnail ( ) / Enlargement ( ) button / Volume button ( ) ƈ You can view multiple pictures, enlarge a selected picture, and crop and save a selected area of an image. ƈ In the MP3, PMP and Text Viewer mode, you can control the volume of multimedia files. ƃ Thumbnail display 1. While an image is displayed full screen, press the thumbnail button. 2. The thumbnail display will highlight the image that had been showing at the time the thumbnail mode was selected. 3. Press the ƊƌȜȞ button to move to a desired image. 4. To view an image separately, press the enlargement button. ƃ Image enlargement 1. Select an image that you want to enlarge and press the enlargement button. 2. Different parts of the image can be viewed by pressing the ƊƌȜȞ button. 3. Pressing the thumbnail button will zoom back to the original full sized image. - You can tell whether the image displayed is an enlarged view by checking the image enlargement indicator shown at the bottom left of the LCD monitor. (If the image is not an enlarged view, the indicator will not be displayed.) You can also check the area of enlargement. - Movie clips and WAV files can’t be enlarged. - If an image is enlarged, a loss of quality may occur. Pressing the Thumbnail button ( ) ƃ The maximum enlargement in proportion to the image size. [Normal display mode] Pressing the enlargement button ( ) Image size [Thumbnail display mode] Maximum enlargement x12.0 x10.66 x12.0 x10.12 x10.0 x8.0 x5.0 x4.0 ŝ49Ş Thumbnail ( ) / Enlargement ( ) button / Volume button ( ) ƃ Trimming : You can extract part of the image and save it separately. 1. Select an image that you want to enlarge and press the enlargement button. Trimming? 2. Different parts of the image can be viewed by No Yes pressing the ƊƌȜȞ button. 3. Press the MENU button and a message will be OK Confirm displayed as shown alongside. 4. Select a desired sub menu by pressing the Ɗƌ button and press the OK button. - [No] : The trimming menu will disappear. - [Yes] : The trimmed image will save as a new file name, and display on the LCD monitor. ſ If there is insufficient memory space to save the trimmed image, the image can’t be trimmed. ŝ50Ş Info ( Ɗ) button ) / Up (Ɗ ƈ When the menu is displayed on the LCD monitor, the UP button operates as a direction button. ƈ Pressing the Info button for over 1 sec., information of displayed image will display on the LCD monitor. Info ( Info ( ) button ) button ISO AV TV FLASH SIZE DATE Info ( 174 F100 10/1 OFF 3072x2304 2007/02/01 ) button Play & Pause ( ƌ) button ) / Down (ƌ ƈ In Play mode, the play & pause / down (ƌ) button works as follows : - If the menu is displayed Press the DOWN button to move from the main menu to a sub menu, or to move down the sub menu cursor. - If a still image with a voice memo, a voice file, or a movie clip is playing In Stop mode : Plays a still image with a voice memo, a voice file, or a movie clip. During playback : Temporarily stops playback. In Pause mode : Resumes playback. Play [Voice recording is stopped] Pause OK Stop [Voice recording is playing] Play Ȝ) / Right (Ȟ Ȟ) / Menu / OK button Left (Ȝ ƈ LEFT (Ȝ) / RIGHT (Ȟ) / MENU / OK buttons activate the following. - Ȝ button : While the menu is showing, the LEFT button operates as a direction button. While the menu is not showing, press the LEFT button to select the previous image. - Ȟ button : While the menu is showing, the RIGHT button operates as a direction button. While the menu is not showing, press the RIGHT button to select the next image. - MENU button : When you press the MENU button, the play mode menu will be displayed on the LCD monitor. Pressing it again will return the LCD to the initial display. - OK button : When the menu is displayed on the LCD monitor, the OK button is used for confirming data that is changed by using the ƊƌȜȞ button. OK Stop [Voice recording is paused] ŝ51Ş Delete ( ) button Special Effect (E button) : Resize ƈ This deletes images stored on the memory card. 1. Select an image that you want to delete by pressing the ȜȞ button and press the DELETE ( ) button. Delete? Delete? No Yes No Yes OK Confirm ƈ Change the resolution (size) of pictures taken. Select [Start image], [MP3 Skin] to save an image to be the start-up image, MP3 Skin. 1. Press the play mode button and press the E button. 2. Press the ȜȞ button and select the [RESIZE] ( ) menu tab. 3. Select a desired sub menu by pressing the Ɗƌ button and press the OK button. RESIZE Move [Single Image] ƃ Image Resize Types 7M (ƃ : User Selectable) 2592x1944 2048x1536 1024x768 User Image MP3 Skin ƃ ƃ ƃ ƃ ƃ ƃ ƃ ƃ ƃ ƃ ƃ ƃ ƃ ƃ 5M 3M 1M ) button ƈ When the camera is connected to a PictBridge printer, you can print images by pressing the Printer button. 2160x1440 1200x800 User Image ƃ ƃ ƃ ƃ 1920x1080 1280x720 User Image MP3 Skin 5MW ƃ ƃ ƃ ƃ 3MW ƃ ƃ ƃ ƃ ƃ ƃ 6MP 1MW Ȝ Ȟ Print ŝ52Ş OK Menu Exit [Thumbnail Image] 2. Select the sub menu values by pressing the Ɗƌ button and then press the OK button. - If [No] is selected : cancels "Delete Image". - If [Yes] is selected : deletes the selected images. Printer ( E OK Confirm MP3 Skin Special Effect (E button) : Rotating an image Special Effect (E button) : Resize ƃ A large sized image can be resized to a smaller sized image, but not vice versa. ƃ Only JPEG images can be resized. Movie clip (AVI), Voice recording (WAV) files can’t be resized. ƃ You can change the resolution of only those files compressed in the JPEG 4:2:2 format. ƃ The resized image will have a new file name. The [User Image] image is stored not on the memory card but on the internal memory. ƈ You can rotate the stored images by various degrees. Once the playback of the rotated picture is finished, it will switch back to the original state. 1. Press the play mode button and press the E button. 2. Press the ȜȞ button and select the [ROTATE] ( ) menu tab. 3. Select a desired sub menu by pressing the Ɗƌ button. ROTATE Move E Exit ƃ If a new user image is saved, one of the two user images will be deleted in order. ƃ If the memory capacity is insufficient to store the resized image, a [Memory Full!] message will display on the LCD monitor and the resized image will not be stored. Right 90˚ E Back Left 90˚ OK Set [ : Right 90˚] : Rotate picture in a clock-wise direction E Back OK Set E Back [ : Left 90˚] : Rotate picture in a counterclock-wise direction OK Set [ : 180˚] : Rotate picture 180 degrees Vertical Horizontal E Back 180˚ OK Set [ : Horizontal] : Rotate picture horizontally E Back OK Set [ : Vertical] : Rotate picture vertically ſ If you display the rotated image on the LCD monitor, empty spaces may appear to the left and right of the image. ŝ53Ş Special Effect (E button) : Colour ƈ It is possible to add special effects to your images by using this button. 1. Press the play mode button and press the E button. 2. Select menu tab by pressing the ȜȞ button. ƈ Custom colour : You can change the R (Red), G (Green) and B (Blue) values of the image. COLOR Move Move E Exit [Still image] 3. Select a desired sub menu by pressing the Ɗƌ button and press the OK button. : Captured images will be stored in black and white. : Captured images will be stored in a sepia tone (a gradient of yellowish brown colours). : Captured images will be stored in a red tone. : Captured images will be stored in a green tone. : Captured images will be stored in a blue tone. : Save the image in negative mode. : Captured images will be stored in set RGB tone. 4. The image is saved as a new file name. Custom Color - Ɗƌ button : Selects R, G, B - ȜȞ button : Change the values OK Set Custom Color Move OK Set Special Effect (E button) : Special Colour Colour Filter ƃ With this menu, you can change the colour information of the image (excluding Red, Blue, Green and Yellow) to Black and White colour. 1. Select by pressing the Ɗƌ button. SPECIAL COLOR Move Color Filter OK Exit E Back OK Set 2. Press the OK button and the image is saved as a new file name. ŝ54Ş Special Effect (E button) : Special Colour Colour mask ƃ With this menu, you can select a part you want to highlight. The rest of the image will be in black and white. SPECIAL COLOR Move Color Mask Select and a mark for selecting part will display. E Exit Press the OK button and you can set the size and location of the part. E Back OK Set Move OK Set T/W Size W / T button : Changing size of part Move Press the OK button twice and the colour mask image will be saved as a new file name. OK Set T/W Size ƊƌȜȞ button : Changing the location [Final image] Move OK Set T/W Size ŝ55Ş Special Effect (E button) : Image editing ƃ Saturation control : You can change the saturation of the image. 1. Press the play back button and press the E button. 2. Select menu tab by pressing the ȜȞ button. ƃ Red eye Removal : Red eye effect can be removed from the captured image. 1. Select ( ) by pressing the Ɗƌ button and Red Eye Fix [Processing!] message will dbe displayed. 2. The red eye will be removed. Press the OK button and the image will be saved as a new file name. E Back ƃ Brightness control : You can change the brightness of the image. 1. Select ( ) by pressing the Ɗƌ button and a bar for selecting the brightness will be displayed. Brightness 2. Change the brightness by pressing the ȜȞ button. 3. Press the OK button and the image will be Move saved as a new file name. ŝ56Ş Move OK Set ƃ Noise Effect : You can add noise to an image to add a more classic feel to your photo. 1. Select ( ) by pressing the Ɗƌ button. 2. Press the OK button and the image will be saved as a new file name. Add Noise OK Set E Contrast Move Saturation OK Set ƃ Contrast control : You can change the contrast of the image. 1. Select ( ) by pressing the Ɗƌ button and a bar for selecting the contrast will be displayed. 2. Change the contrast by pressing the ȜȞ button. 3. Press the OK button and the image will be saved as a new file name. 1. Select ( ) by pressing the Ɗƌ button and a bar for selecting the saturation will be displayed. 2. Change the saturation by pressing the ȜȞ button. 3. Press the OK button and the image will be saved as a new file name. OK Set Back OK Set Special Effect (E button) : FUN Cartoon ƈ You can add a text box on the image to make the image as a cartoon ſ You can select the size of Cartoon image. 1M, 1MP, 1MW are available. Select a desired position by pressing the ƊƌȜȞ button and press the OK button. Cartoon FUN Select Cartoon ( Move OK Set E E ) E Back Exit Back Pressing the OK button You can input texts by pressing the ƌ button (p.64). Press the OK button twice. Balloon OK Set OK Set Text Move Change the location of the text box by pressing the ȜȞ button. Balloon OK Set OK Set Text Select an image by pressing the ƊƌȜȞ button and press the OK button. Select the third image with the same procedure. Move OK Set Select a location of text box by pressing the ƊƌȜȞ button and press the OK button. Press the ȜȞ button to select type of text box. Press the OK button and the file is saved as a new file name. Balloon OK Set Text ŝ57Ş Special Effect (E button) : FUN ƃ Before saving the cartoon image, you can change the selected image. 1. Pressing the Fn button deletes the images in order. 2. Press the OK button and you can select images. ƃ Inserting texts on the text box You can insert texts on the text box. Input Message d Pressing the Fn button OK Search Fn Delete Balloon OK Search OK Set Text Press the ƌ button and a window for inserting texts will display 00/52 Byte abc def ghi jkl mno pqr stu vwx .yz Text Mode Fn Delete Insert texts (p.64) 3. After selecting desired images, press the OK button to save the image as a new file name. Camera Move ŝ58Ş OK Set Special Effect (E button) : FUN ƃ Moving and changing the focus frame You can change the focus frame after selecting a Range menu. Preset focus frames ƈ You can make the subject stand out from its surroundings. The subject will be sharp and in focus while making the rest out of focus. 1. Select a focus frame by pressing the ȜȞ button and press the OK button. 2. Move the location of the frame by pressing the ƊƌȜȞ button. 3. Press the OK button and the file is saved as a new file name. High Light FUN Pressing the OK button High Light Move E Range Exit OK Set Range Move OK Set Select a desired frame by pressing the ȜȞ button and press the OK button. High Light Range High Light OK Set [Range 1] Range High Light OK Set [Range 2] Range Pressing ƊƌȜȞ button High Light OK Set [Range 3] Range OK Save [The frame is activated] OK Set [Range 4] Pressing the OK button Move OK Save [After changing the frame position] ŝ59Ş Special Effect (E button) : FUN ſ Selecting 2 composite shots Composite image ƈ You can combine 2 - 4 different shots in a still image. Pressing the ƊƌȜȞ button Composite FUN Move OK Set Move OK Set [Changing the position] Move E Exit Composite OK Set Pressing the OK button Press the OK button. (You can select 2-4 composite images) Pressing the OK button 7 Move OK Set OK Set E Back OK Search Fn Delete [Selecting the second image] INFORMATION ƃ If you press the Shutter and Play mode button, a capture mode is executed. Change the location of second image by pressing the ƊƌȜȞ button and press the OK button to save the image. Move ŝ60Ş OK Save Special Effect (E button) : FUN ƃ Before selecting the last composite image, you can change a part of composite image. 1. During the composite image editing, press the Fn button. 2. A previous image will be deleted. Press the OK button and you can select a new image. After selecting an image, press the Fn button again and the image will be deleted again. Photo Frame ƈ You can add 8 types of frame-like borders to a still image you want to capture. ƈ Date & Time information will not be printed on the stored image taken with Photo Frame menu. Photo Frame FUN Pressing the Fn button OK Search Fn Delete [Before selecting the 3rd image] Move OK Search E Exit Frame OK Set Fn Delete [Moving backward to the 2nd image] 3. Press the OK button and you can select an image again. Select a desired sub menu by pressing the OK button and press the ƊƌȜȞ button. - Press the E button and the frame will be canceled. Frame OK Save ſ When the Photo Frame image is displayed on the LCD monitor, part of the image may not be visible but this will be corrected when viewing the image on the computer. ŝ61Ş Special Effect (E button) : FUN Sticker ƈ You can add various stickers to the image. FUN Sticker Select ( Move E ) Sticker Exit Select a desired sticker by pressing the ȜȞ button and press the OK button Press the OK button and the image is saved. Move OK Save Fn Add Select a location of sticker by pressing the ƊƌȜȞ button ſ You can add additional stickers by pressing the Fn button. Press the OK button to store the image. ŝ62Ş OK Set Move OK Save Fn Add Special Effect (E button) : FUN Text Typing ƈ You can input text on to a saved image. Text Typing FUN Select ( Move E ) Style Exit Select a desired frame by pressing the ȜȞ button and press the OK button. OK Set Back E OK Set Press the OK button and a window for inserting texts will be displayed. Input Message Input Message d camera d camera Fn Edit OK Set Press the the FR button ( ) and ƌ (OK) button. Texts inserted before will be displayed. 06/88 Byte Kor ABC Cn Symbol Num Delete OK abc Input texts (p.64) 06/88 Byte Cancel abc def ghi jkl mno pqr stu vwx .yz Text Mode You can change the texts by using the Fn button. You can change the colour of texts by using the OK button. Press the OK button to save the changed image. camera Color camera OK Save ŝ63Ş Text Typing ƈ You can input texts in Cartoon of Fun menu. ƃ How to input the texts After selecting the Text typing menu, a window for inputting text will be displayed. You can select Korean, English, Capital letter / Small letter, Number and symbols by pressing the FR ( ) button. Input Message d 00/52 Byte abc def ghi jkl mno pqr stu vwx .yz ڹ ں ڻ ڼ ڽ ھ ڿ ۀ ہ Text Mode ſ Though the character selection menu is ڹ abc ں def ڻ ghi ڼ jkl ڽ mno ھ pqr ڿ stu ۀ vwx ہ .yz ۂ ۃ displayed, some characters can't be selected in accordance with the sales region. e.g.) Typing “camera” ſ Available characters ͿΙ ΐΛΑ ΝΟΡΣ ӏ fF $&% ·Ώ ΓΕ ΜΔ ΅ΚΆ ABC DEF GHI abc def ghi ΖΘΗ JKL MNO PQR jkl mno pqr ΥΩΪή ί αΞ STU VWX .YZ stu vwx .yz ' Ү̀ Ɂȱ " ŖŘ (˅ ȡȢ ƀƁ ! abc def jkl mno stu abc jkl ca vwx ef mn o d pqr .yz Press ڹthree times Press ۃonce Press ڹonce 02/52 Byte abc def ghi jkl mno pqr stu vwx .yz Text Mode Input Message ghi came pqr stu vwx .yz abc def ghi jkl mno Press ڽonce Press ںtwice 04/52 Byte abc def ghi jkl mno pqr stu vwx .yz Text Mode stu ŝ64Ş Input Message ghi Input Message camera vwx pq Z .yz Press ھthree times Press ڹonce 06/52 Byte Text Mode abc def ghi jkl mno pqr stu vwx .yz Setting up the play back function using the LCD monitor ƈ PLAY mode functions can be changed by using the LCD monitor. In the PLAY mode, pressing the MENU button displays the menu on the LCD monitor. The menus you can set up in Play mode are as follows. To capture an image after setting up the play menu, press the PLAY mode button or shutter button. Menu tab Main menu Show Start Select Album Sub menu Secondary menu Page Play / Repeat Play - p.66 All, My Self, Family, Friend, Event, Secret 1, 3, 5, 10sec - p.67 Effect Off, Effect 1, 2, 3, Mix - p.67 Music Off, Music1, 2, 3, My Music - p.67 Edit Voice Memo Off Delete p.68 - p.70 Protect All Main menu Size - Unlock / Lock Sub menu Secondary menu Standard Select / All / Cancel Index No / Yes Size Select / All / Cancel No - Yes - Page p.71 p.73 ƈ This menu is available while the camera is connected to a PictBridge supporting printer (direct connection to the camera, sold separately) with a USB cable. p.68 - All Select Copy To Card Images On Select DPOF Menu tab All, My Self, Family, Friend, Event, Secret - Main menu p.67 Interval View Menu tab p.70 p.71 Sub menu Secondary menu One Pic - All Pics - Auto - Postcard - Card - 4X6 - L - 2L - Letter - A4 - A3 - Page p.75 p.75 ŝ65Ş Setting up the play back function using the LCD monitor Menu tab Main menu Layout Type Quality Date File Name Reset Sub menu Auto Full 1 2 4 8 9 16 Index Auto Plain Photo FastPhoto Auto Draft Normal Fine Auto Off On Auto Off On No Yes ſ Menus are subject to change without prior notice. ŝ66Ş Secondary menu - Page Slide Show ( ) ƈ Images can be displayed continuously at pre-set intervals. You can view the slide show by connecting the camera to an external monitor. 1. Press the Play mode button and press the Menu button. 2. Select a desired menu tab by pressing the ȜȞ button. 3. Select a desired sub menu by pressing the Ɗƌ button. p.75 ƃ Start the slide show : The slide show can start only in the [Show] menu. [Play] p.75 p.75 p.75 p.75 p.76 : The slide show is closed after one cycle. [Repeat Play] : The slide show is repeated until cancelled. SLIDE SHOW Show Start Select Album Interval Effect Music Play Repeat Play Back OK Set Press the OK button and the slideshow will be started. - To pause the slide shown while playing it back, press the Pause button ( again. - Pressing the Pause button again will cause the slide show restart. - To stop playback of the slide show, press the ȜȞ button. ) Slide Show ( ) ƃ Selecting Album : You can playback a selected album. - [All, Myself, Family, Friend, Event, Secret] : The selected album is played back. ƃ Effect : Unique screen effects can be used for the slide show. SLIDE SHOW Show Start Select Album Interval Effect Music Back All My Self Family Friend Event Secret OK Set - [Off] : Normal display. - [Effect1] : Image moves from the top left. - [Effect2] : Image is displayed slowly from the centre outwards. - [Effect3] : Image is displayed slowly. - [Mix] : The image slides irregularly. SLIDE SHOW Show Start Select Album Interval Effect Music Back Off Effect 1 Effect 2 Effect 3 Mix OK Set Press the OK button and the setting will be saved. ƃ Setting play interval : Set the slide show play interval. - [1, 3, 5, 10sec] : the image is displayed during the set interval. SLIDE SHOW Show Start Select Album Interval Effect Music Back 1 sec 3 sec 5 sec 10 sec OK Set INFORMATION ƃ B.G.M : Set the slide show music. - [Off] : The B.G.M is not played back. - [Music 1, 2, 3] : A selected music is played back. - [My Music] : User selected music is played back. SLIDE SHOW Show Start Select Album Interval Effect Music Back Off Music 1 Music 2 Music 3 My Music OK Set ƃ The loading time depends on the image size and quality. ƃ While the slide show is playing, the voice recording, movie file will not be displayed. ŝ67Ş Album ( ) ƃ Adding images in an album Press the Album menu button. - Press the OK button View ƈ Album mode : Images play back by album. [All] : All images saved in the memory ALBUM play back. View Edit [Myself] : Images saved in the Personal album play back. [Family] : Images saved in the Family album Back play back. [Friend] : Images saved in the Friends album play back. [Event] : Images saved in the Events album play back. [Secret] : Images saved in the Secret album play back. The default password is 0000. ſ The secret album can be set with only this camera. All My Self Family Friend Event Secret OK Set ALBUM View Edit Move - Moving folder : Ɗƌ button - Changing image : ȜȞ button OK Set All Move - Selecting images : T button Images you want can be selected one at a time. - Moving Folder : E button - Selecting Album : MENU button OK Exit Change All T Select : Adding images in the Personal album. : Adding images in the Family album. : Adding images in the Friends album. : Adding images in the Events album. : Adding images in the Secret album. E Folder MENU Edit Select Album All My Self Family Friend Event Secret Move Press the OK button and the selected images are added in the selected album. An icon as shown will be displayed. OK Exit All Move ŝ68Ş All OK Exit Change ) 3. Press the OK button and a window for inserting new password will be displayed. Password setup ƃ Inserting the password : when the secret album is selected, password must be inserted. - Select the secret album and press the OK button. A window for inserting password will be displayed. Enter Four Digit Password d Delete Delete Cancel - Insert the password and images on the secret album will be played back. The default password is "0000". 4. Insert a new password and press the OK button. - W (Wide) button : Cancel the inserting numbers. - T (Tele) button : Cancel the password setup and [Password] menu on the [Setup2] will be displayed. 5. Insert the new password again. SETUP2 Quick View Power Off LCD Save Video Out Set Password Format Move 0.5 sec 3 min Off NTSC Cancel Enter New Password d Delete Cancel Enter Again Ҭ Ҭ Ҭ Ҭ ƃ Changing password : You can change the password. 1. Select [SETUP2] > [Set Password] menu and press the OK button. Enter New Password Ҭ Ҭ Ҭ Ҭ Album ( d Delete Cancel 6. Press the OK button and the password setup is complete with displayed [Saved] message. OK Set Saved ſ When a wrong password is inserted, [Wrong Password] message will be displayed. Enter Four Digit Password Ҭ Ҭ Ҭ Ҭ 2. A window for inserting password set before will display. Insert the password by using the touch pad. Delete d INFORMATION Cancel ƃ If you forget the password, visit the A/S centre. ƃ Exposing your password may cause damage. The manufacturer accepts no responsibility. ŝ69Ş Voice memo ( ) Deleting images ƈ You can add your voice to a stored still image. (Min. 2 sec. - Max. 10 sec.) 1. Press the ȜȞ button to select an image that you want to insert the voice memo. PLAYBACK Voice Memo Delete Protect DPOF Copy To Card ಒൂ Back Off On Ⴤ OK Set [Voice memo menu] 2. Select the voice memo menu and the voice memo indicator will display. The camera is now ready to record a voice memo. Shutter:Start [Ready for recording] 3. Press the shutter button to start recording and voice will be recorded to the still image for 10 seconds. While the voice is recording, the recording status window will be displayed as shown alongside. 4. The recording can be stopped by pressing the shutter button again. ŝ70Ş ƈ Of all the files stored in the memory card, the unprotected files in the DCIM subfolder will be deleted. Remember that this will permanently delete unprotected images. Important shots should be stored on a computer before deletion takes place. The startup image and SKIN image are stored in the camera's internal memory (i.e., not on the memory card) and it will not be deleted even if you delete all files on the memory card. SH Stop [Voice is recording] ƃ Deleting images 1. Select a desired sub menu by pressing the Ɗƌ button and press the OK button. [Select] : Selection window for an image to delete is displayed. - ƊƌȜȞ button : Select an image - Zoom T Button : Select the image for deletion. (V mark) - OK Button : Press the OK Button to display the confirmation message. Select the [Yes] menu and press the OK button to delete marked images. [All] : Displays confirmation window. Select the [Yes] menu and press the OK button to delete all unprotected images. If there aren’t protected images, all the images are deleted and a [No Image!] message will display. 2. After deletion, the screen will be changed to the play mode screen. PLAYBACK Voice Memo Delete Protect DPOF Copy To Card Back T Select Select All OK Set OK Delete PLAYBACK Voice Memo Delete All? Delete No Protect Yes DPOF Copy To Card OK Confirm Select All Protecting images DPOF ƈ This is used to protect specific shots from being accidentally erased (Lock). It also unprotects images that have been previously protected (Unlock). ƈ DPOF (Digital Print Order Format) allows you to embed printing information on your memory card’s MISC folder. Select the pictures to be printed and how many prints to make. ƃ Protecting Images 1. Select a desired sub menu by pressing the Ɗƌ button and press the OK button. [Select] : Selection window for an image to be protected / released is displayed. - ƊƌȜȞ button : Select an image - Zoom W / T Button: Protect / release the image - OK Button : Your changes will be saved and the menu will disappear. ƈ The DPOF indicator will display on the LCD monitor when an image that has DPOF information plays back. Images can then be printed on DPOF printers, or at an increasing number of photo labs. PLAYBACK Voice Memo Delete Protect DPOF Copy To Card Back WȜ Select All OK Set Unlock ƈ This function is not available for Movie clips and Voice recording files. ƈ If a memory card is not inserted, the menus are still displayed in the LCD, but are not selectable. ȞT PLAYBACK Voice Memo Delete Protect DPOF Copy To Card Move Standard Index Size Change OK Set [All] : Protect / release all saved images - OK Button : Your changes will be saved. - If you protect an image, the protect icon ( ) will be displayed on the LCD monitor. (An unprotected image has no indicator) - An image in LOCK mode will be protected from the delete function, but will NOT be protected from the format function. PLAYBACK Voice Memo Protect All? Delete Unlock Protect Lock DPOF Copy To Card Select All OK Confirm ŝ71Ş DPOF : STANDARD DPOF : Index ƈ This function allows you to embed print quantity information on a stored image. 1. Select the [Standard] menu by pressing the Ɗƌ button and press the Ȟ button. 2. Select a desired sub menu by pressing the Ɗƌ button. [Select] : Selection window for an image to print is displayed. - ƊƌȜȞ button : Select an image to print. - Zoom W / T button : Select the number of prints. [All] : Configure number of prints for all pictures except movie and voice files. - W / T button : Select a number of prints [Cancel] : Cancel the print setup. 3. Press the OK button to confirm the setting. If an image carries DPOF instructions, the DPOF indicator ( ) will show. PLAYBACK Standard Index Size Back W Select All Cancel OK Set 0images Ȝ W 0images OK Menu ŝ72Ş T OK Set T Ȟ ƈ Images (except for movie clips and voice file) are printed as index type. 1. Select the [Index] menu by pressing the Ɗƌ button and press the Ȟ button. 2. Select a desired sub menu by pressing the Ɗƌ button. If [No] is selected : Cancel the index print setting. If [Yes] is selected : The image will be printed in index format. 3. Press the OK button to confirm the setting. PLAYBACK Standard Index Size Back No Yes OK Set DPOF : Print size Copy To Card ƈ You can specify the print size when printing images stored on the memory card. The [Size] menu is available only for DPOF 1.1 compatible printers. ƈ This enables you to copy image files, movie clips and voice recording files on the camera's built-in internal memory to the camera's removable SD memory card. ƃ Setting the Print Size 1. Select the [Size] menu by pressing the Ɗƌ button and press the Ȟ button. 2. Select a desired sub menu by pressing the Ɗƌ button and press the OK button. [Select] : Selection window to change the print size of an image is displayed. - ƊƌȜȞ button : Select an image. - Zoom W / T button : Change the print size. - OK button : Your changes will be saved and the menu will disappear. [All] : Change print size of all saved images. - W / T button : Select a print size - OK button : Confirm the changed setting. [Cancel] : Cancel all of the print size settings. ƃ Copying to the Memory Card 1. Select a desired sub menu by pressing the PLAYBACK Ɗƌ button and press the OK button. Voice Memo Delete - [No] : Cancels "Copy to Card". Protect - [Yes] : All images, movie clips and voice DPOF Copy To Card recording files saved in the internal Back OK Set memory are copied to the memory card after the [Processing!] message is displayed. After copying has been completed, the screen will return to play mode. ſ DPOF [Size] secondary menu : Cancel, 3x5, 4x6, 5x7, 8x10 ſ Depending on the manufacturer and printer model, cancelling the printing may take a little longer for the printer to process. PLAYBACK Standard Index Size Back W Select All Cancel OK Set Cancel T OK Set Ȝ W Cancel OK Menu T Ȟ No Yes INFORMATION ƃ When this menu is selected without inserting a memory card, you can select the [Copy To Card] menu but the menu can’t be run. ƃ If there is not enough space available in the memory card to copy saved images in the internal memory (10MB), the [Copy To Card] command will copy only some of the images and display [Memory Full!] message. Then the system will return to the playback mode. Please be sure to delete any unnecessary files to free up space before inserting the memory card into the camera. ƃ When you move images from the internal memory to the removable SD card, they will be automatically renumbered to avoid duplication of the file name. If the last file in the memory card is S73F0010.jpg, the copied file names start from S73F0011.jpg. After completing [Copy To Card], the last stored image of the last copied folder is displayed on the LCD monitor. ŝ73Ş PictBridge ƈ You can use the USB cable to connect this camera to a printer that supports PictBridge (sold separately) and print the stored images directly. Movie clips and voice files cannot be printed. ſ If the [USB] menu is set to the [Computer], you cannot connect a Pictbridge compatible printer to the camera through USB cable with [Connecting Computer] message. In this case, remove the cable and do the step 1, 2 again. ƃ Setting up the camera for connection to the printer 1. Connect the camera and printer with USB cable. 2. Select the [Printer] menu by pressing Ɗƌ button and press the OK button. ƈ Easy printing When you connect the camera to printer in the Play back mode, you can print a picture easily. Computer Printer OK Confirm ƈ Connecting the Camera to a Printer ŝ74Ş - Pressing the printer ( ) button : Currently displayed image will be printed with the printer’s default setting. - Pressing the ȜȞ button : Selects a previous / next image. Ȝ Ȟ Print OK Menu PictBridge : Picture Selection ƈ You can select images you want to print PictBridge : Print Setting ƈ You can select the Paper Size, Print Format, Paper Type, Print Quality, Date Print, and File Name Print menus for printed pictures. ƃ Setting the Number of Copies to Print 1. Press the Menu button and the PictBridge PICTBRIDGE menu will display. Images One Pic Size All Pics 2. Use the Ɗƌ buttons to select the [Images] Layout menu and press the Ȟ button. Type Quality 3. Use the Ɗƌ buttons to select a desired sub Date Back OK Set menu and press the OK button. - Select [One Pic] or [All Pics]. A screen where you can set the number of copies to print will appear as shown below. 1. Press the Menu button and the PictBridge menu will display. 2. Use the Ɗƌ buttons to select the desired menu, and then press the Ȟ button. 3. Use the Ɗƌ buttons to select the desired submenu value, and then press the OK button. Menu Size 0 Prev SH Exit 0 Layout Next OK Set SH Exit [When [One Pic] is selected] OK Set Type [When [All Pics] is selected] Quality - Press the Ɗƌ button to select the number of prints. - When [One Pic] is selected : Use the ȜȞ button to select another picture. After selecting another picture, select the number of prints for another picture. - After setting the number of prints, press the OK button to save. - Press the Shutter button to return to the menu without setting the number of prints. 4. Press the Print button ( Date Function Set the size of the printing paper PICTBRIDGE Images Size Layout Type Quality Date Back Auto Postcard Card 4X6 L 2L OK Set [Paper Size] Sub menu Auto, PostCard, Card, 4X6, L, 2L, Letter, A4, A3 Set the number of pictures to be Auto, Full, 1, 2, 4, 8, 9, 16, Index printed on a sheet of paper Set the quality of the printing Auto, Plain, Photo, FastPhoto paper Set the quality of the picture to be printed Set whether to print the date Set whether to print the file File Name name Auto, Draft, Normal, Fine Auto, Off, On Auto, Off, On ſ Some menu options are not supported on all printers. If not supported, the menus are still displayed in the LCD, but are not selectable. ) and images will be printed. ŝ75Ş PictBridge : Reset Sound menu ƈ Initialises user-changed configurations. 1. Use the Ɗƌ buttons to select the [Reset] menu tab. And then press the Ȟ button. 2. Use the Ɗƌ buttons to select the desired sub menu value, and then press the OK button. - If [No] is selected : Settings will not be reset. - If [Yes] is selected : All print and image settings will be reset. PICTBRIDGE Layout Type Quality Date File Name Reset Back ƈ In this mode, you can set up sound settings. You can use the setup menu in all camera modes, except Voice Recording mode. The items indicated by are default settings. Mode Menu No Yes Sub Menu Available Mode Page Off OK Set Low Volume Medium p.77 High ſ Default print setting varies depending on the printer manufacturer. For your printer’s default setting, refer to the user’s guide that came with your printer. Off Start Sound Sound 1 Sound 2 p.77 Sound 3 Off (SOUND) Shutter Sound Sound 1 Sound 2 p.77 Sound 3 Off Beep Sound Sound 1 Sound 2 p.77 Sound 3 Off AF Sound p.77 On ŝ76Ş Sound ( ) [ Volume ] ƈ You can set select a volume of sound, start up sound, shutter sound, warning sound and AF sound. ƃ [Volume] sub menu : [Off], [Low], [Medium], [High] [ Beep Sound ] SOUND Volume Start Sound Shutter Sound Beep Sound AF Sound Back Off Low Medium High ƈ If you set sound to ON, various sounds will be activated for camera startup, when buttons are pressed, so that you can be aware of the camera operation status. ƃ [Sound] sub menu : [Off], [Sound 1, 2, 3] OK Set SOUND Volume Start Sound Shutter Sound Beep Sound AF Sound Back Off Sound 1 Sound 2 Sound 3 OK Set [ Start up sound ] ƈ You can select the sound that is activated whenever the camera is turned on. ƃ Start up sound : [Off], [Sound 1], [Sound 2], [Sound 3] - If the start up image is set to [Off], the start up sound will not activate, even though you may have set these to on. [ AF sound ] SOUND Volume Start Sound Shutter Sound Beep Sound AF Sound Back Off Sound 1 Sound 2 Sound 3 OK Set ƈ If you set AF sound to ON, AF sound will be activated when a subject is focused so that you can be aware of the camera operation status. ƃ [AF sound] sub menu : [Off], [On] SOUND Volume Start Sound Shutter Sound Beep Sound AF Sound Back Off On OK Set [ Shutter sound ] ƈ You can select the shutter sound. ƃ Shutter sound : [Off], [Sound 1], [Sound 2], [Sound 3] SOUND Volume Start Sound Shutter Sound Beep Sound AF Sound Back Off Sound 1 Sound 2 Sound 3 OK Set ŝ77Ş Setup menu ƈ In this mode, you can set up basic settings. You can use the setup menu in all camera modes, except Voice Recording mode. The items indicated by are default settings. Menu tab Sub menu Main menu File Series Reset ENGLISH DEUTSCH LANGUAGE Page ESPAÑOL LCD AF Lamp Start Image ŝ78Ş p.81 Power Off 1, 3, 5, 10 min - p.81 LCD Save Off On p.81 Video Out NTSC PAL p.82 - Format No Yes p.83 Reset No Yes p.83 SVENSKA SUOMI p.79 Magyar - Imprint Page 0.5, 1, 3 sec ITALIANO BAHASA Date&Time Off Set Password DUTCH POLSKI Sub menu Main menu Quick View FRANÇAIS PORTUGUÊS DANSK p.79 Menu tab - yy/mm/dd mm/dd/yy dd/mm/yy Off Off Date Date&Time - Auto Dark Normal Bright Off On Off Logo User Image - p.79 p.80 p.80 p.80 p.80 ſ Menus are subject to change without prior notice. p.83 Setup menu 1 ( ) [ File name ] [ LANGUAGE ] ƈ This function allows the user to select the file naming format. ƈ There is a choice of languages that can be displayed on the LCD monitor.Even if the battery is removed and inserted again, the language setting will be preserved. [Series] : New files are named using numbers that SETUP1 follow the previous sequence, even File LANGUAGE when a new memory card is used, or Date&Time Imprint after formatting, or after deleting all LCD pictures. AF Lamp Back OK [Reset] : After using the reset function, the next file name will be set from 0001 even after formatting, deleting all or inserting a new memory card. Series Reset Set - The first stored folder name is 100SSCAM, and the first file name is S73F0001. - File names are assigned sequentially from S73F0001 ƍ S73F0002 ƍ ~ ƍ S73F9999. - The folder number is assigned sequentially from 100 to 999 as follows: 100SSCAM ƍ 101SSCAM ƍ ~ ƍ 999SSCAM. - Maximum numbers of files in a folder are 9999. - The files used with the memory card conform to the DCF (Design rule for Camera File systems) format. If you change the image file name, the image may not play back. - LANGUAGE sub menu : English, Korean, French, German, Spanish, Italian, S.Chinese, T.Chinese, Japanese, Russian, Portuguese, Dutch, Danish, Swedish, Finnish, Thai, Bahasa (Malay / Indonesian), Arabic, Polish, Hungarian, Czech and Turkish. SETUP1 File LANGUAGE Date&Time Imprint LCD AF Lamp Back ENGLISGH FRANÇAIS DEUTSCH ESPAÑOL ITALIANO OK Set [ Setting up the Date / Time / Date type ] ƈ You can change the date and time that will be displayed on the captured images and set up the date type. - Date type : [yy/mm/dd], [mm/dd/yy], [dd/mm/yy], [Off] SETUP1 File LANGUAGE Date&Time Imprint LCD AF Lamp Back 2007/ 02/ 01 13:00 yy/mm/dd OK Set ŝ79Ş Setup menu 1 ( ) [ Imprinting the recording date ] [ Auto Focus lamp ] ƈ There is an option to include DATE / TIME on still images. ƈ You can turn on and off the Auto Focus lamp. ƃ Sub menus [Off] : The DATE & TIME will not be imprinted on the image file. [Date] : Only the DATE will be imprinted on the image file. [Date&Time] : The DATE & TIME will be imprinted on the image file. ƃ Sub menus [Off] : The AF lamp will not light up in a low light condition. [On] : The AF lamp will light up in a low light condition. SETUP1 File LANGUAGE Date&Time Imprint LCD AF Lamp Back Off Date Date&Time OK Set ſ The Date & Time are imprinted at the bottom right side of the still image. ſ The imprint function is applied only to still images except for the images taken in photo frame effect mode. ſ Depending on the manufacturer and print mode, the date printed on an image may not be printed correctly. SETUP1 File LANGUAGE Date&Time Imprint LCD AF Lamp Back Off On OK Set [ Start up image ] ƈ You can select the image that is first displayed on the LCD monitor whenever the camera is turned on. [ LCD brightness ] ƈ You can adjust the LCD brightness. ƃ [LCD] sub menu : Auto, Dark, Normal, Bright SETUP1 File LANGUAGE Date&Time Imprint LCD AF Lamp Back ŝ80Ş Auto Dark Normal Bright OK Set ƃ Start up image : [Off], [LOGO], [User Image] - Use a saved image for the start-up image with the [User Image] in the [RESIZE] menu in the play mode. - The start-up image will not be deleted by [DELETE] or [Format] menu. - The User images will be deleted by [Reset] menu. SETUP1 LANGUAGE Date&Time Imprint LCD AF Lamp Start Image Back ஒଢ OK Set Setup menu 2 ( ) [ Quick view ] [ LCD save ] ƈ If you enable Quick View before capturing an image, you can view the image you just captured on the LCD monitor for the duration set in the [Quick View] setup. Quick view is possible only with still images. ƈ If you set the [LCD save] to On and the camera isn't operated during the specified time, the LCD monitor will be turned off automatically. ƃ Sub menus [Off] : The quick view function can’t be activated. [0.5, 1, 3 sec] : The captured image is briefly displayed during the selected time. SETUP2 Quick View Power Off LCD Save Video Out Set Password Format Back Off 0.5 sec 1 sec 3 sec ƃ [LCD save] sub menu [Off] : The LCD monitor will not be turned off. [On] : If you select the [LCD Save] and the camera isn't operated during the specified time (about 30 SEC.), the camera power will be idle (LCD monitor : OFF, Camera status lamp : Blinking) automatically. SETUP2 Quick View Power Off LCD Save Video Out Set Password Format Back Off On OK Set OK Set [ Auto power off ] ƈ This function switches the camera off after a set amount of time in order to prevent unnecessary battery drainage. ƃ Sub menus [1, 3, 5, 10 min] : The power will turn off automatically if not used for the period of time specified. SETUP2 Quick View Power Off LCD Save Video Out Set Password Format Back 1 min 3 min 5 min 10 min - After replacing the battery, the power off setting OK Set will be preserved. - Note that the automatic power off function will not operate if the camera is in the PMP, MP3, Text Viewer mode, PC / Printer mode, slide show, playing back a voice recording and playing back a movie clip. ŝ81Ş Setup menu 2 ( ) [ Selecting Video out type ] - NTSC : U.S.A, Canada, Japan, South Korea, Taiwan, Mexico. ƈ The Movie output signal from the camera can be NTSC or PAL. Your choice of output will be governed by the type of device (monitor or TV, etc.) to which the camera is connected. PAL mode can support only BDGHI. - PAL ƈ Connecting to an external monitor When the camera is connected to an external monitor in the play back mode, the image (movie or still image) will be visible on the external monitor and the LCD monitor of the camera turns off. : Australia, Austria, Belgium, China, Denmark, Finland, Germany, U.K., Holland, Italy, Kuwait, Malaysia, New Zealand, Singapore, Spain, Sweden, Switzerland, Thailand, Norway. - When using a TV as an external monitor, you will need to select the external or AV channel of the TV. - There will be a digital noise on the external monitor, but it is not a malfunction. SETUP2 Quick View Power Off LCD Save Video Out Set Password Format Back - If the image is not in the centre of the screen, use the TV controls to centre it. NTSC PAL OK Set - When the camera is connected to an external monitor, some parts of the image may not be displayed. - When the camera is connected to an external monitor, the menu will be visible on the external monitor and the menu functions are the same as those indicated on the LCD monitor. - When the camera is connected to an external monitor, the button sound may not sound. - When you connect the A/V cable in a recording mode, the camera mode is changed to the Playback mode automatically and an image will be displayed. Yellow - Video White - sound ŝ82Ş Setup menu 2 ( ) [ Password setup ] ƈ You can set the password on the secret album. (p.69) [ Initialisation ] SETUP2 Quick View Power Off LCD Save Video Out Set Password Format Move ƈ All camera menu and function settings will be restored to their default values. However, values for DATE / TIME, LANGUAGE, and VIDEO OUT will not be changed. 0.5 sec 3 min Off NTSC ƃ Sub menus [No] : Settings will not be restored to their defaults. [Yes] : All settings will be restored to their defaults. OK Set [ Formatting a memory ] ƈ This is used for formatting the memory. If you run [Format] on the memory, all images, including the protected images, will be deleted. Be sure to download important images to your PC before formatting the memory. ƃ Sub menus [No] : The memory will not be formatted. [Yes] : A [Processing!] message appears and the memory will be formatted. If you run FORMAT in Play mode, a [No Image!] message will appear. SETUP2 Quick View Power Off LCD Save Video Out Set Password Format Back SETUP2 Power Off LCD Save Video Out Set Password Format Reset Back No Yes OK Set No Yes OK Set Be sure to run [Format] on the following types of memory card. - A new memory card, or an unformatted memory card - A memory card that has a file this camera can't recognise or one that has been taken from another camera. - Always format the memory card using this camera. If you insert a memory card that has been formatted using other cameras, memory card readers, or PCs, you will get a [Card Error!] message. ŝ83Ş MP3 / PMP / TEXT VIEWER Mode ƈ This camera has an embedded MP3, TEXT VIEWER & Portable Media Player program. You can take a picture, listen to the MP3 files and watch the movie clip (Movie and Video clip) whenever you want. To use the PMP mode, you must convert the multimedia file with the Digimax Converter. In the TEXT VIEWER mode you can see the text on the LCD monitor with listening MP3 music. ƈ If the file name is over 255 (Including 2 Byte language like Korean, Chinese, etc.) characters, the file name doesn't appear on the play list. Downloading files ƈ To use MP3, PMP and TEXT VIEWER functions, MP3, PMP(multimedia files) and TEXT files must be saved in the internal memory or memory card of this camera. 1. Save the desired files on your PC. 2. Connect the camera to your PC with the USB cable and turn on the camera. 3. Open Window's EXPLORER and search for Removable Disk (SAMSUNG). 4. Make a folder under the Removable Disk. - MP3 Mode : [MP3] - PMP Mode : [PMP] - TEXT VIEWER mode : [TEXT] 5. Select desired files that you want to save and copy them to the desired folder. ŝ84Ş MP3 / PMP / TEXT VIEWER Mode INFORMATION ƃ Take care of the illegal duplication of MP3 & multimedia files. It violates various copyright laws. ƃ This camera can only play back MP3 files in the MP3 mode and SDC files (modified XviD MPEG4 video / MPEG Layer2 audio type) in the PMP mode. ƃ If a file can not be played back on this camera, convert it into the supported file format by using the Digimax Converter. (p.108) ƃ Up to 900 files and 100 sub folder can be saved in a folder. Starting the MP3 / PMP / TEXT VIEWER mode ƈ Insert the memory card that holds MP3, PMP and TEXT files. As this camera has a 10MB internal memory, you can save the files on the internal memory too. 1. Select a desired Multi media mode. (p.16, 86) 2. A menu will display as shown. [Resume] : memorizes the latest stopped frame. MP3 mode : plays back from the beginning of the file. PMP mode : plays back from the latest stopped frame. TEXT VIEWER mode : plays back from the latest stopped frame. [Open] : The browsing menu will be displayed to select a desired file. 3. Select a desired file and press the OK button. And then the file will play back. [MP3 mode] Resume Open OK Confirm ŝ85Ş Starting the MP3 / PMP / TEXT VIEWER mode [MP3 mode] INFORMATION 03-Audio Track 03.mp3 01-Audio Track 01.mp3 Move OK Select [PMP mode] [SDC]-move sample.sdc Who bent my camera? Move OK Select [TEXT VIEWER mode] TEST.TXT TEST.TXT Thank you for buying a Samsung Camera. This manual will guide you through using the camera, includin capturing images, downloading images and using the application software. Please read this manual carefully before using your new camera. Move ŝ86Ş OK Select ƃ When the [Resume] menu (p.91) of each mode are set as [Off], the browsing menu doesn't open. If the last played file was deleted, the browsing menu opens though the setting is the same as above. ƃ The order of play lists on the browsing menu and the order of files saved in the memory are the same. ƃ A title coded with unsupported language is displayed as "--------". ƃ The automatic power off function will not operate if the a file is playing back. ƃ If there are over 100 files in the memory, it takes a little longer for the camera to process to the MP3 / PMP mode. ƃ If there is no operation during the specified time (About 30 sec.) in the MP3 / TEXT VIEWER mode (B.G.M : Off, Auto scroll : Off), the LCD monitor is turned off automatically and the camera status lamp blinks. To use the camera, press any of the camera buttons except the Power button. ƃ Playing back the VBR (Variable Bit Rate) file. A VBR file varies the amount of output data in each time segment based on the complexity of the input the data in that segment. When the VBR encoded files are played back, the LCD will display as shown. - The VBR icon will display instead of the Bit rate icon. ƃ For about 2 seconds of the start and end frames of the PMP file, no camera button except the Power button can be operated. ƃ When an MP3 file doesn't play back correctly, download a free MP3 conversion program and convert it before using the MP3 file on the camera. ƃ Depending on the file type, the movie may be paused during playing back in the PMP mode. The movie restarts automatically and it is not a camera malfunction. LCD monitor indicator for MP3 / PMP / TEXT VIEWER mode ƈ The LCD monitor displays information about the MP3, multimedia and Text file. Indication of present TEXT MP3 mode Battery (p.11) TEXT VIEWER mode Current page / Whole page TEST.TXT Battery (p.11) Lock (p.89) Mute (p.88) Equalizer (p.89) Encoding Type (ANSI, Uni) Thank you for buying a Samsung Camera. Playing time Search speed (p.88) Bit rate (p.86) Playback mode (p.91) Title of file Play & Pause / Control button (p.88) Volume (p.88) This manual will guide you through using the camera, including capturing images, downloading images and TEXT Contents Volume Indication (p.88) using the application software. Please read this manual carefully before using your new camera. [TEXT VIEWER mode] [MP3 mode] Title of file Volume (p.88) Time line Status bar PMP mode Battery (p.11) Lock (p.89) Mute (p.88) Play & Pause / Seeking button (p.88) Who bent my camera? Caption (p.108) ſ Encoding Type : ANSI (American National Standards Institute) Type, Uni (Unicode) Type - When the ANSI encoding type is displayed : You should set the Language of the TEXT VIEWER menu to view the text. Set the Language menu as one that is the same as the Operating System language that the text was created. - When the UNI encoding type is displayed : The text file will be displayed with any language menu. ſ If the text file size is over 10MB, it may take long time to view the text file. Divide the text file and the loading time will be shortened. [PMP mode] ŝ87Ş Using the camera buttons to adjust the camera Volume button ƈ You can control the volume with this button. There are 0 ~ 30 steps. - Mute ( ) : You can mute the MP3 sound with the Up button. Delete button ƈ This deletes files stored on the memory. 1. Select a desired file to delete on the browsing menu and press the Delete button. 2. A message will appear as shown [No] : cancels "Delete files" and the browsing menu will display. [Yes] : deletes the selected file. Play & Pause / Seeking button 01-Audio Track 03.mp3 Delete? 02-Audio Track 01.mp3 No ƈ When a file is playing back, press the ƌ button to pause the file. Pressing it again will resume playback. ƈ MP3 mode When an MP3 file is not played back, you can search the MP3 files by pressing the ȜȞ button. When an MP3 file is played back, you can search the desired part of the MP3 file by pressing the ȜȞ button. (2-16X) ƈ PMP mode You can search the Multimedia files by pressing the ȜȞ button. You can search a desired frame of the file during play back by pressing the ȜȞ button. ƈ TEXT VIEWER mode When the text list menu is displayed : select a text file by pressing the Ɗƌ button. When the text is displayed : press the Ɗƌ button and previous / next page of the file will be displayed. ŝ88Ş Yes OK Confirm INFORMATION ƃ Before deleting files from the camera, take care to download files you want to keep to your computer. Using the camera buttons to adjust the camera Hold / Equalizer button ƃ If you press the Hold button for over 1 second, the camera buttons are locked. - If the camera buttons are locked, the buttons can't be operated while playing back. But Power off, Video out, USB connection and LCD on functions can be operated. Playlist button ƃ While a multimedia file is playing back, you can select a desired file by using the browsing menu. 1. While a multimedia file is playing back, press the Playlist button ( 2. A playlist that is currently playing will be highlighted. 3. Move the cursor to a desired list by pressing the Control button. Pressing the OK button : the selected file is played back. Pressing the Playlist button : the selection will be cancelled. 03-Audio Track 03.mp3 01-Audio Track 01.mp3 Move [SDC]-move sample.sdc OK Select [MP3 Mode] Move ). TEST.TXT OK Select [PMP Mode] Move OK Select [TEXT VIEWER Mode] - If you press the Lock button again or turn off the camera, the camera is unlocked. ƈ The user can select appropriate sound with this setting. - Press the E button and select either <SRS>, <Normal>, <Live>, <Classic>, <Jazz>, <Rock> or <Dance>. ŝ89Ş Setting up the playback function using the LCD monitor ƈ MP3 / PMP / Text Viewer mode functions can be changed by using the LCD monitor. Press the MENU button and the menu will display on the LCD monitor. Menu tab Main menu Resume Play Mode MP3 MP3 Skin Show Play Show Interval Delete All Resume Seeking PMP Player Display Delete All ŝ90Ş Page Sub menu Off On Play All Repeat One Repeat All Random Random Repeat - Default 1 Default 2 User Skin 1 User Skin 2 Menu tab p.91 Resume p.91 Auto Scroll MP3 BGM p.91 TEXT VIEWER Page Off On Off 0.8 sec 1.1 sec 1.4 sec 1.7 sec 2.0 sec Off p.91 On FRANÇAIS DEUTSCH ESPAÑOL ITALIANO Play Repeat Play 3 sec 5 sec - PORTUGUÊS DUTCH No Yes p.92 DANSK SVENSKA SUOMI p.91 BAHASA POLSKI Magyar Off On 1 min 3 min 5 min 10 min - 5 sec On Off - No Yes p.92 Language p.93 p.94 ENGLISH 2 sec 30 sec p.92 Sub menu Main menu p.94 p.92 Delete All No ſ Menus are subject to change without prior notice. p.93 p.92 Yes p.92 Setting up the playback function using the LCD monitor Resume Play mode ƈ You can set the playback type. 1. Press the Menu button in each mode. 2. Select a desired playing type in the [Resume] menu by pressing the Ɗƌ button and pressing the OK button. Resume Off On Move Resume Off On MENU Exit [MP3 mode] Move Resume Off On MENU Exit [PMP Mode] Move MENU ƈ You can set various repeat and shuffle options. Play Mode This function is adopted only in the selected folder. Play All Repeat One Repeat All [Play All] : plays a single track once. Random Random Repeat [Repeat One] : plays a single track repeatedly. MENU Exit [Repeat All] : plays all tracks in the folder Move repeatedly. [Random] : randomly plays all tracks in the folder once. [Ramdom Repeat] : randomly plays all tracks in the folder repeatedly. Exit [TEXT VIEWER mode] Skin of MP3 player [Off] : The browsing menu will be displayed to select a desired file. [On] : When the camera is turned on / off or camera mode is changed, this camera will memorize the latest stopped frame. MP3 mode : plays back from the beginning of the file. PMP mode : plays back from the lastest stopped frame. TEXT VIEWER mode : plays back from the lastest stopped frame. ƈ You can set the skin of MP3 player. [Default 1, 2] : Default skin will be set. [User Skin 1, 2] : An image created by the [MP3 Skin] menu (p.52) will be set. MP3 SKIN Default 1 Default 2 User Skin 1 User Skin 2 Move MENU Exit ŝ91Ş Setting up the playback function using the LCD monitor Playing back the slide show ƈ While the MP3 file is playing back, captured images are displayed on the LCD monitor continuously. Delete all ƈ All files stored on the memory card will be deleted. In the MP3 mode, only MP3 files are deleted. In the PMP mode, only multimedia files are deleted. In the TEXT VIEWER mode, TEXT files are deleted. Show Start Play Repeat Play [Play] : Display the images once. [Repeat Play] : Display the images continuously. Move MENU Exit ſ When the playing back is complete, the slide show will stop. ſ To stop the slide show, press the Pause button and then press the E button. Delete All No Yes Move Delete All No Yes MENU Exit [MP3 mode] MENU Exit [PMP mode] [No] : cancels "Delete files" [Yes] : A confirmation window will display. Select [Yes] and press the OK button. All files will be deleted. Setting slide show interval ƈ You can set the slide show play interval of MP3 mode. - Select an interval from 2, 3 or 5 seconds. Move Delete All No Yes MENU Exit [TEXT VIEWER mode] Delete All No Yes Delete All? No Yes Show Interval 2 sec 3 sec 5 sec Move OK Confirm [MP3 mode] MENU Exit Frame search ƈ You can set the time of skip range when you search the movie by pressing the ȜȞ button. You can search a frame you want easily. [30 sec, 1, 3, 5, 10 min] : This will skip a set frame whenever you press the Left / Right button. ŝ92Ş Move SEEKING 30 sec 1 min 3 min 5 min 10 min Move MENU Exit Setting up the playback function using the LCD monitor Display setting ƈ You can set the play back function display on the LCD. [5 sec] : If there is no operation during 5 seconds, Menu bar will disappear. [On] : Menu bar will appear on the LCD monitor. [Off] : Menu bar will not appear on the LCD monitor. Setting up the recording function in the MP3 mode PLAYER DISPLAY 5 sec On [MK Off Move MENU Exit ƈ You can take a picture and listen to the MP3 files at the same time 1. Press the Shutter button and the MP3 stand-by icon will appear. 2. Press the Shutter button and an image will be taken. E MP3 INFORMATION ſ To see the caption, insert the caption file (.smi) by using the Digimax Converter. (p.108) ſ If a multimedia file has a caption, the caption will appear regardless of display setting. ƃ The camera settings are fixed to default setting of Auto mode ( , , , ). The settings can’t be changed. ƃ If the memory card is not inserted, this function will not operate. Occasionally the next file will be played back when you press the Shutter button, even though a memory card is inserted. ƃ To cancel the recording mode of the MP3 mode, press the E button or do not operate any buttons for about 10 seconds. Auto Scroll ƈ The playing text is scrolled automatically and displays on the LCD monitor. [Off] : The text will not be scrolled automatically. ſ Press the Ɗƌ button and you can use the Auto Scroll function. Auto Scroll Off 0.8 sec 1.1 sec 1.4 sec 1.7 sec 2.0 sec Move MENU Exit [0.8, 1.1, 1.4, 1.7, 2.0 sec] : The text will be scrolled automatically. The interval is marked on each menu icon. ŝ93Ş Setting up the playback function using the LCD monitor Be sure to observe the following precautions! MP3 BGM Setting ƈ You can play MP3 files when you are playing the text. [Off] : You cannot play the MP3 files. [On] : When you are playing the text, you can play the MP3 files. ſ The last played MP3 files will be executed. Important notes MP3 BGM Off On Move MENU Exit ƈ This unit contains precision electronic components. Do not use or store this unit in the following locations. - Areas exposed to severe changes in temperature and humidity. - Areas exposed to dust and dirt. - Areas exposed to direct sunlight or the inside of a vehicle in hot weather. - Environments where there is high magnetism or excessive vibration. - Areas with high explosives or highly flammable materials. ƈ Do not leave this camera in places subject to dust, chemicals (like naphthalene and mothball), high temperature and high humidity. Keep this camera in a hermetically sealed box with silica gel when not planning to use it for a long period. Language setting ƈ You can setup the language of OS (Operating System) that the text file was made. LANGUAGE ENGLISH FRANÇAIS - If the characters of the text file don't display DEUTSCH ESPAÑOL correctly, open the file on Windows 2000 or later ITALIANO MENU Exit Move and save it again. We recommend using 'Notepad' and it has to be saved as ANSI encoding type. - Some unique characters may not be displayed correctly on the camera. - Encode the text files as the standard type or some characters may not be displayed correctly. ŝ94Ş ƈ Sand can be particularly troublesome to cameras. - Do not let sand get inside the unit when using it on beaches, coastal dunes, or other areas where there is lots of sand. - Doing so may result in failure or may permanently render the unit unusable. ƈ Handling the camera - Never drop the camera or subject it to severe shocks or vibrations. - Protect the large size LCD monitor from impact. When this camera is not used, keep this camera in the camera case. - Avoid obstructing the lens or the flash when you capture an image. - This camera is not waterproof. To avoid dangerous electrical shocks, never hold or operate the camera with wet hands. - If you use this camera in wet places, such as beach or pool, do not let water or sand get inside the camera. Doing so may result in failure or may permanently damage the unit. Important notes ƈ Extremes in temperature may cause problems. - If the camera is transferred from a cold to a warm and humid environment, condensation can form on the delicate electronic circuitry. If this occurs, turn the camera off and wait for at least 1 hour until all moisture is dispersed. Moisture build up can also occur in the memory card. If this happens, turn off the camera and remove the memory card. Wait until the moisture has dispersed. ƈ Caution on Using the Lens - If the lens is subjected to direct sunlight, it could result in discoloration and deterioration of the image sensor. - Don't get fingerprints or foreign substances on the surface of the lens. ƈ If the digital camera is not used for a long period, an electric discharge can occur. It is a good idea to remove the batteries and the memory card if you do not intend using the camera for an extended period of time. ƈ If the camera is exposed to an electronic interference, it will turn itself off to protect the memory card. ƈ Under certain conditions, static electricity can cause the flash unit to fire. This is not harmful to the camera and is not a malfunction. ƈ When images are uploaded or downloaded, the data transfer may be affected by static electricity. In this case, disconnect and re-connect the USB cable before trying the transfer again. ƈ Before an important event or going on a trip, you should check the camera condition. - Take a picture to test the camera and always carry a spare fully charged battery. - Samsung cannot be held responsible for camera malfunctions. ƈ Do not use headphones/earphones while driving, cycling, or operating any motorized vehicle. It may create a traffic hazard and can be illegal in some areas. ƈ Avoid using headphones/earphones at high volume. Hearing experts advise against continuously loud and extended play. If you experience a ringing in your ears, reduce volume or discontinue use. ƈ Camera Maintenance - Use a soft brush (available from photo stores) to gently clean the lens and LCD assemblies. If this does not work, lens-cleaning paper with lens cleaning fluid can be used. Clean the camera body with a soft cloth. Do not allow this camera to come into contact with solvent materials such as benzol, insecticide, thinners etc. This may damage the body shell of the camera and also affect its performance. Rough handling can damage the LCD monitor. Take care to avoid damage and keep the camera in its protective carry case at all times when not in use. ƈ Do not attempt to disassemble or modify the camera. ŝ95Ş Warning indicator ƈ There are several warnings that may appear on the LCD display Card Error! ϛMemory card error ƍ Turn off the camera power and turn it on again ƍ Insert the memory card again ƍ Insert the memory card and format the memory card (p.83) Low Light! ϛWhen taking pictures in dark places ƍ Take pictures in Flash Photography mode Out Of Number ϛ When selecting too many printing pages in the PictBridge menu ƍ Select printing page within the limitation Card Locked! ϛThe memory card is locked ƍ SD memory card : Slide the write protect switch towards the top of the memory card Memory Full! ϛThere is insufficient memory capacity to take an image ƍ Insert a new memory card ƍ Delete unnecessary image files to free up some memory DCF Full Error ҮViolation of DCF format ƍ Copy the images to a PC and format the memory No Image! ϛThere are no images stored on the memory ƍ Take images ƍ Insert a memory card that is holding some images ƈ Please check the following File Error! ϛFile error ƍ Delete the file ϛMemory card error ƍ Contact a camera service centre Low Battery! ϛThere is low battery capacity ƍ Insert charged battery ŝ96Ş Before contacting a service centre The camera doesn’t switch on ϛThere is low battery capacity ƍ Insert charged battery ϛBattery is inserted incorrectly with the polarities reversed. ƍ Insert the battery according to the polarity marks (+, -) ϛThe rechargeable battery is not inserted ƍ Insert the battery and turn on the camera The camera power ceases while in use ϛThe battery is exhausted ƍ Insert charged battery ϛThe Camera is turned off automatically ƍ Turn on the camera power again Before contacting a service centre Battery power quickly drains ϛThe Camera is being used in low temperatures ƍ Keep the camera in warm conditions (i.e. inside a coat or jacket) and only remove it in order to take images Camera does not take images when the Shutter button is pressed ϛThere is insufficient memory capacity ƍ Delete unnecessary image files ϛThe memory card has not been formatted ƍ Format the memory card (p.83) ϛThe memory card is exhausted ƍ Insert a new memory card ϛThe memory card is locked ƍ Refer to [Card Locked!] error message ϛThe cameraŖs power is off ƍ Turn the camera power on ϛThe battery is exhausted ƍ Insert charged battery ϛBattery is inserted incorrectly with the polarities reversed ƍ Insert the battery according to the polarity marks (+, -) The camera suddenly stops working while in use ϛThe camera stopped due to a malfunction ƍ Remove / re-insert battery and switch the camera on The images are unclear ϛA picture was taken of the subject without setting an appropriate macro mode ƍ Select an appropriate macro mode to take a clear image ϛTaking a picture beyond the flash range ƍ Take a picture within the flash range ϛThe lens is smudged or dirty ƍ Clean the lens The flash does not fire ϛFlash off mode has been selected ƍ Dis-engage flash off mode ϛThe camera mode canŖt use the flash ƍ Refer to the FLASH instruction (p.26) Incorrect date and time is displayed ϛThe date and time have been set incorrectly or the camera has adopted the default settings ƍ Reset the date and time correctly The camera buttons do not operate ϛCamera malfunction ƍ Remove / re-insert battery and switch the camera on A card error has occurred while the memory card is in the camera ϛIncorrect memory card format ƍ Re-format the memory card The images don't play back ϛIncorrect file name (Violation of DCF format) ƍ Do not change the image file name Colour of image is different to the original scene ϛWhite balance or effect setting is incorrect ƍ Select appropriate White balance and effect Images are too bright ϛExposure is excessive ƍ Reset exposure compensation ŝ97Ş Before contacting a service centre No image on external monitor ϛThe external monitor has not been connected properly with the camera ƍ Check the connection cables ϛThere are incorrect files in the memory card ƍ Insert a memory card that has correct files When using the PC’s explorer, the Removable Disk (SAMSUNG) file does not show ϛCable connection is incorrect ƍ Check the connection ϛThe camera is off ƍ Turn the camera on ϛThe operating system is not Windows 98SE, 2000, ME, XP, Vista / Mac OS 10.1 ~ 10.4. Alternatively the PC does not support USB ƍ Install Windows 98SE, 2000, ME, XP, Vista / Mac OS 10.1 ~ 10.4 to PC that supports USB ϛThe camera driver is not installed ƍ Install a [USB Storage Driver] Specification Image Sensor - Type : 1/2.5ůCCD - Effective Pixel : Approx. 7.2 Mega Pixels - Total Pixel : Approx. 7.4 Mega Pixels Lens - Focal Length : f = 6.3 ~18.9mm (35mm equivalent : 38 ~114mm) : NV lens - F No. : F 3.5 ~ F 4.5 - Digital Zoom :ϛStill Image mode : 1.0X ~ 5.0X ϛPlay mode : 1.0X ~ 12.0X (depends on image size) LCD Monitor 3.0" wide color TFT LCD (230,000 dots) Focusing - Type : TTL auto focus, Multi-AF, Center AF, Face Recognition AF - Range Normal Wide Tele 80cm ~ infinity Macro 5cm ~ 80cm 40cm ~ 80cm Super Macro 1cm ~ 5cm - Auto Macro 5cm ~ Infinity 40cm ~ Infinity Shutter - Speed : 1 ~ 1/2,000 sec. (Night : 16 ~ 1/2,000 sec.) Exposure - Control : Program AE, Metering : Multi, Spot, Center, Face Recognition - Compensation : ť2EV (1/2EV steps) - ISO Equivalent : Auto, 80, 100, 200, 400, 800, 1000 Flash - Modes : Auto, Auto & Red-eye reduction, Fill-in flash, Slow sync, Flash off, Red eye fix - Range : Wide : 3.3m, Tele : 2.5m (ISO Auto) - Recharging Time : Approx. 5 sec. Sharpness Soft+, Soft, Normal, Vivid, Vivid+ E (Effect) button Effect - Colour : B & W, Sepia, Red, Green, Blue, Negative, Custom colour Special Colour : Colour Mask Image Adjustment : Saturation FUN : Preset focus frame, Composite, Photo Frame ŝ98Ş Specification Image Editing - Resize, Rotate Colour : B&W, Sepia, Red, Green, Blue, Negative, Custom Colour Special Colour : Colour Filter, Colour Mask Image Adjustment : Red eye reduction, Brightness, Contrast, Saturation, Noise Effect FUN : Cartoon, Preset Focus Frame, Composite, Photo Frame, Sticker, Text typing Storage - Capacity (MMC 512MB) White Balance Auto, Daylight, Cloudy, Fluorescent_H, Fluorescent_L, Tungsten, Custom Voice Recording Voice Recording (Min. 2 sec - Max. 10 hour), Voice Memo in Still Image (Min. 2 sec - Max. 10 sec.) Date Imprinting Date, Date&Time, Off (user selectable) Shooting - Still Image : ŋAuto, Program, ASR, Scene, Multimedia (MP3, PMP, TextViewer) ſ Scene : Night, Portrait, Children, Landscape, Close-up, Text, Sunset, Dawn, Backlight, Fireworks, Beach & Snow, Self shot, Food, Cafe ŋContinuous : Single, Continuous, AEB (0.3 step, Max. 3 shots), Wise Shot ŋSelf-timer : 10 sec., 2 sec., Double (10 sec. & 2 sec.) - Movie Clip : ŋWith Audio (recording time : (Min. 2 sec - Max. 1 hour) ŋSize : 640x480, 320x240 (Optical 3X zoom with sound recording) ŋFrame rate : 30fps, 15fps ŋColor Effect & WB selectable ŋMovie Editing (Embedded) : Pause during recording, Still Image Capture, Time Trimming ſ To record the movie, a memory card must be inserted. - Media : ŋInternal memory : About 10MB ŋExternal memory : SD / MMC / MMC + / HSMMC (Min. 32MB - Max. 2GB guaranteed) * Internal memory capacity is subject to change without prior notice. - File Format : Still Image : JPEG (DCF), EXIF 2.2, DPOF 1.1, PictBridge 1.0 Movie Clip : AVI (MPEG-4) Audio : WAV Super Fine Fine Normal 3072x2304 2592x1944 2048x1536 1024x768 3072x1728 2560x1440 1280x720 3072x2048 137 189 293 930 176 256 856 154 263 359 540 1456 338 481 1402 295 380 511 750 1793 485 680 1780 425 ſ These figures are measured under Samsung’s standard conditions and may vary depending on shooting conditions and camera settings. Image Play - Type : Single image, Thumbnail, Slide show (Effect, B.G.M), Album, Movie Interface - Digital output connector : USB 2.0 - Audio : Mono - Video output : NTSC, PAL (user selectable, Only in the playback mode) - DC power input connector : 24-pin connector Power Source - Rechargeable battery : Lithium Ion (SLB-0837, 860mAh) - Charger : SAC-45 KIT ſ Included battery type may vary depending on sales region. Dimensions (WxHxD) 89.7x61x21.5mm ŝ99Ş Specification Weight Software 161.7g (without battery & card) - Operating Temperature : 0 ~ 40ŭC - Operating Humidity : 5 ~ 85% - Digimax Converter, Digimax Master, Adobe Reader ſ PMP Specification PMP Decoder - Movie : Xvid MPEG4 (Digimax Convert S/W) - Audio : MPEG Layer 2 (Digimax Convert S/W) Play Mode - Seeking in Play, Skipping in Play - Auto skipping after one file played - Auto reload function (Remember last played frame) - Support Full Screen in Converting S/W Subtitle - Support SMI file (Using Digimax Converter S/W) ſ MP3 Specification Audio File - Frequency : 20Hz ~ 20KHz - Earphone Port : 2.5mm Port (Stereo Type) - Output : Maximum Volume Left 40mW + Right 40mW (16ѳ) - Noise Ratio : 88 dB with 20 KHz LPF ſ Text Specification File - TXT extension name, up to 99999 pages File format - Window : ANSI (Windows 98 or later), Unicode / Unicode (BigEndian) / UTF-8 (Windows 2000/XP) - Mac : ANSI, Unicode (UTF-16) Function - Auto Scroll (0.8 sec ~ 2.0 sec) - Skipping by 1 page / 10 pages - Auto reload function (Remember last page) - Support MP3 BGM during displaying text file Language - English, Korean, French, German, Spanish, Italian, Chinese, Taiwanese, Japanese, Russian, Portuguese, Dutch, Danish, Swedish, Finnish, Bahasa, Polish, Hungarian, Czech, Turkish. * Supportable language is subject to change without prior notice. - File Format : MP3 (MPEG-1/2/2.5 Layer 3) - Bit Rate : 48 ~ 320kbps (Including VBR) Sound Effect - SRS WOW HD, Normal, Classic, Dance, Jazz, Live, Rock Play Mode - All, Repeat One, Repeat All, Random, Random Repeat - Fast Forward / Rewind (Search function) - Slide Show selectable - Skipping in Play, Auto Skipping - MP3&Capturing (Capturing Mode is Auto Default, 5MW) - Auto reload function (Remember both the last played file and frame) - Background skin of MP3 playback using user images ſ Specifications are subject to change without prior notice. ſ All trademarks are the property of their respective owners. ŝ100Ş Software Notes About the software Please ensure that you read the software instructions carefully before use. ŋThe attached software is a camera driver and image editing software tool for Windows. ŋUnder no circumstances should all or part of either the software or the user manual be reproduced. ŋCopyrights for software are licensed only for use with a camera. ŋIn the unlikely event of a manufacturing fault, we will repair or exchange your camera. We cannot, however, be held responsible in any way for damage caused by inappropriate use. ŋUsing a Hand-made PC or a PC and OS that has not been guaranteed by the manufacturer is not covered by the Samsung warranty. ŋBefore reading these instructions, you should have a basic knowledge of computers and O/S (Operating Systems). System Requirements For Windows PC with processor better than Pentium II 450MHz (Pentium 800MHz recommended) Windows 98SE/2000/ME/XP/Vista Minimum 128MB RAM (Over 512MB recommended) 200MB of available hard disk space 1024x768 pixels, 16-bit colour display compatible monitor (24-bit colour display recommended) Microsoft DirectX 9.0 ҭDigimax Converter PC with processor better than Pentium III 500MHz (Pentium ю recommended) Windows 2000/XP/Vista For Macintosh Power Mac G3 or later / Intel Processor Mac OS 10.1 ~ 10.4 Minimum 256MB RAM 110MB of available hard-disk space ҭFor playing back a movie clip 3ivx and QuickTime Player for QuickTime MPlayer for Intel Processor After inserting the CD-ROM provided with this camera into the CD-ROM drive, the following window should automatically run. Before connecting the camera to the PC, you should first install the camera driver. ſ Screen Captures illustrated on this manual is based on English Edition of Windows. ƈ Camera driver : This enables images to transfer between the camera and PC. This camera uses the USB Storage Driver as the camera driver. You can use the camera as a USB card reader. After installing the driver and connecting this camera to the PC, you can find Removable Disk (SAMSUNG) in [Windows Explorer] or [My Computer]. A USB Storage Driver is provided only for Windows. A USB Driver for MAC is not included with the Application CD. You can use the camera with Mac OS 10.1 ~ 10.4. ƈ XviD codec : This makes movie clips (MPEG-4) recorded with this camera play back on a PC. To play back a movie clip recorded with this camera, you must install the XviD codec. If a movie clip recorded with this camera does not play well, install this codec. This software is only compatible with Windows. ƈ Digimax Converter : Multimedia converting program Multimedia (Movie, Video clip, etc) files can be converted into movie clips that can be played back on this camera. This software is only compatible with Windows. ŝ101Ş About the software ƈ Digimax Master : This is the all-in-one multi media software solution. You can download, view, edit and save your digital images and movie clips with this software. This software is only compatible with Windows. Setting up the application software ƈ To use this camera with a PC, install the application software first. After this has been done, the stored images in the camera can be moved to the PC and can be edited by an image editing program. ƈ You can visit the Samsung web-site through the internet. INFORMATION ƃ Be sure to check the system requirements before installing the driver. ƃ You should allow 5 ~ 10 seconds for running the automatic setup program. If the frame does not show, run the [Windows Explorer] and select [Installer.exe] in the CD-ROM Drive root directory. ƃ PDF documents of user manual are included in the Software CD-ROM supplied with this camera. Search the PDF files with Window's explorer. Before opening the PDF files, you must install the Adobe Reader included in the Software CD-ROM. ƃ To install the Adobe Reader 6.0.1 correctly, Internet Explorer 5.01 or later had to be installed. Visit "www.microsoft.com" and upgrade the Internet Explorer. ŝ102Ş http://www.samsungcamera.com : English http://www.samsungcamera.co.kr : Korean 1. The auto run frame will be displayed. Click the [Install] menu in the Auto run frame. 2. Install the camera driver and DirectX by selecting a button shown on the monitor. Setting up the application software 3. Install the software by instructions on the monitor. 4. To play back the movie clip recorded with this camera on the computer, install the XviD codec. ŝ103Ş Setting up the application software ſ The XviD codec is distributed according to and under the terms and conditions of the GNU General Public License and everyone can copy, modifiy and distribute this codec freely, but WITHOUT ANY WARRANTY, IMPLIED OR EXPRESSED, OF MERCHANTABILITY OR FITNESS FOR A PARTICULAR PURPOSE; provided, however, that you have to follow the GNU General Public License whenever you are distributing this codec or modification thereof. For more information see the GNU General Publice License documents (http://www.gnu.org/copyleft/gpl.html). 5. After restarting the computer, connect the PC to the camera with the USB cable. Starting PC mode ƃ In this mode, you can download stored images to your PC through the USB cable. ƃ The LCD monitor is always turned off in PC mode. ƈ Connecting the camera to a PC 1. Connect the PC to the camera with the USB cable. 2. Select the [Computer] menu by using the Smart button. Computer Printer OK Confirm 6. Turn the camera power on. The [Found New Hardware Wizard] will open and the computer will recognize the camera. ſ If your OS is Windows XP, an image viewer program will open. If the download window of Digmax Master opens after starting Digimax Master, the camera driver was setup successfully. INFORMATION ƃ If you have installed the camera driver, the [Found New Hardware Wizard] may not open. ƃ On a Windows 98 SE system, the Found New Hardware Wizard dialog box opens and a window asking you to select a driver file may appear. In this case, specify "USB Driver" in the CD supplied. ŝ104Ş ſ If you selected [Printer] in Step 2, when you connect the camera to your printer, the [Connecting Printer] message will display and the connection will not be established. In this case, disconnect the USB cable, and then follow the procedure from Step 1 and onward. Starting PC mode ƈ Disconnecting the camera and PC : Refer to "Removable Disk" (p.106) 3. Select an image and press the right mouse button. INFORMATION ƃ Before inserting any cables or AC adapter, check the directions and do not insert by force. It may cause breakage of cable or camera. 4. A pop-up menu will open. Click the [Cut] or [Copy] menu. - [Cut] : cuts a selected file. - [Copy] : copies files. Removable Disk ƈ Downloading stored images You can download the still images stored on the camera to your PC's hard disk and print them or use a photo editing software to edit them. 5. Click a folder where you want to paste the file. 6. Press the right mouse button and a pop-up menu will open. Click [Paste]. 1. Connect the camera to your PC with the USB cable. 2. On your computer's desktop display, select [My Computer] and double click [Removable Disk (SAMSUNG) ƍ DCIM ƍ 100SSCAM]. 7. An image file is transferred from the camera to your PC. ŝ105Ş Removable Disk CAUTION ƃ We recommend that you should copy the images to the PC to view them. Opening images directly from the removable disk may be subject to unexpected disconnection. ƃ When you upload a file that is not taken by this camera to the Removable Disk, the [File Error!] message will be displayed on the LCD monitor in the PLAY mode, and nothing is displayed in THUMBNAIL mode. Removing the removable disk 2. Double-click the [Unplug or Eject Hardware] icon on the task bar. [Double Click!] 3. The [Unplug or Eject Hardware] window will open. Select the [USB Mass Storage Device] and click the [Stop] button. 4. The [Stop a Hardware device] window will open. Select the [USB Mass Storage Device] and click the [OK] button. ƈ Windows 98SE 1. Check whether the camera and PC are transferring a file. If the camera status lamp blinks, please wait until the lamp has finished blinking and is constantly on. 2. Unplug the USB cable. ƈ Windows 2000 / ME / XP / Vista (The illustrations may differ from those shown depending on the Windows O/S.) 1. Check whether the camera and PC are transferring a file. If the camera status lamp blinks, please wait until the lamp has finished blinking and is constantly on. 5. A [Safe to Remove Hardware] window will open. Click the [OK] button. 6. A [Unplug or Eject Hardware] window will open. Click the [Close] button and the removable disk may be removed safely. 7. Unplug the USB cable. ŝ106Ş Setting up the USB Driver for MAC 1. A USB Driver for MAC is not included with the software CD as MAC OS supports the camera driver. 2. Check the MAC OS version during start-up. This camera is compatible with MAC OS 10.1 ~ 10.4. 3. Connect the camera to the Macintosh and turn the camera power on. 4. A new icon will be displayed on the desktop after connecting the camera to the MAC. Removing the USB Driver for Windows 98SE ƈ To uninstall the USB driver, refer to the process shown below. 1. Connect the camera to your PC and turn them on. 2. Check whether the Removable Disk is on the [My Computer]. 3. Remove the [Samsung Digital Camera] on the Device manager. Using the USB Driver for MAC 1. Double click a new icon on the desktop and the folder in the memory will be displayed. 2. Select an image file and copy or move it to MAC. INFORMATION ƃ For Mac OS 10.1 or later : First complete uploading from computer to camera and then remove the removable disk with the Extract command. ƃ If a movie clip can’t play back on the Mac OS, refer to the following table. Power Pc Player Download and install the 3ivx codec and run the movie with the QuickTime Player 4. Disconnect the USB cable. 5. Remove the [Samsung USB Driver] on the Add / Remove Programs Properties. Intel Processor Run the movie with the MPlayer http://www.3ivx.com/downl http://mplayerosx.sourcefor Reference oad/macos.html ge.net/ URL http://www.versiontracker.com/macosx/ 6. Uninstallation is complete. ŝ107Ş Digimax Converter ƈ Multimedia (Movie, Video clip, etc) files can be converted into movie clips that can be played back on this camera. This software is only compatible with Windows. ƈ How to use the Digimax Converter 1. Double click the Digimax Converter icon ( ) on the desktop. 2. Click the Add icon ( ) and select a file that you want to add. 3. If you want to add a caption, check "Use subtitles from file (*.smi)". 4. Select settings that you want and click the Convert button. - Output Format : You can set the output format (16:9, 4:3) - Frame size : You can set the width and height of output movie clip. - Frame rate : You can set fps (Frame Per Second). - Screen size : You can set type of display. - Split by size : You can set the file size of output movie clip. 5. Connect the camera to the computer with the supplied USB cable. 6. Copy the converted movie clip in the destination folder and paste the file in the [PMP] folder. ŝ108Ş 7. You can play back the converted movie clip in the Play mode of the camera. ſ Refer to the [Help] menu in Digimax Converter for further information. Who bent my camera? INFORMATION ƃ Before converting a multimedia file, check whether it plays back correctly on the Windows Media Player. ƃ The converted files are saved as *.sdc file type that can be played back on the Windows Media Player. ƃ The Digimax Converter doesn't cover every kind of codecs. If a multimedia file can't play back on the Windows Media Player, install a multicodec (We recommend Full version of latest K-Lite Codec). Install the Digimax Converter again after installing the multi-codec. ƃ You can select destination folder of each converted file. When the folder is not selected, the converted files are saved on a folder where the source file is. ƃ If you convert several files at the same time, the computer may be running slow because of the CPU capacity. In this case, add the files in the program one by one. ƃ Computer specification, installed code and programs are the main causes of converting error. When a converting error happens, please check the following. - Any codecs compatible with the files were not installed or installed incorrectly. In this case, find a compatible codec and install it. If you do not find any compatible codecs, install a multi-codec. Digimax Converter INFORMATION - If you installed various multi-codecs on your computer, it may cause converting problems. In this case, remove all codecs and install a proper multi-codec. - Install a latest Windows Media Player. - Visit device (PC, Graphic card, Sound card) manufacturer web-site and upgrade them with the latest version. ƃ Some kinds of multimedia files are not converted. If the converted media files are damaged, they may not play back on the camera. Unusual type of files may not be converted. The sound and scenes may not synchronise. ƃ The expected file sizes after converting a media file may vary. It depends on the computer system you use. ƃ If there is no font that is compatible with the script file on your PC, the script is shown as ' '. ƃ Transferring the converted file to a removable disk is time consuming. It may take a long time. The duration depends on the file size. ƃ Do not use the PMP mode while driving. It may create a traffic hazard. ƃ A file that does not support fast search on the Windows Media Player can't select converting range and divide file size. Digimax Master ƈ You can download, view, edit and save your images and movies with this software. This software is only compatible with Windows. ƈ To run the Digimax Master, double click the Digimax Master icon on the desktop. ƃ Downloading images 1. Connect the camera to your PC. 2. A window for downloading images will display after connecting the camera to your PC. - To download the captured images, select the [Select All] button. - Select desired folder in the window and click the [Select All] button. You can save captured images and selected folder. - If you click the [Cancel] button, downloading will be cancelled. 3. Click [Next >] button. ŝ109Ş Digimax Master 4. Select a destination and make a new folder in which to save downloaded images and folders. - Folder names can be made in order of date and images will be downloaded. - Folder name will be made as you want and images will be downloaded. - After selecting a folder that was made before, images will be downloaded. 5. Click [Next >] button. ƃ Image viewer : You can view the stored images. ڹ ڽ ھ ڿ ں ڻ ڼ 6. A window will open as shown alongside. The destination of the selected folder will be displayed on the upper side of the window. Click the [Start] button to download the images. 7. Downloaded images will be displayed. - Image viewer functions are listed below. ڹMenu bar : You can select menus. File, Edit, View, Tools, Change functions, Auto download, help, etc. ںImage selection window : You can select the desired images in this window. ڻMedia type selection menu : You can select image viewer, image edit and movie edit functions in this menu. ڼPreview window : You can preview an image or a movie clip and check the multi media information. ڽZoom bar : You can change preview size. ھFolder display window : You can see the folder location of the selected image. ڿImage display window : Images in the selected folder are displayed. ſ Refer to the [Help] menu in Digimax Master for further information. ŝ110Ş Digimax Master ƃ Image edit : You can edit the still image. ڹ ƃ Movie edit : You can get the still image, movie clip, narration, music files together in a movie clip. ڼ ڹ ں ں ڻ - Image edit functions are listed below. ڹEdit menu : You can select the following menus. [Tools] : You can resize or crop the selected image. See the [Help] menu. [Adjust] : You can modify image quality. See the [Help] menu. [Retouch] : You can change the image or add effects to the image. See the [Help] menu. ںDrawing tools : Tools for editing an image. ڻImage display window : A selected image appears in this window. ڼPreview window : You can preview the changed image. ſ A still image edited with Digimax Master can’t be played back on the camera. ſ Refer to the [Help] menu in Digimax Master for further information. - Movie clip edit functions are listed below. ڹEdit menu : You can select the following menus. [Add Media] : You can add other media elements to a movie. [Edit Clip] : You can change the brightness, contrast, colour and saturation. [Effects] : You can insert an effect. [Set Text] : You can insert texts. [Narrate] : You can insert a narration. [Produce] : You can save the edited multi media as a new file name. * You can select AVI, Windows media (wmv) and Windows media (asf) file types. ںFrame display window : You can insert multi media in this window. ſ Some movie clips that were compressed with a codec that is not compatible with the Digimax Master can’t play back in the Digimax Master. ſ Refer to the [Help] menu in Digimax Master for further information. ŝ111Ş FAQ ƈ Please check the following if the USB connection malfunctions. Case 1 The USB cable is not connected or you are using a cable with an incorrect specification. ƍ Use a USB cable with the correct specification. Case 2 The camera is not recognized by your PC. Sometimes, the camera may appear under [Unknown Devices] in Device Manager. ƍ Install the camera driver correctly. Turn off the camera, remove the USB cable, plug in the USB cable again, and then turn on the camera. Case 3 There is an unexpected error during file transfer ƍ Turn the camera power off and on again. Transfer the file again. Case 4 When using the USB hub. ƍ There may be a problem in connecting the camera to the PC through a USB hub if the PC and the hub are not compatible. Wherever possible, connect the camera directly to the PC. Case 5 ŝ112Ş Are other USB cables connected to the PC? ƍ The camera may malfunction when it is connected to the PC at the same time as another USB cable. In this instance, disconnect the other USB cable so that only the camera's USB cable is connected to the computer. Case 6 When I open the Device Manager (by clicking Start ƍ (Settings) ƍ Control Panel ƍ (Performance and Maintenance) ƍ System ƍ (Hardware) ƍ Device Manager), there areşUnknown DevicesŠ şOther DevicesŠentries with a yellow question mark (?) beside them or devices with an exclamation mark (!) beside them. ƍ Double-click on the entry with the question (?) or exclamation (!) mark, and remove them (Click the right mouse button and ‘Remove’ menu will display). Re-boot your computer and connect the computer and the camera. In Windows 98SE, remove the camera driver and reboot the computer. And then connect the computer and the camera. Case 7 In some security programs (Norton Anti Virus, V3, etc.), the computer may not recognise the camera as a removable disk. ƍ Stop the security programs and connect the camera to the computer. Refer to the security program instructions about how to stop the program. Case 8 The camera is connected to the USB port located on the front of the computer. ƍ When the camera is connected to the USB port located on the front of the computer, the computer may not recognise the camera. Connect the camera to the USB port located on the back of the computer. FAQ ƈ When the movie clip doesn’t play back on the PC ſ When the movie clip recorded by the camera doesn’t play back on the PC, the causes are mostly due to the codec installed on the PC. ƃ When codec for play back the movie clip isn’t installed ƍ Install the codec as listed below. [Installing codec for Windows] 1. Installing the XviD codec 1) Insert the CD provided with the camera. 2) Run the windows explorer and select [CD-ROM drive:\XviD] folder and click the XviD-1.1.2-01112006.exe file. ſ The XviD codec is distributed according to the GNU General Public License and everyone can copy, distribute and change this codec. This License applies to any program or other work which contains a notice placed by the copyright holder saying it may be distributed under the terms of this General Public License. For more information, see the License documents (http://www.gnu.org/copyleft/gpl.html). 2. Install the Multi codec If the movie doesn't play back after installing the XviD codec, install a multi codec that supports MP4V. <Note> The caption may not be displayed after installing the multi codec in the Windows 98SE / ME. In this case, install the DivxG400 caption filter. [Installing codec for Mac OS] 1) Visit the following site for downloading the codec. (http://www.3ivx.com/download/macos.html) 2) Check the version of Mac OS and click the [Download] button to download the 3ivx codec. 3) Run the downloaded file and the codec for playing back the movie clip will be installed. ſ When the CPU is Intel Processor, run the movie with the MPlayer. ƃ When the DirectX 9.0 or later is not installed ƍ Install the DirectX 9.0 or later 1) Insert the CD provided with the camera 2) Run the windows explorer and select the [CD-ROM drive:\ USB Driver\DirectX 9.0] folder and click the DXESETUP.exe file. The DirectX will be installed. Visit the following site for downloading the DirectX.http://www.microsoft.com/directx ƃ If a PC (Windows 98SE) stops responding while the camera and PC are connected repeatedly ƍ If a PC (Windows 98SE) is turned on for a long time and the camera is onnected repeatedly, the PC may not recognise the camera. In this case, restart the PC. ƃ If a PC connected with the camera stops responding while Windows is starting. ƍ In this case, disconnect the PC and the camera and Windows will start. If the problem happens continuously, set the Legacy USB Support to disable and re-start the PC. The Legacy USB Support is in the BIOS setup menu. (The BIOS setup menu differs from the PC manufacturers and some BIOS menus don’t have Legacy USB Support) If you can’t change the menu by yourself, contact to the PC manufacturer or BIOS manufacturer. ƃ If the movie clip can’t be deleted, or the removable disk can’t be extracted or an error message displays during the file transfer. ƍ If you install only the Digimax Master, the problems mentioned above occasionally happen. - Close the Digimax Master program by clicking the Digimax Master icon on the Taskbar. - Install all the application programs included in the software CD. ŝ113Ş Correct Disposal of This Product Correct Disposal of This Product (Waste Electrical & Electronic Equipment) (Applicable in the European Union and other European countries with separate collection systems) This marking shown on the product or its literature, indicates that it should not be disposed with other household wastes at the end of its working life. To prevent possible harm to the environment or human health from uncontrolled waste disposal, please separate this from other types of wastes and recycle it responsibly to promote the sustainable reuse of material resources. Household users should contact either the retailer where they purchased this product, or their local government office, for details of where and how they can take this item for environmentally safe recycling. Business users should contact their supplier and check the terms and conditions of the purchase contract. This product should not be mixed with other commercial wastes for disposal. FCC notice ƈ NOTE : This equipment has been tested and found to comply with the limits for a Class B digital device, pursuant to part 15 of the FCC Rules. These limits are designed to provide reasonable protection against harmful interference in a residential installation. This equipment generates, uses and can radiate radio frequency energy and, if not installed and used in accordance with the instructions, may cause harmful interference to radio communications. However, there is no guarantee that interference will not occur in a particular installation. If this equipment does cause harmful interference to radio or television reception, which can be determined by turning the equipment off and on, the user is encouraged to try to correct the interference by one or more of the following measures: - Reorient or relocate the receiving antenna. - Increase the distance between the equipment and receiver. - Connect the equipment into an outlet on a circuit different from that to which the receiver is connected. - Consult the dealer or an experienced radio / TV technician for help. ƈ CAUTION : Changes or modifications not expressly approved by the manufacturer responsible for compliance could void the user’s authority to operate the equipment. Samsung Techwin cares for the environment at all product manufacturing stages to preserve the environment, and is taking a number of steps to provide customers with more environment-friendly products. The Eco mark represents Samsung Techwin’s will to create environment-friendly products, and indicates that the product satisfies the EU RoHS Directive. ŝ114Ş ƈ Declaration of Conformity Trade Name : SAMSUNG TECHWIN Model No. : Samsung i70 Responsible Party : Samsung Opto-Electronics America, INC. Address : 40 Seaview Dr. Secaucus, NJ 07094 Telephone No. : 201-902-0347 This device complies with Part 15 of the FCC Rules. Operation is subject to the following two conditions: (1) This device may not cause harmful interference, and (2) this device must accept any interference received, including interference that may cause undesired operation. MEMO MEMO ŝ115Ş MEMO ŝ116Ş MEMO SAMSUNG TECHWIN CO., LTD. SAMSUNG FRANCE S.A.S. SAMSUNG OPTO-ELECTRONICS UK LIMITED OPTICS & DIGITAL IMAGING DIVISION 145-3, SANGDAEWON 1-DONG, JUNGWONGU, SUNGNAM-CITY, KYUNGKI-DO, KOREA 462-121 TEL : (82) 31-740-8086, 8088, 8090, 8092, 8099 FAX : (82) 31-740-8398 www.samsungcamera.com BP 51 TOUR MAINE MONTPARNASSE 33, AV .DU MAINE 75755, PARIS CEDEX 15, FRANCE HOTLINE PHOTO NUMÉRIQUE : 00 800 22 26 37 27(Numéro Vert-Appel Gratuit) TEL : (33) 1-4279-2200 FAX : (33) 1-4320-4510 www.samsungphoto.fr SAMSUNG HOUSE 1000 HILLSWOOD DRIVE HILLSWOOD BUSINESS PARK CHERTSEY KT16 OPS U.K. TEL : 00800 12263727 (free for calls from UK only) UK Service Hotline : 01932455320 www.samsungcamera.co.uk SAMSUNG OPTO-ELECTRONICS AMERICA, INC. SAMSUNG OPTO-ELECTRONICS GMBH HEADQUARTERS 40 SEAVIEW DRIVE, SECAUCUS, NJ07094, U.S.A. TEL : (1) 201-902-0347 FAX : (1) 201-902-9342 WESTERN REGIONAL OFFICE 18600 BROADWICK ST., RANCHO DOMINGUEZ, CA 90220, U.S.A. TEL : (1) 310-900-5284/5285 FAX : (1) 310-537-1566 www.samsungcamerausa.com AM KRONBERGER HANG 6 D-65824 SCHWALBACH/TS., GERMANY TEL : 49 (0) 6196 66 53 03 FAX : 49 (0) 6196 66 53 66 www.samsungcamera.de RUSSIA INFORMATION CENTER SAMSUNG ELECTRONICS 117545 ST. DOROZHNAYA BUILDING 3, KORPUS 6, ENTRANCE 2, MOSCOW, RUSSIA TEL : (7) 495-363-1700 CALL FREE : (8) 800 200 0 400 (from Russia only) www.samsungcamera.ru TIANJIN SAMSUNG OPTO-ELECTRONICS CO., LTD No.9 zhangheng Street. Micro-Electronic Industrial Park Jingang Road Tianjin China. POST CODE : 300385 TEL : (86) 22-2761-4599 FAX : (86) 22-2769-7558 www.samsungcamera.com.cn Internet address - http : //www.samsungcamera.com The CE Mark is a Directive conformity mark of the European Community (EC) 6806-3715